Cleanwaste Go Anywhere Portable Toilet Review

The Cleanwaste Go Anywhere portable toilet was one of the first toilet solutions that I chose for my camper van. It seemed like a great idea since it is small and takes up a minimal amount of space. It’s also lightweight and easy to carry from place to place as needed.

Another great feature of this toilet is the waste bags that it uses. These come with a powder that turns your waste into a gel so it’s easier to deal with after you have done your business. I purchased this toilet in hopes of using it as my main toilet when I travel on short trips and weekend getaways. It would allow me to have a temporary setup for when I needed to use the bathroom and then be able to store it away once I was finished.

In this article, I’d like to review how this toilet has worked out for me, how it could be better, and whether or not I would recommend it or not.

First Impressions

One might wonder why you would purchase a toilet like this when you can simply use a bucket with a toilet seat on top. After all, it is the same concept and once you put a bag in the bucket, you are left with pretty much the same thing. While this may be true, there are still some reasons to choose a toilet like this over the bucket type.

First of all, I like the fact that it is small and lightweight and can be stored out of the way very easily. Unlike a bucket that can’t be folded up and put away. It also has a handy carrying handle on it that makes it very easy to use in the van but also in a more primitive style of camping scenario. You can pick it up and easily carry it wherever you need to go.

Upon opening the box, I noticed that the toilet is very well-made and looks exactly as I expected it. It’s basically a standard-sized toilet seat on supports that allows you to hang a bag in it that catches your waste.

One thing that I noticed when opening the product is that it is made in the USA. However, it seems that only the outer shell is made in the USA because the netting that hangs from the toilet clearly says made in China.
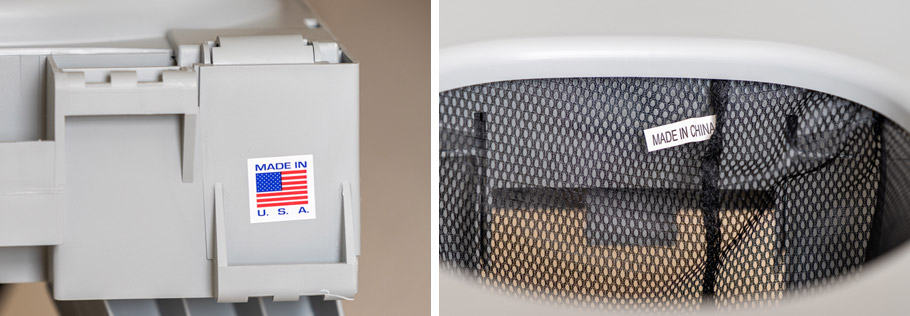
Cleanwaste toilet made in usa closeup

I am not sure how much of it is made in the USA but it looks like it’s a combination of USA and China. On further inspection, I see that the toilet itself is made in the USA and the Go Anywhere toilet kits are made in the USA. The hanging net seems to be the only part that is not made in the USA.

The toilet is a bit heavier than I had imagined it would be. It weighs in at just over 7 lbs. It is built rather substantial and seems like it will hold a person’s weight very well. The company claims that it will hold up to 500 lbs and I can totally see that being true. The toilet seat seems as though it is the same size as a standard toilet seat so it should be comfortable in a practical sense.

Using The Toilet
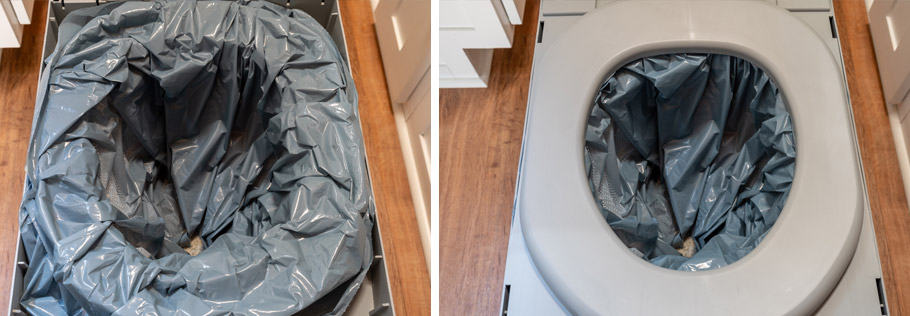
Installing bag in cleanwaste toilet

The key to using this toilet is making use of the Cleanwaste toilet kits that contain a material called Poo Powder that reacts with the liquid waste to harden it into a gel. We’ll see how well this works a little later in the article when I give it a test run. It also is a deodorizing agent so it should help to lessen the smell of this essential chore.

The first step to using this toilet is to unfold the legs so that it will have something to stand on. This is simple to do as they just pull out and lock into place. It’s designed well with one leg in the front and two in the rear. With only one leg being in the front, your feet have a place to rest on each side of the leg.

Sitting on the toilet doesn’t feel much different than what you would feel from sitting on a standard toilet in a home. It’s fairly comfortable and the same size as a standard toilet seat would be. It’s also roughly the same height as the toilet although it is slightly a bit lower than the ones I currently have in my home.

The Go Anywhere Portable Toilet height measures in at 14.25 inches tall from the floor to the top of the seat while my home toilets measure in at 15.75 inches tall.

Cleanwaste Poo powder

For testing the Cleanwaste Poo Powder that is in each bag, I will spare you from using actual waste. Instead, I will use water to show how the Poo Powder turns from a liquid to a solid. Obviously, from the name of the product, it should work for number one and number two.

Pouring water into toilet

As you can see from the images below, I poured an amount of water in the toilet bag similar to the amount you would expect from relieving yourself. It took about 20 seconds for the water to become fully absorbed by the powder. It was turned into a substance that has the consistency of a gel like material just as the product describes.

Toilet gel close up

With the hardened material, you can remove the bag and easily carry it to a trash container and dump it in without a mess.

I won’t get into details about putting solid material in one of these bags. In my experience, it doesn’t work the same and it doesn’t harden very well with the powder. It also doesn’t magically remove the smell but it does help a little bit. However, it still makes it easier to dispose of once you are finished. You can seal the bag up and then place it in the second bag and there is no more smell. The only thing left to do is toss it in the trash.

You can purchase the Poo Powder separately and add it to each bag so that you can get multiple uses out of it. I have never done this and generally only use these for one time use but I could see where this would come in handy if multiple people needed to empty their bladders.

Gel in bottom of toilet bag

Using The Cleanwaste Go Anywhere Toilet In A Camper Van

I originally purchased this system to use as the main toilet for my van. However, after a few trips with it, I knew that it would not work for me as a long-term solution. Instead, I chose to purchase a cassette toilet which makes it much easier to use regularly without the waste of disposable bags.

Another reason that I did not want to use it in my van is that it takes up too much space. Yep, even though it’s a small toilet when the legs are opened up, the footprint is larger than my cassette toilet. Because of this, it would not fit in my shower stall where I currently keep and use my cassette toilet.

In the end, I chose to keep the Go Anywhere portable toilet as a backup system for emergencies. I also use it anytime I need a portable toilet when camping in a tent. It works great for those purposes but it didn’t get the job done for me as a toilet solution for my van.

Cleanwaste toilet and cassette toilet sitting in shower pan

Pros

It’s comfortable

The toilet seat on this portable toilet makes it feel like you are sitting on your toilet at home. The height is comfortable for people of average height. It’s a luxury for those in a camping environment.

It’s easy to fold up and store away

If you need to save space, this toilet folds up and stores away easily. It’s like carrying around a briefcase once you have it folded up so you can easily slide it into a crevice in your camper or car. I keep mine in the garage of my camper van and it serves as a backup toilet for me but it is always out of the way and I hardly even know it’s there.

Cleanwaste Go Anywhere toilet folded up

It’s good quality

The quality is good for a portable toilet. It is sturdy and will hold a good amount of weight. I get the feeling of a solidly built product when I sit on it and it doesn’t feel like it is rocky or going to tip over or fall under any kind of weight pressure.

It makes neat work of a messy job

Doing your bathroom business is a messy job that no one wants to talk about. It’s nice to have a toilet like this that can make the process clean and neat. With this system, you don’t have to experience the icky factor as much. You can do your business and then seal it away in the bags and then toss them the first chance you get. This makes a clean experience for those who are looking to use the toilet when camping.

Cons

The legs are hard to fold back in

Pulling the legs out to stand the toilet up is easy peasy. However, once it’s time to release the legs and fold them back in, it’s a pain in the butt. On the one hand, this is good because it means that the toilet won’t accidentally be folded in on itself. On the other hand, it makes it difficult to work with. I wish there was a better locking mechanism that could be released so that the legs could easily be folded back in.
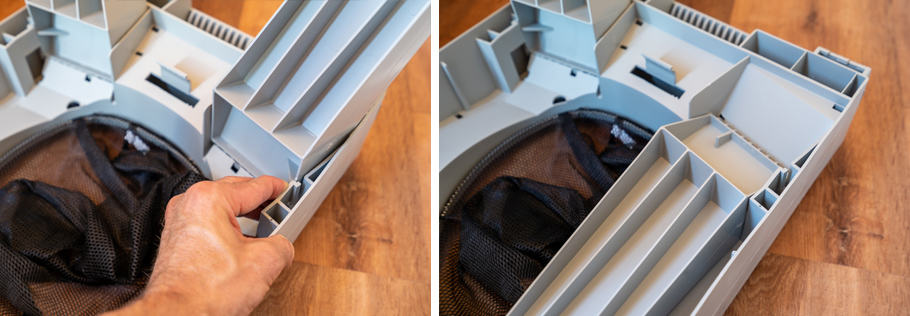
Closing the Cleanwaste toilet legs

It’s wasteful

Using a bag like this to do your business is handy but it is also wasteful. I am not a big fan of one-time-use products but I can make an exception in an emergency. Some of the Cleanwaste toilet kits say biodegradable on them but the ones I have don’t.

It doesn’t mention this anywhere on the waste bag itself so if it were biodegradable, I would think it would be better advertised as such. Even still, it’s a one-time use product that gets thrown away. I would rather use my cassette toilet the majority of the time and utilize this toilet for emergencies.

Conclusion

Overall, the Cleanwaste Go Anywhere portable toilet is a great option for those in camper vans, RVs, or those who go primitive camping. Combine one of these with a portable bathroom tent and you have yourself a private bathroom while out in the wild.

I’m not sure I would want to use this as my main toilet but for short amounts of time, it works great. As mentioned above, there is a lot of waste that you will be throwing in the garbage if you use this regularly. On a weekend getaway or an overnight camping trip, it provides a great solution for when nature calls.

Cleanwaste Go Anywhere Portable Toilet

What Type Of Camping Is Considered Primitive?

Camping is a great activity for those who want to experience nature and get away from the bright lights of the city. When you think of camping, tents and campfires might come to mind. Eating campfire meals, roasting marshmallows, the smell of bug spray, and people laughing are some of the things you might experience.

In this way, you will experience camping the way it was meant to be. This is what primitive camping is all about.

Primitive camping is usually done in a tent or another small shelter without the use of electricity, running water, showers, toilets, cell phone service, and other amenities. It can be enjoyed in the backcountry or a remote campground with limited access to modern conveniences.

It’s a way of roughing it and enjoying nature in its purest form.

Compare this to some of the other popular ways that people camp in today’s world. Glamping has become a popular term for those who want the experience of camping but also want to enjoy convenience and comfort. RV camping is the same way in that it allows you to get away and enjoy nature without lying on the ground in a tent with a rock sticking in your back.

Camping in an RV is like having a little home on wheels where you generally have all the modern conveniences you need. Depending on your setup, you may have a humble living space or you may have a mansion on wheels that makes roughing it seems like a thing of the past.

Primitive camping can also be done in a campground where you pitch a tent and do not connect to the services provided. Many campgrounds have primitive spots available that have no hookups. Although, in this setting, you may still be able to connect to wifi or cell service.

Having spent years in the Marine Corps, sleeping on the ground, or in a tent if I was lucky, I can say that primitive camping is about as simple as it gets. As a Marine, you spend plenty of time sleeping in the dirt or a fox hole. Tents are often used when the situation allows but it certainly isn’t much more comfortable.

During these times, you learn to make do with nearly nothing. You may read a lot, write, talk, and make up other fun ways to pass the time.

Of course, primitive camping in the civilian world is much different that military life but the concept is similar. It gets you out of your convenient lifestyle and puts you into the natural world where you have to learn to appreciate what nature has to offer.

It’s a great way to disconnect from the world, slow down and re-charge your battery. However, if you are not the type that likes to rough it and put yourself smack dab in the middle of nature, it may not be a fun experience for you.

I love the idea of primitive camping and do utilize my tent in an off-the-grid situation occasionally. However, I also enjoy camping in my camper van and often do it in a semi-primitive way. This allows me to experience nature unplugged (except for solar) while being able to live and sleep comfortably just as I would in a small house.

Difference In Primitive Camping And RV Camping

Tent in campground with RV in background

The difference between these two types of camping styles has to do with the amenities available. The typical RV setup has everything that one could need including air-conditioning, heater, TV, kitchen for cooking, comfortable seating, comfortable bedding, shower, toilet, etc. All of these amenities make it seem as though you never left your house and are only sleeping in a new place.

Compare this with a primitive camping setup in which you are very limited with the amenities you have. You may have hiked into the backcountry with a tent in your backpack and a limited amount of food and water. You set up your campsite and enjoy the evening by the fire without a TV or a temperature-controlled environment.

This is a much different experience that one might have in the RV setup. These are two different styles of camping and may be of interest to people in different stages of life. I was much more excited about primitive camping as a 20-year-old than I am as a 42-year-old. These days, I prefer a mix of the two where I can get away and unplug but not have to rough it quite as much.

I can go out into a dispersed camping location in my van and get away from it all while maintaining a sense of normalcy. I have a solar system that provides me with plenty of electricity, onboard water storage, shower, toilet, and other comforts of home.

Best Places For Primitive Camping

Unless you own land and can head off into your own woods and set up camp, you will probably need somewhere to camp. I grew up on a farm and often camped in a tent in the woods on the farm. However, those days are long gone and the farm was sold. Now, I live in a house with little acreage and not much of a place to camp. If I want to go camping, I have to explore beyond my own backyard.

The following are some of the best places I have found to camp primitively.

Backcountry

The best way to camp in a primitive way is to get away from it all. Pack your backpack with the essentials and head out into the backcountry. Here, you’ll find solitude and you’ll be able to become one with nature. You’ll have to fend for yourself and rely upon your ingenuity to take care of your basic needs.

It’s a rough and tough way of camping but it’s also rewarding. Rather than cooking on a stove, you’ll probably cook around the campfire. You’ll need to carry in all your water, food, and toiletries that may be necessary during your stay.

Unless you take a small portable solar system, you won’t have any electricity either. You may or may not have cell signal but it’s probably a good idea to research this before you go for safety reasons.

You can find backcountry trails all over the place including most national parks in the USA. You will probably have to have a permit but don’t let that stop you. You can grab a permit at the local park office and head out.

Public Lands

There are public lands in the USA that can be accessed for off-the-grid camping experiences. Many people drive their RV to a dispersed camping spot in these locations but you may also opt for a more primitive approach. These make great locations for a free camping getaway and allow you to enjoy the outdoors.

These locations can be found by visiting the Bureau of Land Management website.

Campgrounds

Campgrounds have all types of camping with most of them offering full-hookup RV spots as well as no-hookup, primitive camping spots. These can be used by those with tents or vehicles that have living space in them. While you won’t have any type of electrical hookup, you may have access to other amenities that the campground offers.

I would consider this a more primitive approach to camping even though you may opt to utilize the bathroom and shower facilities rather than dig a hole in the woods. Being primitive in this way means that you are living on a minimum and enjoying your time in nature without a full repertoire of conveniences.

Private Land

If you are looking for a well-managed area that can get you into the camping scene, you may find what you need through a place like Hipcamp. This website allows you to utilize other people’s properties for a camping experience. These are often situated on their land and include only a spot for you to pitch your tent or park your RV.

While some of them do have hookups, most only offer a place to stay. In this way, you’ll be more primitive as you will have to make do on your own.

Is Primitive Camping Free?

There are many places that you can camp primitively for free. These places are often located on public lands that are owned by the government. The BLM manages these areas and you may be able to set up camp at no cost.

You may also be able to camp for free at many state or national parks. You will need a permit but these may be obtained for free in some areas but not all. You’ll need to check with each specific park to find out all the details.

Another great place is on private land. If you know someone with land, you may be able to camp without paying for it.

For the most part, you’ll need to pay for access to camping locations. Whether you plan to stay in campgrounds, public lands or rented space on private property, it usually comes with a small cost. Primitive camping will be the cheapest way for you to camp so even if it does cost, it won’t be much.

Bottom Line

Primitive camping can be a fun experience that will get you away from the normalcy of life. It might even be a life-changing experience and help you to appreciate the conveniences we often take for granted.

While I do enjoy roughing it like this from time to time, I usually opt for a semi-primitive experience by utilizing my camper van. I like the simplicity of the experience but I also like the comforts and convenience that I am used to.

If you have never been primitive camping before, you need to do it at least once in your life. Add it to your bucket list. Get yourself a tent and any other supplies you may need and head off into the backcountry. It’ll be an experience you won’t forget and who knows, you may come to appreciate this way of camping and want to do it more often.

Van Conversion Kitchen – DIY Design & Installation

As the heart of a van conversion, the kitchen serves as one of the places, if not THE place that will get used the most. You’ll spend a lot of time in the kitchen. Whether it’s cooking food, washing dishes, using the sink, countertop, or using it for other activities, the kitchen will get its fair share of use.

Other than the bed, there isn’t another area in my van where I spend as much time as I do the kitchen. I am nearly always doing something in this area.

With that being said, I wanted my kitchen to be a nice, compact area that had plenty of storage space. The following article will show you my thinking on my kitchen layout and how I pulled it off.

Overall I am happy with my layout with only a few things I would do differently.

Planning My DIY Van Kitchen

During the planning phase for my kitchen I wanted to make sure that I included a few key items.

  • Kitchen sink with faucet and wand
  • Water supply tank with an electric water pump
  • A simple greywater system that can be dumped easily
  • Counter space for a camp stove
  • Electrical outlet
  • Plenty of lighting
  • Plenty of storage for dishes, pots, and pans

I wanted my kitchen to be reminiscent of the kitchen in my home. The only difference would be that it would be much smaller and have fewer bells and whistles.

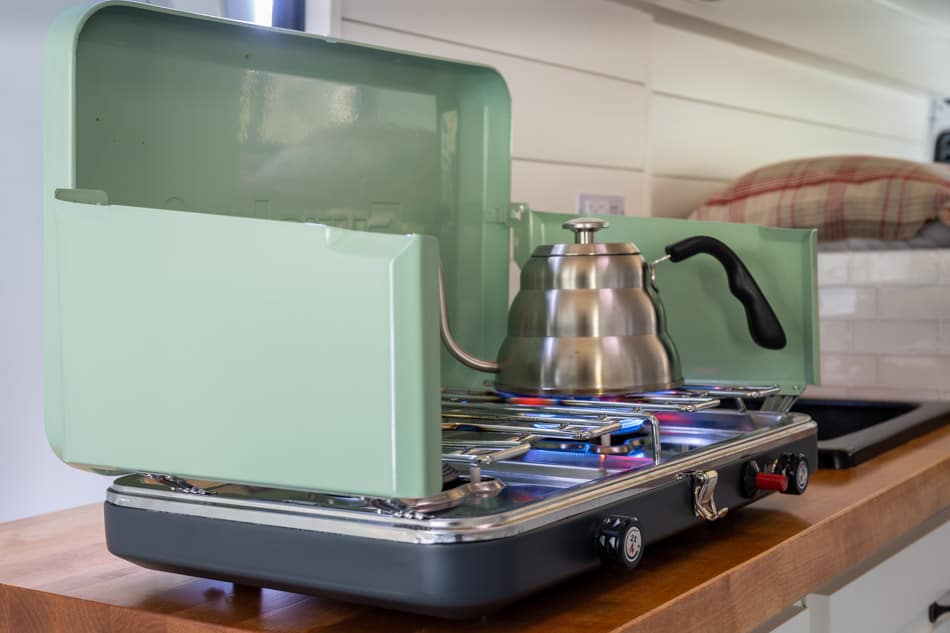
My plan called for a portable camp stove rather than a built-in stove. This plan might have been different if I had planned to live in my van full-time. However, as a part-timer, I wanted something that would allow me to do my cooking and then I could move it out of the way.

I also wanted to use a portable stove because I also go tent camping on occasion so I wanted to be able to utilize this stove for those times as well.

The main part of my kitchen was created using a sink base that I would build from scratch.

Parts I Used

Disclaimer: The links below are affiliate links. This means that I will earn a small commission if you click them and make a purchase.

Creating A Sink Base

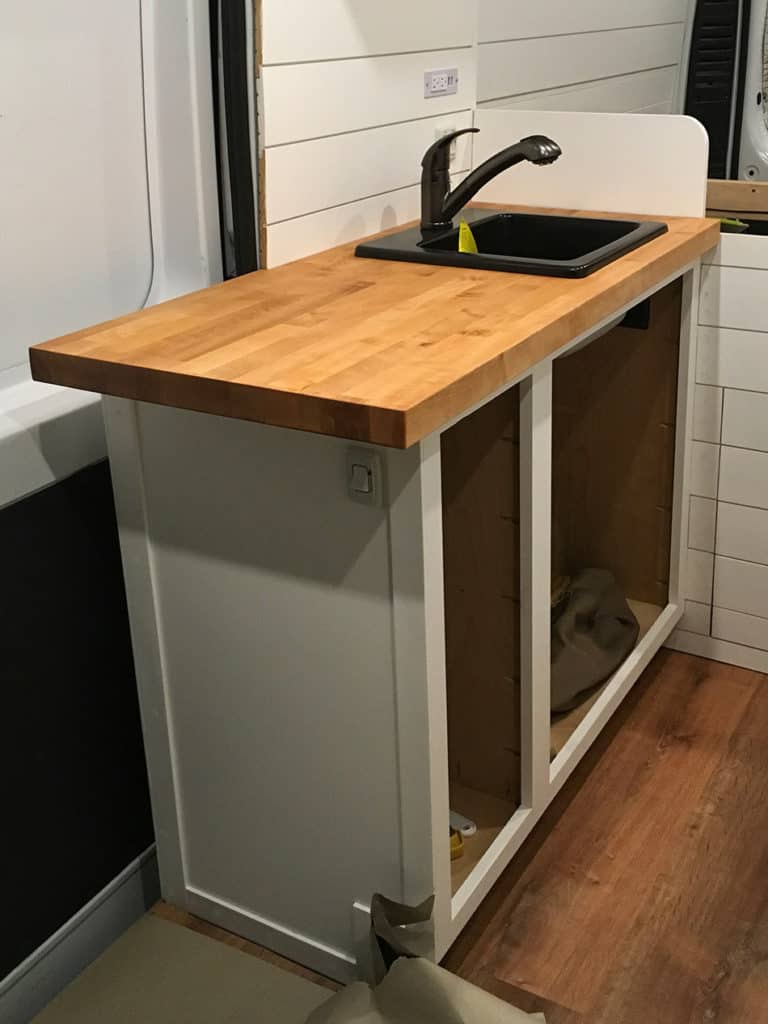
Sink base in van

A sink base is what serves as the main kitchen area in my van. It is a place where my sink is mounted but it also serves as an area for counter space and plenty of underneath storage.

I could have purchased a sink base from one of the big box stores and customized it but that would have been more trouble than it’s worth. Instead, I used those as inspiration to build my own sink base from the ground up, using my own specific dimensions. I also dissected the one I have in my house so that I could create the exact dimensions (other than depth) and shape it the same way.

I built the base using 1/2 inch birch plywood so that I could keep it as light as possible while still maintaining a good amount of strength. I built this just like a standard sink base would be, complete with a kick plate on the bottom. The entire sink base measured approximately 19 inches deep, 41 inches wide, and 34 1/2 inches tall (without the countertop).

Sink base measurements: 41″ Wide by 19″ Deep by 34 1/2″ Tall

This measurement was based on the one in my home and I allowed for an inch and three-quarters that would be for the butcher block on top of the counter. In the end, I would be left with a countertop that was approximately the same height as the one that I’m used to in my home which is the standard height for a kitchen counter, around 36 inches.

As I was putting the sink base together, I used a combination of pocket screws and wood glue to connect everything.

After building the sink base, I installed it in my van. I did have to use some shims in order to get the sink base completely squared with the floor. Like most other items I installed in the van, it was a challenge to get everything straight and square.

Installing The Butcher Block Countertop

For the countertop, I used a 1 1/2 inch butcher block piece that I purchased from Lowes. I had to cut it to fit around the wall. This thick butcher block was difficult to cut but I ended up doing the job with the combination of a circular saw and a jigsaw.

I stained the butcher block with a honey stain and then I put six layers of Polyurethane on all sides. Hopefully this will hold up over time and allow me to have a nice countertop.

The butcher block was installed with screws through the top of the sink base. I used the 8 corner bracing pieces to screw the butcher block to, making it tight and secure.

Installing The Sink

Kitchen sink in van conversion

I initially purchased a larger and deeper sink but concluded that it took up a little too much space. I finally settled on a top mount composite granite sink. Although not as deep as my original choice, it works fine and is plenty big for what I use it for.

I will say that if I lived in my van full-time, I would want to have a double sink. It wasn’t necessary in my case but a double sink can be helpful by giving you a place to wash dishes and a place to dry them.

The sink that I used is mounted using a silicone sealant around the bottom edge all the way around. Despite me thinking it wouldn’t hold very well, it has actually held up very well and the sink is mounted tightly into place.

It is also held in by the faucet that goes through the sink and the butcher block counter. The faucet holds the sink tight to the countertop while the silicone sealant provides an additional way of keeping the sink held in place.

Water System & Plumbing

greywater tanks in van

In keeping with my simple kitchen set up, my water management system is also simple. I chose to use a portable grey water tank underneath the sink that I can easily take out and dump at my convenience. I chose to use a see-through container so that I could see when it required dumping. I also have a spare that I can easily change out to when I am in a location that I cannot dump the tank.

For my sink drain, I used the Camco Flexible Camper Drain Tap that serves as a P-trap and is specifically made for RV usage. It works great but I wish the drain hose was a little bit larger. It can take quite a while for a lot of water to drain through into the grey water tank.

The size of this drain hose is perfect for the see-through containers I have and recommend. It can easily be routed through the top of the container and you can make use of a standard garden hose quick connect as I did.

When I want to disconnect my greywater jug, I quickly disconnect it here and either dump the jug or connect another jug that already has a quick connect installed on the top.

The quick disconnect is nice to have but this also creates a bottleneck for the drain. If you have anything other than water coming through, it could get clogged up. You may discover a better way of having a disconnect but this is the best way that I have found for now. It has worked for me and it does not get clogged up because I am aware of it and make sure large chunks of food or trash doesn’t go down the drain.

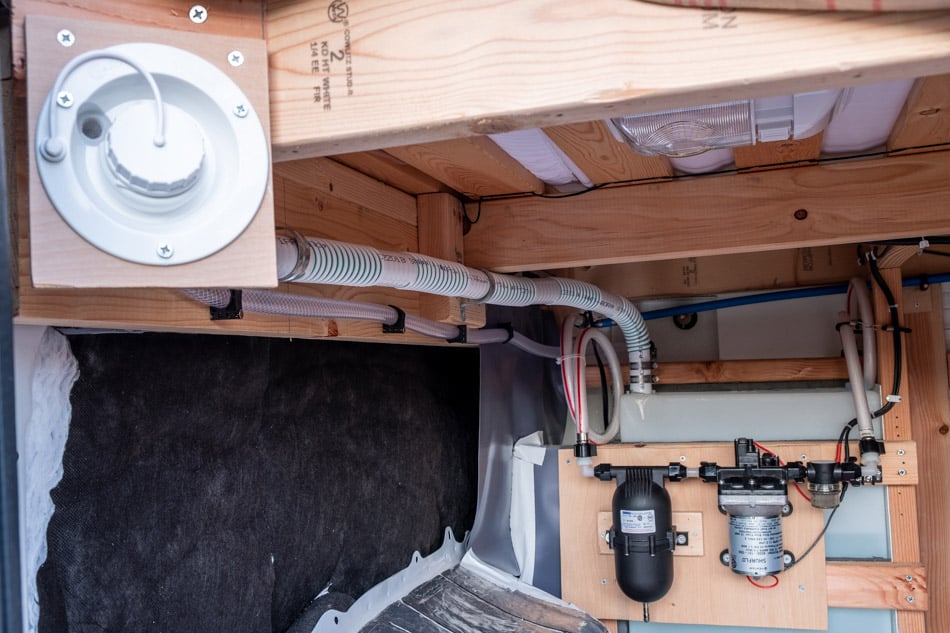
For the water supply in my system I used a 16-gallon freshwater tank that is plumbed using PEX pipe. This freshwater tank supplies water to both, my kitchen sink and my shower.

Freshwater fill tank

I have a fill cap in the back of the van where I can easily fill this tank using a water hose connected to a spigot. Once full, I have plenty of water that is pumped out of the tank using a Shurflo Revolution water pump.

Adding Face Frame Onto Cabinet

Once all the plumbing was finished, I still needed to add the rest of the face frame onto the cabinet so that I could install doors and drawers. I planned to have two doors under the sink and then three drawers of various sizes on the left-hand side.

I built the face frame using a combination of 1×2 and 1×3 finger-jointed pine that was pre-primed. This made the job easy and required just a little sanding after I was finished before I put on a few coats of paint.

Adding Doors

Closeup of doors on kitchen cabinet

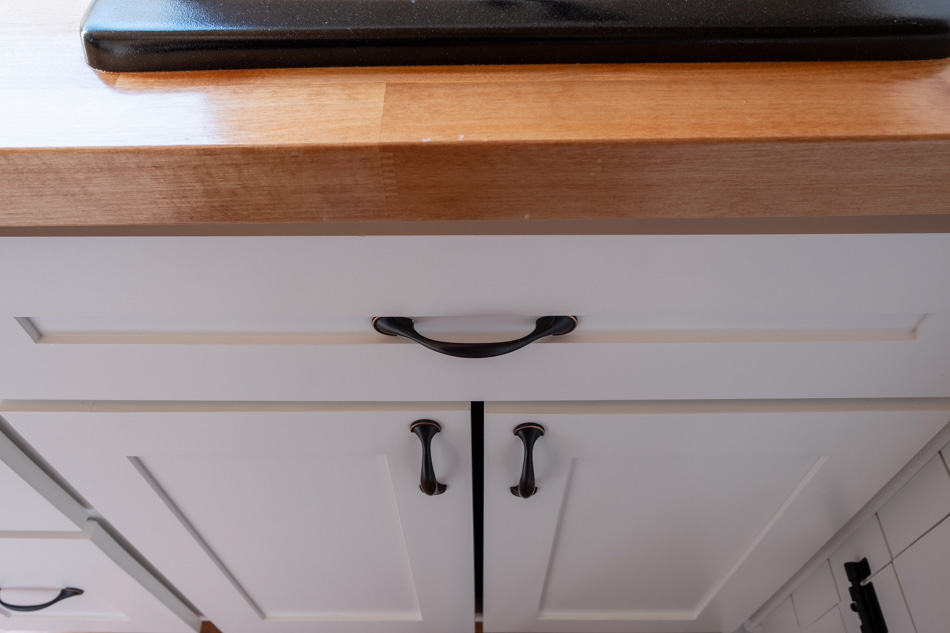
With the face frame finished and all of the interior work completed, the last main thing to do was to add the doors and the drawers. The drawers are the part that I dreaded the most and turned out to be the most difficult part of the process. The doors were simple to build and mount thanks to some jigs that I used.

First, to build the doors, I used 1×3 pine boards and a router to rout a groove into the wood using a tongue and groove router bit set. I then used a quarter-inch piece of plywood that went in the middle creating a shaker style of look.

These doors were created using pocket screws and wood glue. This is the same process that I also used to create the doors on my overhead cabinets and all of the doors throughout my van.

I used wood filler to close up the holes and sanded everything down smoothly before painting.

Second, I used a hinge jig to add the hinges which allowed me to get them perfectly straight and lined up with one another. I would not want to attempt installing concealed hinges without a concealed hinge jig. This was among the four types of Kreg jigs that I used throughout my van build and I wouldn’t have wanted to do it without them. The Kreg jigs came in handy and I highly recommend them.

The concealed hinges that I used have a spring to them and they close tightly. At this time, I have not installed any kind of door latches. I feel like I don’t need them at this point. I have driven around and taken many trips and have never had any problems whatsoever with the doors moving or opening at all.

Perhaps in the future, when the new has worn off, they won’t hold as tightly. At that point, I will install some kind of door latches to keep them securely shut. The doors also stay open on their own, even the overhead ones. At some point I may need to add door stays but I’ll tackle that challenge when needed. For now it’s fine without them.

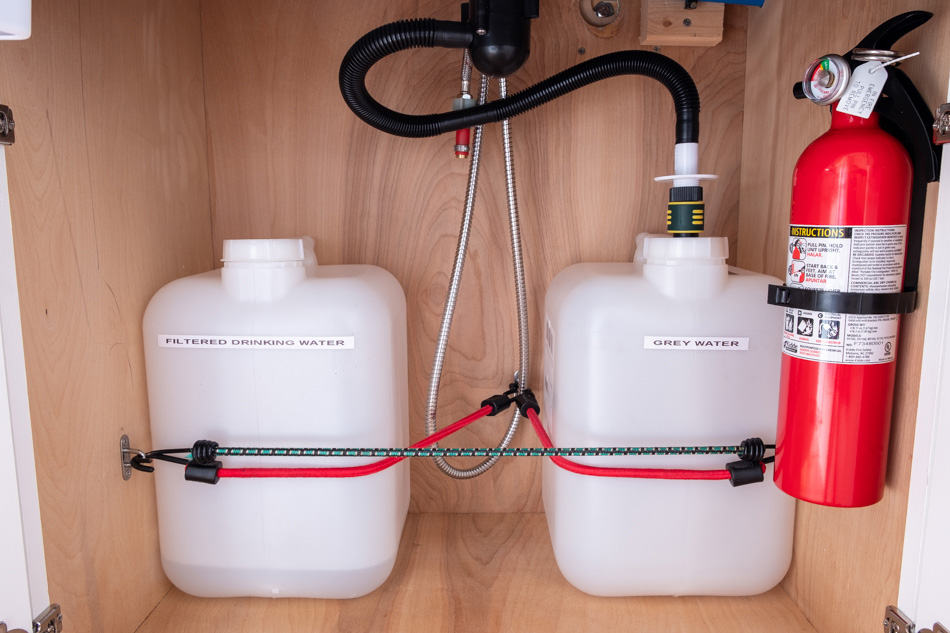
The two doors that I installed open up to a nice spacious area underneath my sink. I can easily get to anything in the area and I can remove my water tanks easily. I also installed a fire extinguisher in this location just in case an emergency were to ever happen in the van.

Adding Drawers

Kitchen cabinet drawers pulled out

With the kitchen cabinet built and the doors installed, the only thing left to do was to install the drawers. I had planned for three separate drawers to be in this area and wanted the face of the drawers to look just like the doors I had built. I use the same process to build these once I knew the dimensions that each drawer would be. The drawer facings are a 1/2 inch bigger on all sides than the drawer boxes.

Building the drawer boxes was the easy part and was done using half-inch plywood and pocket screws. I also used a little wood glue to make sure they were held tightly. I used a square clamp to make sure the boxes were nice and square as I screwed them together. I would recommend a square clamp like this if you are creating a box. It was very helpful in the process. I have two of them and used them together to make sure each drawer box was completely square.

I chose to use soft-close drawer slides for my drawers. The main reason that I chose this was that the soft-close slides hold tightly and require more force to open than standard slides do. This is a tip if you are going to install drawers in your van. With soft-close slides, you can pull out on the drawer slightly and it will close back.

You have to pull the drawer with some force to get it to open. This may become less tight over time but so far it has held tightly in and I haven’t had to use any kind of drawer latches.

The hardest part of the process was getting the drawer slides to be straight inside the cabinet. I had to use a few shims along the way as I did in many other places in my van. I also used another Kreg jig to install the drawers.

I couldn’t imagine doing it without this Kreg jig. The jig made the process so much easier than I was imagining it would be. The jig isn’t perfect and is probably the worst I have used from Kreg but it still allowed me to get it done with less frustration than I would have had without it.

After all was said and done, the drawers were completely straight and the slides work like a charm. The drawers slide out smoothly but they close themselves once they get to a certain point and they close tightly. As I had hoped, they are held in very tightly with the soft-close mechanism built into the slides.

Sink Front Tip Out Tray

Kitchen base tip out tray opened up

Since this is a small van, I wanted to make use of all storage options available. Rather than having a blank cover underneath the sink like most sink bases do, I wanted to utilize this area for more storage. I chose the use the Rev-A-Shelf solution for this.

While this does not add a ton of storage, it does allow me to use this area rather than wasting it. The shelf is perfect for storing dishwashing equipment and other small items. It’s a handy area to keep sponges, rags and dish soap containers. It’s a small area but it makes a difference having a place to store these items out of the way, rather than them being scattered all over the countertop.

This was easy to install using the hinges that it comes with and the templates provided.

Trim And Other Finishings

Trimming everything up, in the end, was the fun part because I got to see it all come together. The main part of the trimmings was to add the door handles and drawer handles.

Again, I made use of a Kreg jig which made the process very easy. Using the jig, the doors were very easy to get perfectly centered and lined up. The handles ended up in the same location on each door and straight. I could not have done this without the jig.

I used the same jig on the drawers to add the handles of the same type. It was a little more difficult with the drawers since each drawer was a different size. However, the jig made easy work of it and I was able to get all of the handles lined up perfectly. I highly recommend the Kreg jig for door handles if you are in the market for one.

I also used the same jig to put handles and knobs on all of the other doors throughout my van. It made it look like a pro had done it.

Things I Would Have Done Differently

Overall, I am very satisfied with the kitchen in my van. However, in hindsight there are always things that could be improved and we wish we had done a little differently. There are a few things that I wish I had done differently but they aren’t huge issues.

  1. Make the cabinet wider.My entire countertop is about 44 inches wide. If I had it to do over I would have gone a little wider than this, maybe up to 60 inches wide. I left it at 44 inches because I wanted more space to come in and out of the van but the space I left is a bit too much and some of it is wasted and could’ve been used for more counter and cabinet space.
  2. Create an extra counter space that folds down. A lot of people do this and I thought of doing it at first but didn’t go through with it. I wanted to add a hinged counter space on the end that folded down out of the way and then could be folded back up when needed to add additional counter space. I can still do this but I’m not sure I ever will at this point.
  3. Install a deeper sink. I started with a deeper sink but decided against it. In hindsight, it was probably the better choice. Sometimes I find it would be helpful to have a deeper area to work with when doing dishes or filling up bottles and such.

These are small changes that I would have made but overall I am happy with everything that I have in my kitchen. It’s a nice area and provides enough space to work with to cook and clean. It looks nice, has lots of storage, and serves the purpose well.

Class A RV VS Class B – Choosing The Right One

A class A and class B motorhome are about as far away from each other as you can get. With a class A being the largest type of motorhome on the market and a class B being the smallest, there are a lot of differences between the two and each will appeal to different people.

With a class A motorhome, you can expect a large rig that can accommodate a family and is very spacious. A class B motorhome is not nearly as large as the class A is. A class B is a camper van that has a very limited living area. When compared to the larger type of class A motorhome, one would have to wonder why would anyone want to live in such a small space compared to the larger space.

This article will compare the two and point out the similarities and the differences of each. They have some things in common and one could possibly be on the fence over which type to purchase. I have gone through this myself and I looked at class A motorhomes for a little while during my search. I was intrigued by the large living area that they provided but it was never a serious option for me.

Some of these large motorhomes are so big that you won’t even feel like you are living a mobile lifestyle. They have all of the amenities and luxurious features that you would expect from a house. However, with all of these luxurious features, you will likely pay the price. They are among the most expensive motorhomes that you can purchase.

Let’s take a look at some of the main differences between these two types of motorhomes.

Main Differences Between Class A And Class B Motorhomes

  • Size. The obvious difference is the size of the two. A class A is much larger than a class B motorhome.
  • Capacity. A class A has larger capacities of freshwater and wastewater holding tanks.
  • Cost. Class A’s will usually be more expensive although there are some Class B’s on the market that can reach high six-figure prices.
  • Amenities. A Class A RV contains everything you need including large kitchens, king-sized beds, washers, dryers, large TVs, and other items that Class B RVs don’t have space for.

Class A Pros

Class A motorhome interior

They Are Larger

If you are looking for a large area to camp or travel in, look no further than a class A RV. These are made for those who want to have lots of breathing room. They are great for people that want to camp or travel with family as well. If you have children, you’ll appreciate the large living space that this type of motorhome can provide.

The convenience of having all of this large living space in a vehicle that can be driven around is amazing. The only problem with this is that it has to be driven. Driving a large motorhome like this can be very intimidating, especially the largest ones. With some of these measuring in at a length of over 40 feet, it takes a little more courage to get behind the wheel than it would with a smaller rig.

The size of these motorhomes can be a good thing if you need the space but it might be bad if you are scared to drive it.

It’s A True Home On Wheels

With all of the space mentioned above, these motorhomes offer a true home on wheels. This is not your standard camper that is meant for roughing it. Instead, this is more of a glamorous approach to living on the road or going camping. You can live in one of these without any problems and you will often find amenities such as fireplaces, large screen TVs, large kitchen areas, islands, recliners, and other large living space items that can be found in most homes.

You will not find glamorous items like these in a camper van. Instead, A camper van will provide you with the necessities in a comfortable way without the glamorous home feeling of a class A motorhome.

Lots Of Storage

To go along with all of the large living space, a class A RV also offers tons of storage space. With cabinets galore and other storage areas inside the living space, there are also storage areas on the exterior of the motorhome. This allows you to carry lots of items such as tools, tables, ladders, sports equipment, and other items that you might find useful out on the road.

One would expect a lot of storage with a vehicle this large and since they are great for families, storage is a necessity. A family will have a lot of use for storage areas and the class A certainly delivers. Most of these types of motorhomes have large exterior storage areas where you can store large or small items.

This is a convenience not afforded to the class B RV. With a class B, you are fairly limited in what you can take with you. Although some class B RVs do have lots of storage, it’s minimal when compared to the class A.

Leveling

Leveling a class A motorhome can be a piece of cake. With most of these expensive RVs having automatic leveling systems, it can usually be done with the push of a button. Although some older models might have more of a manual approach needed for leveling, most are equipped with leveling systems that do it for you.

These are sometimes found in expensive class B motorhomes as well but not in the majority. With a class B, you might need to use leveling blocks and other approaches to make sure that the RV is level when you park. The class A makes it more convenient when parking in an area that isn’t perfectly level. Even when a spot looks level, it might not be perfectly level. A certain amount of leveling may be required and the class A will make this easy to accomplish.

Capacities

If you expect to use lots of water and store a significant amount of gray or black wastewater, the class A will have larger capacities than what a van will. You can expect grey water tanks on a class A to be in the range of 60 to 100 gallons. This is a significant amount of greywater storage and can allow you to go for longer without dumping.

The fresh water tanks can be larger as well and may range in the amount of 70 to 100 gallons.

You wouldn’t be able to carry this much freshwater in a camper van and the gray water and black water tanks are not this large either. With the class A, there will likely be more people traveling in it and using the facilities so more capacities of this nature are necessary.

Class A Cons

Class A motorhome driving down road

More Difficult To Drive

As mentioned above, the class A is like a home on wheels but you have to drive this home around. This can be difficult to drive and can make the class B motorhome seem much more approachable. Parking a large motorhome like this can sometimes be a challenge. Although there are cameras often situated in hard to see areas, it can still be a scary process for the faint of heart.

It will take some getting used to and you may never really get used to driving something this large. It’s like driving a large bus around and you will have to be extra careful when compared to driving normal vehicles and especially smaller RVs like a class B.

Off-Season Storage

When you are not using your motorhome, it will need to be stored somewhere. This may mean that it sits in your driveway or takes up some other space where it can be seen. These are large units and can be unsightly and in the way, if you intend to park them on your own property during the off-season.

Unless you have a large property or a special garage to park it in, you may need to find a different solution for storage. Whereas you might be able to park a camper van on your property quite easily, you might not have the space to be able to pull this off with the large class A motorhome.

Not only that, but you will also need to winterize it and make sure that it will make it through the freezing temperatures of the off-season. This will be a more involved and expensive process than it will in a smaller RV.

Cost

A class A RV can cost a significant amount of money. Some of these can be in the multiple six-figure ranges. Even a basic class A RV can be well over $100,000. These are often purchased to replace a home since people use them to travel with and live out of. However, for someone who is looking for an RV that will only be used for camping trips, this is a steep price to pay.

Of course, you can always find used motorhomes for much cheaper, but even still, you can expect to pay a high price to take ownership of one of these.

Poor Fuel Efficiency

You can expect to get about 8 to 12 miles per gallon when driving a large Class A motorhome. On top of that, you may get less if you are towing a vehicle. This is pretty poor efficiency and can make the high price of the RV even worse. These don’t get nearly as good of gas mileage as a van would get so a class B motorhome will be the much better choice if you are looking to get more miles to the gallon.

A Class A RV Might Not Fit In Some RV Parks

Class A RV parked in campground

If you have a large class A, you may be limited in some ways as to where you can go. Some of the RV parks around the United States have limits on how long an RV can be. While most of these do accommodate larger class A RVs, some of the National Park Campgrounds do not allow RVs of this size.

You may find yourself in a situation where you do not have enough space to park or turn around. The large size of these rigs might end up being more trouble than it is worth. With a smaller sized RV, you will not have to worry about this.

On the other hand, there are some places where only class A motorhomes and larger sized motorhomes are allowed. Some exclusive RV parks do not allow smaller class B motorhomes.

Reasons You Might Choose A Class B RV

If you are researching the good and bad of both, here are a few reasons why a class B might be the better choice.

Smaller And More Mobile

Perhaps the best feature of the class B motorhome is its small size. This makes the RV very mobile and allows you to take it nearly anywhere. It’s as if you are driving a car around that happens to have a nice living area in the back. While not as glamorous as a class A, the convenience that it gives you when traveling is worth the reduction in size.

Easy To Drive

While a class A motorhome might be difficult for someone to drive, a class B motorhome is as simple as most passenger cars. These are small and do not require any specialized skill to drive. It’s simply a van and while some may be larger vans, they are nowhere near as large as what you would get with the class A RV. Driving one of these around is as simple as it gets with a motorhome.

Fits In A Standard Parking Spot

You won’t have to shimmy or fuss around too much with parking a class B motorhome. You can park one of these in pretty much any standard parking place which makes it much easier to manage. With larger RVs, you might be limited to where you can park while you are out on the road. Driving between RV parks can become a challenge when you need to pull over to get a bite to eat or go shopping.

When driving in a van, you can usually just pull up into almost any parking spot.

It’s Made To Take You More Places

Camper van parked on beach

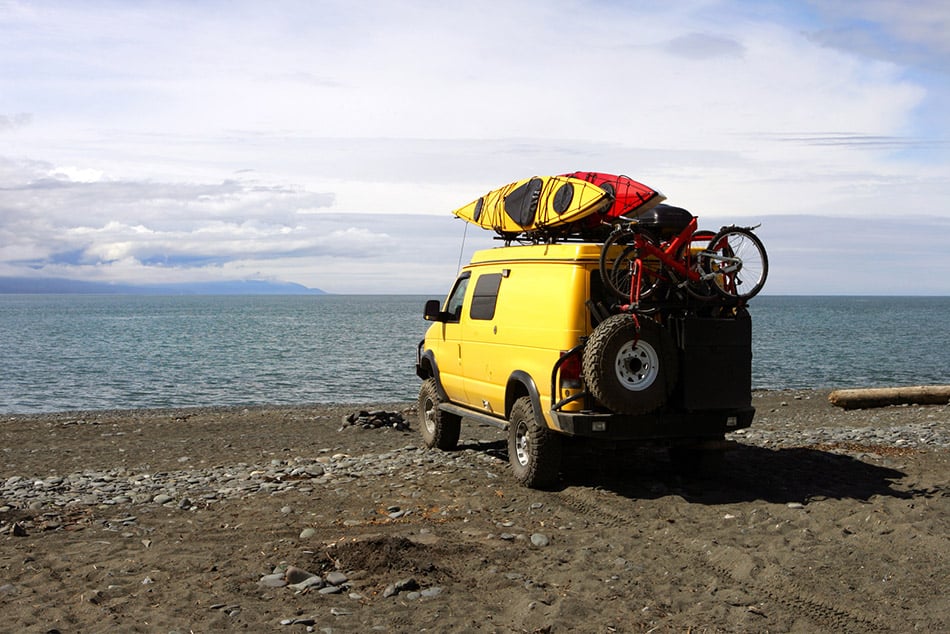
The main thing about a camper van is that it is made to take you places that you couldn’t reach with larger RVs. When someone chooses to purchase a class B RV, this person is looking for adventure and wanting to hit the road without the worries that go along with large RVs. It’s the convenience of having a small home on wheels in a manageable sized vehicle that wins people over.

Once you take to the road in a van, you can go where you want and not have to worry about whether you will fit. You have your home on wheels and although it is not as spacious and nice as a class A RV, it is still a nice space that affords you lots of freedom.

Who Is A Class A Motorhome For?

A class A motorhome is perfect for families. It is also perfect for those who are used to having large spaces and prefer this over minimal spaces. Some people can’t imagine being in anything smaller than something like this. I know people that will only travel in a motorhome of this size or a large trailer such as a fifth wheel that also offers lots of living space.

Owning a class A RV can be a good option for someone who is retired or is living full-time in it. You will have all the space you need in a large RV like this. Another good fit for a class A motorhome is for those who want to rent one for family vacations. If you have a family that you want to take camping, you can rent a class A and use it for a small amount of time. This can make for a fun vacation and one that you will remember for a lifetime.

You can rent a Class A motorhome from places like Outdoorsy.com and RVShare.com.

Essentially, a large motorhome like this is for someone who prefers a lot of space and all of the comforts of home. It’s for the person who wants to see new sites and be in new places but also wants to sit in their recliner and watch their large screen TV.

Conclusion

The main similarities of these two types of RVs are that they are a living space that you can drive around. These both have the convenience of being a motor vehicle and allowing you to walk from the driving area to the living space without getting out of the vehicle.

They start to differ quite a bit once you begin talking about the details of each. A Class A RV is much larger and can be compared to a standard home. It really comes down to personal preference and the space that you need. If space is an important factor, there is no question about which one you should choose.

Both of these RVs are great options and serve different purposes for people who are looking for different experiences. I prefer the size of a class B because I am more focused on traveling places than fancy living spaces. As long as I have the conveniences I need and a nice place to eat and lay my head, I am fine with the small space.

I prefer convenience over such a large amount of living space. Others will prefer the opposite and that’s why there are options available on the market for both preferences.

Are Dogs Allowed In RV Parks?

Taking trips with my dog has always been one of the perks that I have loved about traveling in my camper van. It can be difficult otherwise to take a dog or any pet on vacation when staying in hotels or other accommodations. However, an RV is like a traveling home and there is no reason your pets can’t go along with you.

RVers are generally pet-loving people and you will often see them traveling with their pets. Because of this, an RV park can be a great place for you to bring your pets, as long as you are courteous to others.

Most RV parks and campgrounds are pet friendly and do allow dogs but often have rules and regulations you must follow. There are some exceptions to this and many RV parks may not allow certain breeds of dogs that are known to be aggressive. Checking with each RV park you plan to visit is recommended.

The important thing is to make sure your dog is well-behaved. One of the reasons that people enjoy the RV lifestyle is because of the peace and quiet and relaxation it allows. A barking dog can be a nuisance to those trying to have a relaxing getaway. What you may see as your cute dog playing and barking might be seen as an annoyance to a neighboring camper.

Most campgrounds are aware of this and try to keep owners of pets in line with their rules. On one hand, campground owners want to allow campers to bring their furry friends with them. On the other hand, they want to make sure everyone staying in their campground has an enjoyable stay.

It can be difficult for the owner of an RV park to draw the line and enforce pet owners to comply. It’s best to make sure you are complying and doing all that you can to keep your dog well-behaved.

I love dogs as much as any other dog lover but I certainly don’t like to hear loud barking. When I go on a trip in my class B van, I am looking for a nice, relaxing time away. The last thing I want to hear is a loud dog that can’t be controlled by their owners. It can be quite distracting to have to hear such a thing.

Because of this, most RV parks or campgrounds have pet policies in place to protect those who want a quiet time away. Failure to comply with these policies could get you removed from the campground.

Campground Pet Policies

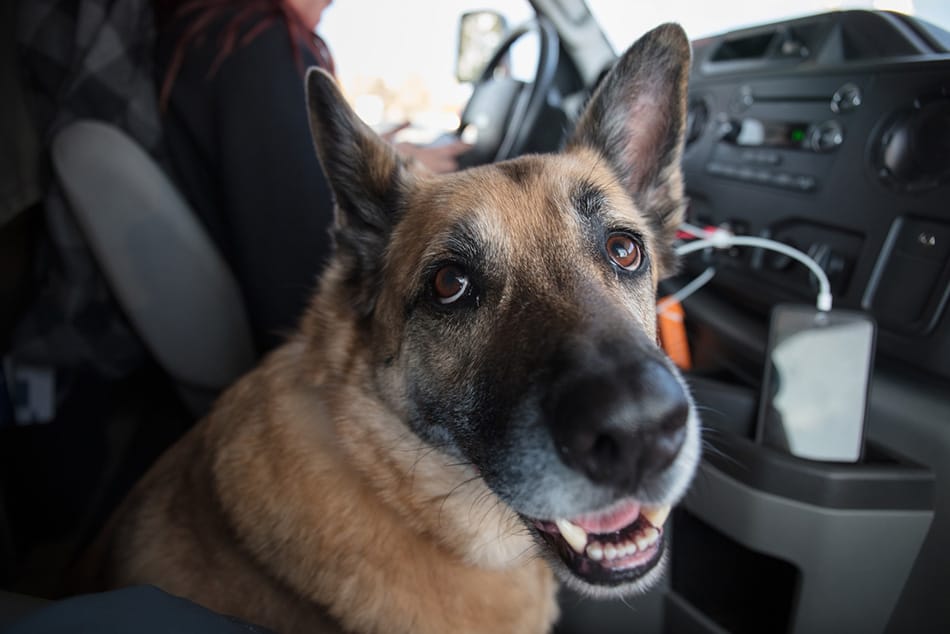
German Shepard in RV

Most campgrounds have some type of policy in place that outlines rules for bringing pets. While most of these are very similar, there are some differences. There is no one-size-fits-all approach to this and you’ll have to check with each campground to get full details.

The following are a few bullet points of what you can expect from some of the well-known campgrounds throughout the US.

KOA

  • Call ahead to ensure that bringing your pet is allowed. There are some dog breeds that have been flagged as high risk of aggression from insurance providers.
  • Service dogs are always welcomed.
  • Campers with hostile or aggressive dogs will be asked to leave.
  • Dogs must always be on a leash and you should be respectful of others around you.

Full information can be found here: KOA pet policy.

Thousand Trails

  • Your dog must always wear a collar with identification.
  • No more than two pets allowed per site.
  • No aggressive dogs will be permitted.
  • You may be asked to leave if you do not adhere to their pet policy.
  • Do not leave your pet unattended.
  • They have the right to reject any pet.
  • Must have vaccine documents available upon request.

Full information can be found here: Thousand Trails pet policy.

You’ll find similar policies like this no matter the RV park you go to. I feel that these policies are very fair and protect residents from having to deal with rowdy animals from other campers.

Other Places To Stay When RVing With Your Dog(s)

RVing with a dog should be no problem if you are looking to stay in RV parks. However, many people like to stay in other places that may be a bit more secluded. There are other great options for those who prefer to sleep in places beyond the known RV parks.

The list below are places that you may want to consider if you like to RV with your dog or other pet.

Harvest Hosts

The majority of Harvest Hosts locations are pet friendly. In fact, you’ll probably find pets owned by the owners at most Harvest Hosts locations. I have taken my dog to Harvest Hosts locations and have had no problems whatsoever.

Of course, you’ll need to make sure to be respectful just as you would at an RV park. Being at a Harvest Hosts location is a privilege and you don’t want to wear out your welcome by having a disobedient, aggressive, or loud barking dog.

Harvest Hosts are small businesses so you don’t want to interfere with their daily operations by having a pet that is out of control.

Boondockers Welcome

Similar to Harvest Hosts, Boondockers Welcome allows you to camp at other people’s properties. These people often have pets of their own so they are usually OK with you bringing yours. You will need to ensure that your dog is welcome when you book your stay but most locations will allow dogs.

Dispersed Camping Areas

If you are fortunate enough to be in an area where dispersed camping areas are available, your dog will probably be allowed. In the United States, there are lots of places to stay for free on public lands. These lands, however, are generally in the Western states so those of us on the East Coast may not be as fortunate in finding dispersed camping locations.

There are plenty of apps that can help you find locations but they aren’t a sure thing. You may need to check with the local BLM office in the area that you are in to make sure your dog is allowed. Learn more about dispersed camping.

Tips For RVing With A Dog

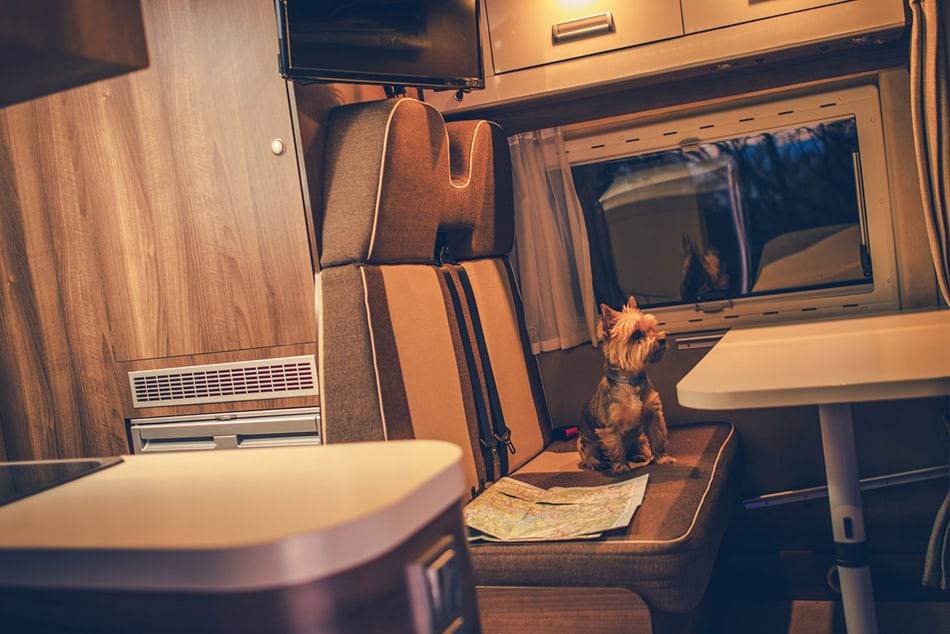
Small dog sitting in RV dining seat

Keep Your Dog Quiet!

When you are camping, make sure to keep your dog as quiet as possible. Dogs bark but as an owner, you should make sure that your dog is not a disturbing element at the campground. I have been to a campground where the constant sound of a dog barking made my stay less enjoyable. It’s not the occasional bark that would bother others but the never-ending barking that could get you kicked out of the RV park.

Other people don’t want to hear your dog because they don’t love your dog as you do. Others are looking to relax and unwind and listening to someone’s dog bark does not help. If you allow your dog to be loud, you may be asked to leave. Make sure you have your dog under control and know how to keep them quiet when the situation demands it.

Always Clean Up After Your Dog

This shouldn’t have to be said to dog owners but I often see it when I am out. Many people do not clean up after their dogs and leave their waste lying on the ground. This is incredibly rude, especially at an RV park where other people are walking and trying to enjoy their stay.

It’s just common courtesy to clean up after your dog does his or her business. Always keep poop bags in your RV in case you are in a place that doesn’t have them. Better yet, don’t expect RV parks to furnish these for you. Instead, keep these in your RV at all times if you have a dog and then you’ll never have to worry about it. Just be sure and use them.

Consider The Weather

The camping season is usually in full swing during the summer months. This can often make for a miserable time for a dog as far as the weather is concerned. A dog may get too hot during the summer heat so you will need to make sure that you consider this at all times. Make sure you have taken precautions to keep your dog cool and comfortable when the heat is at its hottest.

Take them walking in the early morning or late in the evening when the weather has cooled down. My dog has a lot of hair and gets very hot in the summer heat. Even the early mornings and evening hours can be difficult for her.

Don’t Leave Them Alone In The RV

Whether you have an air conditioner or not, don’t leave your pet alone in your RV for long periods of time. Systems fail and your air conditioner could stop working, leaving your dog to suffer in a hot enclosure. If you are going to leave them alone in an RV at all, I would suggest using a temperature sensor as well as a camera system so that you can monitor them at all times.

One solution that you might consider is the RV PetSafety Pet Monitor 4G. This system will alert you when the temperature is at a level that is dangerous for your pet.

Without air-conditioning, an RV can get extremely hot in the summer. They aren’t as insulated as effectively as a sticks and bricks home so they can heat up very quickly when the sun is beaming down on them.

Keep Them Safe While Driving

When driving in your RV, you should consider your dog’s safety as well as the humans inside. You don’t want your dog sitting in the front dashboard or another unsafe area. Your dog should be buckled in using a car seat for dogs or another solution.

In the case of a wreck, you want to make sure that your dog isn’t going to go flying through the RV. Even driving and braking can cause a dog to lose their balance and fall if not buckled in. Many people have their dogs sit in their lap while driving or riding but this is also unsafe.

Consider creating a safe place for your dog to ride when your RV is traveling down the road. There are some solutions on the market that will keep your dog safe in moving vehicles.

Bottom Line

Most RV parks will allow dogs to stay. In fact, I have never been to an RV park that doesn’t allow dogs. While many of them do have restrictions, you will usually be just fine as long as you are courteous to others and keep your dog on a leash.

RVing with your dog is part of the fun and it allows you to take fun trips without leaving them behind. Your dog will feel at home in the RV that they know. It’s much easier to travel with a dog in this way than it is to travel in a car and stay in hotels. Hotels do not often allow dogs so traveling in an RV is the way to go if you want to take your dog.

Just be sure and follow the rules of the RV park and if you are ever in doubt, ask before you go. Since RV parks have different rules, you will want to make sure that you are safe to bring your dog. The best way to do this is to call the RV park before you go.

Camper Van Top Load Fridge – Installation And Review

Deciding on a fridge for your camper van conversion can be a challenge. It really comes down to your layout and how well each specific type of fridge will work for you. There are two options that most will consider; a top load and a traditional upright refrigerator.

The type you choose will all depend on your personal preferences as well as your layout. I went back and forth for a while on this decision because my van layout could have used either type. My main concern was choosing the solution that would be the most efficient with my solar system. I also wanted something that had lots of room and a separate freezer.

After researching and looking at various models, I decided that a top load fridge would work best for me.

Choosing A Top Load Refrigerator

There are a few major players in the RV refrigerator market and all of them have offerings that will do the job. In my search, I needed a solution that had a freezer option. When traveling in my van, I cook nearly all my meals so I like to have everything I need available. This includes frozen foods as well as perishable items that need refrigeration.

Let’s take a look at a couple of the popular brands that I looked at during my search.

Dometic

Dometic is a big name in the world of camping and they make many different solutions for campers. Refrigeration is a large part of their business and they have some great products that have been put to the test by many RVers over the years. Dometic has always been at the top of my list since I have purchased from them before. I have worked in the RV industry and know that they are a reputable company with good support.

Whynter

Whynter is another brand that I was looking at during my search. Although not as known as the Dometic, Whynter offers mobile refrigerator solutions that work great for RVs and other mobile solutions. Their dual-zone portable freezer/refrigerator would fit the bill quite nicely for my van conversion. It would be similar to what the Dometic fridge offers but at a lower cost. I had to decide whether or not I wanted to stick with a name I trusted or save a little money.

In the end, I chose the Dometic CFX 75DZW (affiliate link). This one made the most sense to me. The size was perfect for what I needed and I felt that it would be the most efficient.

Note: The model I purchased is now called the Dometic CFX3 75DZW. There is also another version of this size refrigerator; Dometic Waeco CFX 75DZW.

Brand / ModelSizeWeightTemperature RangePower Consumption
Dometic CFX 75DZW75L 35.12″ W x 19.5″ L x 18.58″ H61.29 lbs-7°F to 50°F1.43 Ah/h
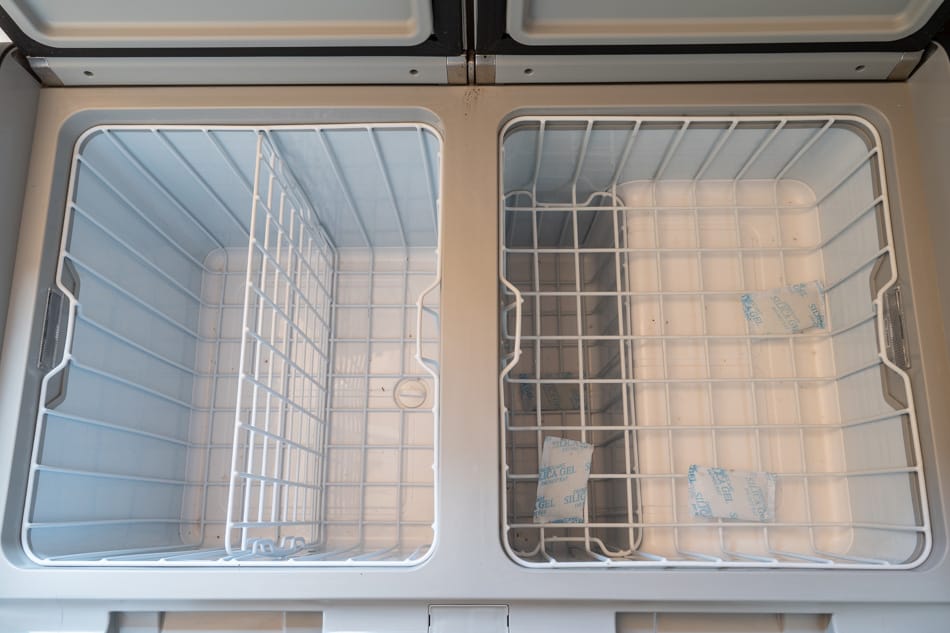
Dometic fridge interior

Top Load Refrigerator Installation

Slide

I planned for my fridge to be stored out of the way underneath my bed. This was a perfect location for the fridge to be out of the way but useable by using drawer slides that allowed me to pull it out. I had planned to purchase the refrigerator slide system that Dometic sells that goes along with the refrigerator. At the time of this writing, the product is DOMETIC CFX SLD7580110B.

Fridge pulled out full extension

This would store neatly under my bed and I would be able to pull it out as needed. The slide system from the Dometic also has a locking feature that allows it to stay closed when not in use.

Although this slide system was not intended to be used the way I was going to use it, I had planned on customizing it to fit my needs. I purchased the Dometic slide system and it ended up being a bad decision.

There are a few reasons that this did not work for me.

  1. The slide is NOT full extension. Once I began planning and installing this, I was disappointed to learn that the slide stops about two inches short of being full extension. This meant that I could not pull my fridge out far enough to open the top. I had to come up with a new plan so that I could get full extension.
  2. The locking mechanism has too much play. After testing the system out and learning how it would work, I realized that it had too much play in it. This meant that it would rattle and make a lot of noise as I traveled in the van. I didn’t like the thought of this and I wanted something that would be tight and secure.

Overall, I will say that this slide system is very high-quality. However, in my specific build plan, it just would not work. Rather than send it back though, I decided I would tear it apart and customize it to work for my van. It would cost me more money but in the end, I would be left with a sturdy, steel base with my own custom full-extension slides installed.

I would also install my own locking mechanisms so that the refrigerator would be tight, secure, and quiet.

I’ll have to say, it was a little difficult to customize but in the end, it was worth it. I completely removed the slides that came on the unit and ordered 36-inch full extension slides that would fit. These would allow me to install my refrigerator flush with the wall and then pull it out all the way so that I could open the top of the refrigerator completely.

This is exactly what I was looking for in the first place. I’m not sure why Dometic doesn’t make full extension on this. I’m assuming that my plan for using it was different than what it was designed for.

I used the same steel base but installed the new slides onto it rather than the ones that came with it. Fortunately, I was able to use the same supports and mounts that the slide came with. This all lined up perfectly with the new slides that I had purchased. I just had to drill new holes in all of the parts to make them fit. I used the same screws and bolts that I had taken out when I tore the thing apart.

After all was said and done, I was left with a base for my refrigerator that would allow me to install it the way I had planned. It cost me an extra $70 for full-extension, heavy-duty slides but extra costs are to be expected in a custom van conversion.

Mounting The Fridge

After the slide system was created, I positioned the refrigerator unit exactly where I wanted. I built a base system out of 2x4s so that I could get the unit up off of the ground a few inches. This way, when I pulled the refrigerator out it would be above the floor.

I also added a waterproof area underneath the fridge just in case there were to ever be any water leaking from it. I mainly created this because I had leftover shower liner that I needed to use. This seemed like a perfect spot for it.

I created this simple 2 x 4 rectangle area in my garage area by screwing the 2x4s to the subfloor. After that, I drilled holes in five different locations around the frame that went all the way through the 2x4s and the metal floor of the van.

When I installed the system, I used large bolts in these holes with washers and nuts that hold everything into the metal floor. I wanted to make sure it was installed this way so that it would be secure. The refrigerator is a heavy item and if a wreck or something were to occur, I didn’t want it flying through the van. Having it bolted through the entire van floor helps to give me more peace of mind that this will not happen.

Bolt through the fridge frame

The whole unit was installed so that the front of the slide system would be flush with the wall that I had created. This would allow me to build a door onto the front of the fridge while keeping everything flush with the wall. The plan was to have a fridge that became part of the wall and only had a handle on it for you to pull the fridge out when needed.

Installing The Drawer Front

The drawer front was created using shiplap just like I used on the walls. Before installing the shiplap, I had to create wooden supports that would hold the shiplap on tightly. I did this by removing the refrigerator handle and adding 2×3 boards vertically that would essentially serve as studs to mount the shiplap. This gave me a support area to build my drawer front onto and made it very secure.

Once the supports were in place, I simply used #8 screws and a nail gun to secure each shiplap board. I made sure to line them up as close to perfect as I could to the shiplap on each side of the drawer front. The most difficult part was lining up the bottom because I had to cut the shiplap to create the perfect amount of spacing.

After I was finished installing the shiplap, I filled in the screw and nail holes with wood filler and then sanded and painted.

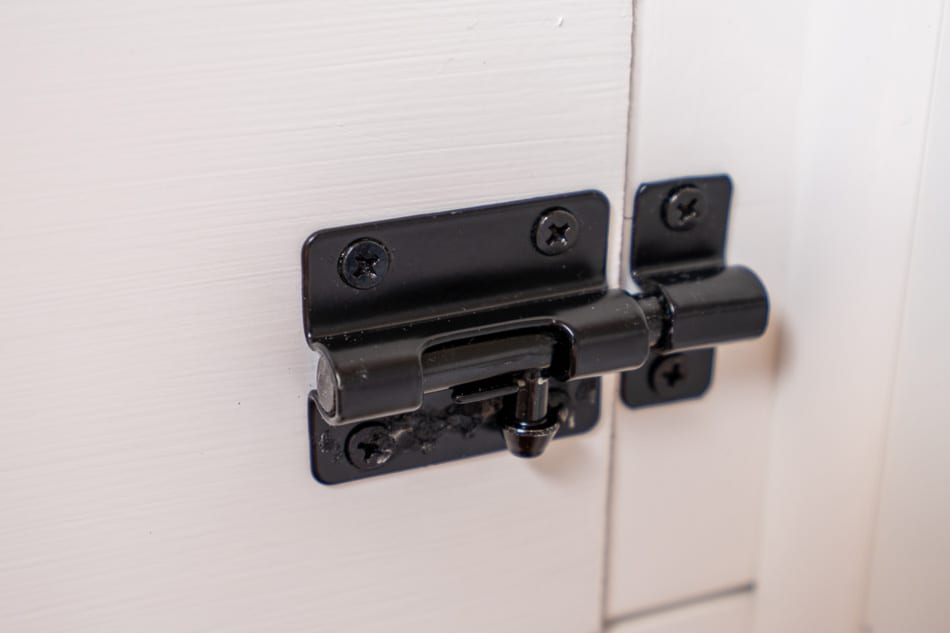
After that was done, I installed the hardware on the front of the drawer face. This included a handle and latches on each side to hold the draw securely closed. However, the latches I chose were not the best option, and I will probably change them out for better ones soon. Currently, I have the hardware seen in the picture below on the drawer.

Latch holding fridge drawer closed

These rattle and make too much noise as I’m driving. I wanted to avoid this and I will solve this by using a different type of latch. I’m not sure what I’m going to use yet but there is probably something better out there that won’t make noise.

For now, these are fine and the noise they make is bearable but it is pretty much the only noise that comes from my van while I am driving so I would like to get rid of it.

Powering The Refrigerator

As I had hoped, the efficiency of this top load refrigerator is excellent. I can power the refrigerator completely by using my Yeti 1400 solar generator. It uses a very minimal amount of electricity to keep everything cold inside. It uses less electricity if I am not using one section as a freezer. This is obvious since it doesn’t have to run as much to keep one side at freezer temperature.

When the refrigerator compressor is running, it draws a various amount of amps from my solar generator, depending on what the compressor is doing. The highest draw I have seen is around 5 amps. Normally, it is drawing around 2-3 amps when running. However, it only runs a few times per hour for a few minutes depending on the ambient temperature and how cold I have the compartments set for.

Other than that, it doesn’t use any electrical power to maintain the temperature inside each compartment. It is surprising how little electricity this unit uses.

If you are using this with a Goal Zero product, you may need to purchase the extra regulated cable (affiliate link) to use this refrigerator. Some of the newer models of their products have this built-in but the model that I have doesn’t. This regulated cable allows the 12 V output of the generator to always be 12 V.

Without it, 12 V becomes less and less as The battery drains. Dometic refrigerators need a constant 12 V in order to run. This is one of the things that irks me about Goal Zero but at least it is fixable with an inexpensive regulated cable.

Regulated cable for Goal Zero

Using The Refrigerator

The refrigerator works the way you would expect any refrigerator to work. I love the convenience of having a refrigerator and a freezer in one. It allows me to set one side for all of my frozen foods and the other side for my standard items that only need to remain cool.

I keep my freezer set to 16°F and my refrigerator is set to 40°F. I have found these temperature settings to be perfect for maintaining my food the way that I like. Even in 100° weather, the refrigerator performs flawlessly and has no trouble maintaining these temperatures.

In very hot situations, I have found that it does drain my solar generator a little more than it would in more ideal situations. In hot environments, the refrigerator compressor has to run more than it would otherwise. The more the compressor runs, the more energy that it uses.

On sunny days, the refrigerator does not use more than what my solar panels bring in from the sun. As long as there is some sun to charge from, I can use this refrigerator while maintaining around 100% charge on my battery.

After using my refrigerator for a while, I have learned a few things that I like and a few things that I don’t like. Let’s take a look at the pros and cons of using this type of refrigerator.

Top Load Refrigerator Pros

It’s very efficient

I have been very happy with the little amount of energy that this refrigerator uses. I also like the fact that when you open the refrigerator, the cool air doesn’t come out. Since cold air sinks, it stays in the cooler rather than rising out when you open the door.

Nothing falls out when you open the door

When you drive around in a van or an RV, items in a refrigerator are bound to shift and move around. In a standard refrigerator, you may have to open the door slowly to make sure these items don’t fall out. This is not the case with a top load refrigerator. You will not have to worry about anything falling out when you open the top doors on the refrigerator.

It stores out of the way

The refrigerator stores neatly out of the way and you don’t even know there’s a refrigerator there in my van conversion. Although it does take up some space in the garage, I planned for this and it is not an issue.

Top Load Refrigerator Cons

It’s difficult to get to items on the bottom

When you store items in a refrigerator like this, there are bound to be items that are on the bottom. Of course, these are usually the items you need. You will find yourself pulling lots of other items out just to get to the items on the bottom. It makes it more of a hassle sometimes if you have a fully-loaded fridge.

It requires some reaching

The way I have the refrigerator installed in my van requires a bit of reaching. When I pull the refrigerator out, I have to bend over to get something out of the back of the freezer. It can be difficult to get to the very back sometimes.

Conclusion

A top load refrigerator has worked well for my van conversion. However, a standard upright refrigerator would have also worked. There are other models on the market that would have fit into my plan just like the top load did. However, I chose to go with the top load because I liked how efficient it is and I like the idea of items not falling out when you open the door.

Both of these have been true as the refrigerator is very efficient and uses very little energy and I never have to worry about items shifting and moving around while I’m driving. Although there are a couple of cons, I feel that the pros outweigh the cons, and having a top load refrigerator is a good choice.

It won’t work in every van conversion but it’s worth taking a look at if you aren’t sure. If you are going through a van conversion, be sure and consider each option before you get too far into your conversion. Each type will require a different space so make sure you are giving this some thought and building this into your layout as you go.

Conversion Van Dinette – Creating A Dining Area

The dining area in my van is located in the front section. I did this so that I could make use of the seats that were already in the van. Rather than cut off the living area from the driver and passenger seating area, I wanted to be able to swivel the front seats around so that I could utilize these with the dining area. Doing this opens up the area and makes it a larger living space since you are utilizing nearly the entire length of the van.

If you don’t utilize the front seats, you are essentially cutting your living space off shorter than you need to. When you can take the two front seats and swivel them around, they become the most comfortable seats in the house. This makes a perfect place for a dining area and this is what I decided to do.

For my plan, I wanted to use this area for a place that I could sit down and eat or do other things. It provides a perfect place to put my laptop and work while I am looking out the side door. The location of this area is perfect for when you are parked in a picturesque place that has great views.

The following is a detailed account of my thought process as well as creating the space and the parts that I used to accomplish it.

Deciding On A Layout

When I planned my dining area, as mentioned above, I wanted to make use of the side door area. While some people choose a dining area further back in the van, I wanted mine to be in the front open area so that I could look out as I ate or worked at the table. I knew that I wanted some sort of bench seat that would allow me to face toward the door.

Another feature that I knew I wanted was a table that could move around freely into different positions. I chose to use the Lagun mount for this because this is one of the best options available for mounting a table in tight spaces. I’ll discuss this a little further down in the article.

Not only did I want to have a bench seat, but I also wanted to have lots of storage area within the seating area. I chose to use a banquet bench seat design similar to what you would find in a home dining area. During my search for banquet seating plans, I found the perfect solution at one of the major online retailers (Ballard Designs – Breton 30″ Bench). However, the price was pretty steep and I would have to customize it so that I could fit it in the van where I wanted it.

Purchasing an expensive seat like this was going to cost me around $800 at the time. That’s a lot of money to spend just to take a saw to it and cut it to fit in a space. What if I messed it up? What if I cut it too short or crooked? These questions scared me away from purchasing it. Although it would have been nice to purchase something that was mostly already done for me.

In the end, I chose to build something similar myself. Using the one I had found online as a model, I took my own custom measurements and got to work on building it from scratch.

Seating

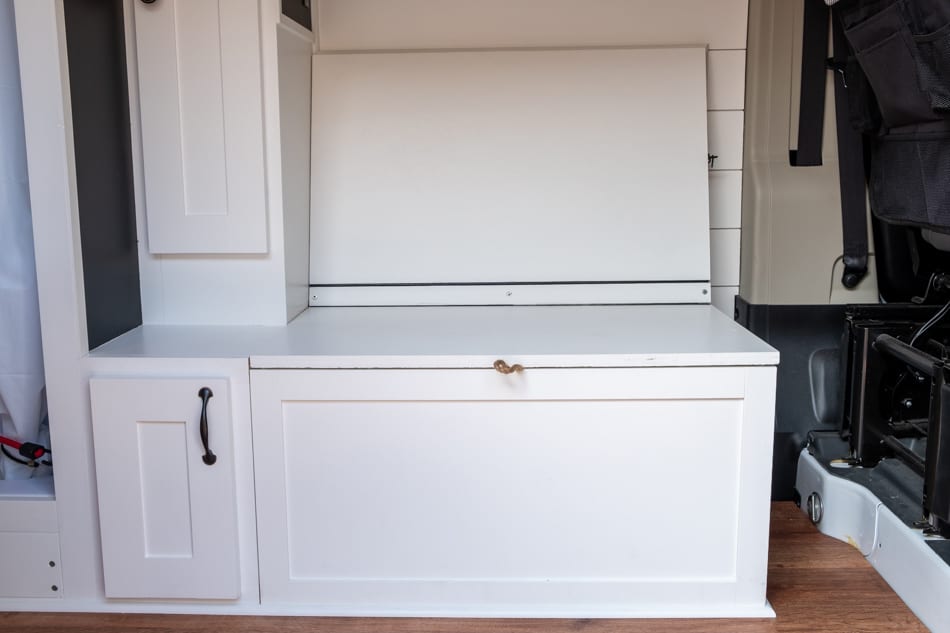
Banquette bench

I built my bench seat using 3/4 inch birch plywood. I purchased a large 4 x 8 sheet of this plywood and it was more than enough to complete the job. I didn’t have a specific plan for building it other than my own knowledge and experience of how to get it done. I didn’t follow any kind of template or pattern to do it. I just guessed my way through this and it seemed to work out pretty well.

I’ll have to say, there were times throughout the process that I wish I had just purchased the one online and been done with it. I’m glad I stuck with it though because, in the end, it turned out better than I had imagined it would.

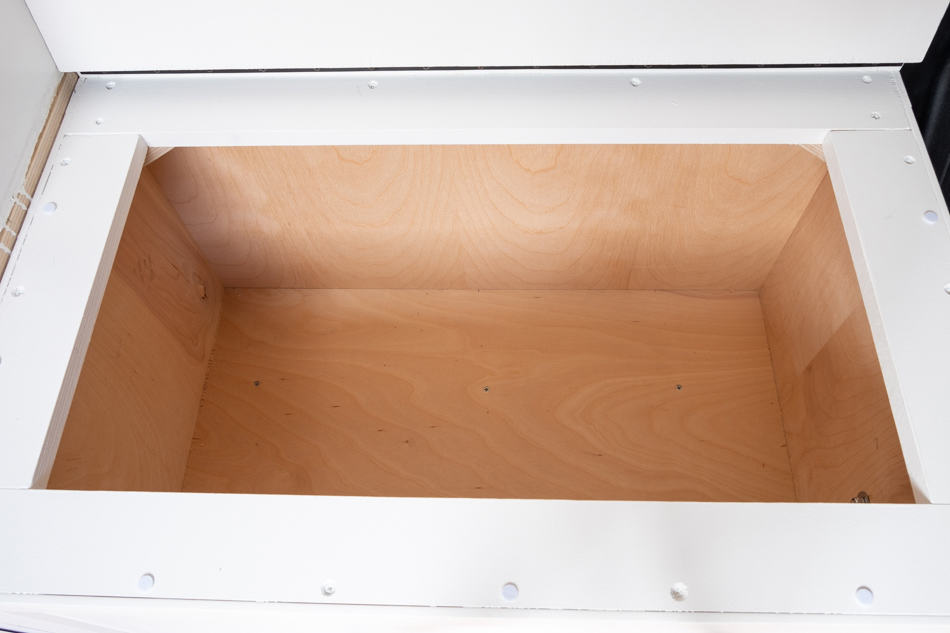
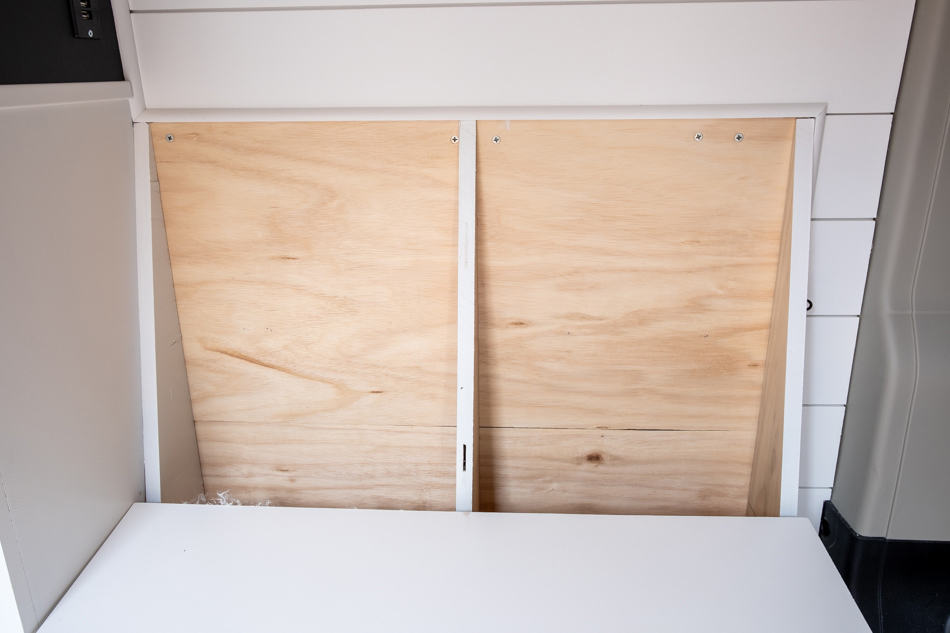
Not only did I have a bench seat, but I also had a storage box that could store a ton of stuff. The commercial product that I was working from had storage in the bottom as well. However, I took mine one step further and created an additional storage compartment in the back of the seating area.

Banquette bench bottom storage area

This is perfect for small, slim items and has become the area where I store a stepping stool and other odd-shaped items. When stored in this rear storage area, things are completely out of the way and you don’t even know you have them.

I often forget that there is even storage behind it and I forget where I have put things. I have to remember to open the rear storage area to check. This is a good thing because having lots of storage in a small van is not always the case.

Banquette bench rear storage area

I built this bench seating in my garage before ever installing it in the van. My goal was to build it similar to the commercial version I had found except using my exact measurements. Once it was fully built, I would then paint it and finish it, then install it in my van.

That’s exactly what I did and once the seating was fully complete. To install it, I screwed it down tightly to the sub-flooring as well as the furring strips in the wall behind the bench. This gave me a very sturdy installation and I don’t have to worry about it coming loose. This bench seat isn’t going anywhere and it is set up to provide me with seating to use with my dining table or just to chill in.

The size of the seating area of the bench is 30 inches wide by 18.5 inches deep. It’s large enough for two people to sit on if needed but more comfortable for only one person. The entire banquet bench measures 30 inches wide by 24 inches deep.

Bench seating with cushions

Directly beside this seating area is a pantry area where all of my food items will be stored. As you can see from the picture, this area doesn’t come out as far as my shower area. I did this on purpose so that I wouldn’t feel so boxed in when sitting in the dining area.

I wanted to create a more open area when I was sitting in the dining area and looked back towards the rear of the van. If I had built the pantry area all the way out, I wouldn’t be able to see anything except a wall beside me. Not only that, but the pantry would also be super deep and hard to get into.

This idea has worked out quite well and has opened up the space just as I had hoped it would. The only problem with doing this was the space that was created in front of the pantry left a bare spot where no cushion would be. Instead of leaving this empty, my wife created a small cushion to match the cushion from the dining bench. This can also provide additional seating but it’s mainly for my dog to sit in while I am sitting on the bench. It works out great for this purpose.

When traveling with my wife, one of us will usually sit in the banquet seating area while one is sitting in the passenger seat, swiveled around. This gives us both a comfortable seating area and allows us both to eat at the table together. Our dog can plop down on the bench seat in the little extra cushion area made for her.

Note: my original plan was to have swivel seats in both front seats. However, after installing the passenger one, the additional height of the seat was raised an inch and a half. I feel like this might be too much for the driver’s side. The driver’s seat already sits up high as you’re driving so I’m not sure I want it to sit up any higher than it already is. I have refrained from installing the driver seat swivel base thus far. I might decide to follow through with this in the future. For now, it works great with only using the passenger seat.

Table

My table is quite simple. I chose to use a small and lightweight solution for now because this is something that can always be upgraded in the future. For this tabletop, I purchased a small edge-glued pine board at The Home Depot. The tabletop is small but large enough for my needs and it stores out of the way nice and easy when not in use.

I finished the tabletop with a light honey stain and then put five coats of polyurethane all around it.

The tabletop is strong enough for normal usage when eating or using it as a workstation, but I wouldn’t recommend sitting on it. It’s not as strong or sturdy as a home dining table but it serves its purpose and provides me with a nice table area with a decent size that also doesn’t take up a lot of space. It also doesn’t add much weight to the van.

In the future, I may upgrade this tabletop to a more substantial unit but I’m not sure it’s really necessary. Only time will tell how this one will work out.

So far, after using my van for over a year now, I’m happy with this little tabletop. It has served my needs well and I don’t see any reason to upgrade unless this one becomes damaged.

Lagun Table Mount

In order for my dining area to come together as I wanted, it required that I use a table mount that could move around. I wanted to be able to swing my table around to wherever I needed it. This would allow me to use it as a dining table or as extra counter space when cooking. It would also allow me to move it completely out of the way when I just wanted to sit down without a table.

The obvious choice for this solution was the Lagun mount. This mount is often used in boats and RVs for this purpose and it provides a perfect solution for what I was looking for. Many people use these mounts in van conversions so I wanted to give it a try in mine. I purchased the mount directly from Lagun USA.

This is a well-made solution for creating a dining table with flexibility. It works well for my dining area and provides me with a way to position my table exactly where I need it for whatever I’m doing.

I mounted the Lagun mount to the side of my banquet bench. This location is fairly hidden and the mount is conveniently located out of the way but allows the table to be positioned perfectly. The installation was very easy. It comes with everything you need, including a piece of teak plywood and some shims for getting it perfectly straight.

I only used the plywood and didn’t need the shims since the surface I mounted to was already as straight as it could be. The additional plywood helped to give it a sturdier place so that it would be a more solid mount.

Note: be careful with the plywood. After more than a year later, I still have a splinter from it buried deep in my index finger. I was hoping it would work itself out by now but no luck.

Lagun Mount Pros

  • High quality – This mount is very high quality and made from heavy anodized aluminum. I expect it to last for many years and perform well for my dining table.
  • Space-saving – If you live or camping in a small space, the Lagun mount is very useful. You’ll be able to move it out of the way or even remove it altogether when it’s not needed.
  • Easy installation – It comes with everything you need, except for the tabletop, for a simple installation.
  • You can add additional mounts – Purchase as many additional mounts as you need. You can place them in different areas and then simply move your table from one mount to the other as needed.

Lagun Mount Cons

  • Expensive – At nearly $200 for the basic mount with hardware, it is a significant expense. However, I feel that the convenience and quality warrant such a price.

Overall, I have been very happy with the Lagun mount. It is a very high-quality table mount and gives you a lot of flexibility. It is well thought out to perform well in this type of living space. If you want to make the most of a small space, this type of mount is a no-brainer. The price is a bit steep but you are getting a high-quality item that can do wonders for making your space seem larger than it is. I highly recommend it.

Final Thoughts

The main thing I was trying to create with my dinette was a place to do my dining with a view. The large sliding side door is the perfect place to be able to look out at nature as you enjoy a meal, read a book, work on your laptop, or just chill out.

Although the area that I built provides a nice space for doing these activities, it doesn’t take up a lot of space. On top of that, it adds additional storage which is essential for a camper van. It has become the main hangout spot in my van and you can nearly always find me chilling in the front passenger seat or the comfortable cushioned bench seat.

Hopefully, this post will give you some ideas for creating a dining area in your van. The most important thing is to create something that works for you. There are many different plans out there so take what works for you and leave what doesn’t.

Eureka Ignite Camp Stove Review – Why It’s My Favorite

Choosing a camp stove can be a difficult task since there are so many on the market. You want to choose something that is going to do a good job and give you similar results to what you would experience cooking on your home stove.

However, many camp stoves are cheap and do not offer the amount of control over the flame that you might like to see.

When I began my search for a camping stove that would be used in my van, I was overwhelmed with the number of different ones on the market. It’s often difficult to trust reviews online because some reviews are done by people that didn’t know what they were doing or were expecting something different from the product.

I have been an outdoorsman and avid camper most of my life so I have used a lot of different camping stoves. Most all of the ones that I have used have been sufficient for cooking meals, heating water, and doing other things that you would need to do.

Where they differ has been with some of the controls and how well they work, the overall quality as well as how long they last.

I took a chance on the Eureka Ignite stove and purchased it because I liked the way that it looked and it seemed like it would work well as my van stove. This has been over a year ago and I have used it numerous times so I feel like I am able to write a review and share my thoughts on the product after extended to use.

First Impressions

Eureka Ignite camp stove with kettle

I purchased the Eureka Ignite because it looked like it would be a good solution as a way to cook meals in my van. There weren’t very many reviews on the grill when I first purchased it so I had to take my chances and assume that it would be a good one. It seemed to be a high-quality stove from the images available.

One of the main features that made me choose this grill is the simmer control. It is supposed to give you greater precision when operating the flame at a simmering level. I know from experience, simmering on a camp stove doesn’t always work very well.

Upon receiving the grill, and opening up the package to first take a look at it, I saw that it was pretty good quality. It was about as good of quality as you will find on a camping stove in this price range. Most all of these types of grills in this price range are about the same as far as quality goes.

The grill isn’t much different from what you would expect from any of these types of grills. As far as looks go, I think it looks better than other grills in this price range as well as the grills that I have used camping throughout my life. This one has a higher quality look to it but, of course, looks don’t matter when you are using it to cook with.
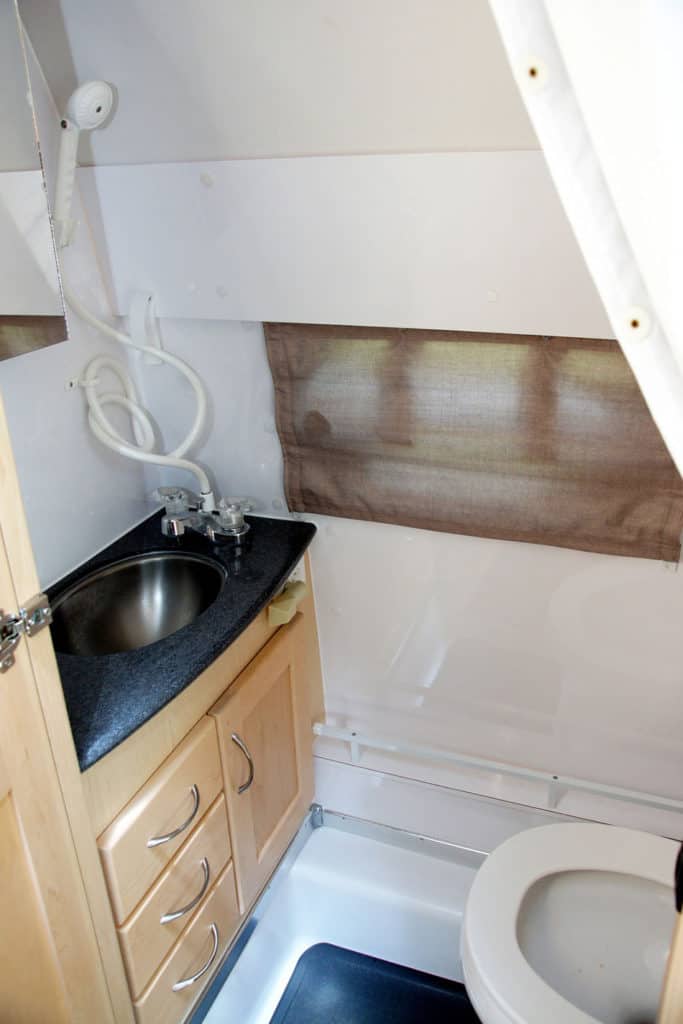
The real test is using the grill to cook with which is the primary reason that I purchased it. My hope is that it will be a good grill to perform all of the tasks that I would expect from it for cooking meals and boiling water for coffee and tea.

First impressions are good and it’s exactly as I would expect it to be. I feel like the quality of it is sufficient and it seems like it will do the job that I purchased it to do.

Using The Stove

Kettle on stove with flame

Having used the stove many times while camping in my van, I have been impressed with how well it works. It’s very similar to a gas stove that you would have at your house and you can control the flame quite well. The simmer control on the stove works very well and you can reduce the flame very low to simmer the food.
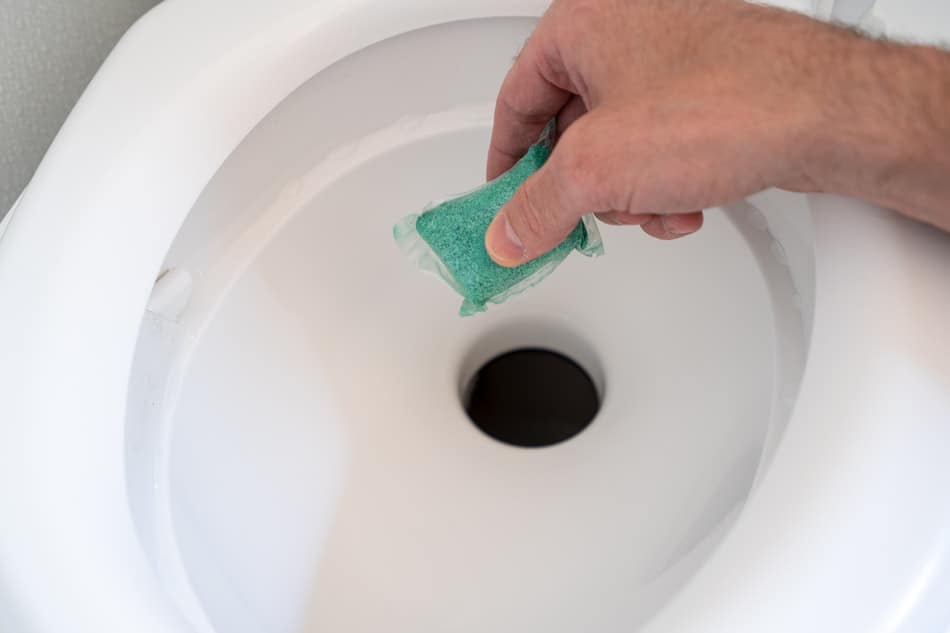
There isn’t a lot to say about the workings of the stove itself. It works like you would expect a stove to work. The igniters work great and I’ve never experienced the stove not being able to fire up. I generally have to push the ignite button 2 – 3 times before it fires up.

It uses the 1 pound propane tanks which work well for me. I keep 3 or 4 of these in my van at all times so I won’t run out. I can use one tank for quite a while before needing to change one out. In fact, after using the grill for over a year now, I have only gone through one full tank. I am only a weekender though so if you are planning to use this grill for full-time living, you will burn through them much quicker.

I have used it to cook meals many times but the majority of the time I use it, I am boiling water for my coffee. The grill fires up quickly and when the flame is set to the max level, it boils a full 1 Liter (34 fl oz) kettle of water in about five minutes.

Things I Like About The Eureka Ignite

After using this grill for over a year now in various situations, I feel more confident in my opinions of the product. I have mainly used it inside my van but have used it to cook outside a few times as well. Overall, it has proven to be a great grill and the following are the things I like about it and only two that I wish were better.

High quality

I have been impressed with the quality of the stove. It seems to be well-made and a step above the stoves that I have used in the past. It seems like a stove that will last for years to come. I have used it in various settings and have had no issues with anything as of yet. I have been using the stove for over a year as I write this and I’ve had no noticeable issues as far as quality goes.

Simmer Control

Simmering grill with knobs showing

With the camp stoves that I’ve used in the past, the ability to simmer left a little to be desired. Most of the controls on camp stoves I’ve used in the past are either high or low and not much in between. It was always difficult trying to get the right amount of flame to keep from burning food.

Simmer control is essential if you want to cook a meal that needs cooking on low heat for longer periods. With the Eureka Ignite, it handles this very well. I can get the flame to where it’s barely running and almost turned all the way off. This allows me to simmer food just the way I would at home and gives me a good result without burning the food.

Lightweight & Small

The Ignite is small and compact for a two-burner stove. I’m able to store it away nice and easily when not in use but it’s simple to get back out when needed. Being small and lightweight also makes it easy to take outside of my van and use it in other settings.

The stove weighs approximately 10 pounds as tested on my home scale.

Compatible With JetLink

Camp stove with propane tank connected

I am a big fan of the Jetboil system. Being an avid hiker, I often carry my Jetboil system in my pack so that I can have a hot meal, coffee, or tea while out on the trail. The Eureka stove systems connect with these Jetboil systems using the JetLink accessory hose to allow you to be able to connect multiple burners.

To be honest, I probably won’t use this feature but I do use the Jetboil system so this was a bonus. If I choose to utilize this feature in the future, at least it’s there. It’s something beyond what other camp stove options offered during my search.

It Looks Good

One other simple reason that I like this stove is that it just looks good. This isn’t on the top of my list for things to search for in a camping stove but I have been pleasantly surprised with how well this one looks. When compared to the old olive drab green stoves that I have had in the past, this one is an upgrade in the looks department.

Easy To Clean

The stainless steel tray is easy to keep clean. I have had pots to boil over plenty of times but have been able to easily clean it up afterward. The stainless steel ensures that I won’t have any rust issues with it in the future.

Things I Don’t Like About The Eureka Ignite

Wind Guards

Eureka ignite stove hinge close up

I am not a big fan of the wind guards on the stove. If you do need to use them, they are quite large and will probably help with the wind. However, in the setting in which I use my stove for the most part, which is in the van, they just get in the way. I wish there was a way for the lid to stay open without having to use these.

I could customize it myself to do this, but I feel like it should give you a better solution for when the wind guards aren’t needed.

I can’t count the times that I have accidentally bumped one or both of the flimsy wind guards and it caused the lid to fall backward. This can get annoying and I wish it had a better way to connect them more securely to the lid. The little sockets that it sits in when you have the lid raised, have too much play in them and it doesn’t hold as securely as I’d like.

This isn’t uncommon so many other stoves are just like this but it is something that irks me about it.

No Carrying Case

It doesn’t come with any kind of carrying case for storage so I keep it stored in the cardboard box it came in when not in use. It would be much handier if there was an included case with padding and handles. This would make it easier for storage and also make it easier to carry to other locations. Just a cheap, cloth case with a little padding and a few extra pockets would be nice.

You can purchase cases from other brands online but it would be nice if Eureka would include one with their stoves. Even a cheap portable fire pit I purchased came with a padded case with handles. I don’t see any reason that Eureka can’t include one with their products.

Bottom Line

Camp stove with saucepan and skillet on top

This stove is perfect if you are looking for something small that will handle most of your cooking needs. I don’t cook intricate meals so I’m usually only using a saucepan and a 10-inch skillet. It has served me well during the time I have had it and it has turned out to be a good purchase overall.

Many people who have camper vans or other RVs have built-in stoves and this can be a big advantage. However, if you don’t have one built-in, a stove like this will give you great results. If you are someone who cooks a lot or need to feed more than one or two people, something larger might work better. The Eureka Ignite Plus may be the better option in this case.

I like the Ignite because it is small and stores out of the way easily when not in use. It is high-quality and gives me precise control over the flame. For the price, I feel like it would be hard to beat this stove.

Van Conversion Mistakes – 10 Things NOT To Do

If you are going to be converting a van to a camper, there are some things that you should avoid. I made plenty of mistakes during my van conversion and some of them could have been avoided if I had put a little more thought into it. I wish I had someone to point out a few things to me before I got started with my van conversion. It would’ve saved me lots of headaches, time, and money along the way.

No matter what, you are going to make a few mistakes along the way. Mistakes are part of the process and you’ll learn from them and move on. However, there are some common mistakes that people make when they go into a project like this that can be avoided. Wouldn’t it be better to avoid some of these types of mistakes?

The following list contains things that I experienced along the way that I wished someone with more experience would’ve told me beforehand. Some of these may seem a bit obvious but others may not. Hopefully, these will help you along the way on your journey of converting a van.

1) Taking On The Challenge All By Yourself

Unless you are super skilled at pretty much everything, taking on a van conversion challenge all by yourself is a daunting task. I had a little help along the way but I spent most of the time working on the conversion all by myself. It was a struggle as I had to become an expert in all parts of the entire process.

The planning and execution rested on my shoulders and all the mistakes were mine as well.

No matter how good you are at certain things, you can’t possibly be good at every single thing that is involved. I was good at some of the carpentry work but the plumbing, electrical, and overall strategizing was a little over my head at times.

If you are going to do this, it’s best if you have someone that will work with you from the beginning and will stick with you until the end. Two heads are better than one and if you try to do this alone, you will have many sleepless nights and frustrating hours.

This will all depend upon your skill level so if you know you can handle it all by yourself, go for it. However, if someone had told me how difficult it was going to be from the beginning and told me that it would be challenging for one person, I may have decided not to do it or I would have enlisted reliable help before I even started.

2) Being Too Rigid In Your Design

If you have already planned your van build and have it down on paper, be prepared to change it. There will be times along the journey that you will need to do something different than you originally thought. If this is your first van conversion, be prepared to change things up a bit as you go in order to accommodate unforeseen problems.

If you are a pro at this and have done it before, you probably already know what you’re doing so this won’t apply to you.

Someone who has never done this before will tend to be rigid in their design and know exactly what they want.

This was me.

I knew exactly what I wanted and I went to the end of the world to accomplish it. This was the result of lots of frustration while working on the conversion. I eventually had to give in and change a few things to make the entire process easier along the way.

I learned to be more flexible as time went on and it helped me to get through some of the challenging parts of the conversion.

Don’t be afraid to change things up a bit as you go because there is no right or wrong way to do it. The goal is to have a living space that works for you. If you can accomplish this more easily, then don’t spend so much time frustrating yourself with a rigid plan that you had from day one. Give yourself permission to change your plans when the current plan isn’t working the way you want.

3) Expecting a Quick Build

When I purchased my van, I expected it to be done within six months or less. To me, this was a very doable timeframe. I purchased my van in September and my goal was to have it fully completed by the end of March of the next year. At this point, it would have been almost Spring and the perfect time for taking my first trip.

What I didn’t realize was how difficult the van conversion was going to be. I thought since it was such a small space, I would be able to knock it out in no time. I was surprised once I got going and realized how fast time was slipping away from me and how little I had gotten done.

On top of that, it was wintertime and freezing cold outside. This weather made me want to stay in the house and not mess with the darn thing.

After all, was said and done, March 31st of the following year came and I was halfway done. It ended up taking me nearly another six months to finally complete my conversion. It was around September when I finally got to a point that I could say it was finished. I was finally ready to take it on its first journey as a van conversion a year after I purchased it.

4) Setting Budget Too Low

I initially budgeted $6000 for my conversion because I wanted to keep it simple. I didn’t think that a simple set up would cost so much in a small space. I had already thought this through ahead of time and made a spreadsheet of the costs that I thought would be associated with the van build.

Needless to say, I was way off. I ended up spending over $10,000 when it was done. This was much more than what I had initially planned for. There were many reasons for this and some of the reasons were because I changed things along the way. I opted for more expensive solutions that would be easier to work with.

One example is the insulation. Right off the bat, I started with a higher price in insulation than what I had planned for. I chose 3M Thinsulate for the entire van and it was one of the most expensive insulation options available. It was a good choice though because it was easy to install and saved me a lot of time. Read about that process here.

Just know going into your conversion that whatever your budget is, it’s probably too low. You will run into unexpected things along the way that will jack the price up further. Plan for unforeseen problems to arise so that when they do, you aren’t alarmed. Hopefully, you’ll be closer to your budget than I was to mine.

5) Not Chunking It Down Into Small Steps

An entire van conversion can be an overwhelming project to think about. If you are going to take on a huge challenge like this, you must chunk it down into small steps. Focus on one small thing at a time and don’t move on until that is finished. I made the mistake of trying to do too much at a time. My mind was always focused on the entire van and it was overwhelming.

I finally smartened up and chunked it down into small steps that I could take. I focused on one area such as the shower. I only focused on the shower and only on what I could do for the next step in the process. I didn’t think about anything else until that step was finished.

Working in this way will help you to stay on track and accomplish small things. Once you have accomplished all of the small things, you will be amazed at the large project that you have completed. Whatever you are working on, put all your brainpower into that one thing. Don’t daydream or stress about what you are going to do next or in another part of the conversion.

6) Underestimating OR Overestimating Your Skill Level

Chances are, you can do some pretty amazing things but may not even know it. There were times during my van conversion that I thought I couldn’t accomplish a specific task. I assumed that I would have to hire someone to do it for me. The electrical and plumbing systems are two of these tasks.

I didn’t want to end up with a dangerous electrical situation or a leaking plumbing system. However, I pushed forward and discovered that it really wasn’t that hard. I had the skills and knowledge to get the projects done. Not only that, but I also had the internet to do my research. We live in a time where you can learn how to do anything in the world by looking online.

The same was true for cutting in my window. I was a little nervous about it and considered taking it to a body shop to get it done. This ended up being very easy as well and now I’m glad I did it.

Don’t let doubt make you abandon parts of your conversion.

On the other hand, overestimating what you can do can be just as bad. If you are certain that a task is over your head, don’t attempt it because you may end up cutting corners and creating a dangerous situation. If in doubt, ask for help from someone who may know a little more about whatever it is.

7) Planning Too Far Ahead

When you start with a van conversion, it’s easy to look way ahead to the finished product. The dream of having the van fully converted sometimes seems so far out of reach that it can be depressing. When you are starting with an empty van or one that needs a lot of updating, it can be easy to plan so far ahead that you lose sight of the small things that need to be done right now.

It’s almost a guarantee that you’re going to run into problems along the way. When you plan too far ahead, these problems can take you off course and threaten your whole project. It’s great to start with a plan but don’t put your focus too far out. Put your focus on the here and now and what you are working on.

8) Not Adding Windows Or Other Ventilation

Many people avoid adding windows or other ventilation to their van because they want to remain stealthy. This is an oversight that I believe most people will regret in the end. I can say for certain that I would not enjoy my van nearly as much if I had not added one window and a Maxxair roof fan.

Whether you add a fan or windows or a combination of both, The airflow that you get from these will make life much more enjoyable. It can be very hot in the summertime, especially without any kind of ventilation. Ventilation is a lifesaver in these hot situations and can make it feel very pleasant inside the van.

People may think that additional windows will allow the sun to heat the van up. This is true if you don’t use window covers but window covers are easy to make and can block out most of the heat. The airflow that you will get from the windows will be well worth the trouble of installing them.

9) Not Considering Resell Value

During your van conversion, you will want to consider that there might be a time that you will put it up for sale. If you just go ahead with a unique layout that only suits your very specific needs, you may miss out on being able to sell it in the future.

I have seen a lot of van conversions that are so customized that I can’t imagine anyone else wanting to purchase it. The more you customize a conversion to only suit your needs, the more you may eliminate other potential buyers in the future.

Interests come and go so you may find yourself wanting to sell your van not long after converting it. If you create a van that is accessible and user friendly for the majority of people, you will be better off. I made sure I thought this through during my conversion and I questioned everything I did, making sure that it would be something others would probably like.

I’m not saying that you should convert your van only to sell, it’s just that including a layout that the majority of people can use is just a smart idea.

10) Taking Shortcuts

In speaking of resale, taking shortcuts is another way to ensure that reselling your conversion is more difficult. If you are going to do something, you might as well do it right. If there is something that you don’t know how to do, rather than take a shortcut to get it done, consult with or hire someone to do it for you.

Things like this will come back to haunt you in the future and bad work will have to be fixed. If you do things right the first time, even though it may be more difficult, it will look better and last longer. When it’s time for you to get rid of your camper van and sell it to someone else, some of these shortcuts may scare off potential buyers.

Not only that, but shortcuts taken along the way could make for a dangerous situation. Take the time to do things right the first time around and you will rest easy knowing that it was done with quality.

Conclusion

Converting a van to camper is a big challenge to take on. It can be a long process and if you don’t take some of these suggestions, you could find yourself becoming discouraged along the way. I know because I’ve been there and I had to stop and re-think my plans quite often.

Mistakes along the way are inevitable but some of these mistakes may be blessings in disguise. You’ll have to redo something and realize that the way you re-did it works out better. Just trust in the process and know that nearly everyone that converts a van has to struggle through certain parts of it.

Just keep pushing ahead and it will all be worth it in the end.

What Is A Wet Bath In An RV? 5 Pros And Cons

RVs are generally equipped with some sort of facilities that can be used for showering and using the toilet. Many of the larger motorhomes and campers have separate shower and toilet areas that you would commonly find in a home. However, in a smaller RV, like a camper van or a small trailer, there just isn’t enough room for the standard types of facilities.

That’s where a wet bath comes in handy.

A wet bath is an area that includes a shower and toilet area together in one small space. This space can also contain a sink, mirror, cabinets, and other features. The entire space will get wet when the shower is running which is why it is called a wet bath.

The main benefit of a wet bath is that it saves space. It allows you to have the convenience of a full shower and toilet but has a smaller footprint than it would if these two areas were separate. A wet bath is perfect for small campers where space is limited. Anything that can be done to save space is welcomed in a small RV such as a Class B.

Some people love wet baths and some people hate them. I have heard people say that they are perfect for weekend getaways or occasional trips but would not want to use one in a full-time situation. I agree that they can be a bit inconvenient but the space-saving that you get from one of these can make up for any inconvenience that they may be.

I have one of these in my camper van and I am happy with it. However, mine isn’t fully a wet bath because I can remove my cassette toilet easily and use the shower only. It’s also possible for me to leave my toilet in the shower while I am taking a shower as I have done before.

There are benefits to this kind of set up but also some disadvantages that you might want to know about if you are looking at getting one of these types of bathrooms. Let’s take a look at the pros and cons of wet baths below.

Pros

rv wet bath full view

1) Saves Space

One of the best features of a wet bath is that it takes up less space than any other type of shower and toilet combination. This is extra important in a small RV or camper and can be an excellent choice for a camper van. A wet bath contains everything that you need to clean yourself and to relieve yourself.

Everything is contained in one small unit and this small unit takes up minimal space. Having everything together in one unit is a convenient way to still be able to have these features without taking up a lot of space.

Wet baths are usually found in smaller RVs. These are commonly seen in camper vans, small travel trailers, and some class C motorhomes. They work very well for campers of this size since you are working with limited space, to begin with.

You wouldn’t want to create a separate shower and toilet area in something as small as a camper van so a combination of both of these in the same space makes sense.

2) Easy To Clean

Since everything in a wet bath is designed to get wet, cleanup is easy because you can just wipe everything down once you are finished. This makes it easy to spray bathroom cleaner all over the place and then wipe it down without having separate areas to worry about.

Since most people clean their wet bath right after using it, it stays clean most of the time after it has had time to dry out.

Cleaning a wet bath can be as simple as using the shower head wand to spray down the entire area after you have finished using it. This makes it easy to make sure all of the soap and dirty water has been rinsed out of every crack and crevice. Once this has been done and you are fully finished with your shower, you can simply wipe it down with a towel or chamois.

3) Give You A Place To Sit While Showering

Having a toilet inside your shower can be handy for those times that you want to sit down while you are taking your shower. It becomes a bench that you can sit on and this makes it easier to wash your feet or clean areas that may be easier to clean while sitting down.

This is also great for those who need to sit down for a specific reason while they are taking a shower.

4) Can Be Used As A Drying Space

Another great thing about a wet bath is that you can hang or put wet clothes and other items that you don’t want in your living space. I often use my wet bath as a place to hang wet or sweaty clothes after I have been on a long hike or bike ride. It is also handy for putting wet umbrellas or wet clothes that have been hand washed.

You can hang stuff in the bathroom and not have to worry about the area getting wet. This comes in handy especially in small spaces and allows you to get things out of the way so that they don’t get the living space wet. There is often a lot of room inside a wet bath since it spans the space of a shower and toilet all in one. This gives you a sizable area to handle all of your wet belongings.

5) More Spacious For Showering

Once it is time for you to take a shower, you will generally have a more spacious set up than you would in other separate showers. Since the toilet, sink, and shower are generally all in one confined area, the space of the entire area can feel larger when taking a shower.

This gives you more elbow room to work with and makes it so that you don’t feel the walls closing in on you as you are lathering and rinsing.

Likewise, as you use your toilet, you have more space to do your business. This space allows you to move more freely and easily than you would by just having a small dedicated toilet space. Although the entire footprint of the wet bath may be small, the elbow room and moving around space that you might have can make up for the small area.

Cons

Interior view of wet bath

1) Everything Gets Wet

The biggest con is that when you take a shower in a wet bath, everything inside will get wet. Although it is designed to be this way, it sometimes can be a challenge and an inconvenience. I often find myself trying my best to not splash so much water around so there will not be so much to dry off after I am finished.

If you have toilet paper and other toiletries inside, you will need to make sure that they are in an area that won’t get wet. It’s common to have a waterproof toilet paper holder that allows you to keep the toilet paper dry as you run water throughout the showering area.

However, I have found that sometimes these are not fully waterproof or may not be fully closed and water could get to the toilet paper and turn it into a soggy mess.

Although easy to clean up, the water can get to be a lot and many people learn how to conserve water better the more they use one. By conserving water and learning how to spray yourself without creating as much splash, it is easier to manage the wetness.

2) A Wet Bath Can Be A Hassle

Having a wet bath isn’t always a good thing. Many people find them to be a hassle since everything inside gets wet. This can lead to moisture problems in your RV if you do not keep up on drying it. The wetness must be managed regularly and this can become a hassle for those who are not used to having one of these.

Those who are used to taking a shower at a house may be in for an unwelcoming adventure when using a wet bath. It can take a little while to adjust to the hassle that is required to maintain one of these types of setups.

3) They Are Small

If you have a small camper, a small bathroom can be a benefit. However, it can also be a disadvantage because if you have a small shower like this, it will be more difficult to use than a larger area would be. Larger people may have a difficult time using a small wet bath that can be found in small RVs. Everyone is different and will have to decide for themselves whether or not something like this is too small.

Personally, I like the size of a small wet bath. I don’t use it all the time and it’s nice to have the option without taking up so much space in my van. Yes, it is small once I go to use it but I can get the job done without much inconvenience. It’s not a big deal having a small shower like this and it can certainly be a welcoming feature when you are dirty and in need of a cleanup.

4) You Have To Spend Time Drying It After Use

It’s best that you always dry your shower and everything else inside of it after each use. This adds a little more time to your normal routine because you have to plan for the time it is going to take you to dry everything off. You have to get down into corners and crevices to make sure that everything gets properly dried out after you have run water throughout the entire area.

Although this is not difficult by any means, it does take extra time and if you had a separate shower you probably would not need to do this. It’s important that you do this to maintain a dry area in your van so that it doesn’t become a humid, mold creating space. You can make this process easier by having a dedicated towel or another absorbent device that soaks up a lot of water.

5) A Wet Bath Doesn’t Have Much Storage

In a wet bath, you will not find a lot of storage. Besides a few crevices and shelves, there isn’t a lot of room to store toiletries and other items. Even the items that you do have located in the area will possibly need to be removed when you use the area to take a shower.

Some of these types of areas do have watertight cabinet areas that can be used for storing items. By using the spaces, you won’t have to worry about water penetrating and getting the contents inside wet.

However, many of these types of areas are minimalistic and do not have a lot of room to store items.

Conclusion

A wet bath can be a great addition to a small camping space. If you have a Class B motorhome or a small travel trailer, you probably know all about using one of these. If you have a larger one, this type of showering area may be foreign to you.

They don’t take up a lot of space and they serve multiple purposes. Anytime that you can have something like this that serves multiple purposes in a small place, it is going to be ideal. Although it is not as luxurious as a full separate shower and toilet area, it gets the job done and allows you to have these conveniences even in a very small space.

There are pros to having this type of system but also cons so each person will need to decide if this is something they will want or not. These make a great solution for those people who use them occasionally. For those who mainly do their showering and bathroom using at a campground facility, they are perfect.

For those who live in small spaces, it’s hard to beat the convenience of having a shower and toilet like this. It may be difficult at first to get used to but the more you use it, the more you will appreciate the convenience that it offers.

Do Cassette Toilets Stink?

If you are considering installing a toilet in your RV or van, you have probably already looked into cassette toilets. These types of toilets have mixed reviews and some people love them while others hate them. There is a certain amount of ickiness associated with having a toilet like this inside a vehicle. Depending on what you use it for, it could become quite messy.

A cassette toilet does not stink as long as you use it for number one only. Using it for number two might create a problem unless you intend to dump it shortly after using it. If you add chemical treatments to the toilet and dump it often, you will probably never notice any unpleasant odors.

Problems can arise when you use the toilet for both liquids and solids. Once you start dropping deuces into it, you could be looking at a real, stinky mess. Many people who use a cassette toilet only use it for number one and keep it as an emergency solution for other needs that may arise.

I have one in my van and I consider it a necessity. I use it all the time for number one and have never had a problem with it. I keep it cleaned out and dumped regularly so I never let it build up or give it time to develop into a stinky problem.

I always use chemicals or vinegar in it so it generally has a fresh, chemical smell that comes from it when you open it up to dump it. When it is sitting unused in the van, I have never noticed a smell coming from it.

In case of emergency, if I were to use it for something other than peeing, which I have done a time or two, I make sure to dump it as soon as possible. You never want to leave solids inside the tank to marinate.

If you use it for liquids and solids, be sure that you have a plan to dump it as soon as possible. After it has been dumped, be sure to clean it out well so that nothing is left inside.

I have heard horror stories from people who have used it for both during a longer period of time. Once it was time to dump, it was an absolute nightmare. The smell can become disgusting and make you never want to use the toilet again.

These are actually great toilets and can serve you well as long as you follow a few simple guidelines.

5 Simple Ways To Keep A Cassette Toilet Smelling Fresh

1) Use Chemicals

Dropping chemicals into cassette toilet

One proactive step that you can take to ensure that your toilet doesn’t become a stinky mess is to use chemicals designed for this type of use. These types of chemicals break down the waste and tissue while also adding a fresher smell to the waste tank of the cassette toilet.

These come in handy drop-in packets similar to what you would find for use in a dishwasher. You just drop them in the bottom of the tank and then the wastewater that falls into the tank will mix with the packet. This type of solution is also available as a liquid that you can pour into the tank.

The liquid is great for using in small amounts when you are just going on a short trip. Rather than wasting a whole drop-in packet, you can use a small amount of liquid and this will do the trick.

I often use a small amount of liquid chemical when I am going on an overnight stay or a few days away. If I am going on a trip where my waste tank will go a little longer between dumps, I will use a drop-in packet.

Both of these types of chemicals are biodegradable and can be emptied in standard sewage systems. They can also be dumped in campground dump stations and other dump stations that can be found in other places.

2) Dump & Clean Often

When using a cassette toilet, you will want to dump it and clean it as often as you possibly can. Allowing the cassette toilet to become filled with waste is a good way to create a stinky problem within your RV. You can avoid this by simply dumping the cassette toilet every chance that you get.

I try to dump my cassette toilet at least every day when I am out on the road on a trip. It isn’t always possible but it is a good idea to plan to do this as much as you possibly can. Some people allow their cassette toilet to fill up during an entire trip and then empty it after a week’s worth of using it.

This is a disaster waiting to happen. I wouldn’t suggest allowing your toilet to fill up more than three days at the most. Any more than this and you are likely going to have a smelly toilet.

It should also be noted that anytime you dump your toilet, you should take the time to clean it. This means that you should run freshwater in the waste tank and swish it around and dump it. Do this multiple times until the rinse water is coming out clear.

You don’t want to have colored water or water with chunks still coming out of the holding tank. Be sure that everything is removed from the cassette toilet before you call it complete.

It’s also good to add a little white vinegar to the rinse water as you are swishing it around. This works great but you can also choose to use a commercial cleaner as well. I prefer to use white distilled vinegar because it is a cheap option and does a great job.

3) Don’t Let It Get Too Full

Cassette toilet fill level gauge

As mentioned in the prior tip, dumping your toilet regularly will help you avoid a toilet that is too full. Be sure you plan ahead and do not allow your toilet to get too full. You don’t want to be in a location where you cannot dump your cassette toilet waste tank even though it is getting to a higher level.

It’s a good rule of thumb to not allow your toilet to get more than half full. Even though in an emergency you might allow it to go more than this, in normal situations, it’s good to adhere to this.

Many cassette toilets have a gauge that lets you know whether they are full or close to being full. Many of these aren’t very accurate or only give a general idea so you will need to pay close attention.

One good way to make sure that you do not overfill your waste tank is to not fill up the entire freshwater tank. If you keep the freshwater tank half-filled, you can make it a point to empty the waste holding tank once the freshwater tank is near empty.

The freshwater tank is almost always a larger capacity than the wastewater tank so if you fill the freshwater tank to its full level, you will still have fresh water available even after the waste holding tank is full. Avoid this mistake by not filling the freshwater tank up to its maximum capacity.

You can always add additional water to the freshwater tank as needed if you can not dump it at the exact moment that your freshwater tank runs dry.

4) Don’t Mix Liquids & Solids

Having a toilet in your RV doesn’t mean that it is to be treated like your home toilet. Of course, you can choose to do this if you wish but I will warn you that mixing liquids and solids is a recipe for disaster. Unless you are going to dump the holding tank right after you dump your bowels, I would leave the cassette toilet for number one only.

Mixing the two can create a mess that will likely become a gross situation to deal with. It’s not that you will smell it within your RV or van but the problem will occur when you go to dump the holding tank. If you leave the waste to marinate for a length of time, the surprise you will find when emptying the holding tank will not be very pleasant.

Although I have used my cassette toilet for both, I typically only use it for number one. Peeing in the cassette toilet does not pose any problem and isn’t even gross when emptying it. Of course, this is assuming that you empty it regularly.

However, once you begin to do both and especially if multiple people are using it, this can get pretty gross.

It’s best to have another solution for number two and possibly even depend on public restrooms. If you are boondocking, you can take a shovel and head out into the wild to relieve yourself the natural way.

5) Keep Water In The Bowl

Water standing in cassette toilet bowl

In order to avoid any smells coming out of the holding tank, you should always keep a small amount of water in the toilet bowl. This will help to seal the tank and not allow odors to pass through.

This is similar to the way a P-trap works in a plumbing system. By allowing water to stand in the P-trap, no gas odors can come through and enter into the living area.

When you are not using the toilet, make sure you leave a little bit of water in the bottom of the bowl to create this effect. Of course, you will need to make sure your toilet is secured and level when you are driving. You don’t want the water to be splashing out as you are driving.

You don’t have to put a lot of water in the bowl, just a small amount will do the trick.

Conclusion

Talking about toilets can be a nasty subject that many people avoid. However, it’s a fact of life and we all need to have a way to relieve ourselves. All humans do it so there is no need to shy away from the discussion.

Having a cassette toilet in your van or RV can be a very convenient way for you to make sure you always have a way to use the restroom.

Many people do not like to have toilets like this and prefer to only use public facilities. This may depend upon where you are currently at in life. Younger people may be fine with using public facilities but more mature folks will appreciate the convenience of having a private toilet at their disposal.

Cassette toilets are the best option for the money. They don’t cost a lot but they offer a convenient and reliable solution. There are lots of different options and capacities that will work for all types of people and their needs.

A cassette toilet was my first type of toilet in my camper van and it’s the one that I have stuck with. I love it and wouldn’t want to be without it. I find it to be very handy and no big deal to maintain.

It isn’t as dirty of a job as you might imagine as long as you stick with the tips that I mentioned in the article above. You will be able to use it and not have to worry about the toilet becoming a smelly problem within your living space.

Class B RV With Pop Up Roof – 5 Awesome Options

A Class B RV is the smallest type of motorhome that you can purchase. Also known as a camper van, a Class B RV is often ideal for one or two people but can get very tight for any more than that. These types of motorhomes are great for easy maneuverability and being able to travel without being intimidated by the size of the rig.

Many of these RVs are small and in order to provide more space, some manufacturers of these motorhomes have added pop-up roofs. These pop-up roofs extend upwards, giving you more room to walk around and oftentimes, more room for extra bedding or sleeping areas.

A pop-top can be a very welcome addition to a van that is already small. It can give you a dedicated place to sleep and stay while providing a nice view while camping higher up. Many of these pop-up roofs have screen windows all around giving you panoramic views of whatever location you are camping in.

Let’s take a look at some of the popular models on the market today. These models listed below offer an awesome camping experience and also allow for the added feature of the pop-up roof.

1. Pleasure-Way Tofino

MSRP: $70,850

The Pleasure-Way is a four-season, stealthy camper van that offers all that you would want in a high-quality Class B motorhome. It has a very low profile and utilizes a low-roof van built on the Ram Promaster chassis.

The benefit of this low-roof van is that it doesn’t look the part of a motorhome until the pop-top is raised. This means that as you drive around and park in various locations, you will probably not be noticed. People won’t recognize that you are in a Class B RV until you have popped the roof.

This RV is on the shorter side at 17 feet, 9 inches feet long. It can carry up to 2000 pounds of occupancy weight so it will hold quite a bit of gear and human weight for such a small RV.

The interior of this coach is quite roomy, even when the roof is down. There is plenty of room to move around and perform regular tasks such as cooking, eating, and lounging. A person of average height will have no problems moving around in the living space provided.

Upon opening the rooftop, you are presented with an area with additional headroom where you can stand up straight. This additional headroom is positioned in the kitchen area of the van which makes it easier to stand up and perform cooking duties as well as perform other dreaded responsibilities such as cleaning and washing dishes.

The rooftop has gas struts which makes it very simple to open. It practically opens on its own once you release the latches that hold it in place.

The top contains a large sleeping area that can accommodate multiple people. It is a great location for children and also has ventilation on each side. This additional sleeping area allows you to travel with more people and also allows you to have an additional area for sleeping.

The material of the pop-up roof is made from Sunbrella which is a durable outdoor material that can withstand the weather. This material is often found in outdoor furniture and is made to last through bad weather situations. It is also less prone to fading from the harmful UV sun rays.

This van provides everything you need in a minimalistic package. The two swivel seats in the front allow you to increase the living space and turn the small van into a much larger space.

For sleeping, the rear jackknife sofa can be turned into a bed or the top bedding area can be used. There is plenty of sleeping room in the van.

If you are looking for a popup roof on a van, the Pleasure-Way Tofino is a great, affordable option that you will be happy with if you are looking for a small Class B van. It’s a great van for stealth camping or dry camping and will be a winner for those looking to boondock but don’t need the huge amount of space found in much larger RVs.

One negative about this van is that it doesn’t come with an installed roof fan. A roof fan can make a huge difference in being able to stay cool in warm weather. You’ll need to install this yourself if you want this included in the van.

Read more about how I installed the Maxxair roof fan in my van.

2. Winnebago Solis

MSRP: $100,667

The Winnebago Solis is a van that is new for 2020 and offers a large-sized Class B motorhome with a pop-top. Similar to the Tofino above, the Solis also utilizes the Ram Promaster except this one is built on the high roof version. When you throw the pop-top onto it, you have a van with a great second sleeping area that can accommodate children or adults.

The van itself provides a spacious living area without the pop-top so you never really have to use it if you don’t want. It comes in handy by providing an additional sleeping area or as your primary sleeping area. By utilizing the popup roof as your sleeping area, you open the rest of the van up to being a large living area.

The pop-top contains a sleeping area along with vented windows. It’s roomy and comfortable and makes a great place to spend the night on a nice night.

The van contains all of the living amenities that you would expect from an RV like this. A spacious dining area along with swivel seats opens up the area and makes use of all the space contained in the van interior.

The living space is opened up and allows for using the space to haul items rather than just using it for an RV. It has a full pass through that runs the entire length of the van. The rear bed folds down and it has a wet bath with a cassette toilet.

The Solis is a great option for those looking for a lot of space in an RV with the additional benefit of having a pop-top. If you have children that you travel with, the Solis provides extra sleeping space as well as four, seat-belted seating areas when traveling.

3. Corado Axion Studio

MSRP: $85,000+

Here, we have another Class B RV that is built on the Ram Promaster van. The Axion Studio is similar in size to the Pleasure-Way Tofino since both are built on the Promaster 1500 and have a total length of 17 feet, 9 inches.

Overall, this RV has a nice layout and is fairly spacious for a van of such a small size. The upper sleeping area in the pop up roof is similar to the other options and offers a large, comfortable area to sleep with windows that are vented for maximum airflow.

The RV contains all of the areas that you’ve come to expect and has a large lounge area that doubles as a sleeping area when it’s time for bed.

The aluminum ladder allows you to climb up into the top bed for a fun night of sleep with a view.

One of the disadvantages of this van is that it only contains 3-point seatbelts in the front driver and passenger seats. If you have children that travel with you, you’ll probably need to leave them at home since there is no safe place for them to buckle in.

4. Modvans CV1

MSRP: $85,000+

The Modvans CV1 is built on the Ford Transit chassis and features a large pop-top roof. Without the roof popped open, it is a low-roof so you won’t have as much room to move around when it is closed. The pop-top really opens up the area and gives you a lot of space to move around.

The headroom with the added pop-top is great for taller people or those who feel a little claustrophobic in small spaces.

The added pop-top can provide additional headroom when using the van interior and it can also provide a sleeping area when it’s time to call it quits for the day.

The comfortable pop-top bed gives you 360-degree views of the area around you and provides a space with airflow through the screened windows.

This RV is great for stealth camping because it doesn’t look like an RV. It looks like a standard, low-roof van that could pass for a standard work van. However, the interior includes a living area that gives you all you need in a modern RV.

Overall, the van is small and when the roof is closed, the living space might feel a bit cramped. It’s great for one or two people but might get tight if you have additional people traveling with you. It does contain additional seating with seatbelts so you can travel with four people if needed.

5. Sportsmobile Classic 4×4

The Sportsmobile Classic 4×4 is the ultimate off-road, adventure RV for those looking to get away from it all. It’s built on a custom Ford Econoline chassis. This van is built to get you off the road and into locations that you might not be able to get to otherwise.

The living space isn’t going to be as luxurious as what you might find from other Class B RVs but it provides all that one could need. It’s complete with a kitchen, sleeping area, sitting area and has a solar system that will allow you to stay off the grid for an extended period of time.

This is more of a van that is made for camping short periods of time but may not be the best choice for living in or longer stays.

The penthouse top is the pop-top that adds additional space to the top of the van. It allows you to stand up fully and walk around in the van. It can also be set up as a bed for a sleeping area similar to the other vans listed above.

When the pop-top is opened, the space really becomes opened up. The screened windows allow for maximum views and airflow.

One thing is for sure, the van is a cool looking rig. It screams adventure and you are sure to turn some heads when driving this beast around. It’s great for those who want an off-road RV and something a bit different than the regular offerings on the market.

This RV will take you to places where you can camp in areas away from the crowd. Get off the beaten path and enjoy nature knowing that you can go nearly anywhere you want with this off-road machine.

Why A Pop-Top?

As you can see from the vans above, a pop-top provides a great additional living space to a van. Not only that, but it also allows for a taller interior, making it more comfortable to move around. A pop-top is great for small families since the top sleeping area often provides a perfect escape for children.

They can sleep in their own space while the main sleeping area in the van living space can be reserved for the adults or vice versa.

There are benefits to having a pop-top but one reason you might not want one would be the inconvenience. It might be a bit inconvenient if you are traveling, making quick stops. If you have a low roof van, you’ll have to move about the van hunched over unless you want to take the time to raise the roof.

This isn’t usually a difficult task so it is certainly doable. The problem is that it draws attention to you and may not be the best solution for enjoying time in your van while in a parking lot.

Besides that one negative aspect, a pop-top can create a great experience and provide you with a useful addition that will make your journey more pleasurable.

Add A Pop Top To A Conversion Van

Van with roof popped open

If you don’t want to spend the money on a motorhome that already has a pop-up roof, you can always add one to a van you may already have. Most modern vans can be customized with a pop-top and this would allow you to enjoy the same benefits as you would enjoy from the five Class B RVs mentioned above.

Companies like Colorado Camper Van and Sportsmobile can provide an option for you to add this feature to your van. Expect to pay between $10,000 and $15,000 for having a pop-top added to a van.

Although this can be a great option for those seeking to add a pop-up roof on a current van that they have, it can be an additional cost to consider. It may end up being just as affordable and much more convenient to find a used Class B RV for sale that already has one.

Final Thoughts

A pop-up roof can be a great addition to a van, especially for tall people or those who need a second sleeping space. Families can benefit from a setup like this since it gives them more space while keeping the footprint of the vehicle small.

Sleeping in a pop-up on top of the roof can be a fun experience and similar to sleeping in a tent that is off the ground. Although in the summer months, sleeping in a pop-up roof area may not give you the best experience since it can get stuffy.

The five motorhomes outlined above are great options that are currently on the market. If you are looking for a small RV that is easy to drive but contains the added space of having the additional pop-up roof, these options are worth considering.