Disclosure: Some of the links in the article below may be affiliate links. This means that I may earn a small commission if you click on them and make a purchase.

Cutting a hole in the top of your van is one of the scariest things you’ll do during your van build. This is something I put off for a long time because once it’s done, there is no going back. I imagined every possible scenario of what could go wrong.
I watched so many videos and read all the blog posts I could about how to install one. I’m pretty handy so it wasn’t the how to of the whole process that scared me.
Instead, it was the mental challenge of cutting a hole in a perfectly fine, leak-free roof of my new van that was so scary.
The time had come for me to do this because I wanted to get it in so that I would be done with it. I could then move forward with insulating, installing flooring, walls, etc.
I picked a time when I knew the weather would be good for at least a few days. I didn’t want to see any rain in the forecast and preferred the temperatures to be between 50 – 70 degrees Fahrenheit so that the caulking would dry properly.
I installed my fan in October and the weather was just right where I live. I simply followed the following steps outlined below.
Where should we put it?
The first thing I wanted to do was decide exactly where I wanted the fan to go. I gave a lot of thought to this.
With our layout, I preferred the fan to be close to the bathroom area. There is a perfect flat spot for the fan on a Promaster near the front. However, this spot is too far towards the front for what we wanted. We decided to move it back a little bit so that It would be closer to the bathroom area.
Since we’ll also be taking showers in this area, it makes sense to locate our fan as close to this area as possible. We intend for our fan to serve multiple purposes.
The main purpose is provide adequate airflow throughout the van.
The second purpose is to allow odors to escape from things like cooking and nature calls.
The third purpose is to allow moisture or steam to escape for when we take showers or cook food, boil water, etc.
It’s important to keep these types of things in mind when you are locating your fan. Make sure you put it in a central location where you have all areas covered that the fan might be used for.
Tools You’ll Need
Installing a fan is a pretty simple process. However, it does require a few tools that you may or may not have lying around.
The following is a list of tools that I used during my install.
- Cardboard – for creating a template. It’s a shame that it doesn’t come with one but creating one is simple enough.
- Sharpie – for marking my template onto the roof.
- Jigsaw – for cutting the hole. There are other saws you can use but nothing beats the jigsaw in my opinion.
- Jigsaw sheet metal blade – preferably a 36 TSI blade assuring that the cut is smooth as can be.
- File – for filing the edges of the cutout after the hole has been cut.
- Rustoleum paint – for painting the bare edges of the cutout to ensure no rust or corrosion in the future.
- Drill with 1/8 inch bit – for drilling the screw holes that hold the fan frame to the roof.
- Butyl tape – for sealing the fan when screwing it down.
- Self-leveling caulk / sealant – for a final layer of sealing.
All of these tools can be found online or at your local hardware store.
Marking The Hole
Once you have all the tools you will need, you’ll begin by making a template of the cutout.
I created a template out of cardboard that was the exact measurement of the fan. In the case of the Maxxair fan, you can cut a 14 inch X 14 inch hole and you should be ok. However, I would recommend tracing the fan onto cardboard and then cutting it out to create the perfect template. The template was actually a bit smaller than 14 X 14.
Tip: it’s better to make the hole as tight as possible. You can always file away parts or cut more as needed but you can’t put it back if you get the hole too big.
I actually practiced installing the fan into the hole I cut in the cardboard as if it were the roof of my van. This ensured that my template was correct.
After the template is made, you’ll need to mark the cutout hole. This is simple but you better get it right. You don’t get a second chance on this so make sure you measure twice or even more before you start cutting.
Cutting The Hole
After the template is traced onto the van ceiling, now is time to begin the part that most (including me) dread. I traced mine onto the ceiling and then drilled a small hole in the center of my template up through the roof.
That way, I can tell where the center of the template should be placed once I get up on the roof.
After climbing up onto the roof, I positioned my template so that the drill hole was in the center, traced the template on the roof and was left with the exact place I needed to cut for my Maxxair fan.
Let the fun begin…
I made sure to have a good sharp sheet metal blade for my jigsaw before I began. I chose to use the Bosch ones that I purchased at Home Depot. You can get them from Amazon or pretty much anywhere else as well. Be sure to get the 36 TPI (teeth per inch) blades for best results on thin sheet metal.
To begin, I drilled a hole in each corner of the cutout so I could have a starting point for my jigsaw blade. After that, it was just a matter of tracing the line with my jigsaw until the hole was cut out.

Now the reality sets in that you have a hole in your roof and there is no going back. Fortunately, the hole was perfect and my fan sat down in it nice and tight.
Prepping the cut edges
The next step was to file off any rough spots where I had cut and then re-paint the edges with Rustoleum paint to avoid any rust or corrosion in the future. I also decided to go ahead and line up my fan and drill holes where the screws would go. That way, I would be able to also paint those holes as well.
NOTE: Be sure and carefully vacuum up any metal shavings that are left on the roof after cutting and drilling. You may also choose to use a strong magnet or sticky tape to gently pick them up.

I put a couple of coats on and let it dry overnight.
This was perhaps the easiest step in the whole process since I could rest easy knowing that my hole was correct and I just needed to clean it up. What a relief.
Installing The Fan
The next day, the first order of business was to put butyl tape on the underside of the fan frame. I also used butyl tape to build up the low areas in the roof, creating a flat, watertight surface to sit the fan frame down on.
Once the butyl tape was on, it was ready to place the fan frame in. Be careful when you do this because once you sit it down with the butyl tape, you may never move it again. Butyl tape can be quite sticky especially when it is hot outside and you are sticking it to a hot metal roof.
Be sure it’s lined up exactly how you want it. This probably isn’t a problem if you haven’t already drilled holes. In my case, I had already drilled the screw holes through the roof and needed to make sure I lined it up perfect with those holes.
Fortunately, I did.
Looking back, I probably wouldn’t have drilled the holes beforehand. I would have drilled them after the fan frame was positioned into place.
All that was left was to screw the fan frame onto the roof. I would suggest using wood on the underside of the roof to give your screws something the bite into. I used 1×2 furring strips and screwed the screws directly into them.
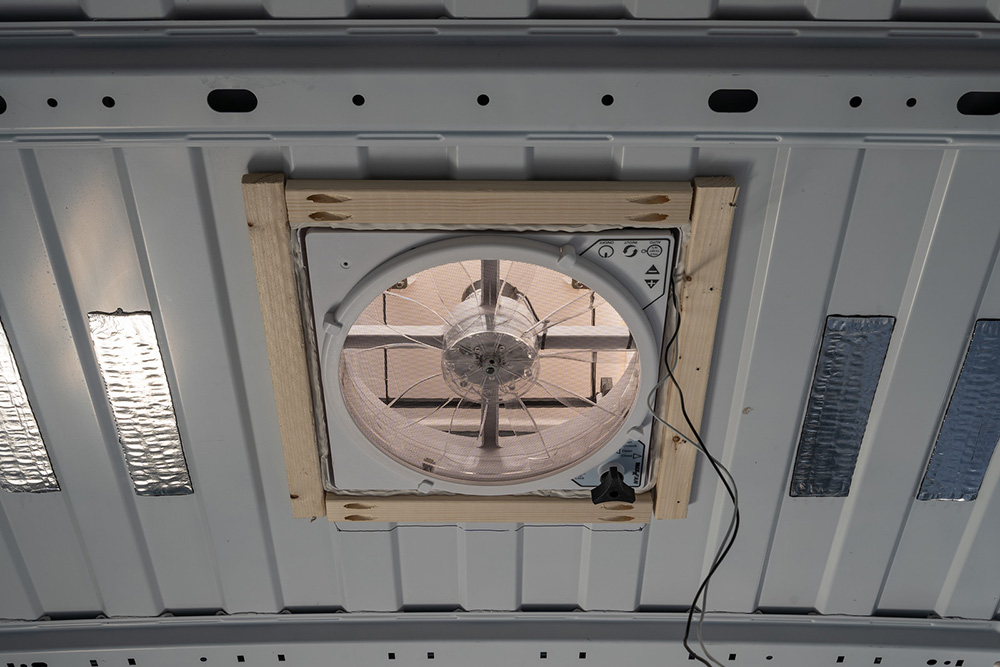
Many people simply screw into the metal of the roof and this is probably fine. However, I feel like having extra wood below will give more stability and hold up better long term.
Making Sure it won’t leak
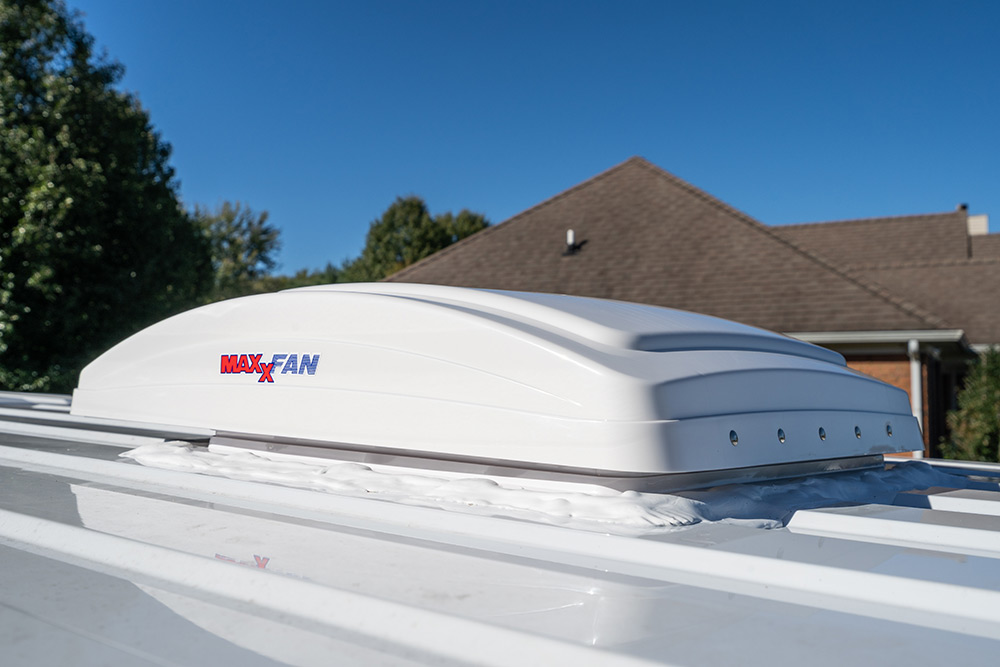
After the fan frame was screwed in, I removed the excess butyl tape that had squeezed out and then added Dicor Self-leveling Lap Sealant around all the edges and on top of all the screws.
Self-leveling lap sealant is great for these types of installations because it will spread itself out and get into the nooks and crannies, creating a strong watertight seal. Just be sure you put it on when it isn’t going to rain for a few days.
I used an entire tube of lap sealant on my fan. This was more than enough but I wanted to make sure there will not be any leaks. I’m confident that there won’t be.
The final step in the install was to put the actual fan onto the frame. This is easy with the four screws provided.
Testing the fan
I tested my fan out using a portable car jump starter that I have that has a 12 volt power system. I simply plugged in the wires to it, turned it on and tested all the settings. It worked like it should and I was surprised by how much air it actually brings in and pulls out.
I would suggest testing your fan as soon as possible just in case there are problems. You don’t want to install your fan and then get around to testing it six months later when you finally get your solar installed.
You’ll end up with a fan that doesn’t work and is out of the return window.
Test it as soon as you get it installed in your van so that you can rest easy knowing that the job is done and the fan works!
Final Step
It’s time to put the trim piece on in the interior.
The final step you’ll take on your fan install is a very satisfying one but you may not get to do it for a while.
Installing the interior trim won’t happen until you have finished with your interior ceiling. Adding the trim is just a matter of putting the four screws in that it comes with. It’s really simple but it feels so good when you finally get it put in.
It will actually feel like a finished product and you can envision your van build being closer to being complete.

Sit back and enjoy the cool air
Overall, the fan install wasn’t nearly as difficult as I had envisioned. Even though I had watched videos and knew how to do it, I was still scared to cut that hole. In the end, I’m glad I did as I believe this to be one of the essentials in order to spend time comfortably in a small van.
I will also be installing windows in my van in order to increase the air flow. I expect the windows and fan to work together to create a flow of air that will keep me cool and help to get rid or smells and moisture that may get trapped otherwise.
If you are on the fence as to whether or not you should install a fan in your camper van or RV, I would say that I wouldn’t build a van without it. I have used it extensively while working on other areas of the van. Sometimes it can get stuffy when you are crawling around in the van working on flooring, walls or any other part. It’s nice to have the airflow that the Maxxair fan creates.
There was a time when I wasn’t sure I wanted to put a fan in my roof. I just didn’t want to take the chance of cutting a hole and ending up with a damaged roof if something went wrong. However, I took my time and went step by step and it ended up being pretty easy.
I wouldn’t want to be without the Maxxair fan and I’m sure you’ll feel the same way after you have installed yours.