Is Goal Zero Good for Van Life?

When I was seeking to build out my camper van, I was certain that I wanted to integrate a solar system into my build. Solar power just makes sense for someone who wants to travel in a van and boondock occasionally in remote places where power hookups are likely not available.

I was building out my van myself and I don’t have any experience with electrical systems. I understand the basics but I’ll be the first to admit that I was a little scared to piece together a system by myself. I was worried that something wouldn’t work right or even worse, it might catch on fire and burn the van down.

I was having some difficulty in understanding what I would need in order to accomplish what I needed for my electrical requirements.

I didn’t want to create a potential safety hazard especially if I decide to sell my van in the future.

I also factored in that I would not be living in my van full time so I wouldn’t need a massive solar system. My power requirements are pretty low. The following items are what I intend to use with my electrical system.

  • Refrigerator/freezer – Dometic 75DZW top loader, which runs very efficient compared to traditional refrigerator/freezer combos.
  • Water pump (Surflo Revolution) – this only runs for small amounts of time when you are running the water.
  • LED lighting – ceiling and garage lights that have minimal power draw.
  • Charging for laptop, phone, iPad, camera batteries and other small electronic devices.
  • TV – this will run for a minimal amount of time if I ever get bored out on the road.

Other items that I may need to power but will likely only be used with shore power when I am in a place with hookups.

  • Space heater in the winter
  • Portable AC in the summer

That’s it. I’m pretty minimal with what I need in order to function and live with all of the conveniences that I am used to living with at my house.

I learned about the Goal Zero company during my search for a plug and play solar system that I could use that would take the guesswork out of the design and installation.

I was particularly interested in the Goal Zero Yeti 1400 since this would provide all of the wattage/amps I would need.

The main thing that drew me to the Yeti 1400 was how simple it was to install and use. It doesn’t even need to be installed. You can just set it where you need it and plug your devices into it and you are ready to go.

However, it is also easy to set up to be able to use with outlets and other electrical devices just like you would a full-fledged solar system.

Another thing I liked about the yeti 1400 was that I could also remove it from the van as needed. This means that if I need a solar unit at my house or anywhere else I can take it out of my van and use it anywhere that I need electrical energy.

This could be especially useful during a power outage in my house because I can easily retrieve it from my van and power most all the small devices that I use within my house including lights, TV, radio, refrigerator, fans, etc.

If I had opted for a solar system that is installed permanently in my van, I would not be able to do this. This probably doesn’t matter to a full-time RVer or van dweller but for me as a weekender or part-time van lifer, it’s perfect.

Installing The Yeti 1400 in My Van.

I chose a location in the rear of my van above the wheel well for the place that my Goal Zero Yeti 1400 would live. This is a good place in my van because it’s under the bed and out of the way.

It’s also easy to get to from the rear doors for when I need to access it for any reason or remove it from the van.

I was also able to create an electrical board behind the Yeti where all of my 12-volt wiring ties into a fuse block. The fuse block then connects to the Goal Zero and allows me to have 12-volt power whenever I need it.

For the AC power, I simply used recessed power strips that are typically used in offices as desk power outlets. These easily plug into the two provided AC outlets on the Yeti. This setup works great although the outlets I used happen to be 12 amp instead of the normal 15 amp.

This will likely not be a problem since I will only run smaller items through these outlets and will probably never reach the 12 amp capacity.

Because of the Goal Zero unit, installing solar power in my van was a breeze. It was much simpler than I imagined it would be in the beginning.

I didn’t have to do any research for batteries, charge controllers, converters or anything else used in a solar system. The Goal Zero comes ready with all of these in a plug-and-play system.

The only other parts that you will need to charge the Yeti 1400 is solar panels. I opted for Renegy 100 watt flexible panels and taped them to the top of my van using Eternabond. Eternabond is extremely sticky and I don’t foresee any issues with the panels ever coming off the roof.

Of course, I check them often and after a year of use, they are still as tight as they were the day I installed them.

Installing the solar panels was probably the most difficult part of the entire system since I had to figure out how to wire them, and how to bring the wires down from the roof in order to connect to the unit.

I opted to bring the wires through the rear camera housing so that I wouldn’t have to drill any holes in the roof.

Using the Goal Zero Yeti 1400 in my Van

After installing the Goal Zero and solar panels into my van, the next step was to use it and see how well it works on the road.

Since the 12-volt wiring was one of the first things I did in my van build, I was able to connect the lights and switches as well as the Maxxair fan to the Yeti and use it as I was building out the rest of the van.

Those devices worked great throughout the build and since I have finished my van build completely, I have been able to power these devices along with all other devices on actual road trips.

I have put the Goal Zero unit to the test and can now report my findings as to how well it works in a van environment when out on the road.

For the most part, the unit has worked like a charm. It has been more than sufficient for keeping up with my electrical demands from all of the devices that I use while also maintaining a 100% charge on most sunny or partly sunny days.

The most challenging part of depending upon a solar system is making sure you have a large enough battery bank and that you can receive enough sunlight to keep it charged regularly.

Using solar may also require a change in the way you are accustomed to living. Since we have unlimited power in our homes, we don’t think about how much we are using daily. This will change once you are out on the road and know that you have a limited amount of electrical power you can use.

I’ll admit, this took a little getting used to at first. On my first trip, I used electrical power probably more than I should have. It was my first time using all of the systems at once and it used more than I imagined it would.

With the refrigerator running, the Maxxair fan, the water pump, lights and other things like radio and TV, I found myself losing battery percentage faster than I thought I would.

However, this is not to say that the unit couldn’t handle it. The Yeti still kept everything charged close to 100% each day.

It was more of an eye-opening experience for me and made me consider a more energy-saving approach going forward.

The days of my first road trip were sunny but it made me wonder how well the system would perform on cloudy days.

After going on several trips, I have discovered the good and the bad of using the Goal Zero system for my van. Below are the pros and cons of using this type of system.

Pros

  • It’s a self-contained unit that is easy to install or remove whenever needed.
  • It’s safe. The engineers at goal zero have constructed the system and I don’t have to worry about my homemade contraption catching fire or not working.
  • It’s easy to use.
  • It’s powerful enough for most uses that people would have living in a van.
  • The readout and display are very good.
  • It has Wi-Fi so that you can connect and interact with it, although I’ve never had much luck getting it to work consistently.
  • It has lithium batteries which means that you can use the entire battery bank unlike AGM batteries, which you can’t completely drain.
  • It’s lightweight considering the amount of electrical energy it provides. The weight saving is important for van life.
  • It’s very well constructed and will withstand the rigors of mobile living.

Cons

  • The readout is not accurate although it is very informative.
  • It doesn’t have as much electrical power as a custom-built system would likely have.
  • It has the potential to stop working at any time although this is easy to remedy (more about this below).
  • It’s expensive for what you get. Although I would argue that the added cost saves you time and headaches of designing your own system. Besides that, you can often find them on sale around the holidays.
  • You have to purchase an extra 12 volt regulated cable in order to maintain 12 volts.  This is especially important if you are running a Dometic fridge.  It’s ridiculous that you have to purchase an extra part to make the Yeti work the way it should in the first place.  Note: I believe they have corrected this oversight and now have this built into the units.

There are two specific problems that I have had with my unit. I’m not sure if this is common with all of them or not but I have experienced this with mine.

1. The battery percentage readout is not accurate.

Most of the time when the yeti is fully charged, the percentage meter only reads anywhere from 94 to 97%.

This was very confusing in the beginning and I thought something was wrong with it. However, after speaking with technical support, I learned that the battery meter was simply out of sync with the battery.

They told me how to sync it back up by letting the battery drain down to 0-20% and then holding down the units button for 5 – 10 seconds. This will re-sync the display with the battery level and then attempt to charge the unit to full.

This seemed to work but it was out of sync again within the next few charges.

I have seen this pattern the entire time I’ve had to Goal Zero so I assume it will always be this way. I don’t worry about it any longer. As long as the input says zero, it doesn’t matter what the percentage of the battery says.

If the solar panel input is at zero, that means it is not charging from the sun so it is fully charged.

It’s also important to note that this problem is more prevalent when using solar to charge versus a standard household plug to charge.

2. It has completely stopped working once.

The generator completely shut off on me once when I was using a very small load of devices, somewhere in the 40 watt range. The unit was dead and none of the buttons would do anything to bring it back to life.  It was fully charged so I knew the battery couldn’t be dead.

I assumed it had gone bad and I would have to send it in for repair.

However, I was able to find a fix for this myself.

I opened the unit up using the four bolts on top and unhooked the cable from the battery, waited a minute or two and then plugged it back up.

After doing this, it started working again. I’m not sure if or when this is going to happen again so I am always sure to keep the proper size wrench in my van so that I can remove the top as needed if it should ever happen again while I am out on the road.

How Well is the Goal Zero Constructed?

I have been very impressed with the quality of the yeti 1400. It is high-quality as you would expect from something that costs as much as this unit does. Mine has been in use for over a year now and it has gone through its amount of testing over that time.

One time, in particular, I ran over it with a pickup truck. I had placed it on the floor in my garage and forgot about it as I was pulling my truck in.

I quickly realized that I was running over something because I heard it scooting across the garage floor. I stopped my truck, got out to check what I was certain was a damaged unit.

To my surprise, the unit still worked as it always did and it only had a small rubber tire mark on the side of it. I was relieved, to say the least, but more than that, I was happy and impressed that the unit survived and I didn’t have to purchase a new one.

This incident won me over as far as the quality goes for the Yeti 1400. I’m not sure there’s anything I could do that could cause more damage than running over it with a pick-up truck.

If it can survive this, it will likely survive anything else that might happen out on the road and I am confident that it will be a good, working unit for years to come.

Bottom line

If you are like me and don’t know where to start as far as designing and installing a solar system, I would strongly suggest looking into the Goal Zero products.

Also, if you are a weekender like me and only use your van or RV on occasion, it makes sense to purchase something like this that can be used in other ways besides powering your van or RV.

I’m convinced that this product will provide years of service and allow me to enjoy the conveniences of home when I am on the road. I have had my van for only a short time but I have already enjoyed the benefits of using a well constructed solar system.

If the Yeti 1400 is not powerful enough for your needs, you can always opt for the Yeti 3000 which provides a whopping 3000-watt hours.

Goal Zero also offers an array of solar panels and other products that go hand-in-hand with the larger units. The solar panels that they offer are portable and since I needed something that would be installed on my van, I opted for another company’s panels.

Besides that, the solar panels that Goal Zero offers are a little bit on the expensive side.

I am not sure how long my unit will last or if it will begin to lose its capacity after a certain amount of time but so far I have been very impressed with it.

It has provided me with everything that I expected and needed out of the system in order to provide electricity for everything I need in my van.

Goal Zero Yeti 1400 installed under my bed

Goal Zero Crush Light

Although the flagship products of Goal Zero are their solar powered generators and solar panels, which I have discussed in this article, they have 

other products that are also great for van life and go hand in hand with the solar generators that they offer.

One of my favorites is the Crush Light.

This is a great little lantern that weighs almost nothing and takes up almost no space.  It provides a bright light source when opened up and stores away easily when it is crushed down.  It has a built-in solar panel for charging or you can simply plug it up to a power source such as the Yeti 1400.

Although my van has lights built in, I often find myself in need of light as I venture out away from my van during the night, especially in remote areas.

The crush light gives me the light I need in a convenient package. 

Is a Camper Van a Good Investment?

If you are considering van life, you may wonder if purchasing a van to live in is a good investment. Since homes are typically good investments one might think that owning an RV or a camper van might also be a good investment.

Is a camper van really a good investment?

Purchasing a camper van should not be seen as an investment. An RV of any kind is rarely a good investment and is only something you should consider as a toy that will likely depreciate and lose value making it a bad financial investment in the long run.

However that’s not to say that a camper van is not a good investment for your happiness and quality of life. Owning a camper van can be a very rewarding experience and it can allow you to see and do things that you would have only dreamed of.

Many people dream of traveling but do not have the time or the money to do so. Owning a camper van allows you to travel more often and spend less money doing it while having more fun in the process.

In financial terms, a good investment is something that you will profit from through income (regular dividends, rent payments, etc.) or value appreciation.

In the case of a camper van, it isn’t likely to earn any money for you over time and will take money away from you due to depreciation, maintenance, taxes and fees as well as other costs associated with driving a vehicle.

However, there are a few exceptions when a custom camper van could be a good investment. We’ll discuss these exceptions below.

Building Out A Camper Van To Sell

Building out a camper van involves buying an empty cargo van and converting it into a fully functioning camper van. These types of camper vans are popular because they are completely customized to your liking and have more character than the traditional commercial camper van (class B RV).

These are also difficult to build and require a lot of time, expertise, and handyman skills in lots of different areas. There are examples of well-built custom camper vans all over the internet and some are very good and others are not so good.

By doing this, you stand the chance of making a profit if you intend to sell the camper van after you have finished converting it. Many people like these types of camper vans but they do not want to convert them themselves.

It’s a challenging task to convert an empty van so people are willing to pay a good price for one that is already done for them.

However, the cost of these types of camper vans is typically less than a traditional class B RV that one might find. Class B RVs are basically the same thing but they have been customized and built by a company that specializes in this type of work.

Let’s use my van build as an example of how it might be a good investment.

We purchased our van for $23,300. We built it out for around $10,000 so the total amount we have in our van adds up to about $33,300 give or take a little.

If we were to sell our van, we surmise that we could ask around $55,000 as the selling price. We may or may not sell it at this price but we wouldn’t let it go for much less.

In fact, some people would likely price theirs higher than this but we feel that this price would be fair for our particular van build.

If we were to sell our van for $55,000, we would earn $21,700 on our camper van making it an investment that was worthwhile. This does not include any costs that we may have spent actually using it such as fuel and maintenance.

We have seen custom vans sell for more that don’t even have as nice of features as ours, such as a bathroom.

If you are planning on building out a van, plan on things costing more than you originally intended.

We thought we’d get ours built out for $5,000 but the costs kept adding up and we were up to $10,000 before we even realized it.

You’ll be surprised at how little things like screws, bolts, tools and weird items will add to your total costs. There is no way to plan for these things unless you have done it before or you are following a specific blueprint and plans.

Renting Out A Camper Van

Another way that a camper van might be a good investment would be to rent it out to potential customers who would like to use a camper van on occasion.

Similar to renting a vacation home or an Airbnb property, renting out your camper van is a good way to earn an additional income while still allowing you to use the camper van as well.

This could provide you with a consistent passive income if you live in an area where camper van rentals are in high demand.

You could simply list your van on a website such as outdoorsy.com or RV Share and potential renters would then pay an amount to rent your van for a certain amount of days.

Of course, for this to be considered a good investment you would need to earn enough by doing this to cover and exceed any costs associated with owning your van.

This would all be dependent on the location you live in. I would not be able to do this where I live as my location is not the greatest for this type of market.

However, if you live in an area with more outdoor fanatics who would enjoy this type of living, you could be in luck with this type of investment.

If you choose to go this route, I would only recommend cash flowing a van so that you do not have a loan on it with interest to pay. Some people may not be able to do this and if you can’t, then this type of thing may not be the best choice.

Is A Camper Van A Waste Of Money?

Although a camper van could put a huge dent in your wallet, it is not necessarily a waste of money. There is more to life than just saving money or earning a return on everything.

If you own a camper van and make use of it on a regular basis you are likely a more happy person because of it. You cannot put a price on happiness and on living a life full of adventure and fun.

We only have this one life that we live and purchasing something like a camper van allows us to enjoy the great outdoors more. If you are like me and feel alive when you are exploring and being adventurous, a camper van is certainly not a waste of money.

It’s no different than the guy who buys a boat because he is totally fulfilled out on the lake. Was the boat a waste of money for this guy? He enjoys it and can likely afford it so there is no reason that he should not have it.

What Are The Costs Associated With Owning A Camper Van?

When you own a camper van, you learn very quickly that costs add up. Similar to a car you might own, there are ongoing fees and maintenance that must be done in order to maintain the van.

These fees could include the following:

  • Buying the van whether it is an out right sale or finance. If financed, you’ll have have interest to pay.
  • Taxes – you can’t escape them
  • Registration fees – they come every year like clock work
  • Insurance – this could be a very large expense depending on your driving history
  • Maintenance including oil changes tire rotations, standard service checks, etc.
  • State inspections, if your state requires this
  • Fuel – whether it’s gas or diesel, your loaded camper van will get less mpg then your car does
  • Repairs – it’s almost certain that things will go wrong at some point

The fees add up and seem to never end just as they do with your car there is always something to pay and sometimes these payments are unexpected.

If you are purchasing a camper van as an investment, you will need to consider these costs as they will have a big say in the final outcome.

Bottom Line

Purchasing a camper van will usually always be a bad investment in financial terms. It will likely be one of the biggest money pits you’ll have in your life.

If you are looking to invest money, consider other options. Vehicles depreciate rapidly and you will always lose money on an RV if you just purchase one, use it and then try to resell it.

Other than the options listed above, buying a camper van to earn money is not a wise decision. However, if you are wanting to invest in your long term happiness and well-being, owning a camper van can do wonders for such a thing.

You can’t put a price on spending a weekend in a camper van in some amazing location. If you can afford one, they can make great toys that will bring more enjoyment to your life.

Just know that you won’t likely turn a profit on it once it’s all said and done. You will however, be richer in experiences and there is no price one can put on that.

Why Is Van Life So Popular?

Van life has become popular in recent years thanks to the internet. With people sharing photos and adventure logs of places traveled and adventures lived, many people are jumping on board with this exciting trend.

There is no doubt that the popularity has risen but what is so appealing about this lifestyle?

Van life is popular because people are sick and tired of the status quo as well as the rising costs of housing. This lifestyle allows people to travel and explore while maintaining the essential comforts of home and allowing them to live at a reduced cost.

People have grown tired of working in a cubicle 8 hours a day in hopes that one day they can retire and live life. They get their measly two weeks of vacation each year and it’s usually more stress than a vacation.

It’s just never long enough and then they have to come back to a job they hate, just to earn money so they can pay for a house and keep doing the same things over and over and over.

People are buying into a new way of life that allows them to enjoy their lives while they are young. Van life has become a method used to be able to get away, travel the country, see the sights and experience the best of what life has to offer.

There are also those people who are more like me; weekenders. We do not live in our camper van full time, only use it for short vacations and traveling around the country to explore places we would have never thought possible before.

The Van Life Movement

Today’s job market is more centered around remote based work than it ever has been before. Employees in certain industries can work from anywhere as long as they have an internet connection and a phone.

Since nearly everyone has a cell phones nowadays, it makes it easy to be able to work from nearly anywhere in the world.

Anyone can buy a van, convert it themselves by watching YouTube tutorials, reading blogs like this one or by just figuring it out themselves. It really isn’t that difficult if you are just wanting a basic camper van.

Pinterest and Instagram have also influenced this type of lifestyle with glamorous images of people living their best lives.

These images don’t really convey what it’s like living in a van but they surely have an effect on those who have an itch for wanderlust.

Van life isn’t always sunshine and butterflies and there are good and bad about the lifestyle which we’ll discuss later. You have to take the good with the bad usually in anything you do that is worth doing.

Which brings us to the question…

Is Van Life Worth It

This question can only be answered by first determining what your expectations of van life are. If you expect it to be a total vacation and like you are living in a social media post then it probably won’t be worth it. There are many reasons that one would choose do this.

It’s a good idea to first test the waters before you go all in on van life. A good thing to do is to rent a van or an RV or even a minivan and test it out for a weekend.

Once you have tested it out, you’ll know better about what to expect from the lifestyle. If you have never even been camping before, you definitely want to try this out before you go all in.

Van life may be worth it if you have an itch for adventure and you are tired of the normal routine of daily life.

Here are some of the reasons people might have for jumping into van life whether it be full-time or simply as a weekend getaway option.

To Travel and See More Than Their Backyard

This is a good reason for wanting to do van life as it is the most obvious and achievable from the lifestyle. Traveling in a camper van is a great way to get out and travel without spending a fortune on things like air travel, hotels, dining out, etc.

This is one of the reasons that I jumped into van life and was my main inspiration during the struggle of building out my van. I long to see something more than what I see during a regular week as I stare at my computer screen with blank eyes.

I have traveled a lot in my life and have seen many places and I do not want to stop now just because have a corporate job. I want to experience the open road, and see amazing places that I would never be able to see without a van.

Not only do I want to see other places, I want to get close and personal with nature. Spending time in a camper van allows one to shed the conveniences of the modern world and strip their lives down to the basic necessities needed.

Because They Think It Will Be Cheap

Is it really cheap? That depends on your lifestyle. It’s possible to do it cheap but it’s more likely that you’ll spend more than you think you will. There are many costs associated with traveling in a camper van or any type of RV.

Gas isn’t cheap and vehicle maintenance is also required. Throw in the fact that vehicles depreciate and you are losing money before you even go anywhere.

You’ll likely spend money on campgrounds or other parking spots from places like Hipcamp or memberships like Harvest Hosts. Of course, you can always choose to stealth camp but this can be risky and dangerous if you aren’t careful.

People make out like it’s the cheap way to live nowadays. If you watch YouTube videos you may get the sense that living in a van is a way to live without hardly spending any money.

However, this is usually not the case and living in a van can get quite expensive unless you stick to a budget that you determine before you get started.

Van Life Culture

You won’t have to grow your hair out long or grow a beard or become a vegan to live in a van. There are people from all walks of life who live or travel in a camper van and are about as “normal” of people as you will meet.

People who choose to do van life are usually free spirited type of people who love to do something different than what is considered normal and who love to travel, experience exciting things and live life to the fullest.

These people get bored sitting in their office or living in one place and seeing the same things over and over or going through the same motions day in and day out.

I am exactly this type of person. Doing the same thing day after day gets very old to me and I tend to be one who wants to spice things up by doing something different occasionally.

Since my way of doing van life is only as a weekender, I have the best of both worlds because I have the normal house life but then I also have an option to get away when needed.

Living In A Van Full Time

If you are planning to live in an RV, it is not necessary to buy a huge class A or class C RV. You also do not need a travel trailer or a fifth wheel or any other type of large RV.

It is totally possible to live in a class B RV or a converted camper van full-time.

The great thing about living in a van full time is that you are free to go wherever you please. Although you may not be able to park anywhere you please, you can roam the country and visit places that you would not be able to if you had a traditional sticks and bricks house.

The smaller size of a van will allow you to park in places that a larger RV would not be able to.

Living in a camper van full-time will require a shift in your current lifestyle. You will likely need to downsize, and you will probably need to become accustomed to living in a small space. You will also need to learn how to live with less and to live in small spaces perhaps with other people.

If you are not currently retired and you plan to live in a van full time, it is totally possible. You simply need to make plans to produce an income that isn’t dependent upon you being in a specific location.

You can start in internet business or become a web developer, designer, writer or a number of other great location independent jobs.

Many people who live in vans full-time travel to where the weather is best for whatever time of year they are in. For example: in the summer people head north and in the winter you may decide to head south.

Living in a van allows you to do this since you are not stuck in any one place.

Bottom Line

Van life is popular because it makes life more fun. It’s a way for people to get out and explore without having to wait for retirement to do so.

Even retired people can enjoy van life as well. It isn’t reserved for the younger generation and can be a great way for retired folks to finally take those trips that they put off for so long.

It’s also important to note that you do not have to convert a van yourself. You can choose to buy a class B camper van that has already been manufactured or there are a multitude of van conversion companies popping up that can convert a van for you.

Acquiring the van is the easy part. The hard part is making the decision to actually do it. Even though it sounds good and many people are having fun doing it, it’s still hard to take action since it seems so risky and outside the status quo.

Van life can be fun and rewarding as long as you take time to plan exactly what you want to achieve. There will be good times and bad but the good parts of van life outweigh the bad and it is a great way to live.

Our Journey of Making a Van Into a Camper

We wanted a camper van but without the high costs associated with a traditional RV. So, we decided to buy a cargo van and turn it into a custom camper.

It’s likely that you have seen such vans around the internet these days. Especially on Pinterest or Instagram where they have become popular. You’ve probably seen pictures of some beautiful millennial couple laying in the bed, nearly naked, looking out of their van into the sunset.

Ah the glamorous life of living in a van. Makes you want to quit your job and hit the road, right?

These staged photos don’t really show the reality of how it is to actually build a camper van and then to travel in it.

My intention is to show you how it actually is, not just show you a bunch of serene, beautiful pictures that make it look like we are living in some kind of dream.

My wife and I have worked in the camping industry for many years and we know some of the realities of how it is out there. I was also in the Marines and had my fair share of sleep in some of the most uncomfortable places in the world.

Building this van is going to be a challenge but we are up to the challenge and look forward to sharing the experience with you.

Our Reasons for Doing This

Need for adventure

I was a Marine so I had a life of adventure for at least a little while in my younger days. However, those adventures ended when my enlistment ended.

It’s been corporate life ever since with the occasional vacation sprinkled in here and there.

Although, we have been blessed with great careers, the mountains are calling my name and I just want to get away more often than I have in the past.

Photography

I have been an amateur landscape photographer for many years but I have no way of going to locations throughout the country without boarding a plane and spending a small fortune on a stressful trip.

I have visions of me pulling up to my photography location in the mountains, crawling into bed to enjoy a good nights sleep. Then in the morning, I can simply roll out of the van and get to work. After my pictures have been taken, I can come back to the van, brew some coffee, eat some breakfast and enjoy the morning.

Is it really going to be like this? Who knows, but I surely will never know if I don’t give it a try.

Our Fur Child

One of the main reasons is that we have a dog that we love very much and we don’t like to leave her anywhere. However, she doesn’t like to travel either.

She also doesn’t like to stay in strange places so we feel like a camper van would really give us a solution to be able to travel with her and she could always feel at home.

We wouldn’t have to worry about where we were going to stay, whether they allow pets and we could make her feel at home while we’re traveling. At least that is the plan. The reality of this remains to be seen.

YOLO (You Only Live Once)

What would you do if you knew you only had a short while to live on this earth? What if you had a day left? A month? A year?

Well, we don’t know how long we have on this earth and any minute could be your last one. Why spend so much time doing things that don’t make you happy?

I don’t know about you but when my time comes, I want to know that I did all I could do to make sure my life was filled with intentional moments. Moments that I chose and things that I chose to do.

I don’t want to get to the end of my life and have regrets. What if I just said, nah, building a van is too much work or it’s too expensive? Instead, I am taking on the challenge and I know that it will either bring me joy or it will just be another learning experience.

You only live once.

Where do we plan on going?

One of my goals for travel has always been to visit all of the National parks in the USA. As an avid hiker and photographer, the national parks provide a great place to do this.

Traveling to the national parks throughout the country is a great use of camper vans or RVs in general. Most of them have campgrounds and you get to be up close and personal to the landscapes at each place rather than spending your time in a hotel.

We plan on using the van to travel to as many national parks as possible. However, there are many other places we’d like to go and we don’t even know them all yet. We’ll figure it all out once we get on the road.

Deciding on a layout and how I’ll build it?

It’s tough deciding on a layout but there is one thing we knew for sure when we started this; we want a bed that stays a bed instead of a couch / bed contraption.

We also knew that we wanted to incorporate a shower and toilet into our build. Without these basic things, It just wouldn’t be as fun to us. We wouldn’t want to have to worry about where the next bathroom is or how to get clean after a long sweaty hike or bike ride.

I’m not a carpenter and really don’t have a desire to do most of the work that I’ll have to do. However, I generally keep my sights set on the end product in mind and am willing to do what it takes to get there.

I do have some low voltage electrical experience and I would consider myself to be a good do-it-yourself type of person at most things so I’ll be able to test that out on this van build.

You’ll be able to follow along and see our layout as well as problems we may encounter and what we do about them.

Timeframe for our van build

I’m an optimist so I plan to have this van completely finished in only a month. No, just kidding…

I really don’t have a time frame, although I think 6-12 months is probably a good place to start. The real goal for us is to just get it done.

If we don’t start now, a year from now, we’ll still be wishing we had.

I’m not one to put things off and I know this is going to be a monumental challenge but that doesn’t scare me. My eye is fixed on the end result so I’ll do whatever it takes to make this dream a reality.

Follow our progress

I’m looking forward to the process of building this van and I’m excited to see the finished product. I will also be sharing parts of the van build in a series of posts written here on this blog.

Some of the posts you can look forward to seeing are as follows:

  • Insulating a camper van – I’ll show you what I do for insulation and keep you posted on how it is working out.
  • Solar power solution – I don’t know much about solar but I will learn all about it and I’ll share what I learn here. This is the part of the build I’m looking forward to the most.
  • Cutting holes in the van for a fan, windows, etc. – scary stuff but I’m gonna tackle it.
  • Installing a full featured shower – I couldn’t imagine a real camper van without one so you can bet this build will include it.
  • Installing vinyl plank flooring – We want this build to look like a tiny home on wheels and our flooring will bring it all together.
  • Much, much more…

I hope you can find something of value here as we go through this challenging process of making our van into a camper.

Insulating a Camper Van: What’s the best insulation?

Insulation in a camper van is a highly debated topic. Many people have many different opinions as to what works the best or if insulation should even be used at all. After looking at all options available, we decided to use 3M Thinsulate and believe this to be the best option available on the market.

We actually went back and forth on multiple options and debated about which would be the best to use for our van build. It’s one of those things that can keep you up at night. After all, it is a foundational step that you want to get right.

There are many steps in the van build that you could simple change along the way but insulation isn’t as simple. Once insulation is installed, you will likely have walls, cabinets, ceiling and flooring mounted so it won’t be as easy to go back and change the insulation.

Among the factors we considered when choosing the type of insulation we would use included:

  • Ease of installation – this was number one for me because I didn’t want to spend a lot of time on this step and I didn’t want a messy job.
  • Time of installation – I had seen videos of people taking weeks or even months to finish insulating their vans. I wanted to do something that would take less time.
  • Health – I didn’t want to be breathing harmful chemicals from materials often found in insulation.
  • Weight – I wanted it to be as lightweight as possible.
  • Effectiveness – I wanted it to be effective at helping the control the temperature inside the van.
  • Noise reduction – A van is just a thin metal shell. It can be noisy so I wanted insulation that could help reduce that noise.

The Case for not insulating a van

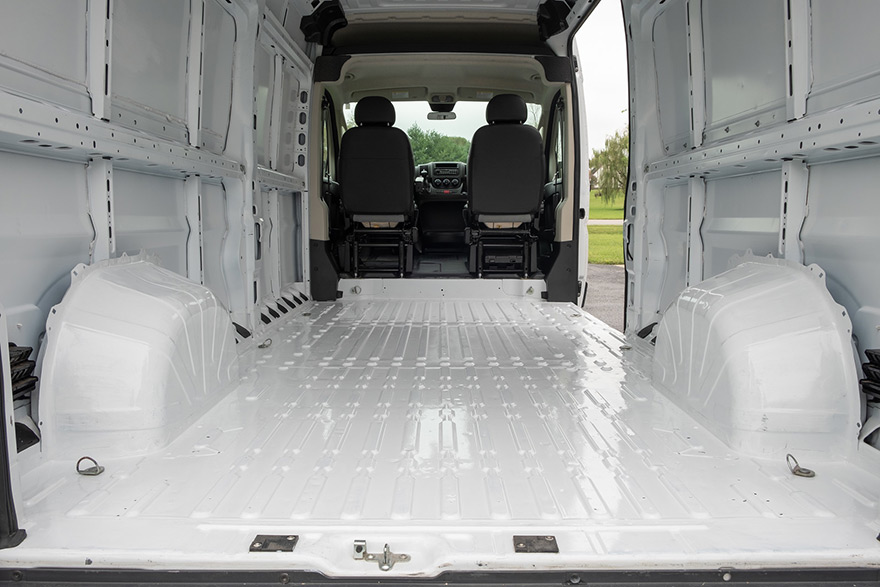
empty cargo van
Empty cargo van before insulation

I really never considered not insulating our van but I did do some research about it. The school of thought is that insulating a van that is mostly in a warm climate isn’t as effective as insulating one that is in a cold climate.

There is probably some truth to this but I haven’t felt the effect of it yet. I do live in a warmer climate and since installing our Thinsulate insulation, It has been much more climate controlled than it was before.

Besides that, the noise level is much less than it was when the van was just a big metal box.

I suppose if you were ONLY going to use your van in hot climates, you could get by with Reflectix or some type of reflective barrier.

However, I feel that insulation combined with a gap and reflective barrier has worked best for our van build.

The options that we considered for van insulation

There were really on three options that we even considered. Most of which are among the most popular that you see for van builds.

These options include:

  • Polyiso board – the cheapest solution but the most difficult and time consuming to install
  • Thinsulate – the most expensive but easiest and least time consuming to install
  • Reflectix – this really isn’t an insulation but we did throw around the idea of only using this throughout the van.

At first, we decided to go with Polyiso board. It was cheap and available locally and was highly rated as far as the insulation factor goes. We purchased two one inch 4′ x 8′ boards of this at our local Home Depot and thought we had our plan figured out.

Polyiso insulation installed on floor
Polyiso insulation used on the floor

In fact, we actually did end up using 1/2 inch Polyiso on the floor. It made sense on the floor since we built a square joist system that made it easy to cut and install into the areas. It was like putting a puzzle together and it actually made a noticeable difference in the road noise. We were happy with that and proceeded to use the 1 inch version of the same thing on the rest of the van.

This sounded like a good plan until I started measuring and cutting and realized how difficult and messy it was going to be. It’s nearly impossible to cut this insulation perfect for each area so you have to use Great Stuff to feel in the gaps and hold it in place.

I’m not a fan of Great Stuff and didn’t want to touch it and after much debate on whether or not it would be worth the trouble, we decided to go back to the drawing board.

Thinsulate was the other option on the table and it was becoming more clear that it was the one to go with.

Why Thinsulate is the Best Option

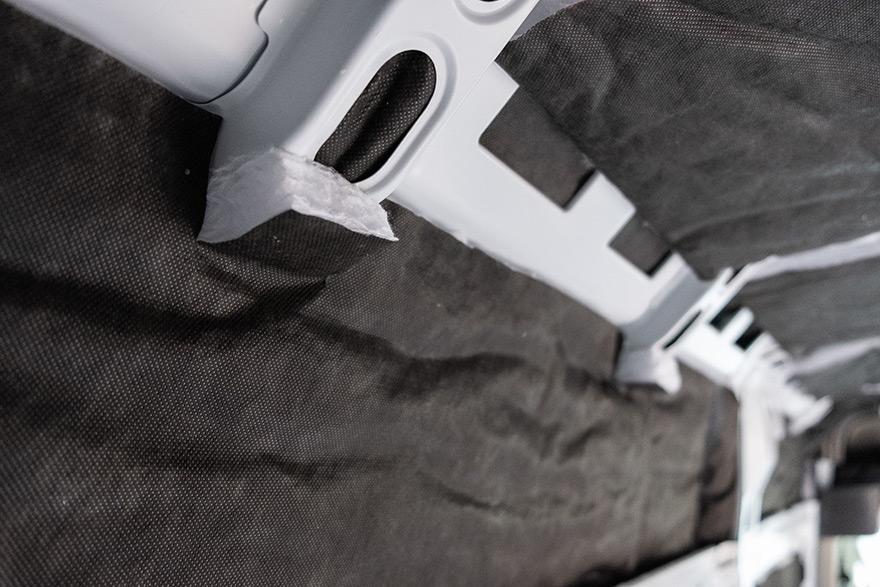
Thinsulate along the sides of van

Thinsulate stood out as the clear winner for us because of a few key areas.

  1. It was easy to install. As stated before, I didn’t want to spend a lot of time on insulation but I wanted a good foundation.
  2. It has sound deadening properties. This was very important to me as I wanted my van to be as quiet as possible while parked as well as while driving down the road.
  3. It’s Super lightweight. You want to add as little weight as possible during your van build. Although the weight savings probably wasn’t much over Polyiso, it all adds up in the end.
  4. It doesn’t hold moisture. Very important in a van build where condensation could be present quite often.
  5. It has a decent R value. It isn’t much different in R value than the Polyiso board. With an R value of 5, it was sufficient for our needs.

We decided to go with Thinsulate in the end and I am so glad we did. It was actually fun installing it because I felt like I was getting something accomplished. It was easy to cut to size (as long as you have sharp scissors) and then stick up by using 3M spray.

I actually finished the whole van in only two days and they weren’t even full two days. It was actually just one full day when you consider I only spent half of the each day working on it.

Of course there are other options that you can use on your van but most of the other options got scratched off of our list very quickly.

Insulation on top of insulation

Polyiso on top of Thinsulate behind shower

Having already purchased Polyiso boards, I decided that I could make use of it in areas where there would still be gaps behind the walls. I also figured it would be good to use it in the shower walls so that the noise level would be cut down a little.

I’m not sure if it helped much but at least I made use of it since it was out of the return window.

I also had leftover Reflectix that I used to make the window coverings. I found the perfect place for this as I began planning the ceiling furring strips and cedar planking. There would be about an inch gap between the Thinsulate and the ceiling wood so I figured it would be a great place to add a reflective radiant barrier.

As you can see in the image, I added the Reflectix to the furring and there was still a gap between it and the Thinsulate which is the best way to install Reflectix according to the manufacturer.

I was also able to use the leftover Reflectix on the ceiling and along the walls to create additional radiant barriers.

In truth, I’m not sure how all this will work because in the end, it is still just a big metal box. There are still metal areas exposed in the van that are hot to the touch so are these areas offsetting all the hard work I did in insulation?

I don’t think so. I’m confident that what I have done with insulation is much better than not having done anything at all. Combine that with the fact that I didn’t spend a ton of time on it and I feel good about my combination of materials used.

How is it working out?

I haven’t fully finished our van yet in order to take it on an actual trip but I have spent a lot of time in it working on other parts of the build.

Insulation in the Winter

Having finished my insulation project in the autumn I have had the opportunity to test it out throughout the winter. I was installing walls, ceiling, shower, cabinets and other things during this time.

Throughout the winter I noticed that once I got in my van, closed the doors and began to work, the van became pleasantly warm and stayed that way for a good period of time.

I’m certain that this would not have been the case had I not insulated it so well. I likely will not be doing a whole lot of winter travel but If I do it will probably be to a place with a warmer climate.

Insulation in the summer

My plan was to have our van ready to go by March 31 so that we could go on some spring trips. However, life happened and I was still left with a lot to do when that deadline came.

So my build has continued through the summer. It is now July 4th as I write this and I still have plenty left to do. I have been working in the heat to get things done and I can finally see the light at the end of the tunnel.

What I have noticed is that it does get quite stuffy in the van during the heat of the day. This is to be expected I would imagine. However, if there is a breeze blowing, I can open the windows and the roof fan and it becomes fairly pleasant inside.

Once the sun goes down, the heat doesn’t stay around long as long as you have some airflow going through the van.

I am so glad that we decided to add an additional window in the rear of the van. I believe this window will be the key in keeping us cool.

I also think that having insulation in the summer is better than not having it. It was summer when we first purchased our van and it was super hot working inside of it. I feel like it is much more pleasant to work in now since it has been insulated.

However, the windows and the airflow created by them has a lot to do with it as well.

Would I do it over again?

If I was going to make another van into a camper van, I would probably do much of the same thing on the next one. I would absolutely choose Thinsulate as my main insulator.

However, I probably would not use any Polyiso board on any part of the van other than the floor. I believe this type of insulation works great for floor insulation.

I would also use Reflectix again but only on the ceiling. I went Reflectix crazy on this van build and put it in every nook and cranny on both the ceiling and the walls. Of course, this is mainly because I had a large amount of leftover and wanted to use it all.

Overall I’m happy with the outcome of my insulation project. I look forward to seeing how it will perform on an actual trip.

Conclusion

Having gone through the insulation process and obsessing over how to do it right, I can breathe easy now knowing that I did the best I could. I really don’t know if the insulation is going to be sufficient but I believe it will be.

If you are obsessing over insulating your van or RV, I have a few tips for you:

  • Just pick an insulation type and go with it. I believe that any insulation is better than none (unless it’s fiberglass batts or denim).
  • Don’t expect to keep out all heat or cold simply by insulating your van.
  • Nothing will be perfect so don’t spend too much time on this step in your build.

I spent way too much time worrying about whether I was going to insulate my van perfect or not. I thought it would matter more than it actually does. However, I’m really glad I insulated it as I believe I now have a solid foundation and that will provide more comfort.

Now it’s time to get on with the more fun parts of the van build.

Installing a Maxxair Roof Fan in a Camper Van

Cutting a hole in the top of your van is one of the scariest things you’ll do during your van build.  This is something I put off for a long time because once it’s done, there is no going back.  I imagined every possible scenario of what could go wrong.

I watched so many videos and read all the blog posts I could about how to install one.  I’m pretty handy so it wasn’t the how to of the whole process that scared me.  

Instead, it was the mental challenge of cutting a hole in a perfectly fine, leak-free roof of my new van that was so scary.

The time had come for me to do this because I wanted to get it in so that I would be done with it.  I could then move forward with insulating, installing flooring, walls, etc.  

I picked a time when I knew the weather would be good for at least a few days.  I didn’t want to see any rain in the forecast and preferred the temperatures to be between 50 – 70 degrees Fahrenheit so that the caulking would dry properly.

I installed my fan in October and the weather was just right where I live.  I simply followed the following steps outlined below.

Where should we put it?

The first thing I wanted to do was decide exactly where I wanted the fan to go.  I gave a lot of thought to this.  

With our layout, I preferred the fan to be close to the bathroom area.  There is a perfect flat spot for the fan on a Promaster near the front.  However, this spot is too far towards the front for what we wanted.  We decided to move it back a little bit so that It would be closer to the bathroom area.

Since we’ll also be taking showers in this area, it makes sense to locate our fan as close to this area as possible.  We intend for our fan to serve multiple purposes.  

The main purpose is provide adequate airflow throughout the van.  

The second purpose is to allow odors to escape from things like cooking and nature calls.  

The third purpose is to allow moisture or steam to escape for when we take showers or cook food, boil water, etc.

It’s important to keep these types of things in mind when you are locating your fan.  Make sure you put it in a central location where you have all areas covered that the fan might be used for.

Tools You’ll Need

Installing a fan is a pretty simple process.  However, it does require a few tools that you may or may not have lying around.  

The following is a list of tools that I used during my install.

  • Cardboard – for creating a template. It’s a shame that it doesn’t come with one but creating one is simple enough.
  • Sharpie – for marking my template onto the roof.
  • Jigsaw – for cutting the hole.  There are other saws you can use but nothing beats the jigsaw in my opinion.
  • Jigsaw sheet metal blade – preferably a 36 TSI blade assuring that the cut is smooth as can be.
  • File – for filing the edges of the cutout after the hole has been cut.
  • Rustoleum paint – for painting the bare edges of the cutout to ensure no rust or corrosion in the future.
  • Drill with 1/8 inch bit – for drilling the screw holes that hold the fan frame to the roof.
  • Butyl tape – for sealing the fan when screwing it down.
  • Self-leveling caulk / sealant – for a final layer of sealing.

All of these tools can be found online or at your local hardware store.

Marking The Hole

Once you have all the tools you will need, you’ll begin by making a template of the cutout.  

I created a template out of cardboard that was the exact measurement of the fan.  In the case of the Maxxair fan, you can cut a 14 inch X 14 inch hole and you should be ok.  However, I would recommend tracing the fan onto cardboard and then cutting it out to create the perfect template.  The template was actually a bit smaller than 14 X 14.

Tip: it’s better to make the hole as tight as possible.  You can always file away parts or cut more as needed but you can’t put it back if you get the hole too big.

I actually practiced installing the fan into the hole I cut in the cardboard as if it were the roof of my van.  This ensured that my template was correct.

After the template is made, you’ll need to mark the cutout hole.  This is simple but you better get it right.  You don’t get a second chance on this so make sure you measure twice or even more before you start cutting.

Cutting The Hole

After the template is traced onto the van ceiling, now is time to begin the part that most (including me) dread.  I traced mine onto the ceiling and then drilled a small hole in the center of my template up through the roof.  

That way, I can tell where the center of the template should be placed once I get up on the roof.  

After climbing up onto the roof, I positioned my template so that the drill hole was in the center, traced the template on the roof and was left with the exact place I needed to cut for my Maxxair fan.

Let the fun begin…

I made sure to have a good sharp sheet metal blade for my jigsaw before I began.  I chose to use the Bosch ones that I purchased at Home Depot.  You can get them from Amazon or pretty much anywhere else as well.  Be sure to get the 36 TPI (teeth per inch) blades for best results on thin sheet metal.  

To begin, I drilled a hole in each corner of the cutout so I could have a starting point for my jigsaw blade.  After that, it was just a matter of tracing the line with my jigsaw until the hole was cut out.

Installing Maxxair Fan - hole in roof
The hole in the roof where the fan will go

Now the reality sets in that you have a hole in your roof and there is no going back.  Fortunately, the hole was perfect and my fan sat down in it nice and tight.

Prepping the cut edges

The next step was to file off any rough spots where I had cut and then re-paint the edges with Rustoleum paint to avoid any rust or corrosion in the future.  I also decided to go ahead and line up my fan and drill holes where the screws would go.  That way, I would be able to also paint those holes as well.

NOTE: Be sure and carefully vacuum up any metal shavings that are left on the roof after cutting and drilling. You may also choose to use a strong magnet or sticky tape to gently pick them up.

Maxxair Fan - mounting holes
Hole for fan with mounting holes

I put a couple of coats on and let it dry overnight. 

This was perhaps the easiest step in the whole process since I could rest easy knowing that my hole was correct and I just needed to clean it up.  What a relief.

Installing The Fan

The next day, the first order of business was to put butyl tape on the underside of the fan frame.  I also used butyl tape to build up the low areas in the roof, creating a flat, watertight surface to sit the fan frame down on.

Once the butyl tape was on, it was ready to place the fan frame in.  Be careful when you do this because once you sit it down with the butyl tape, you may never move it again.  Butyl tape can be quite sticky especially when it is hot outside and you are sticking it to a hot metal roof.

Be sure it’s lined up exactly how you want it.  This probably isn’t a problem if you haven’t already drilled holes.  In my case, I had already drilled the screw holes through the roof and needed to make sure I lined it up perfect with those holes.  

Fortunately, I did.

Looking back, I probably wouldn’t have drilled the holes beforehand.  I would have drilled them after the fan frame was positioned into place.

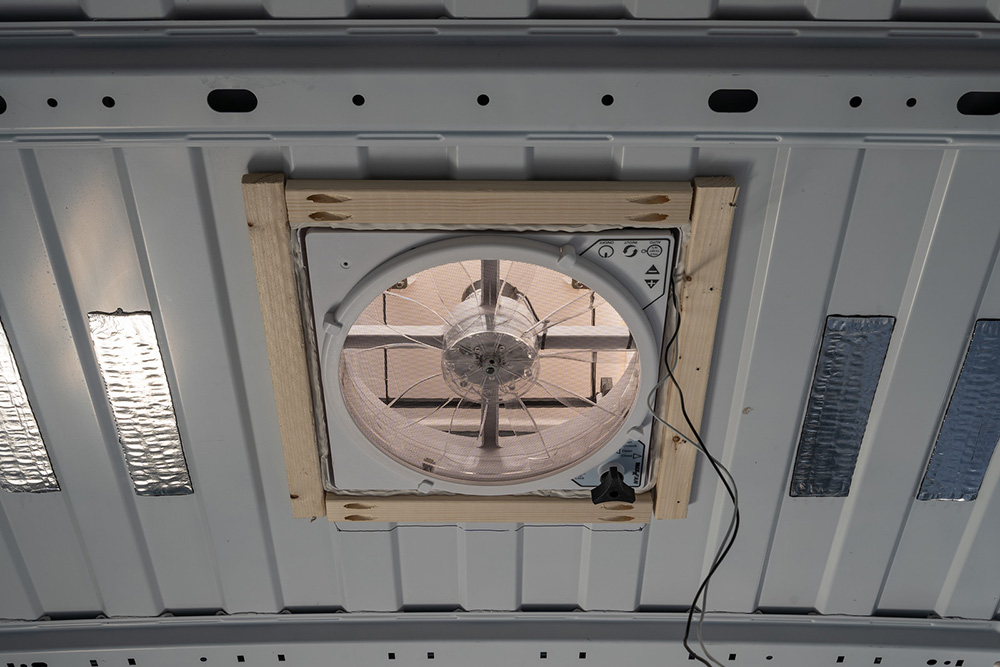
All that was left was to screw the fan frame onto the roof.  I would suggest using wood on the underside of the roof to give your screws something the bite into.  I used 1×2 furring strips and screwed the screws directly into them.

Furring strips for installing fan
Inside view of fan after installation

Many people simply screw into the metal of the roof and this is probably fine.  However, I feel like having extra wood below will give more stability and hold up better long term.

Making Sure it won’t leak

After the fan frame was screwed in, I removed the excess butyl tape that had squeezed out and then added Dicor Self-leveling Lap Sealant around all the edges and on top of all the screws.  

Self-leveling lap sealant is great for these types of installations because it will spread itself out and get into the nooks and crannies, creating a strong watertight seal.  Just be sure you put it on when it isn’t going to rain for a few days.

I used an entire tube of lap sealant on my fan.  This was more than enough but I wanted to make sure there will not be any leaks.  I’m confident that there won’t be.

The final step in the install was to put the actual fan onto the frame.  This is easy with the four screws provided.  

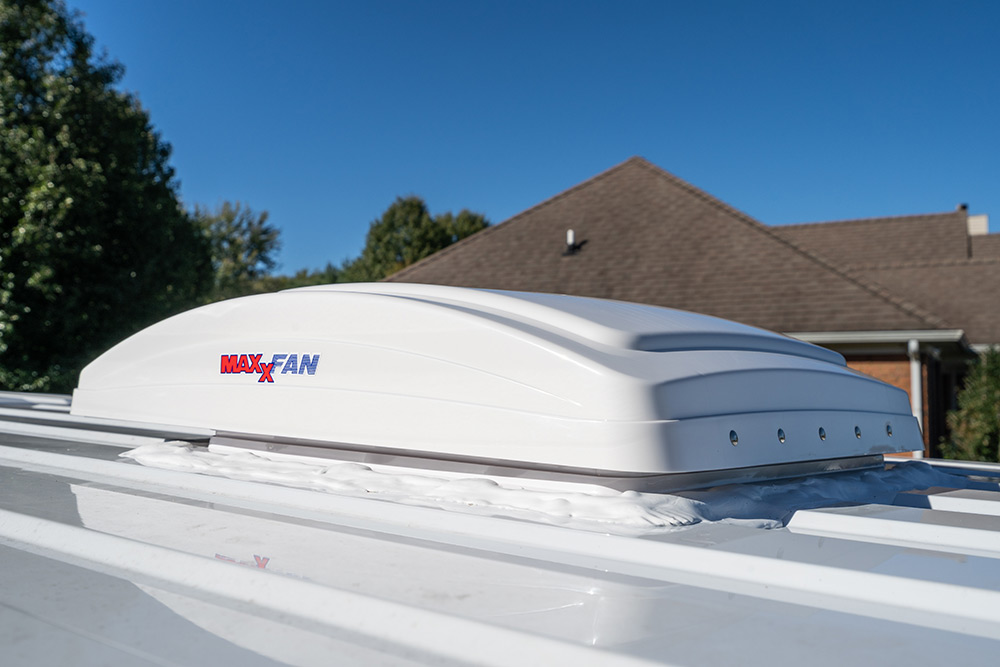
Maxxair fan mounted into frame
Maxxair fan mounted in the closed position

Testing the fan

I tested my fan out using a portable car jump starter that I have that has a 12 volt power system.  I simply plugged in the wires to it, turned it on and tested all the settings.  It worked like it should and I was surprised by how much air it actually brings in and pulls out.  

I would suggest testing your fan as soon as possible just in case there are problems.  You don’t want to install your fan and then get around to testing it six months later when you finally get your solar installed.  

You’ll end up with a fan that doesn’t work and is out of the return window.

Test it as soon as you get it installed in your van so that you can rest easy knowing that the job is done and the fan works!

Final Step

It’s time to put the trim piece on in the interior.  

The final step you’ll take on your fan install is a very satisfying one but you may not get to do it for a while.  

Installing the interior trim won’t happen until you have finished with your interior ceiling.  Adding the trim is just a matter of putting the four screws in that it comes with.  It’s really simple but it feels so good when you finally get it put in. 

It will actually feel like a finished product and you can envision your van build being closer to being complete.

Fan Trim Installed
Fan completed and trim installed

Sit back and enjoy the cool air

Overall, the fan install wasn’t nearly as difficult as I had envisioned.  Even though I had watched videos and knew how to do it, I was still scared to cut that hole.  In the end, I’m glad I did as I believe this to be one of the essentials in order to spend time comfortably in a small van.

I will also be installing windows in my van in order to increase the air flow.  I expect the windows and fan to work together to create a flow of air that will keep me cool and help to get rid or smells and moisture that may get trapped otherwise.

If you are on the fence as to whether or not you should install a fan in your camper van or RV, I would say that I wouldn’t build a van without it.  I have used it extensively while working on other areas of the van.  Sometimes it can get stuffy when you are crawling around in the van working on flooring, walls or any other part.  It’s nice to have the airflow that the Maxxair fan creates.

There was a time when I wasn’t sure I wanted to put a fan in my roof.  I just didn’t want to take the chance of cutting a hole and ending up with a damaged roof if something went wrong.  However, I took my time and went step by step and it ended up being pretty easy.

I wouldn’t want to be without the Maxxair fan and I’m sure you’ll feel the same way after you have installed yours.

Noico 80 Mil Sound Deadening Installation

If you’ve ever ridden in a cargo van, you know just how loud these metal boxes can be. Road noise can be unbearable on long trips as you hear nearly everything along the way. Even the smallest bump can echo throughout the van as the metal panels vibrate.

These vans are built for work so having a quiet and comfortable ride is something that isn’t considered in their design. If you want these luxuries, you have to build it in yourself.

This is why I decided to install a sound deadening material throughout the cargo area of the van before doing anything else. I wanted to try and create as quiet of an environment inside the van as possible.

There are numerous options when considering sound deadening for a vehicle and some of the options on my list are listed below.

BrandThicknessGood & Bad
Noico80 mil (0.08 inches)Low Cost, installation indicator, low odor, pre-cut sections
KilMat80 mil (0.08 inches)Most affordable, installation indicator, pre-cut sections
FatMat80 mil (0.08 inches)More Expensive, comes on a roll, requires cutting
Dynamat67 mil (0.067 inches)Most Expensive, low odor, thinner than other options

I chose the Noico 80 mil sound deadening mat for this project. Out of the four that were on my list, I felt like this one would be the best for my needs. I liked how it looked and it was among the cheapest option available.

It also has good reviews from others who have used it in van builds so I thought I’d give it a shot.

Sound deadening mat absorbs the vibrations that would normally travel throughout the thin sheet metal that makes up the cargo van. By adding mass to the sheet metal, you will likely hear more of a thud as you hit a bump rather than a vibration of the sheet metal.

At least this is what I hope will happen.

I’ve seen many people mistakenly call this soundproofing. This is in no way soundproofing. It is simply a way to minimize the vibrations in the large areas of sheet metal.

However, this is a good first step if you are looking to soundproof your van. I aim to use various products that will all work together to keep unwanted noises to a minimum.

I purchased this material for use in my camper van and I would like to share my review of the material and the process of installing it.

First Impressions

I ordered two of the 36 Sq ft boxes of this and when it arrived on my doorstep, I was surprised at how heavy each box was. I didn’t weigh it but the product description says it is 28 pounds for one box so I had nearly 60 pounds of sound deadener material sitting on my front porch.

First impressions were great. It seemed to be very high quality and was in sheets that were easy to work with. Each box has nine sheets of the material in it and the diamond patterns on it make it easy to cut and stay in a straight line.

Installing the sound deadening in my camper van

Tools needed for the job

Of course, you’ll need the Noico sound deadener material itself. I purchased mine here.

You’ll also need…

  • Roller – used to roll it onto the metal so that it will be most effective
  • Sharp scissors – it’s easy to cut with scissors but they will get messy from the tar-like material
  • Tape measure
  • Marker
  • Good gloves – this stuff has sharp corners and can cut you if you aren’t careful. It also can leave a sticky residue on your hands so it’s best to wear gloves.
  • Degreaser – I used Krud Kutter in an aerosol can. It’s easy to spray on and wipe back off leaving the surface squeaky clean.

The first place I wanted to make sure to install this was on the wheel wells. This is one of the noisiest and most vibrating areas in the van so I thought it would be the most effective here.

It was also a good test to see how good it would actually work.

I installed it on one wheel well first and then banged on it for a test. There was a noticeable difference between the one with sound deadening and the one without.

Sound deadening on wheel well

After the wheel wells were completed, I continued installing it on the sides and the ceiling and floor. I wasn’t concerned with covering every square inch. I just wanted to get a large percentage of each area covered.

Here is the method I used to install the material.

  1. Plan out exactly where I wanted to put it. You don’t need to install it all over the place, only in areas that you deem likely to vibrate the most.
  2. Once I had my plan, the next step was to measure and cut the material to size. I did this in small squares so that each square would be easier to work with.
  3. Before placing the squares onto the metal, I cleaned the metal of the van with a degreaser and then dried it off. This will help to ensure the material will stick. I used KrudKutter and it worked great.
  4. Once the squares were cut and the surface was cleaned, I stuck them into place. I typically worked within a small area of the van placing the small squares in that area.
  5. After I had all the squares stuck on, I went back and rolled them on tightly with the roller. This is a very important step because you can tell a difference after doing this. It gives it a little more sound reduction from being rolled on tightly.

That’s it! It was a simple process but it was a LOT of work. It was difficult rolling it on because you have to push fairly hard to get it flattened out.

However, the product makes it easy to know when it is properly seated. The diamond patterns on the material will flatten out and it’s easy to tell the areas that are done from the areas that still need work.

Sound deadening on side wall

Results

After going through both boxes of the material, I did notice a difference throughout the whole van although it wasn’t as dramatic as I thought it would be.

You can tell that if you bang on the side walls or the floor, it does create more of a quick thud instead of the longer-lasting vibrating sound from before.

However, if I had it to do over, I would probably buy less of it and concentrate it on the noisier areas like the wheel wells, side panels, and floor. I probably wouldn’t touch the ceiling with it because I barely notice a difference there.

Installation tip:

Be sure and order a good roller when you purchase this stuff. It’s cheap and it makes the installation much easier. I’ve seen people in Youtube reviews using cans, tennis balls, and other items and that’s nonsense when you can get a cheap roller that does a better job.

The roller is the main tool that you will use and it makes sense to get a good one. You don’t want to be rolling and have the tool fall apart on you.

The roller I purchased did great throughout the whole install and allowed me to get the material properly seated.

What does 80 mil mean?

When I was first looking at sound deadening material, I was a little confused at what some of the numbers meant. I initially assumed that 80 mil must mean that it is 80 millimeters thick.

I thought, there is no way that it could be this thick. That would make the material over three inches thick.

Of course, that’s not what it means at all. What it really means is that the material is 0.08 inches thick.

1 mil = .001 inch

so

80 mil = .08 inch

50 mil vs 80 sound deadening

If you are in the market for sound deadening, I would recommend going with 80 mil. It is thicker and will provide a better vibration reduction over 50 mil.

It will be a bit heavier but overall, it will be more effective for reducing noises.

If you are going to go through the trouble of installing a sound deadening material, be sure to do it right from the start. 80 mil is a good thickness to use and will provide sound reduction without being too heavy.

Noico claims that their thicker 80 mil will give you 1.5 times greater insulating effectiveness than from their 50 mil product.

Final Thoughts

Sound deadening fully installed in my van

I’m not sure this was a necessary step in the process of my van build but I’m glad I did it. I can tell a difference and it doesn’t sound as much like a tin can when driving down the road.

However, don’t expect this to create a super quiet ride for you. This is simply a vibration dampener and should be combined with other acoustic insulation if you expect a more quiet environment.

Overall, the process of installation was very easy and I have put together a pro and con list below from my experience.

Pros

  • Low odor – tiny asphalt odor in the beginning but goes away quickly
  • Easy to install – peel and stick and roll it into place
  • Low cost – adds a great sound deadening layer for a small price to pay
  • Quality – you get all the quality as some of the more expensive brands for less money

Cons

  • Sharp corners – I had quite a few nicks and cuts when I was done installing it. You can avoid this by always wearing protective gloves.

Plain and simple, if you are building out a camper van or want fewer sound vibrations in your vehicle, you can’t go wrong with Noico 80 mil.

It provides a solid base of sound deadening that you can then add to with sound-deadening insulation to help create a quieter ride.

We plan to use Thinsulate for our insulation which will hopefully provide an acoustic barrier that will keep more sound out.

Learn more about our experience with installing Thinsulate in our van.

Cleaning, Patching and Preparing a Van Floor

When we purchased our van, it came with a mess of stuff bolted to the floor.  As I’m sure many people experience, we had to rip this stuff out and then worry with the holes that were left.

Had we realized there were going to be so many holes to fill, we may have kept looking and passed on the purchase of this van. 

However, we had been looking for a while and high top vans aren’t easy to find close to where we live, unless you want to order a brand new one from the dealer.  That’s not something we wanted to do so our search for the perfect used one led us to this one.

Everything else was perfect and to be honest, we didn’t even think about how difficult removing items from the cargo area and patching holes would be.  We figured that everyone has to go through this when they buy a used van.

The first order of business was to remove the 1 x 6 wood boards and the track system that was mounted to the floor.  

These were held in with a combination of bolts and pop rivets.  I knew I was in for a treat with the pop rivets.  In my experience, these things are a pain in the butt to remove.  The best way I have found is to drill them out.  

There are other ways, but this is the way I chose and it worked pretty well.

The bolts required going underneath the van and also required someone to hold the other side of the bolt from the top side while I loosened the nut from the bottom side.  

This wasn’t difficult but time consuming and frustrating at times as I bumped my knuckles, elbows and head on different parts of the van underside.  

In total, there were 128 holes from all the bolts and rivets that were removed.  

Holes in van floor
Example of holes in the van floor

Wow, if someone had told me at the dealership that there were 128 holes to patch, I would have probably walked. 

Having removed the bolts and rivets, I was left with all these holes to patch.  Before patching these holes, I wanted to clean, sand and paint all areas that were bare metal.  

The floor didn’t have any rusty areas, thank goodness.  However, I did plan to go ahead and paint the whole floor just to make it look nice.

I’m a perfectionist and I want to know that every part of the van was done right.  I wouldn’t feel right just covering up a scuffed up metal floor.  That’s not me.  

So my next step was to sand each hole along with the entire floor.  I then painted each hole with two coats of Rustoleum white protective enamel paint.  

After that had dried, I put two coats of the same paint on the entire floor and wheel wells along with any areas on the side walls that had paint rubbed off.  

I was on a mission to make the cargo area of this van look like it had just come off the assembly line.  I’ll have to say, the before and after was impressive and I’m glad I went through the trouble to make it look as good as I did.  

The next step was to fill in the holes and I accomplished this in a  variety of ways.  

My first choice was to put pop rivets back into the holes where they had come out of and this is what I did for about 60 holes.  

I feel like this provides a good seal and closed the hole up just as well as it was before.  I also plan to go underneath the van and put sealant around each rivet where it is poking through just to be sure it is watertight.

The rest of the holes I tried different options but finally settled on JB Weld Steelstik.  I had tried Permatex liquid metal filler and it was terrible.  It just cracked and fell right through the hole with the slightest amount of pressure.  It wasn’t suitable at all for this application.  The JB Weld dried and felt as though it was as sturdy as the metal floor was.  

A few tubes of JB Weld later, I was finally finished with all of these holes in the floor.

JB weld in the van floor
Patched holes in the floor

In the end, I was happy how it turned out.  It took far longer than I had imagined but that was only because I was meticulous and wanted to do every thing as correctly as possible.  

I feel like this is foundational stuff that needs to be done right.  

Now that the floor has been done to my satisfaction, I can move on to the next step in my build process knowing that I have done the best I could on the floor.

View the next step – Installing sound deadening material…

Choosing a Van For a Camper Conversion

Searching for a van can be a daunting task. It’s often difficult to find a good used van that is in excellent condition with low mileage. On the other hand, buying a new van is expensive and isn’t usually a good idea since vehicles depreciate so much.

Which Van is Best For Conversion to a Camper?

This question will depend entirely upon what you are looking for in a van. Whether you are looking for a small van or a large van, there are many options for you to choose from.

The one that is best for you might not be the best option for someone else.

During my search, I mainly focused on three models of vans and each of them had something unique to offer that the other one didn’t.

However, I had some specific criteria that I was looking for in my van. In order to choose the best van for myself, it had to meet these criteria as close as possible.

The criteria that I set for my search were as follows:

  1. It needed to be wide enough to sleep sideways in the van. The layout I had designed had the bed facing in this manner.
  2. It needed to be a high roof so that it would be comfortable to move around in.
  3. It would need to be a medium length van. The 159″ wheelbase Ram Promaster offered the ideal size.
  4. If used, mileage needed to be less than 30,000 miles.
  5. I wanted something that was no more than a couple of years old. At the time of my build, it was 2018 so I was set on buying something 2016 or newer.
  6. The price needed to be $25k or less.

Obviously, you will probably have different criteria if you decide to convert a van to a camper. Some will require more space and some will require less.

Whatever the case may be, you should set out to make a list of criteria for yourself and then choose the van that best suits your needs.

Best Van Options For DIY Camper Conversion

Since finding the perfect van for you is a personal option, there are many vans that will work and will probably be included in your search.

There are a few common models that are typically used when one wants to convert a van into a camper. The following list contains the most popular and most reliable vans on the market.

Mercedes Sprinter

The most expensive of all is the Mercedes Sprinter. The Sprinter is a popular option mainly because of the Mercedes name. It offers small options as well as larger options and also is available in diesel or gasoline.

Many people prefer a diesel engine for the extra power that it provides. However, a diesel engine was not a criterion of mine and I actually did not want a diesel engine because diesel engine fuel is more expensive where I live and also isn’t available in all locations like gasoline is.

The Sprinter vans are available in 144-inch wheelbase all the way up to 170-inch wheelbase and come in a low roof or high roof option.

The downside of the Sprinter van, in my opinion, is the narrow width. Since I wanted my bed positioned sideways within my van, the Sprinter did not offer enough space for this so this van was off of the table for me.

Other downsides include the high price tag as well as the high price required to maintain the van.

Ram Promster

The Promaster is a popular option for van builders and it has many positive things going for it. Unlike the sprinter van, it is only available in a gasoline engine and also only in two-wheel-drive.

The Mercedes Sprinter as mentioned above is available in two-wheel-drive and the all-new 2019 version is available in four-wheel-drive.

The Ram Promaster has been around for many years in Europe and is marketed as the Fiat Ducato. It has a proven track record and is a dependable van and works perfectly for a van build.

In fact, many commercial class B motorhomes are built on this chassis.

The good thing about the Promaster is that it has a wider body and allows a full-size bed to be positioned sideways within the cabin. This is important to me because of my layout and it was one of my major criteria.

The Promaster is easy to find, easy to service, and the V6 gasoline engine provides plenty of power as well as outstanding fuel efficiency. It is also easy to drive and has a comfortable but minimal cabin.

Ford Transit

Another popular option is the Ford transit and this van is available in many different configurations. They come in short-wheelbase is as well as longer wheelbases and the roof options include low roof, medium roof, and high roof.

The Transit is sure to meet the requirements of most conversion van builders.

However, like the Sprinter, the Ford Transit has a narrow footprint and does not allow a full-size bed to be positioned sideways. This ruled the Transit out in my search.

The Transit is a dependable van that can easily be serviced throughout the United States no matter where you are. It’s very easy to drive and very comfortable and has all the modern conveniences that you are used to in a vehicle.

The Transit is also now available in four-wheel-drive which is great for those who have the need to go off-road from time to time.

Nissan NV

I’m a big fan of Nissan as I have owned a Nissan Frontier for nine years now without any problems. My wife owns a Nissan and we have owned other Nissans in the past. We have never had problems with any of them.

I initially looked at the Nissan NV as an option for a conversion van. However, for my taste, the Nissan NV was just a bit small and it was also hard to find in my area. Not to mention, it looks a little strange with the body shape that it has.

Like most all of Nissan vehicles, the NV is very fuel-efficient and allows for a lot of space in a small van. You don’t see as many Nissan NV‘s as camper vans but they do make a great option if you are looking to build out your own van.

The NV comes with a V-6 or a V-8 engine and has plenty of power to carry your camper van wherever you need to go.

Chevrolet Express

If you are looking for a low roof van or one that you can add a pop-top to, the Chevy Express is a great option. This van is commonly seen as a work van for companies in different industries.

From plumbers to electricians, you see these vans all over the place. They are a dependable option.

These are easy to find used since most companies use vans like this as work vans.

However, be careful buying used work vans especially if they have high mileage. These types of vans get used and abused by many different people over the years and can be a nightmare if you end up with one that has been misused or not well maintained over the years.

Ford Econoline

Similar to the Chevrolet Express, the Ford Econoline is also a great option if you are seeking a lower roof van. These are also easy to find and can be purchased used for a great price if you are looking to build a van for less.

The production of these ceased in 2015 so if you were interested in this van, you’ll have to settle for a used one.

VW Vans

If you want a vintage option or one with some character, a VW van may be the way to go. Many people appreciate the old school feel of a van like this. Some of the options include the Westfalia, Volkswagen Type II, and the Vanagon.

This type of van will probably require a lot of work because you may have to do mechanical work in order to make it functional. If you like old vehicles and are up to the challenge, Volkswagen vans can be a very cool option.

What is the Most Reliable Van?

If I’m going to spend money on purchasing a van for a camper conversion, I want to know that it will be reliable and last for many years to come. Most modern vans are reliable as long as they are taken care of and maintained properly.

There is no way to say what type of van is the most reliable. Many people have different experiences with different brands and models of vans.

The three most common brands which include the Ford Transit, the Mercedes Sprinter, and the Ram Promaster which are all written about above are at the top of the list if you are looking for a reliable van.

You can’t go wrong with any of these three as long as you do your homework and make sure you are buying a van that has been well-maintained if it is a used one.

Of course, there will always be those lemons or duds that you will find from time to time. However, this is uncommon and is unlikely.

What is the Most Economical Van?

Fuel economy is very important to me and I want to know that the van that I choose is going to get good fuel efficiency. Of course, there are also other things to consider with fuel economy.

It isn’t just about the van or the engine or transmission. You must also consider the weight of the vehicle and the aerodynamics can also come into play.

If you are going to have a roof rack with solar panels and other things up on your roof that can cause wind resistance, the fuel efficiency may suffer.

On the other hand, if you make your van build as light as possible and do all that you can to make it as aerodynamic as possible, you will reap the benefits of a fuel-efficient van.

I prefer either the Ram Promaster or the Ford Transit in the case of fuel efficiency. I also prefer a gasoline engine and in my mind, I am seeking to get between 16 and 22 miles per gallon with my camper van conversion.

My Choice and Process For Purchasing a Van

After all, was said and done on my search for the perfect van, the only two models that I was interested in were the Mercedes Sprinter or the Ram Promaster.

The Ram Promaster seems very well suited for a camper van and many of the Class B motorhomes are built on the Promaster chassis.

Right from the start of my search, I realized that the Sprinter was quite a bit more expensive than the Promaster. This was to be expected. However, it is also slightly more narrow which would make it difficult to fit my bed sideways as my layout required.

I decided to narrow my search down to a Promaster.

The difficult part was finding one that wasn’t hundreds of miles away. I wanted a used one but I didn’t want to drive all over the country to look at a van that I wasn’t even sure would work for me. I had never even stepped inside a Promaster at the time that I began my search.

I finally found one at a dealer that was less than 50 miles from where I live and it was exactly what I was looking for. I immediately called about it and went to look at it.

Once I stepped inside the van, I realized that it was perfect for what I was looking for. I knew that I would be able to build an awesome home on wheels with this vehicle.

The van checked off all the boxes on my list so I snatched it up the same day and drove it home.

The van was a 2017 Ram Promaster 2500 high roof. It had 27,300 miles on it and I purchased it for $23300.

It was well under book price so I am happy with that decision. The drive back from the dealer was a pleasure and the van seemed to be exactly what I was looking for.

Of course, it’s just an empty metal shell at this point so it seems a bit overwhelming to look into the cargo area and think about the work that has to be done to get it camper van ready.

The van buying part is over, now comes the fun part of actually putting our plan to work.