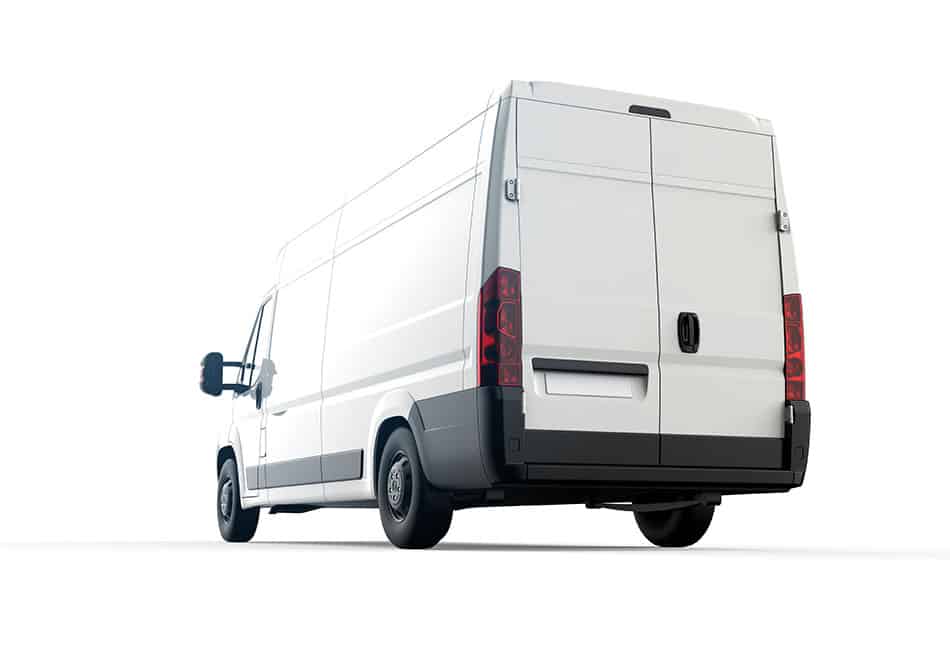
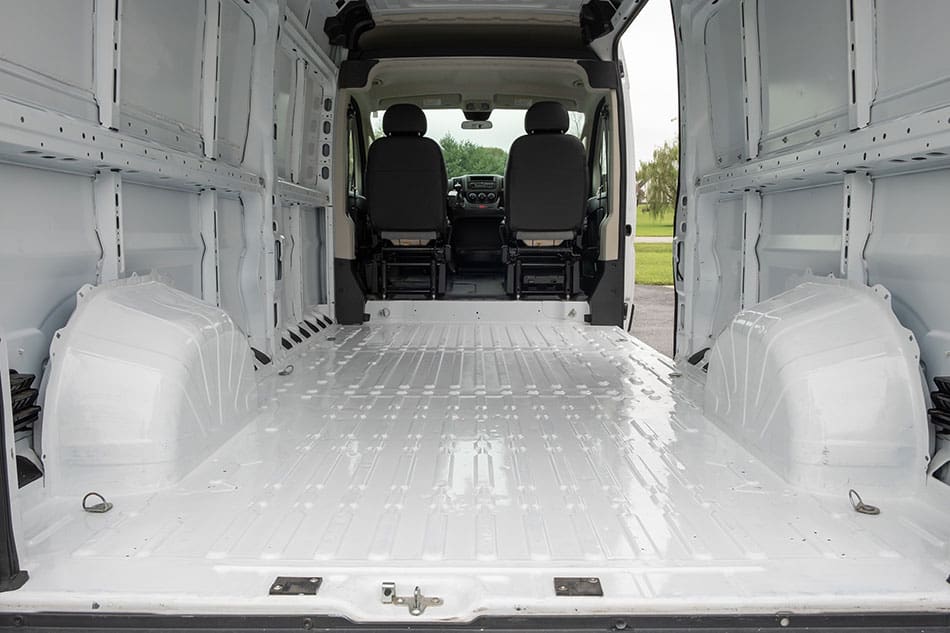
When buying a camper van, you may wonder if it will fit into your garage. This was a question I had during my initial research to buy a van to convert to a camper.
I keep my personal vehicles in my garage so I didn’t want to keep my van in the garage full-time. I was only interested in keeping it in the garage as I was working on it.
Once I got to looking at various Class B vans and standard cargo vans to convert, I had my answer as to whether or not it would fit in the garage.
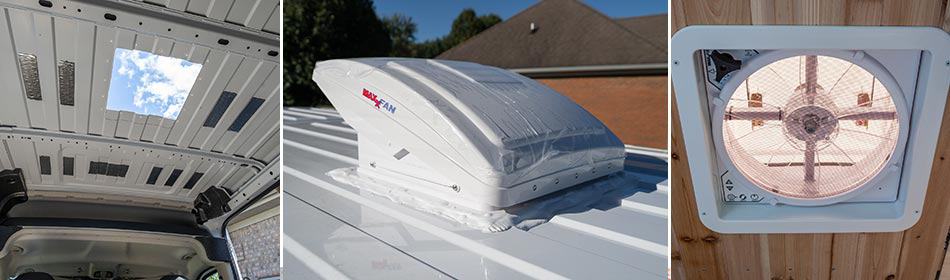
Most camper vans will not fit into a standard 7-foot garage door opening. High roof vans typically rise to the height of about 9 feet while low roof vans may be between 7 and 8 feet high. Camper vans may also have fans, vents, roof-racks, solar panels and other items that make them even taller.
Once I realized that a high roof van would not fit into my standard garage, I began to look at the options that I had. The most obvious option would be to not worry about it and park it outside, which is what I ended up doing.
The other option would be to go with a low roof van so that it would fit in my garage and be easier to work on. I could work on the conversion during times of bad weather and get it done quicker.
However, after my research, I learned that even a low roof van would be too tall for my garage door opening. Even if it had fit, I didn’t want to settle for a small solution that I couldn’t even stand up and walk around in.
If fitting your van into a garage is important, you will probably have to have a taller garage opening.
How Tall Is A Camper Van (12 Examples)
Camper vans come in various sizes but most of the Class B motorhomes on the market today use the same few vehicle chassis’s so all are similar in size.
However, there are additional items that vans may have on top that could make them even taller. The list below contains some of the popular Class B vans and their sizes and whether or not they will fit in a standard 7 ft garage opening.
Model
Exterior Height
Fits in Standard 7 ft Garage door?
Coachmen Nova
9′ 4″
NO
Leisure Free Spirit
9′ 9″
NO
Pleasure Way Ascent TS
9′ 7″
NO
Roadtrek Zion
9′ 5″
NO
Regency National Traveler Explore
9′ 8″
NO
ModVans CV1
7′ 6″
NO
Pleasure Way Tofino
8′ 2″
NO
Winnebago Solis
8′ 11″
NO
Winnebago Travato
9′ 4″
NO
Thor Sequence
9′ 5″
NO
Ram Promaster High Roof
8′ 5″
NO
Ford Transit High Roof
9′ 1″
NO
The point here is that most options on the market are probably too tall to fit into your garage opening. You would need to have a door opening with more height on it if you wanted to store your van inside your garage.
Even the shortest van on the list won’t fit into my standard garage opening of 7 feet.
Many people build garages specifically for their RVs and these garages have a high door, typically around 12 feet tall, which allows a large motorhome to be pulled into.
This is an expensive undertaking and is only an option for those who want the convenience of keeping their RV in a garage.
If you are concerned that your RV should always stay in an enclosed area, don’t worry, other options on the market will allow you to do this.
Where To Store A Camper Van
As shown above, there aren’t any options for camper vans that will fit into a standard garage opening. You would need a taller garage opening than the standard 7 feet that most homes have.
Some homes do have 8-foot garage openings so you could find a van that would fit if this is the case for you.
If you are like me, your camper van can be stored just fine outdoors in a designated spot. In my case, I have mine parked on my driveway and that’s where it stays.
I performed the entire conversion in this location and it stays parked there at all times when not in use.
If you would like your camper van to be more protected from the elements, there are a few options you have. These options can cover your van and help keep it safe from damaging weather.
1. Metal RV Carport
A metal RV carport is a good way to keep your RV out of the weather and covered and at least provide some protection from the elements.
Although these typically have sides that only partially cover the structure, they do protect the top so that sunlight, rain, hail, snow and other inclement weather conditions do not get to your RV.
These are a less costly way to protect your RV than building a full garage. Depending on the size that you purchase, you can expect to pay anywhere from $1000 to $4000 for one that will cover most camper vans.
The video below shows an example of what you might expect a metal carport to look like.
These types of carports come in different sizes and can be customized for your needs so no matter the size of your rig, it is possible to build a carport sized perfectly for what you need.
2. Portable Carport Shelter
If you are looking for an even cheaper way to store your RV, a portable carport may be the answer. These are not as sturdy as a metal carport would be but can still provide some level of protection for your motorhome.
Companies like Shelterlogic create large-sized portable carports made to cover large vehicles like RVs. The following video shows a portable carport installed to park an RV in.
Although these make a good temporary solution, I would not suggest using them for long-term RV storage. You would be better off spending the extra money to install a metal carport than to rely on this type of solution long-term.
3. RV Cover
If you are looking to store your camper van in a garage simply for protection, perhaps the best way for you to protect your RV is with an RV cover.
An RV cover will cover your camper van and keep it protected when not in use by not allowing weather and sun damage to occur.
Although not as good as a sturdy garage, an RV cover can be great if you just want to keep your RV in your driveway or at another location out in the weather.
One problem with an RV cover is that it is more inconvenient than other ways that you could cover your RV. It isn’t something that you can easily install and remove.
In the case of a camper van, you may be driving it throughout the year so an RV cover can be difficult as you may need to remove and install it often.
I use my camper van year-round so an RV cover would make it more of a challenge and more inconvenient each time I wanted to use it. They work great for those RVers who keep their RVs sitting throughout the off-season.
Benefits Of Keeping Your RV Covered
After looking at various ways that you might cover your RV, you may wonder if it’s even necessary? Are there any benefits?
There are definitely benefits but you have to decide if the cost of building a large enough garage or purchasing a different solution is worth it for you.
Below is a list of some of the benefits you might expect from keeping your RV covered.
Protects your RV from sun damage. The sun beats down on your RV all day long in the hot summers and this can cause various damage and premature deterioration from the harmful UV rays. Keeping it covered can circumvent this from happening.
Your RV will stay cooler. Your RV can feel like a sauna inside if left out in the hot sun all day long. Keeping it covered will allow your RV to maintain a more consistent temperature.
Protects equipment on roof. Your van or RV may have solar panels, fans, air conditioners, and other accessories on top. Keeping these items covered can help to extend their lives.
Protects from leaks. If left to weather, your roof could develop leaks from caulking that might deteriorate more rapidly in the weather. This could lead to leaks around seals if not properly maintained.
Helps protect your expensive purchase. A camper van or other type of RV isn’t cheap so keeping it covered and protected seems logical and a good idea if you have the means to do it.
Keeps your RV cleaner. My camper van sits out in the weather and it stays dirty from the weather. If it were in a garage, I wouldn’t have to wash it as much to keep it looking good.
Final Thoughts
If you have a standard-sized garage with a standard sized door opening, you can probably forget about storing a camper van inside.
It would be nice to be able to put your van inside the garage so that you can keep it out of the weather and be able to access it even when the weather is bad.
It would have been great to have been inside a garage during my van conversion. It would have allowed me to stay on target better even when the weather wasn’t cooperating.
A garage is not needed to take care of your RV and keep it well maintained. Vehicles are designed to be outside and the weather shouldn’t affect it as long as you take proper precautions.
Keeping your RV covered or, at a bare minimum, keeping your tires covered will go a long way towards helping you take care of your RV.
When I decided to build a conversion van, an electrical system was one of the things that scared me the most. I am not an electrician.
Although I do have a background in low-voltage wiring and electronics, I do not have very much knowledge of high-voltage systems and I am not qualified to install a full-blown electrical system in a van, house or any other type of structure.
At first, I considered hiring this out to an electrician but being the perfectionist that I am, I find it difficult to relinquish tasks to others, especially on a project like this when I didn’t have a solid plan yet on what I wanted.
If I were to hire an electrician to come in and do it for me, I would probably end up getting it done the way that they wanted to do it since I was not very concrete in my ideas to begin with.
I knew there had to be a simple way to add electricity to the van since so many people are building camper vans nowadays. Some people do not use a full-fledged electrical system and only use portable power or generators.
I wanted a system that would be fully installed in my van and would be ready to use at any given time. I also wanted it to be a solar system because I want to be able to rely solely on the sun for the majority of my energy usage.
I’m a big proponent of solar power and with today’s better systems, it’s easy to generate more power from the sun than it ever has been. A simple, small conversion van should have no problems whatsoever having a solar system that runs everything within the rig.
I decided to look for a ready-made solar system that was one unit and had everything already done for me and provided standard 120 volt AC outlets as well as USB ports and a 12-volt connection for all of my 12-volt accessories.
This is when I discovered Goal Zero. I came across this company during my research and was intrigued by their offerings. I thought their Yeti 1400 portable solar power generator would be the perfect solution for what I was looking for. This generator offers 1400 watt-hours of electrical energy.
All of this running off of a lithium battery bank. Lithium has many advantages over the deep cycle AGM batteries that many people use.
Lithium batteries are not as heavy as AGM.
Lithium batteries are smaller and more compact.
Lithium batteries last longer.
Lithium can be drained fully with no problem. AGM batteries shouldn’t be drained past about 50% or so.
I liked the idea of having lithium batteries in my van.
Although they are more expensive than AGM batteries, I believe it to be worth the cost for use in my van conversion.
I planned to use the Goal Zero Yeti 1400 and then to utilize installed power outlets that would connect directly to the Goal Zero unit. The Goal Zero would be connected to solar panels on top of my roof and would be charged using the energy from the sun.
I decided that 200 watts of flexible solar panels would be plenty to keep my battery charged.
Sketch of my electrical system
Goal Zero Yeti 1400
The first order of business was to purchase the portable solar generator. I was fortunate to find it on sale around the holidays so I got a good deal on it and went ahead and ordered it.
I had picked the perfect spot under my bed that it would sit and be strapped in out of the way and would allow me to have energy flowing throughout my van without even seeing the unit.
As you can see in the picture, I built a box over the wheel well and a padded spot on top of the box where the goal zero would rest. I padded this area so that it would work as a shock absorber of sorts as the van drives down the road.
I also built a bumper area around the whole thing so that it would stay put more easily. The front part is hinged so it’s easy to remove the Yeti 1400. Since this unit is portable, it can also serve purposes in other places as needed.
I have used the unit inside my house during power outages and also in places around my property where extension cords would not reach. It’s handy having a portable solar generator that can be installed in your van but can also be removed when you need power elsewhere.
It’s easy to disconnect everything and then pull it out of the van and use it where needed. Once I’m done with it, I can simply put it back where it goes and easily plug everything back in and I’m ready to go.
This made my electrical system install so much easier than it would’ve been if I had tried to build a custom electrical system or pay someone else to do it for me.
In this way, I purchased the portable solar generator and the engineers at Goal Zero had already done the work for me. There was no guesswork and no safety concerns of me building some kind of homemade electrical system on my own.
To me, this type of system is ideal for conversion vans since it makes the process so easy and allows you to use it in other ways besides just in your conversion van.
The system is strapped down tightly by its handles using heavy-duty hooks that I installed on each side of it. It’s held in tight with ratcheting straps so that it doesn’t move while driving.
Installing A 12 Volt DC Fuse Block
For all of my 12-volt accessories, I installed a fuse block that they would connect to. The fuse block that I used is the Blue Sea Systems Fuse Block that allows up to 12 circuits; more than I will need.
This fuse block has a negative side and a positive side making it easy to connect 12-volt circuits. This was used for accessories such as my ceiling LED lights, ceiling max air fan, water pump, and garage lights.
All of these accessories attach to the fuse block and then the fuse block connects to the Goal Zero 12 volt Anderson port using a special cable. This allows 12 volts to flow to all of the devices connected to the fuse block.
All of those circuits will be protected with a fuse that is installed in the fuse block. If there were a short in the system, then a fuse would blow instead of causing further damage.
This is the first line of defense since the Goal Zero Yeti 1400 itself has built-in fuse technology as well.
My refrigerator is also 12 V but I did not connect this using the fuse block. I connected my refrigerator using the 12 V “cigarette lighter” type connection and it connected directly to the Yeti 1400.
12 Volt DC Accessory Wiring
There wasn’t a lot of wiring to my simple electrical system. The only accessories that needed wiring throughout the van were the LED lights and switches, the Maxxair fan and the water pump.
For these, I used 14 gauge stranded wire. There were also a few runs that I used 14/2 wiring designed for outdoor lighting. The main thing is to use a wire that is stranded instead of solid.
This is basic wire with a positive and a negative side and the connections were very simple as all circuits were connected in parallel and at the fuse block, the red wire was attached to the positive circuit and the black wire was attached to the negative circuit.
I had three different circuits for my lights throughout the van. Each light circuit in the van connected to other lights in the van in parallel. In layman terms, all lights connected red/red and black/black.
That left me with one positive and negative wire from each light circuit that ran to a switch. From the switch, one positive and one negative wire ran to the fuse block.
For the Maxxair fan, a positive and negative wire was run from the fan to the fuse block.
The water pump required the same wiring; one positive and negative wire.
All of these devices were easy to connect by just connecting the positive to the positive circuit and the negative to the negative circuit.
In total, I used six circuits on my fuse block and the fridge connected directly to the Yeti 1400 so there were 7 12-volt circuits when all was said and done.
To connect these to the fuse block, I used Fork Spade Wire Connectors. These help to make installing the wires more secure and it neatens up the area as well.
These were also capped off with heat shrink tubing to protect the wires from moisture and to make my wiring layout neat.
Since the terminal ends were blue, I wanted to make them red and black so that it would be easy to see what is what. The heat shrink tubing allowed me to do this. Some of the wiring I used was all the same color, making it difficult to tell positive from negative. The colored heat shrinks help to set them apart.
120 Volts AC
For the 120 volt AC plugs in my van, I used a version that made it simple for my system.
Essentially, they are extension cords with outlets at the end of them. I only installed two of these in my van. One of them in my kitchen and one of them in my dining area.
Both of them were installed and the wire was run to the location of the solar generator. They were plugged in directly to the AC ports that the Yeti 1400 provides.
This was simple and I didn’t have to do any wiring for my AC system. It was all pre-done for me and the system was already wired for it in a safe way that I didn’t have to worry about.
It made the whole process much simpler and I can sleep well at night knowing that I used items that were done by people who know what they are doing versus me who has no qualifications to install something like this from scratch.
I could have hired someone to do this for me but I didn’t want to do that because there would have been a cost to doing that and I probably wouldn’t have ended up with it done the exact way I wanted it.
The only problem of doing it this way is that the outlets that I chose are only rated for 12 amp instead of the normal 15 amps. This isn’t a problem for me because I am not plugging very much stuff into it other than a space heater and a very small portable air conditioner.
These items by themselves are within the amp rating of the plugs so I should be safe to use these.
Solar Panels
After the Yeti 1400 was installed and all of the wire runs were connected using the fuse block, as well as the AC power plugs, the next thing to do was to add solar panels to keep the Yeti 1400 charged.
Solar seems complicated at first when you begin looking into how it all works but it is very simple. I needed to have solar panels on top of my roof with wires that come down from the solar panels and plug directly into the yeti so that it can charge using the sun’s energy.
The problem with this was figuring out exactly what cables I needed and what connections I needed for it to work between the Renogy solar panels I used and the Goal Zero unit that I used.
Fortunately, this was easy to accomplish because there are cables and connectors that you can use to easily accomplish this.
It took a little bit of research and ordering the wrong thing a time or two but I finally understood what I needed and the process ended up being much simpler then I thought it would be.
I was able to install the flexible solar panels on the roof without drilling through the roof. I used a combination of sticky products. The first one was double-sided Gorilla tape that I used to stick the panels to the roof. The second way I secured them was with Everbond tape.
I used 4-inch tape that was run around the perimeter of the panels. Everbond is very sticky and the panels are secured tightly.
The solar panels that I used have very short leads coming off of them. For some reason, on the Renogy panels, one side is shorter than the other so I had to purchase an extender to go on the short side so that I could neatly route both sides together.
From there, I used branch connectors to connect the solar panels in parallel to each other. The negatives connected together and the positives connected together and then I was left with one positive wire and one negative wire from both panels that would run down to my Goal Zero unit.
I accomplished this with two 15 ft 10AWG extension cables. One for positive and one for negative.
These two wires entered my van through the rear camera housing instead of the roof. This was a genius solution that I had found somewhere else online and utilized it myself. It kept me from drilling holes in the roof to bring the wires through.
Once the wires were inside the van, I routed them down to where they needed to be through the dead space in the wall until they came out exactly to where I needed them to be.
From there, I would need another part that connected these MC4 connectors to the Anderson connector on the Yeti. I used an MC4 to Anderson adapter to accomplish this and it worked perfectly.
Once that was done, I had input wattage coming in from the sun.
The only task left to do was to neaten up the wires, label them and make sure everything was tight and installed to where they wouldn’t move. I used cable ties and wire loom split tubing to protect wires where they entered or came out of the wall.
I neatly routed them to where the wires would be easy to plug and unplug so that the wires would stay in place when I wanted to remove the portable solar unit.
At this point, I had a full electrical system installed in my van and it was simple to do considering the options available. I didn’t have to wire anything myself and I didn’t have to do any guesswork with high powered electrical equipment.
The system I used worked perfectly for my needs.
Simple Shore Power Socket
In keeping with the simple electrical system that I had already built, I wanted to add a simple shore power solution to my van as well. There are times when I may need a little more electrical power when I am camped in RV Parks or other places that offer hook-ups.
An added benefit of this is that it gives me another way to charge my solar battery bank when the sun isn’t cooperating.
I chose to use a 15-amp socket instead of the larger 30-amp socket that many larger motorhomes have. I don’t foresee using this very often but it is nice to have the option of plugging into electrical power if needed.
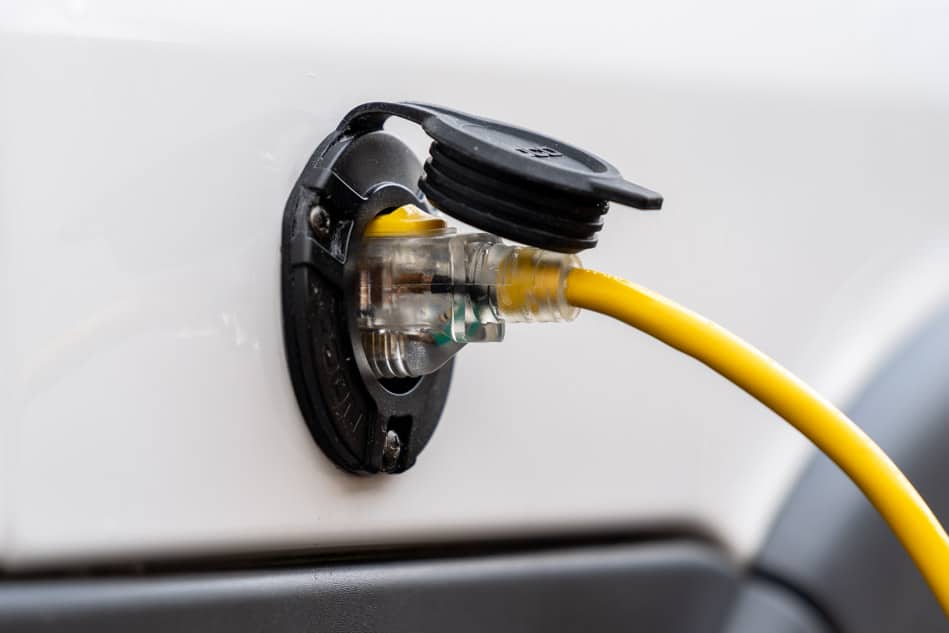
The solution that I came up with was to use a part that would essentially allow an extension cord to pass through the wall of my van. The extension cord would come from the power pole at a campground and plug into the socket on the outside of my van.
Inside my van, I could then unplug my AC outlets from the Yeti 1400 and plug them into this socket instead. This would allow my wall outlets to harness the energy of shore power instead of pulling from my solar battery bank.
The specific product that I used has dual extensions coming off the back of it so you have two cords in which you can connect to. This was perfect for my case because I have two outlets in my van that will need electrical power.
This type of product is very simple to install. It only requires that you drill a 2-inch hole in the side of your van where you want the device installed and three small holes for the screws. Mine was installed on the rear passenger side behind where my solar generator sits.
It has a gasket but it did leak a little bit after I first installed it. I chose to take it back off and add a little silicone around the hole and screws holes. This stopped all the leaking and it hasn’t leaked since.
The extension cords coming off the rear of the socket are in a position that makes it easy for me to unplug from the Yeti 1400 and plug into these extensions instead.
Conclusion
I think the portable solar generator that I used pairs very well with a camper van conversion. It allows you to have the best of both worlds.
On one hand, you have a fully working electrical system in your van and on the other hand, you can remove it at any time and use it elsewhere whether you are using it tent camping or using it around your house to provide power during a power outage.
The choices are endless with the Goal Zero Yeti 1400 as you can use it anywhere you wish since it is a portable unit. Portable solar units work great if you are like me and don’t want to fool with a custom electrical system.
It still allows you to do things yourself but without the risks associated with designing and building an electrical system.
This system was simple to install and it has provided me with enough power to power all of my devices while the solar panels keep my battery charged at near 100% at all times.
The lowest I have let it drain to thus far has been 74% but this was during periods of low sun and when the sun comes back out, it charges up rather quickly and it’s back up to 100% in a very short time.
I’m glad I went with this type of electrical system in my van and hope this information helps you if you are looking to add a simple electrical system to your camper van conversion.
Products Used In My Electrical System
Solar
Goal Zero Yeti 1400 – my solar powered generator that provides electrical power throughout my van.
Acegoo LED lights – I chose these for my lights throughout my ceiling.
14 AWG wire – the wire I used to wire most of my 12 volt accessories.
Light switches with dimmer – simple light switches I used for two of my light circuits. I used the large version on one circuit and the small version on the other.
Light switches – simple light switch without a dimmer for my shower area.
Wire crimps – this is what I used to connect wires at each ceiling light and other areas where splices were required.
Heat shrinks – I added these to the ends of the wires where they attached to the fuse block.
Camping is seen as a good wholesome way to enjoy family fun and also a way to get away from the hustle and bustle of our daily lives. It provides us with a way to get away from it all when we’ve had a rough week at work or we just have an itching to get out in nature and enjoy something different.
I work behind the computer most of my days and camping is a great way for me to get out and enjoy different sites, hearing nature sounds and enjoy being up close and personal with the great outdoors.
Sometimes we get so involved in our modern lives that we forget to take the time and enjoy the simpler things in life. Camping allows us to unwind, unplug and enjoy a more primitive style of living.
We, humans, were not made to sit in offices all day and nature helps us to get back on track. We live in our plush homes with modern conveniences and it’s good to get back to nature and be able to enjoy something simple and free from worries.
The only problem is, some people worry that safety could be a concern when out on the road camping.
Is this reality? Is it safe to camp in an RV?
Camping in an RV is relatively safe and free from the worries of crimes or other misfortunes. Although there are rare occasions when bad things happen, these times are the exception instead of the rule. The majority of campers remain safe during their camping expeditions.
The people you will meet in RV circles are among the kindest people you will meet. Besides the occasional trouble maker, you can expect a pleasant experience no matter where you park your camper.
Not only can an RV provide more convenience for the outdoor and adventure seeker, but it can also provide added safety over more primitive camping options.
When I was first getting into camping, I wondered how safe camping in an RV actually was. I have been tent camping most of my life and during my time in the Marine Corps, I did my fair share of all kinds of “camping.”
There are often worries of safety that go beyond crime from other people when using these types of camping methods. Thoughts of bears entering your tent or a massive thunderstorm with lightning in the area come to mind. Both of these can be stressful for those who are camping without the safety of four walls and a solid roof.
However, those in RVs do not usually have to worry about such things. Although a thunderstorm may be scary, you are fairly safe from the elements within your RV. A bear walking by isn’t likely to even attempt to get inside your RV and probably wouldn’t be able to anyway.
In this way, RVs provide a great deal of safety for those who may have doubts.
The rigid walls of an RV make for a safe place to lay your head and rid yourself of worries that you might have in a tent.
RV Parks vs Boondocking
When staying in an RV Park, you have the added benefit of a community of people who are generally looking out for each other. This isn’t always the case but for the most part, if something bad happens, others will come to your aid more often than not.
RV Parks have staff and, in some cases, security. They are sometimes gated and free from non-residents passing through. Camping in a place like this can be very safe and you shouldn’t have any concerns about bad things happening.
Boondocking leaves you on your own in remote places which could be good or bad, depending on the person. For me, I’m happy with boondocking and feel a sense of security knowing that no one is around. You may not always be alone when boondocking but there will probably be limited campers dispersed throughout an area.
On one hand, it would be out of the way for an evil-doer to seek out a boondocker to commit a crime. On the other hand, if something were to happen, you’d be mostly alone with no one nearby to come to your rescue.
Although boondocking is generally safe, it is something to consider and decide which option you are more comfortable with. I enjoy both but I really enjoy getting off the beaten path and pulling into an off-grid spot for the night. I feel safe and peaceful as I camp in the middle of nowhere with only nature as my friend.
Others may not feel this way and opt to only stay in areas where other people may always be close by. This is a judgment call that you should make by listening to your intuition.
3 Common Camping Fears
Other people committing crimes
Robberies, assault, and other crimes may be at the forefront of people’s minds. This can be especially true for solo travelers.
Having the fear that others may hurt you while out on your trip can usually be tamed by using common sense. Avoiding sketchy areas and always locking your doors are two starting points for anyone traveling in an RV.
If you do travel alone, make sure someone knows where you are at all times. RV communities are generally some of the nicest people you will meet and you will likely feel very safe and comfortable in RV parks.
Wild animals (Bears)
No one wants to be eaten by a bear and you never know what you will see in nature. Many people fear the day when they come face to face with a scary, aggressive animal.
However, this isn’t usually a problem for those in RVs or for people who camp using other means. While you may see bears or other wild animals in places that you camp, it isn’t likely that you’ll have to fend any of them off.
Common sense prevails here as well and you can avoid any problems by knowing your area and being prepared.
I travel a lot in the Smokey Mountains and there are many bears in the area but I have never had any issues whatsoever. Keep your food and trash put away and don’t make your area a target for bears and you’ll be just fine.
If you are in an area where bears may be, you might consider having bear spray in your RV. Hopefully, you’ll never have to use it but if you need it, you’ll have it.
Inclement weather
Camping during a thunderstorm, hailstorm, high winds, and other bad weather conditions isn’t fun and camping with little protection from the storm can be scary.
An RV provides a good amount of shelter from a storm. You wouldn’t want to be in an RV during a major storm such as a hurricane or tornado but the normal thunderstorm is no big deal.
A vehicle is protected from lightning so you are safe from lightning strikes in an RV. High winds, torrential downpours, hail, and other bad weather conditions my do some damage but you’ll most likely be safe inside your rig.
10 Tips For Staying Safe In Your RV
Traveling in an RV is a fairly safe way to travel but there are many things you can do to make sure that you are maximizing your security. The following list outlines ten ways in which you can make your journey a little safer.
1. Trust Your Gut
You know when something feels off. Your body has a way of telling you that something just isn’t right. I have pulled up to places before and thought that something just didn’t feel safe about the place. If your gut is telling you something like this, it’s best to listen to it and get out of there.
2. Park your RV for an easy escape
If you happen to be in an area where you feel a little uncomfortable, make sure you have your RV in a position that makes it quick to leave. This isn’t always easy to do if you have a fifth-wheel or large trailer but a motorhome can pack up and be gone pretty quick.
3. Research before you go
We are in the Information Age so there is no reason to arrive at a place knowing nothing about it. Unless, of course, you have no internet access and can’t do your due diligence. In this case, you will need to listen to your gut. Otherwise, make sure you research an RV park, campground or boondocking site before you arrive.
4. Install an alarm system
There are multiple options for installing a security alarm in your RV. You may choose to use a camera system that will allow you to view surrounding areas or traditional loud-sounding alarms that go off if someone were to open a door.
An alarm like this will alert others in the area and the perpetrator will likely flee. If you don’t want to install an actual alarm system, a fake alarm sticker on your window can help to ward off potential criminals.
5. Always keep your doors locked
Make sure your doors are locked at all times. You’d be surprised at how many people ignore this and leave their rigs open and unattended. This makes an easy target for burglars. Even if you are in an area where you feel safe, it’s still best to keep your doors locked. You just never know what could happen so it’s best to be safe rather than sorry.
6. Travel with a dog
A dog can be the best security system that you can have in an RV. They will alert you when something is wrong and scare other would-be criminals aways by barking and calling attention to the area. Besides being your best friend, they will be your protectors and will give their lives to protect you.
7. Properly maintain your RV
Caring for your RV is a great way to stay safe out on the road. You don’t want to break down in a sketchy part of town because you didn’t properly maintain your engine or have a tire blowout because you didn’t check and fill the air in your tires. Stick to a maintenance routine and keep your RV running in tip-top shape.
8. Keep windows covered
Don’t allow others to see in your RV, especially if you are a solo traveler. It’s best to keep it a mystery about what is inside your RV. You don’t want would-be criminals knowing the situation of what might be waiting for them behind the walls of your RV. Windows covered and a dog inside will go a long way in warding off evildoers.
9. Make sure other people know where you are
Even if you are not traveling alone, it’s good to keep someone in the loop on where you are at all times. Keep your family or a friend notified of your whereabouts when you are out camping, especially if you are traveling and are staying at different places regularly.
10. Carry self-defense weapons in your RV
If you are legally able to carry a gun, it can be a huge help if you were to run into problems while out on the road. If not, there are non-lethal ways that you can protect yourself and items that you can easily carry in your RV.
Pepper spray, stun guns, tasers, batons, fire extinguishers, knives, and personal alarms are a few items that can help you protect yourself. You could also opt for a baseball bat that stores near your door as an easy-to-grab weapon.
No matter what type of weapon you choose to carry, make sure these items are legal in the state or area that you will be camping in and that you have any necessary licenses.
Bottom Line
Many of the concerns that people have about safety in their RV are unfounded and based on unreal expectations that have been popularized in movies or books.
It’s common to hear about the rare case of something happening to a camper and assume that it’s a dangerous world out there. However, camping isn’t dangerous and is fairly safe.
The best way to stay safe in your RV? Use good old-fashioned common sense.
In general, camping is a very safe activity and most RVers that you’ll meet are very responsible and welcoming.
This community usually consists of older adults who simply want to enjoy their time. When you pull into a campground or RV park, you will usually be surrounded by people who want to enjoy their trip just as much as you do.
It’s also a community of people who understand each other and look out for one another.
Camping in an RV is fun and can be a very enjoyable and safe experience as long as you are prepared and make common sense choices on your trip.
Installing the ceiling in my van conversion was a fun project and one that wasn’t very difficult. The process was easy once I had already laid the foundation with furring strips, insulation, and wiring.
After all of the necessary parts were in order, it was time to cover up the ceiling. I chose to use cedar planks because I love the look of it. There were also other reasons which I’ll discuss later in this article.
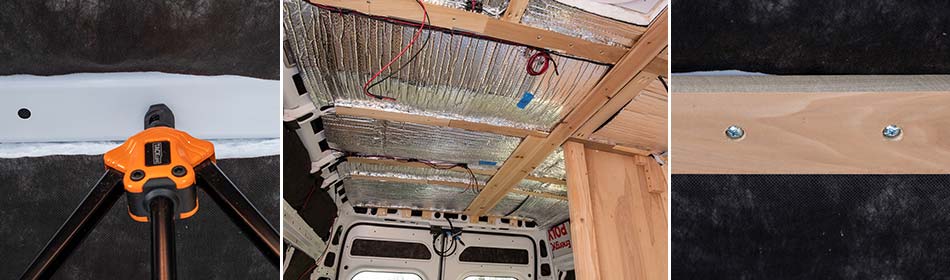
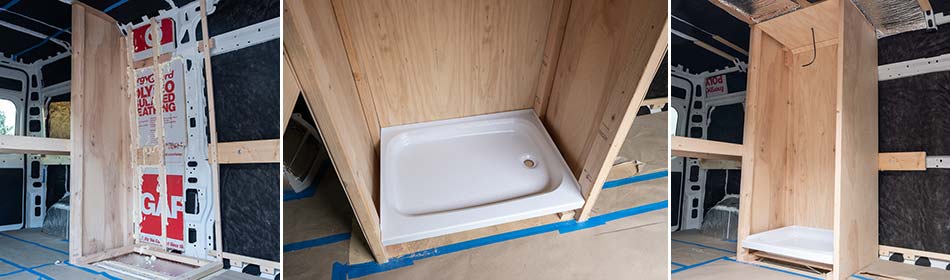
I started with the first plank in the near center of the van next to where my shower had already been built since the shower went all the way up and attached to the ceiling.
I had spent a lot of time getting the shower squared so I knew that if I followed the layout of the shower, my planks would end up straight. I used this as a reference to get my first ceiling plank straight.
The first plank went all the way from front to back and that gave me a starting point that I could work off of for the remaining planks. I would be able to continue working from that centerpiece out towards the sides of the van and in theory, everything should end up straight.
This worked out great. Once I got to the sides of the van the planks were still straight. Even parts that were slightly off would be covered with the overhead cabinets anyway so it wasn’t a big deal.
My goal was to make it look completely straight for someone walking in the van and looking up at the ceiling. The visual part of the ceiling would run from the front to the rear of the van and be completely straight to the eye.
I’m a perfectionist on details like this and I wouldn’t be able to stand it if it was slightly crooked. This can make the difference in a professional look or an amateur look so be sure you get your first plank straight and then all the other ones can be built off of this first one and they will stay straight.
After you install the first plank, it’s just a matter of moving either left or right of that first one and installing each subsequent plank in a staggered position from the first one.
It’s best to make sure the seams are not butted up against each other because they will hold tighter and it looks better if they are staggered.
I staggered my boards by measuring different lengths to where the seems would not meet the seem from the plank next to it. I ended up with a few different measurements along the way and repeated it after every third row.
Parts & Tools I Used
1/4 inch cedar planks – I purchased these from my local Home Depot. I ordered two boxes of these and each box contained 18 planks. This was more than enough to finish my entire ceiling.
Miter Saw – This was my most used tool during this process. This is the ideal tool to use for installing cedar planks because it ensures that you will make each cut straight and the ends of the planks will butt together nicely.
Fine-tooth blade miter saw blade – I recommend using a blade of at least 60 teeth per inch so that you can have a nice clean cut without splintering. I started the process using a rough cut blade and it splintered way too much and didn’t look very good.
Jigsaw – Beyond a miter saw, I also used a jigsaw with a fine-tooth blade on it for areas that needed more than just a straight cut. You will probably need a jigsaw so that you can cut around different parts throughout the ceiling unless you have an empty ceiling.
#6 1-inch zinc-coated screws – I used the SPAX brand screws here and most everywhere throughout my van. I chose screws for my ceiling because I wanted it to hold good. If I was to use nails, they could back out over time and come loose as I am driving down the road with the vibrating van.
LED Lights – As you go along, you’ll have to decide where you want lights if you will be installing flush mount ones as I did. I already knew where my holes needed to be for my lights because my wires were already run and marked.
2 1/4 inch Forstner bit – When I came to the spot where I needed a hole for a light, I used a Forstner bit and drilled a 2 1/4 inch hole to allow for my LED lights to fit into. A Forstner bit works great for this application because it drills such a clean hole.
3/32 drill bit – When installing the planks with screws, it’s best that you drill a small hole through the wood first. This will help to keep the planks from splitting which happened a few times to me in the process when I tried to do it without drilling a hole.
Countersink bit – This will create a larger indention in the plank where the screw head will seat.
Speed square – I also used a speed square so that I could mark straight lines at each location where I was to cut the plank.
Using Screws vs Nails
Some people may decide to use nails to hold these planks against the ceiling but I chose to use screws for a few different reasons.
The first reason is that screws will stay tight without coming loose and even if any were to come loose they are easy to screw back in and tighten up. With screws, I feel more confident that my ceiling is securely installed.
The second reason is that the cedar planks are fragile and may not take the abuse of a nail gun. I have a brad nailer that I tested on a few planks and found that even on the weakest setting, the brad nail almost shot all the way through the plank.
Not only that, but the jolt from the brad nailer puts a dent in the fragile wood at each location where you install a nail.
In my experience, it’s much better to use screws to hold the ceiling planks on. It may be different if you were installing them in a house that isn’t moving. However, a van moves and vibrates constantly so you want to be sure the ceiling is held in tightly.
The Installation Process
The installation process was very easy to do and there wasn’t much to it once you took the time to get the first plank completely straight. Here is the process that I used during the whole installation until it was completed.
Step 1
Install the first plank in the center or close to the center of the van as I’ve already discussed above. Once you do this, you will have a base in which you can work off of to install all the other planks on both sides of the center one.
Step 2
Decide on a side to start. For me, it was the passenger side because this was the easiest to work with as it was wide open and nothing had been installed on that side yet.
Decide on the measurements you will need for that row so that the ends are staggered with the row next to it.
Cut one section at a time and install it and then measure again before cutting the next section. For mine, each row of planks has about 3 sections of various lengths staggered throughout the van.
Step 3
Install the planks. It’s simple, you just place the planks into place and insert the tongue into the groove and make sure they are tightly seated. Be careful though because these 1/4 inch cedar planks are fragile if you try to push too hard on them.
The tongue and groove sections can easily break if you aren’t careful.
Once you have the section in place and tight against the plank beside it, now is the time to drill your hole. I used a 3/32 inch drill bit to drill up through the plank and slightly into the furring strip. I then used a countersink bit to create a seat for the screw head.
Once the holes were in place, I used a drill driver to install the screws. Just make sure not to get these too tight because they may crack under the pressure of a tight screw.
Step 4
Repeat the process. Keep doing this until you have installed all sections from the center towards the sides of the van. You’ll get the hang of it once you begin the process.
Note: It helps to have two people but it’s not necessary. I did mine completely by myself and had no issues. The planks are so light that one person can easily handle it. Even full-length planks are easy to work with.
Difficult Areas
The tricky part is going to be the sides of your van along with the front section that curves inward. There may also be sections where you will have to build around something such as the ceiling fan.
You may have to cut some planks with a jigsaw so that they will fit around areas like these.
I had to cut a plank in half longways and at an angle for it to meet up with my wall on the driver’s side. This was probably the most difficult part of the whole install. It was more guesswork than anything coming up with the right angle for a perfect fit.
Parts like these will be trial and error and you’ll have to figure out a plan to make it work.
Pros Of Using Cedar Ceiling Planks
It’s very lightweight. It weighs next to nothing and is easy to work with because of this. One person can easily do the job.
It looks awesome! The look of it reminds me of a rugged, outdoor cabin that makes me want to spend time in it. It gives my rig more character.
It’s easy to install. The ceiling was one of the first things I installed in my van so I was glad that it went so smoothly. It was an easy job for such a great looking finish.
Mold and mildew resistance. Not that it eliminates the chance of having these issues but it is more resistant than other types of woods that one might use. When you are in a small area like this, mold and mildew could be an issue so having something like cedar is a good idea.
It smells great! Cedar has a wonderful smell but it does dissipate after a while. After a year of being installed, I can still smell it if I get up close to it so it does last for quite a while.
Cons Of Using Cedar Ceiling Planks
Expect some planks to be unusable. I purchased three packages of the planks because I knew some would not be useable. Some were warped, cracked, bent and broken so there was quite a bit of waste. Purchase more than you think you need if you are going to use this product.
Expensive. If you were to use another solution like plywood and just create a solid ceiling, you would spend less money.
Installation Tips
When cutting, be sure and use a fine-tooth blade. This is important if you want it to look well-finished. Using a course blade will create splintering and have it looking like an amateur job. A 60 TPI or higher blade is recommended. I started out using a rough cut saw blade and it looked horrible.
Be sure and cut each piece as straight as possible. A miter saw is the best choice for making straight cuts as long as your miter saw is set at a true 90°. This is important because you want the ends of each section to be straight when they butt up against another section so there will be no gap.
Think it through as you are installing it. Be sure to choose pieces that complement each other as you are moving throughout the ceiling. Many of the pieces have different shades of coloring and some are more knotty than others. Be intentional about where you put pieces and make sure they blend in well with other pieces around it.
Purchase more wood than you think you’ll need. I would guess that 20% of the planks will not be useable for long runs. You will be able to cut shorter pieces from bad pieces but just know that it is normal to have some bad planks.
Use screws. I would suggest using either stainless steel or zinc coated screws. These shouldn’t rust with any moisture in the van and will keep the ceiling held tightly.
Conclusion
Installing cedar planks on a van ceiling seems like the obvious choice to me. Nothing says outdoorsy and has a camper feel like a cedar plank ceiling.
Living near the Smokey Mountains, I have become accustomed to staying in rustic cabins that have plank walls and ceilings. Although these are usually made from pine, they are similar in style.
When I’m in my van, it makes me feel like I am in a cabin in the woods. It has that rustic feel to it that makes me feel like I am on a vacation.
I used a lot of white in my van as a lot of people do to help brighten up the area and make it feel larger. The Cedar ceiling helps to offset the amount of white throughout the rig.
I recommend using cedar planks in van builds like this because it is super lightweight and that is one of the main things you are looking for. It’s important to keep the weight as low as possible for many different reasons.
The Cedar ceiling gives you a great look without adding a lot of weight.
There are heavier woods and thicker wood that you could use on your ceiling and a lot of people do. However, the quarter-inch planks I used are perfect for a van.
When I first began building my custom camper van, I knew I would be installing solar panels on top of it. It took me a while to decide on using flexible panels because I just wasn’t sold on them in the beginning.
I had read and watched videos about how they don’t last as long and they also are not as efficient as rigid panels. However, I was intrigued by the way I would be able to install these on top of my van and no one would even know they were there.
In comparison, rigid panels stick out like a sore thumb on top of your van so all the world will know that you are in a camping rig. This is not a problem if you don’t mind being seen as an RV and are not interested in maintaining a stealthy existence.
I originally wanted to have a stealthy van so that I could pull up to a place and stay under the radar. I thought this was feasible in the beginning but the more I got into my van build, the more I learned that being stealthy wasn’t really a thing. I already had a roof fan on my van so anyone in their right mind would know that a person was inside.
Nevertheless, I still decided to install flexible solar panels. It made the most sense for my van build.
The real question you may want to know is how good are they? Well, let’s talk more about this.
Are Flexible Solar Panels Good For Campers?
At the time of this writing, I have had my flexible solar panels installed for a little over a year now. I have been on numerous trips and have used my electricity in my van extensively.
Even when I am not on trips, I generally am inside my van every single day. I am always improving something inside or working on something that never got finished. During these times, I use my lights and electrical outlets and I keep my solar battery bank charging and in use regularly.
I have been highly impressed with how my panels have held up and how efficient they have been. My doubts, in the beginning, were unfounded and I have become a fan of using flexible panels after my time with them.
Flexible solar panels are a great option for campers because they are easy to install, lightweight and can be curved to match the contours of the camper. Today’s solar panels have improved greatly and are efficient enough to provide a great solar power experience.
With that being said, flexible solar panels would not be a great option for a home or other off-grid install where they will be mounted stationary on a flat surface. In this case, I would suggest standard solar panels because you will be able to capture more of the sun’s energy with them.
Flexible panels work for campers because of the convenience. I have been happy with mine but I will admit that I wish I could get a bit more out of them.
I have 200 watts (2 x 100-watt panels) installed on my roof and on the best, full-sun day, I will get about 140 watts coming into my charge controller.
That isn’t great but it serves my purpose well and considering that I don’t use a lot of electricity in my van, they keep my batteries fully charged most of the time.
How Long Does A Flexible Solar Panel Last?
I certainly hope they last a long time since I am depending on mine to capture the sun’s energy. This depends on the brand of the panel you use as well as how they are installed and how well they are maintained.
It’s not always easy to maintain solar panels because they are often mounted in obscure locations that make them difficult to get to. I have used a ladder to get on top of my van to check mine ever so often.
I do not have a ladder attached to my camper van so it is a chore having to set up a ladder. Not that it’s difficult, it’s just something that tends to get put off for another day.
It also depends on the type of panel that you have. There are different types and each of them may have a different lifespan. Let’s look at two of the most popular types of flexible solar panels and the lifespan you can expect from each.
Monocrystalline – The highest quality, most expensive panels that are made of the highest quality silicon. They are long-lasting and may last up to 25 years with 80% efficiency. This is the type that I chose for my camper van.
Polycrystalline – Lower priced and not as efficient as Monocrystalline. These are also designed to last up to 25 years with 80% efficiency.
Note: There are other types of solar panels but the two types listed above are mostly what you will find on the market.
The years listing in the above options are based on product warranties. Renogy warranties their flexible panels for 25 years with an 80% efficiency rating, meaning that after 25 years, they should still be working at 80% of their original efficiency.
This is for the power output rating and not for the materials themselves. They offer a 5-year warranty on the material and workmanship of the product.
I’m not sure how this will play out since I have never owned solar panels that long. I would be a happy camper if I was able to get 5 – 10 years out of them.
Renogy Flexible Solar Panel Review
I chose to use Renogy 100 watt flexible solar panels on my camper van build. I researched a few different brands and finally settled on Renogy because of the reviews I found on them.
I used Goal Zero as my solar energy solution and the Renogy panels are what I chose to use in combination with it. Goal Zero doesn’t offer flexible panels so I had to seek them out from other companies.
I got a good deal on them during their Holiday sales so I ended up getting them at a great price. I’ll admit that these are the first flexible solar panels that I have used but upon receiving them, I could tell that they were of great quality.
These panels are Monocrystalline which are made from the highest quality silicon. They really do feel like they are well made and will last a while.
They are also very lightweight with each one weighing in at only 4 pounds. This is minimal and will not even be a noticeable addition in weight for my camper van. This is one of the main reasons that I went with the thin, flexible option.
I didn’t mount the panels directly to my roof. Instead, I installed them on top of Coroplast corrugated plastic which was cut just a bit bigger than the panels. I did this so that the panels would have a buffer from the hot metal roof and would be able to run at a cooler temperature.
This worked great and made the installation a simple process. I’m hoping that this will help to avoid overheating on my panels and allow them to perform better and last longer.
After using my flexible solar panels for over a year now, I can say that I have been very happy with the performance that I have gotten from them. In the hot summer sun, the surface temperature typically measures about 135° with the full sun beaming down on them.
I am aware that rigid solar panels would likely be more efficient and provide me with more wattage coming into my solar charger. However, the easy installation, as well as the stealthy nature of flexible solar panels, made it the best option for me to use.
If I had gone with rigid solar panels, I would have installed a roof rack to place them on and this roof rack would’ve added to the weight and took away any stealthiness from the van. Also, rigid solar panels are much heavier than flexible ones so this alone steered me in the direction of flexible panels.
I have not had a problem with them yet and they have functioned as they should on many trips and provided me with all the solar energy that I need. I am happy with the Renogy solar panels and recommend them if you are building a van yourself or would like to use them on your camper or RV.
5 Simple Tips For Getting The Most Out Of Your Flexible Solar Panels
Don’t install them directly on a metal roof.. Overheating can be a problem if they are installed on a hot metal roof. It’s a good idea to create a buffer from the metal roof that you can install them on. Corrugated plastic is a great solution for this.
Keep them covered when not in use. When you are not using them and not using the camper that they are installed on, it’s a good idea to keep them covered. You can cover them in the off-season by using an RV cover.
Keep them clean and free from debris. Use soap and water often to scrub the panels clean. If you don’t, your panels could become covered in dirt and grime, bird poop, bugs and other things that might restrict their performance.
Avoid walking or stepping on them. Many flexible panels are marketed as being strong enough to walk on. I wouldn’t do it unless you want to damage them or send them to an early grave.
Avoid too much bending. Although they are flexible, I wouldn’t suggest bending them any more than you have too. Just because they can bend doesn’t mean you need to take it to extremes. Try to keep them as flat as possible for the best performance.
Flexible Solar Panels vs Rigid Solar Panels
If you are having a hard time deciding between flexible and rigid solar panels, I know exactly how you feel. I went through the process myself and nearly pulled my hair out trying to make the best decision.
It comes down to solar efficiency. If you have a large requirement for energy, you probably want to stick with rigid panels as these will be able to capture more energy from the sun.
On the other hand, if you are like me and live a more minimal lifestyle, flexible panels will give you all that you need. 200 watts of solar panels have been more than enough for my needs so far. If I need more, I have room on my roof for another panel or two so I can always add to it in the future.
Flexible panels are more expensive than traditional rigid panels so you will need to consider this as well as you go about choosing your panels.
Why Do Flexible Solar Panels Fail
Flexible solar panels are more fragile than the traditional, rigid panels. This makes sense because flexible panels need to bend and be able to be mounted into positions that rigid panels might not be able to be.
Rigid panels are covered in tempered glass and maintain a decent amount of protection from the elements. Backing your RV up under a low hanging tree and having tree branches rubbing on your flexible panels could be damaging. You should consider things like this when you choose to have flexible solar panels and be extra careful.
Another big reason that flexible solar panels sometimes fail is that they tend to overheat more than rigid panels do. They often do not receive any airflow in the positions that they are installed in since they are usually installed on metal roofs.
You can combat this by installing them on corrugated plastic as mentioned earlier in the post. This will help to lift the panels off of the surface and will allow for better airflow and heat dissipation.
There is no reason that you shouldn’t be able to expect a decent life span with flexible panels as long as you take care of them. Understand that they are more fragile than rigid panels so you will need to do all that you can to not put them in situations that may damage them.
The Best Flexible Solar Panels
I have been very happy with the performance of the Renogy flexible solar panels. They have met my requirements very well and I have been pleased with the performance of them. I will admit that these are the only flexible solar panels that I have used but I have done a fair amount of research.
Renogy makes a few options of flexible panels and I have chosen the 100-watt panels for my use. They also make a 50-watt version and also a 160-watt version.
Pros & Cons of Renogy Flexible solar panels
Pros
Customer Service – The customer service is reported to be great and I have dealt with them myself and had a pleasant experience. They were knowledgeable, helpful and gracious in helping me with a beginner issue of figuring out the proper parts I needed to connect to a Goal Zero Yeti 1400.
High Quality – These panels are high quality and have a sturdy, well-made feel to them. I expect them to last for many years.
Lightweight – Like most flexible panels, these are lightweight and at only 4 pounds for the 100-watt panels, the load is negligible.
Cons
Expensive – While there aren’t many cons to purchasing these panels, they are not the cheapest option on the market but you often get what you pay for.
Bottom Line
Flexible solar panels can be very good when installed and used in the right application. They are best when used in areas where it would be difficult to mount rigid solar panels.
Campers and other odd-shaped vehicles are great candidates for flexible solar panels and they will serve the purpose quite well.
As technology keeps improving, they will only get better and better which is great for consumers who need a more flexible solution.
I have been happy using flexible solar panels and would probably use them again if I had it to do over. I can’t say yet whether they will stand the test of time but so far they have held up well and have done a great job.
Buying an RV is one of the most expensive items that most people will ever purchase besides their homes. Depending on the type that you purchase, the costs can be well over six-figures. Of course, there are many different options on the path to RV ownership and some can be much more affordable.
One thing is for certain though; whether it’s an expensive one or an affordable one, you still want to take care of it and do all that you can to make it last.
Not only that, but you also want to make sure that it maintains its value and doesn’t depreciate at a more rapid rate than it already will.
Campers depreciate so if you can do all that you can to keep things in tiptop shape, you could end up getting more value out of it in the long run.
There are many simple actions that you can take to ensure the longevity of your RV and some of these actions are very inexpensive and do not take a lot of work.
One of these simple actions that you can take is adding tire covers. Many people add tire covers to their RV if the RV is going to be sitting for a while. Since most people don’t live in their RV and only use it occasionally, an RV can sit for long periods without being used.
What are RV Tire Covers For?
RV tire covers are designed to wrap around your rig’s tires and cover them up while it is not being used. There are a few reasons you might want to do this.
The purpose of RV tire covers is primarily to protect the tires from sun damage which includes harmful UV rays. These damaging UV rays can penetrate the rubber and damage it over time.
Tires sitting out in the hot sun are prone to weathering, dry-rotting and other problems associated with heat and the hot sun beaming down on them.
They are also used to protect the tires from other inclement weather situations. This may include snow, ice, rain and other weather conditions that leave the tires exposed.
If you allow your tires to just sit out in the weather at all times, it’s possible that they can become damaged over time and have a lifespan shorter than they would if you had simply covered them up to begin with.
The third reason you might want to use tire covers is just to keep your tires clean and free from dirt and debris. Not to mention, dogs peeing on them if you have dogs roaming around your neighborhood who like to seek out vehicle tires and hike their legs.
I prefer to keep tire covers on my van most of the time when I’m not using it. If I know it’s going to be sitting still for a few weeks, then I will always cover my tires. It only takes a few minutes to put all four tires covers on so why wouldn’t I?
How Are RV Tire Covers Measured?
When you shop for tire covers, you will see that they come in all kinds of different sizes. This makes sense because RVs are not all the same size. They come in different sizes and the tires attached to them range in width and circumference.
To find the proper size for your specific RV, you will need to measure your tire before you purchase tire covers but don’t worry, it’s very simple to do.
You’ll only need a tape measure or some kind of measuring tool. You will want to measure the diameter of the tire in the center of the tire and its widest point in most cases.
For example, my RV tires measure approximately 29 inches in diameter at the widest point so the right tire cover for me would be one that has a minimum fit of 29 inches.
I ordered the 29 – 32-inch covers and they fit like a glove around my camper van tires which was built using the RAM Promaster.
If you have the Promaster with standard tires, this size will fit perfectly. Most cargo vans will have similar size tires.
However, you must measure your own tires so that you can get the proper size for your vehicle. You may need larger tires if you have a larger RV so the best way to determine this is to take a simple measurement and then purchase the tire covers accordingly.
If your tires measure between sizes, I would suggest going up in size because if you purchase tire covers that are too small, you won’t be able to use them. On the other hand, if the tire covers are just a bit too big, they will most likely still work for you.
Most tire covers have bungee cords that attach in the back making them tight on the tire. This will make up for tire covers that are just a tad bit too big.
Are RV Tire Covers Worth It?
If you are concerned about purchasing tire covers for your RV, then you should consider a few things.
First of all, they are pretty cheap so even if you decide after you’ve purchased them that they aren’t doing the job, you haven’t lost much.
On the other hand, if you never use tire covers, and notice that your tires are aging prematurely, you may wish that you had tried using them.
In my case, it was inexpensive for a set of four tire covers that will help to keep my tires in good shape. I could help to extend the life of my tires by a few years possibly by making sure they are covered and protected when not in use.
If you leave your RV outside in the weather at all times, tire covers are very much worth it. Especially if you want your tires to last longer.
However, if you have a garage that you keep your RV in, then it may not be necessary for you to use them since your whole RV is already protected.
Most people do not have large garages that they can pull a tall RV into so it typically remains in their driveway or at some other location on their property.
Another reason they might not be worth it for you is if you have a cover that fits over your entire RV. RV covers are made to cover the entire RV including the tires so it might not be necessary if you have this.
For the low cost of tire covers, they are worth it. Anything you can do as preventive maintenance to such an expensive item is always worth doing.
I gladly purchased tire covers just for a little more peace of mind and to know that I am doing all that I can to make my tires last longer.
Camping is not cheap so you must try to do all that you can to minimize costs. Replacing tires every few years can be very costly so if you protect them as much as you possibly can and help to extend the life of the tire, you will come out better in the long run.
You will be happy that you spent the minimal amount on tire covers to protect your motorhome or trailer.
Should I Cover My RV Tires?
As mentioned above, if you plan on leaving your RV out in the inclement weather at all times, most experts would agree that your RV tires should be covered and protected.
It’s a minimal action step that you can take so why not?
You spend more money on a nice dinner at a restaurant so why wouldn’t you spend that money to increase the lifespan of your tires. The tires are the part of your RV that touches the road and if your tires become damaged, the walls of the tires could become weaker and possibly be more prone to blowouts while you are on the road.
An RV is heavy so it’s important to have a good set of tires underneath it at all times. Keeping your tires in good working order is very important. The experts say that you should replace your tires every seven years or so.
If you keep your RV sitting outside and your tires exposed to the elements, you may need to do it even sooner to make sure that you are safe out on the road.
I would recommend that anyone who owns an RV of any kind that has tires attached to it that stays outdoors at all times to decide to keep the tires covered and protected.
Best RV Tire Covers
When you set out to purchase tire covers, keep in mind that many of them come as a two-pack set so when you see a lower price, make sure you pay attention to how many you are getting.
If you have a drivable motorhome, you will need a set of four to cover all tires. Small travel trailers often have two tires so you won’t have to spend as much to protect your trailer.
In the end, you can generally expect to pay about the same amount for most high-quality tire covers.
I would suggest purchasing light-colored or silver, reflective tire covers since these will help to reflect the sun rays and keep your tires cooler from the heat.
The ones I use for my camper van are the ELUTO Tire Covers for RVs. These have been excellent and they are waterproof and have bungee cords with hooks on the back so that you can wrap them around your tire and they won’t blow away.
I don’t use the bungee cords normally because they fit nice and snug around my tire and I haven’t had any issues with them blowing off the tire in high winds.
Some of the other models I would suggest would be the following.
If you are looking for a more deluxe tire cover that will withstand more but also cost a little bit more, the Classic Accessories OverDrive Covers are a great option.
Conclusion
Tire covers serve as the first line of defense for protecting your RV tires. It’s a simple thing that you can do but can reap big rewards in the future by allowing your tires to remain in good working order for many years to come.
It’s a cheap solution but it’s one of the easiest actions that you can take to safeguard against tire damage.
If you intend on maintaining a safe vehicle to take you and your family on fun camping trips, then you cannot afford not to include RV tire covers in your repertoire of preventive maintenance items.
At a minimum, you will want to protect the tires because they provide the base on which your RV travels. You always want your tires to be in good condition so that you and your family can enjoy many safe years of camping fun.
Camping can be a fun lifestyle but many people are intimidated by the size and cost of large RVs. Most large motorhomes are out of the price range of the normal camping enthusiast.
Although there are many advantages to owning and camping in a large space, smaller camping solutions are where the majority of campers are going to be spending their money.
A camper need not be a behemoth of a rig to be enjoyed. One can easily purchase a small RV and get just as much or even more enjoyment out of it. No matter what you have heard, bigger isn’t always better.
I have had the opportunity to enjoy a small space in my camper van and have learned that staying in something small like this makes me appreciate the trip even more.
Let’s take a look at some of the options for those looking to minimize the space they are camping in.
Small Camping Options
Camper Van (Class B Motorhome) – A camper van is a small camping area and motor vehicle all in one. Everything is self-contained making it very convenient and easy to use.
Small Travel Trailer – Travel trailers come in all sizes and the smaller ones can be easy to tow, and provide ample room for living and enjoying.
Teardrop Travel Trailer – Even smaller than a travel trailer, a teardrop trailer is lightweight, minimal and provides a safe, comfortable place to sleep. Think of a teardrop trailer as a large, hard-sided tent with a few more amenities.
Pop-up Campers – I spent a lot of my childhood in various pop-up campers and these compact campers fold down when not in use. When ready to use, the living area is expanded, providing a nice living space. They are lightweight and can be pulled by almost any vehicle.
Truck Campers – If you have a pickup truck, a truck camper is small and efficient. You can use it when you need it and then unload it when you don’t. Although these are often small, they are usually very roomy.
Truck Camper Shell – If you don’t want a full camper, a camper shell can provide a safe place from the weather in a convenient, small package. I have seen some pretty sweet setups built using these.
Car / SUV Camping – Perhaps the smallest camping option of all is sleeping in a car or SUV. Many people make this work and depending on modifications, it can work out quite well. There are also truck bed tents that can work great as well.
Rooftop Tents – If car camping isn’t for you, a rooftop tent may be the answer. These tents can be quite large and give you a comfortable place to camp off the ground. These mount to the top of a vehicle roof.
Tents – The most primitive option is the old-fashioned tent. I’ve slept in a tent many times and it can be very enjoyable. A tent provides shelter and allows you to get up close and personal with nature.
Hard sided pop-up camper
10 Benefits of Camping in a Small Camper
A small camper can be very beneficial in many ways. Many people assume they need a large sized camper because they are used to the luxury of living in a house.
However, camping should be seen as different. Camping is a way to get away from the normal routine of life and enjoy the simpler things in life.
Camping provides a great way to unwind from the stresses of life. Owning a large camper can often add to the stress rather than help to get rid of it.
Below, you’ll find 10 benefits that owners of small campers enjoy. If you are looking to downsize, keep reading to learn how beneficial it may be for you.
1 – Easy To Drive And Maneuver
My favorite thing about a small camper is that you can drive or pull it nearly anywhere and it’s easy to maneuver into most any location. Whether you are driving it to a campground or a dispersed camping location, they are usually easy to park and set up. Oftentimes, they can be managed easily with only one person.
Compare this to larger RVs. The larger the RV, the more difficult and intimidating it will probably be. Especially for those who aren’t used to pulling trailers or driving large vehicles.
Pulling a smaller camping trailer can often go unnoticed and you may even forget that something is behind you. A camper van will have a similar feel to driving a standard passenger vehicle.
This makes the process of loading up and hitting the road much more pleasant for those who don’t want to bother with large, cumbersome RVs.
2 – Lightweight And Easy To Tow
If you have a small travel trailer, pop-up trailer or a teardrop trailer, these can be super lightweight when compared to a much larger trailer. This means that nearly any car will be sufficient for towing it.
A small travel trailer may be as light as 1800 pounds and a pop-up camper might weigh in as low as 1200 pounds. A teardrop trailer could be less than 1000 pounds.
This type of weight is usually no problem for mid-size cars or pick-up trucks.
By comparison, large travel trailers and fifth-wheels can be quite heavy and require a heavy-duty vehicle for towing. A large travel trailer can weigh over 5000 pounds and may weigh as much as 8000 pounds or more.
Something of this size will require a heavy-duty vehicle for towing.
3 – Less Expensive
It stands to reason that the smaller the camper, the less it will cost. This isn’t always the case but it is typical of travel trailers and other towable solutions depending on the brand and model.
As mentioned above, larger campers require a more heavy-duty vehicle for towing. You will need to have a heavy-duty vehicle or purchase one with a large camper. With a small trailer, however, you may be able to use whatever vehicle you currently have.
Camper vans and some truck campers may be a bit of an anomaly in this case. Camper vans are much smaller than larger motorhomes or travel trailers. However, some of them can be quite expensive and reach prices in six figures.
This is not the case if you decide to build a custom van yourself as I did. I ended up with a small camper van for a very affordable price by taking on the challenge of building it myself.
4 – Helps You Focus More On The Adventure
When you head off into the great outdoors in a small camper, you are probably looking to spend time in nature. You may require a recharge from your stressful life.
Since a small camper isn’t big enough to contain a lot of entertainment, you are forced to wander outside the camper to seek entertainment from Mother Nature herself.
When I head out in my camper van, I am not looking to spend the day trapped inside my van watching movies. Instead, I am out hiking, biking or just relaxing outdoors, taking in the beauty of nature.
5 – Allows You To Visit More Places
Campgrounds often have size limits on some of their parking spots. Even those that have room for large units often have a limited number of accommodating spaces for large motorhomes or RVs.
Those who camp in smaller units don’t often run into the problem of not being able to park at a campground.
Besides that, a smaller camper such as a truck camper or a camper van can park more inconspicuous in places without being noticed.
This is helpful when you are in a location and campgrounds are fully booked and you are scrounging to find a place to stay for the night.
6 – Less Fuel Costs
If you are driving a smaller camper, you can expect to pay less in fuel costs. I can use my own experience as an example. My Class B motorhome averages around 20 miles per gallon and there is no way I could expect that kind of fuel efficiency in a Class A or Class C motorhome.
Likewise, towed RVs will get better fuel mileage as well due to less weight being pulled. However, this will depend on the vehicle you are using to pull the trailer with.
Even if you pull your rig with a heavy-duty Ford F-250, you may notice a difference in pulling an 1800 pound trailer versus an 8000-pound trailer.
7 – Cozy And Comfortable
If nothing else, a small camper is just cozy and makes it fun being in one. If you are plugged in, they are easy to heat and cool since they are so small.
A small teardrop trailer will be less than 100 square feet of living area so if it is equipped with a 5000 BTU air conditioner, it will cool off quickly in the summer heat.
Likewise, with a propane heater, it will be nice and toasty inside during the coldest winter day.
A nice cozy and small camper allows you to enjoy your time in nature while relaxing and unwinding as all your cares and worries slowly slip away.
8 – Easier To Store
When you are done with your small camping space, it should be no trouble to store. You probably won’t need a separate garage or a special building to park your small travel trailer for the winter.
My camper van sits in my driveway all year long and I don’t have to do anything special except for normal winterization procedures.
If I had a large Class A motorhome, it may be different. I wouldn’t want a gigantic vehicle sitting in my driveway so I would have to find different storage so that I wouldn’t have an unsightly mobile home cluttering up my property.
9 – Easier To Maintain
Without as much living space in a small camper, maintaining it is going to be easier. If you own a camping trailer of some kind, the maintenance will be limited. There isn’t much to do other than winterizing and make sure all systems are in working order.
Since campers are almost always kept out in the weather, seals start to corrode, caulking weathers and other working items may need routine maintenance. This is all normal but it is much easier to do on a smaller scale than it is on a larger camper that may have more surface area to maintain.
If you have a camper van, you will still need to do all of this plus make sure the vehicle itself is in good working order. However, this is much easier than the amount of maintenance that would need to be done on a larger Class A or Class C motorhome.
10 – Easier To Sell
A large motorhome or RV can be a challenge to sell unless you are looking to lose money on the transaction. Not everyone is able to purchase a camper for the high cost that a large one demands. You may get a seller but it may take you longer than a more affordable, small one would.
Small campers are popular because they are more affordable. This is an advantage for you if you have one that you are trying to sell. You will find a buyer much easier on a camper that costs $10,000 than you will on one that costs $60,000.
How To Get More Space In Your RV
No matter the size of your camper, we all want to have as much space as possible. A camper requires that items be stored and organized efficiently in order to make the most of the space.
This is even more true with a small rig. Organization is key to maintaining a clutter-free environment. Clutter is often a reason that people think they need a bigger space.
Chances are, if you have a cluttered small space, you will also have a cluttered large space. This means that if you upgrade to a larger RV because you think it will end the clutter, you may be in for a surprise unless you learn how to properly organize your space.
There are a few ways you can make sure that your small space remains clutter-free and provides you with a spacious area that allows you to enjoy your camping experience.
8 Simple Camper Organization Tips
There are many hacks that you can use to keep your camping space nice and tidy. The ones listed below are simple ones that I learned early on in my camping experiences and hopefully, they’ll help you reduce clutter in your space.
Take only essential items – If you are going camping, you only need a few items. There is no need to pack your camper full of non-essential items just in case you need them. Think it through and take only the essential items.
Make use of storage cubes and bins – Instead of just tossing items inside cabinets, organize them with storage cubes and bins. These are great for keeping your items separate and easy to find when you need them.
Use Hooks to hang items – Hooks installed in various places provide a great way for you to hang items that you often use. Keys, jackets, belts, flashlights and other items can be hung neatly and ready to use whenever you need them.
Make use of hanging shelves – A hanging shelf can be a great place for storing items such as shoes and other clothing items. They utilize vertical space that would be wasted otherwise.
Use folding & stackable bowls – Kitchen bowls and other cooking essentials can take up a lot of space. Collapsable bowls and other items save space and help to free up more room.
Make use of bungee cords – Bungee cords are a necessity and you should be sure to have a bunch of them on hand. These are great to use while traveling to keep items from getting thrown all over the place as you are driving down the road.
Repurpose grocery bags for trash – Grocery bags make great trash bags and since they don’t hold a lot, it will force you to empty them daily.
Use a soap and shampoo dispenser – If you have a shower that you use in your camper, consider a soap dispenser instead of taking soap and shampoo bottles on your trip.
Final Thoughts
A small camper can be much more enjoyable than you might think. If you are used to a large motorhome or RV, it may be difficult for you to downsize but if you do, you’ll see the benefits of owning a smaller rig.
Going small is becoming more and more popular as people become more serious about minimizing their lifestyles. It can be fun to travel and live in such a small space.
I have camped in everything from tents to large motorhomes and I have grown quite happy with the size of my camper van. It has allowed me to get out more and focus on the adventure.
Give it a try and you may enjoy the simplicity of traveling in a small camper. You may find that you can enjoy the camping experience without the need for a large, fancy rig.
To use furring strips or not to use furring strips. That seems to be a question that many people ask when building a custom conversion van.
The answer, of course, is to do whatever you feel is right for you. There is no one size fits all solution when it comes to customizing a van so that it can serve as a camper.
My choice was to use furring strips in my build. There are a few reasons that I chose to do this.
Furring strips create a consistent place to screw in the finished wall and ceiling products. Once you install them, you will have consistent strips of wood that make it easier to attach the finishing product to.
They create a more secure hold. As long as you bolt the furring strips in tightly, the wall can be screwed in nicely to the furring strips creating a very strong and secure bond.
It allows a little more space for insulation & wiring. You wouldn’t want to put the ceiling and walls directly on the metal because you need a buffer from the metal of the van. This buffer allows you to insulate and also gives you more room to run any wiring you may need.
It allows you to use fewer screws. It’s good to minimize the number of screw holes you put in your van. Anytime you drill holes, you are opening that area up for possible rust issues in the future.
A lot of van builders use self-tapping screws that go directly into the metal of the van. I am not a big fan of this approach and I tried to avoid this.
The approach that I used allowed me to bolt the furring strips to my metal van using the holes that were already there. Then, other products screwed into the furring strips.
This is similar to using wall studs in a house. They provide wall space and also a place in which to screw in the finished wall or ceiling. I wanted to try to emulate this as much as possible although using much smaller studs.
Promaster Furring Strips
If you own a RAM Promaster, installing furring strips is pretty simple. The layout of the van has the walls and ceiling fairly straight and flat so it’s easy to install the furring strips onto the van supports.
Some of the other vans on the market are more rounded so it makes it more difficult to install straight pieces of wood.
Parts & Tools I Used
There isn’t a lot to putting furring strips up in a van. The main things you need are the furring strips themselves.
I used a few different types of wood for these. My ceiling was outfitted with 1×3 inch Poplar wood. On the sidewalls, I mainly used 1×2 inch furring strips that you can pick up at any Home Depot or other home improvement centers.
Beyond that, only a few tools are needed, depending on the approach you’ll use to mount them.
I used rivet nuts to secure the furring strips in various places around the van.
If you are working with a Ram Promaster, you will need a few different sizes throughout the van. The main size you’ll use is 10-24. You’ll also use 1/4″-20 and 5/16″-18. I used 5/16″-18 in the hex holes that are in the side ribs of the van and they worked perfectly.
If you have these three sizes, you’ll have everything you need to make it work.
To install these rivet nuts, you will need a tool. The tool is the most expensive part but it’s so worth it. There are other ways that you can mount rivet nuts without the tool but I highly suggest you use the proper tool for the job if you want to make sure the nuts are secure and won’t come out in the future.
The Tacklife Rivet Nut tool worked great for me and it allowed me to install the furring strips without any problem.
I used a combination of bolts in various sizes that would fit each rivet nut size. Mainly I used 1 1/4″ long bolts in #10-24, 1/4″-20 and 5/16″-18 sizes.
I installed all of my furring using bolts as well as pocket holes. I did end up using a handful of self-tapping sheet metal screws for added support in some areas.
Van Conversion Ceiling
I started on my ceiling since I wanted to first install the ceiling and then work my way down. The ceiling was difficult for me to figure out in the beginning because I wasn’t sure how I wanted to do it.
My main concern was keeping enough headroom in the van so that you could easily stand and walk around. Adding too much stuff to the ceiling, along with the floor would take away some of the headroom.
In the end, I used 1 x 3 inch Poplar wood for the furring that attached directly to the roof supports. I used three separate pieces on each support so that I could more easily mirror the curvature of the roof.
This allowed me to create a nice set of furring strips on the ceiling while keeping the ceiling as high as possible.
You could use one solid piece of wood for each roof support but this would shave a few inches off the ceiling in the middle since there wouldn’t be as much curvature.
The tricky part was the front support and the rear support. These required a bit different of an approach to accomplish.
Front Support
The first support beam located in the front of the van is used to attach the headliner in the front of the van. To expose and make use of this support beam, you have to cut some of this headliner off.
My solution was to cut some of the material off on the side and then attach my wood to the angled side of the support beam.
Once that wood was attached, using rivet nuts, I was able to attach my normal furring strips to those wood locations along the beam.
It’s tricky to do but if you take your time and think it through, it’s doable and mine ended up working out great.
Rear Support
Similar to the front, the rear support beam required some ingenuity to make it work. The main issue here was figuring out how to align this furring strip with the rest of them throughout the van.
There wasn’t a beam to work with in the back so I had to create multiple pieces of wood and bolt them to the rear ceiling wall. I bolted them using Rivet Nuts in the holes that were already there.
The furring strips were screwed into these pieces of wood from the side, creating a strip of furring across the rear similar to what I had done on the other beams throughout the van.
The pieces of wood that I used to bolt to the rear wall also will serve another purpose. They will become the supports on which I install the finished trim piece after all is done.
After all the furring strips were in place, I could then run wires, clean up the insulation, add Reflectix and then begin working on my finished ceiling.
Van Conversion Walls
Furring strips on my van conversion walls were a little different. In my case, I did parts of the van as needed and didn’t do the areas that didn’t need it.
Many people install furring strips over the entire walls when it is empty. This is fine if it works for you but I opted to do it differently so that I could save a little space, work effort, money, and weight.
I installed the furring strips where I would need them and this included areas like the upper cabinets, wall areas and other furniture areas that needed something to attach to.
Most areas received at least some furring except for the garage area.
The trickiest part of this was the rear sidewalls of the van above the bed area. It would’ve been easy to create furring strips that went straight down but instead, I wanted more headroom when laying in bed so I had to do something a little different.
My furring strips in this location start at the top and then go straight down just below the upper cabinet area. After that, I transitioned to a wider layout allowing for more bed space.
This made a big difference in creating more headroom and making it a more comfortable place to sleep.
Conclusion
I consider furring strips to be a necessary part of properly converting a camper van. If you skip this step, you will need to install different parts of your van build directly to the metal framing of the van.
This may work for you but you may also come to a point during your build when you will have wish you had done it differently.
You will also be opening yourself up the possibility of walls being crooked and other non-professional looking areas. The furring strips allow you to create a straight base that you can work with so as long as your furring is straight, your other items will mount to it and look professional.
My advice would be to think it through and only use it as needed. Also, try and make use of the holes that are already in your van by using Rivet Nuts or Plus Nuts. These can help keep your items tight and secure and built to last.
As someone interested in adventure, I have looked at all the options for campers. I have settled on a camper van but a truck camper has a lot to offer and can also make a great choice.
You can’t go wrong with either option and it comes down to a personal choice about what will fit your needs the best.
Truck campers haven’t gotten the credit they deserve since van lifers have overwhelmed social media with look-at-me pictures of themselves living in a fantasy world.
Camper vans have become the ultimate home on wheels and have left other types of campers without as much attention.
Although I do own a camper van, I am not the social media show-off type and chose my current configuration because it made the most sense for my needs. It serves a purpose and fits well with my lifestyle.
However, truck campers have always been high on my list and I could see myself having one in the future. One could make arguments for the good and bad of both. That is what this article is about.
I have taken the knowledge of what I learned during my research and the process of buying a camper. This isn’t a list that puts one above the other. Instead, this pro and con list attempts to point out various good features as well as the bad ones of both.
It is subjective so keep that in mind as you read through the list.
Camper Van
A camper van is a solid solution for those who are looking for a camper to travel in that doesn’t take up as much room as larger motorhomes. The minimalistic design of a camper van is great for those who need something that will take them from point A to point B and provide an excellent living area.
I love owning one and it provides me with a home away from home when I am ready to go out on the road. Even though I love it, there are some cons to owning one. This is especially true if you are a weekender like me and don’t live in it.
There have been times when I have wondered if a truck camper would be a better solution for the part-time user like myself.
Let’s look at some of the pros and cons below.
Pros
1. All-in-one solution – A camper van provides a solution that is a living space and a drivable vehicle all in one. Similar to larger RVs but in a much smaller package. It’s the best of both worlds. When you buy a van, you don’t need anything else as everything is self-contained.
2. Pass through from front to back – One of the main reasons I ended up with a camper van is because you can move from the driving cabin to the living space without getting out of the van. This is beneficial to me and makes it easier to stop and care for my dog, brew some coffee, use the toilet, etc. without ever going outside.
3. Good fuel economy – Many camper vans get excellent fuel economy. Mine averages around 20 mpg which I think is pretty good. I’m happy with that kind of fuel mileage when you compare it to other types of RVs that get less than that. Of course, this will depend on the model of van you have and the load you are carrying.
4. Less hassle – There isn’t much of a hassle to a camper van; you just get in it, start it up and take off. In comparison, truck campers need to be loaded onto your truck and this can often be a difficult process, especially if you are doing it alone.
5. Easy storage – Storing a van when not in use or during the winter is easy as long as you have space for it. Mine stays parked in my driveway and is ready to go whenever I am ready to use it. There is no need to break anything down when I am done using it or set anything up when I am ready to get going. Other than winterization, the van stays put and stores easily when not in use.
6. Easy to park – Most vans can be parked nearly anywhere and can fit into standard parking spaces in most public parking lots. Unlike the larger width of truck campers, vans are typically no wider than a full-size pickup truck and have no issues with pulling into a parking spot with vehicles on both sides.
7. Storage capacity – Camper vans are generally set up in a way that utilizes all the space within them. With cabinets, cupboards, overhead storage, drawers, and other storage areas, you are usually covered to pack more into a van than you might imagine from looking from the outside. My van has ample storage for all of my stuff including bikes that store neatly under the bed.
8. It can be stealthy – If you are looking to go unnoticed, you probably can’t do it in a truck camper. A van is your best bet and if your camper van resembles a cargo van, you will find it easy to blend into an environment and not be noticed or asked to leave in the middle of the night.
Cons
1. Not as versatile – A camper van can only be used as one thing; a camper van. Unlike a truck camper, you can’t take the living area off and then use the rest of the vehicle as your personal vehicle. Although some vans do have modular areas that come out or fold away to open up the space, this still isn’t the same as having a dedicated vehicle.
2. Not well suited for off-road excursions – You probably won’t be taking a van off the main roads very much unless you have a four-wheel-drive van. Even then, a van will never be as well suited for off-roading the way a pick-up truck will be.
3. Can be more expensive – Vans can be quite expensive with some of them reaching amounts over $100,000. The pricing can get out of hand and is ultimately the reason I decided to convert my own van. If you choose a DIY option, the price can come down considerably but can still be a large expenditure.
4. Living space is dependent on vehicle – Unlike a truck camper, the camper van is one unit. If something tears up mechanically in your van, your whole living area is gone while the van is in the shop. In contrast, if you have a truck camper and something happens to your truck, you can remove the camper and continue using it.
5. Poor towing capacity – Don’t expect to tow much with a camper van. Of course, I can’t imagine what one would want to tow anyways since you have all you need enclosed in the van, to begin with. Many people like to tow trailers with motorcycles or other toys to use while out on the road. Most camper vans max out around 5000 pounds of towing weight.
6. Requires registration – When you own a camper van, it needs to be registered which means you will have to pay yearly taxes and fees on it. This adds to costs and if you have other vehicles, the fees can begin to get out of hand.
7. More to insure – You’ll need insurance on your van and that can be another expensive cost. This cost will differ from person to person and from company to company but it’s important to remember costs like this as you set on a search for a camper van.
8. Requires regular maintenance – Just like any vehicle, a camper van will require regular maintenance such as oil changes, tire replacements, and other regular services. You could also have mechanical issues that add even more costs and make it a headache to deal with.
Truck Camper
A truck camper is an outstanding option for those who want more versatility in their travels. If you are looking to get off the beaten path and travel the roads unknown, a truck camper could be a great option for you.
Since a truck camper is just a shell and is independent of a vehicle, it can be fitted onto any truck designed to carry the load. Many people prefer to use a four-wheel-drive truck that allows them to have an off-road adventure truck with living space on the back of it.
It’s a great solution for those who want to travel and don’t require a lot of space. Similar to camper vans, they are not as spacious as other types of RVs but you already know this.
It’s not the function of a truck camper to provide a ton of living space. The point is to get you to where you want to go while also providing a comfortable living area.
Pros
1. Can be used only when needed – The cool thing about a truck camper is that you only load it up and use it when you need it. When you aren’t using it, you have your truck to use in any way that you wish without having a loaded camper on the back of it.
2. Stores away when not in use – As long as you have a place to store your camper when not in use, it can be tucked away nicely out of the way. This allows you to free up your truck to use as a personal vehicle or to use to haul items the way a truck is designed to be used.
3. Versatile and able to go offroad – If you have a truck capable of getting off the beaten path, you can do it with your home attached. Most campers are limited to where they can go but a truck camper allows you to drive to places you wouldn’t be able to otherwise.
4. Cheaper than a camper van – Assuming you already have a truck or don’t spend an arm and a leg for a fancy truck, this type of camper may be cheaper than a camper van. However, they can get very pricey depending on the model and features you choose.
5. Some can be very spacious – They are surprisingly spacious inside and provide ample room for moving around and offer a comfortable area to live. Looking from the outside, you may think that they are tiny and limiting. However, one look inside and you may be surprised by the amount of space you have.
6. No need for registration in most states – Your truck will need to be registered but the camper itself will not in most states. You will need to check with your state for the final verdict on this. All states are different so the requirements may be different depending on where you live.
7. Low insurance costs – You may be able to add your truck camper onto your regular car insurance depending on your insurer. If not, you’ll want to get specific truck camper insurance. Either way, the cost is minimal unlike insuring an entire vehicle. Insurance can protect your camper from damage as well as theft, fire or vandalism.
8. Low maintenance – Unlike a camper van, a truck camper doesn’t require much ongoing maintenance. Other than the normal wear and tear maintenance that all campers require such as caulking and winterization, the camper itself is independent of a vehicle. This means there is nothing to fix or replace regularly. Of course, you will need to maintain the vehicle that the camper rides upon.
Cons
1. Heavy – Truck campers can get quite heavy and can require a heavy-duty truck to haul them. I have a Nissan Frontier and the options available for a small truck like mine are hard to find. The ones I have found are near the maximum amount of my truck’s payload. Of course, a larger truck will be able to haul one with no problems but just know that a fairly heavy-duty truck is required to safely haul one.
2. Expensive for what you get – Some truck campers can go upwards of $50,000 or more. That’s expensive for a box with a living area in it. This price doesn’t even include the truck that is needed to carry it. You may end up paying $20,000 – $30,000 or more for a truck that is powerful enough to haul something like this.
3. You Need a truck to carry it – As mentioned above, a truck is needed to haul a truck camper. You have to figure this cost into your total price when doing your shopping. Unless you already have a truck, this could be a big added expense.
4. Inconvenient to load and unload – Although you can remove and replace the camper whenever you want, it isn’t the easiest thing to do. It can be difficult and an annoying part of the process.
5. Poor fuel economy – With a few thousand pounds of a camper on your truck’s bed, you can expect the fuel mileage to go out the window. Depending on the truck and camper configuration, people have reported getting 10 – 12 miles per gallon which is considerably less than the 20 I get with my loaded camper van.
6. Wider than a camper van – Some truck campers can be wider than most camper vans. This makes it a little bulkier in the rear of the vehicle, making it a bit more tricky to park in some locations. Some may be difficult to park in parking spots with vehicles on both sides.
7. Separate from the truck – You have to get out of your truck to access the rear living space. If you are in bad weather or need to get out of a sketchy area, this can be a negative. This is unlike the camper van that allows you to access the living area without leaving the vehicle.
8. It can be more difficult to get in and out of – Sometimes, the entrances are not well suited for people who may have a difficult time with it. The entrance is usually up higher and requires steps or a built-in ladder that one can climb up. Even the inside living area generally requires some climbing to get up into the cab-over bed.
9. Greater height than a van – This may not be a big deal but it was something that turned me away a bit during my search. Truck campers have a generous amount of headroom and when combined with the height of sitting in the bed of your truck, the overall height can be much more than what a high roof van is. My Ram Promaster is 8.9 feet tall at its highest point. Many truck campers rise to over 12 feet. My concern would be driving in high winds and areas with low clearance.
Final Thoughts
Whether you choose to go with a camper van or a truck camper, you will probably be pleased with either one. Both are nimble and will take you to places that you may not be able to go with larger motorhomes or RVs.
Though both are limited in space, they each provide a living area that is big enough for comfortable living. Both have pros and cons so it’s up to you to decide which one suits your needs the best.
If you already own a large truck that can handle a camper, it may be a good idea to go this route. On the other hand, if you will need to buy a truck plus a camper to go on it, you may be approaching an expensive undertaking.
Whichever you choose, the idea is to get out into Mother Nature and explore and both of these options allow you to do just that.
Owning a Class B Motorhome or a camper van can be very rewarding if you are the adventurous type and you are interested in travel and outdoors.
Unlike other types of RVs, the purpose of a Class B is to get you on the road quickly and make it easy to go from place to place.
Living in a van can be very different from living in a large RV so you’ll have to understand this difference before you commit to buying one. However, the benefits are aplenty and can make your travels fun and exciting.
Having owned a camper van and spent time traveling and living in it, I have seen the benefits of owning one. I have been around the RV industry for a large part of my life and have spent much time outdoors.
I’ve done a lot of research on my own and have concluded that a Class B RV is the best option for my needs. I prefer a minimal approach to the camping lifestyle and do not like the idea of hauling a large mobile home around.
If you are like me and think that a Class B might be right for you, keep reading and learn 10 good reasons that you should buy one.
1. You’ll Use It More
With a class B motorhome being so small, you are likely to use it more often than you would a larger motorhome. Large motorhomes can be cumbersome and difficult to get around in so they often sit and do not get used as often as they should.
When you have a small RV like a class B, it is easy to hop in it and take off on a journey without the hassles typically associated with other RVs.
Many people who have travel trailers, fifth wheels or other larger motorhomes use them a few times and then they sit. They become more trouble than they are worth and then end up for sale.
I’ve seen this happen over and over in my neighborhood. A new RV will show up in someone’s driveway and it won’t be very long until you see it up for sale. People generally change their minds after the new wears off and the reality of the hassles involved sets in.
A van will get used more because it’s easier to manage out on the road and makes the journey more fun and adventurous. Not to mention, it takes up much less space in your driveway and it’s easy to move out of the way if needed.
2. Easy To Drive
If you can drive a car, you can drive a class B motorhome. Since a Class B is nothing more than a van, it makes it simple to drive.
Although some are larger than others, most are within the 19 – 25 ft length range and most of them fit in standard parking spots.
This is a huge benefit and one that is necessary if you are planning on staying in places that have limited parking.
Most Class B motorhomes have a nice, comfortable cabin area with comfortable seating and plenty of field of view. In today’s vans, you will feel as though you are driving a luxury car instead of a cargo van, which is what camper vans are built upon.
Compare this to a large Class A motorhome that many people are intimidated to drive, including me. If you have never sat in the driver’s seat of a Class A, you should go check it out. If you are aren’t used to being in something that big, it may make you think twice.
What’s more, there are some roads that you might not be able to access with a large motorhome and you will need to know in advance. A Class B usually doesn’t have this problem.
3. Easy To Maintain
A van is very easy to maintain and can usually be serviced at standard auto mechanic shops. My van is built on the RAM Promaster chassis so I can take mine to most any Dodge dealership to have the oil changed, tires rotated or replaced and other service completed.
Many Class B RVs are built on the Ford Transit and this vehicle can be serviced at nearly any Ford dealership. These types of vans can also be serviced by any mechanic shop as long as they have a high enough shop entrance door and a strong enough lift to raise the van.
Other types of motorhomes and RVs require that you take them to dealerships that only service RVs. This makes it less convenient and it’s easier to just be able to drive into any mechanics shop to get regular service.
Beyond that, a Class B can easily be DIY serviced if you don’t mind getting your hands greasy. I change the oil in my van myself as well as keeping other fluids topped off.
It’s not much different than servicing a standard passenger vehicle. I find it to be a great benefit of owning such a small RV.
4. Better Fuel Mileage
With a class a motorhome, you are looking at around 7 to 13 miles per gallon in fuel economy. In contrast, the class B RV generally ranges between 18 to 20 MPG or more.
This is substantially better and in today’s world where fuel costs more than it did in the past, it’s becoming a necessity to have a vehicle that is designed for better fuel economy.
My class B camper van tends to average around 18 miles per gallon. Depending on where I am traveling, I can usually expect to end up within this range during my trip.
I have calculated this average after traveling on mountain roads as well as long flat roads. I have gotten well over 20 on flat interstate roads and less than that on roads that have more hills, twists, and turns.
This kind of fuel mileage isn’t much different than I get from my Nissan Frontier pickup truck. I’ve been impressed with the fuel mileage that my van has gotten and I’m happy going on trips with it knowing It won’t cost an arm and leg at the pumps.
5. Allows You To Get Outside More
Owning a large RV can have its benefits but their large size makes them just another home away from home. If you live in the RV full-time, this can be great.
However, for those who use motorhomes for traveling, the larger ones can distract from the overall adventure of the trip. Of course, this is my opinion and I totally understand larger families needing larger RV units.
A camper van is too small to park it and just spend time sitting inside of it. With something this small, you are forced to get outside and enjoy Mother Nature.
The larger motorhomes and RVs are big enough that you can park them and then sit inside watching TV, playing games or doing other activities without feeling cooped up.
I don’t know about you but when I’m traveling, I’m not interested in spending time inside. I want to be outdoors exploring the place I am at. If I were going to sit inside, I might as well stay at home.
The world is your home when you travel in a Class B. The van itself just provides a safe shelter and a place for privacy and to eat and sleep.
6. Go More Places
Some RV parks and National Parks don’t allow larger motorhomes. In this case, a smaller Class B is ideal as you are sure to get a spot in nearly any public campground.
Class B RVs generally range from 19 feet to 25 feet long and are usually about as wide as a standard vehicle. A vehicle like this will fit into almost any parking spot therefore it is safe to assume that you can take it anywhere.
As an example, at the time of this writing, Mather Campground at Grand Canyon National Park only allows for RVs and trailers up to 30 feet. There are also other campgrounds in this area that have a limit of 30 feet as well.
Staying at these campgrounds would not be an issue if you are driving a 20 foot Class B RV.
7. You Can Be More Stealthy
Park a Class A motorhome or a fifth wheel on the side of the road or in a public parking lot and see how long you last. Likely, you won’t last long. Anyone knows that a large rig like this has someone living inside of it and you may be asked to leave.
On the other hand, if you were to park in the same area with a camper van, you may go unnoticed. Although even this is unlikely since many class B motorhomes have features that set them apart from standard vehicles. Many people still aren’t sure if it is a motorhome or not.
This is easier to achieve in a camper van that is built primarily for stealth camping, also known as a stealth camper van.
Some class B vans such as the Pleasure Way 2020 Tofino are hard to tell if they are camper vans or not. The Tofino has a pop-up roof and when the roof is down, it’s still livable but doesn’t really look like something someone is living in.
Having a van like this can allow you to slip into a parking spot and go unnoticed.
A great way to achieve this benefit is to build one yourself. A stealth camper van is easy to build using a cargo van but you still have to be careful because as the popularity of these has increased, so has other people’s awareness of them.
8. You Can Live Minimally
The Class B RV forces you to live a minimal lifestyle. This may not be the life for you but in the modern times we live in where we all have so much stuff, it’s nice to get away from the consumerism that drives our hectic lifestyles.
When you travel in a Class B, there simply isn’t enough room for your stuff to come with you. Because of this, you are forced to enjoy the journey more.
Traveling in a larger motorhome allows you to bring more with you or collect more stuff while out on the road. A small van will keep you from doing this because you won’t have a place to put it all.
When you downsize your stuff and opt for enjoying the smaller things in life, you begin to appreciate the things that you have more. The small size of a Class B allows you to focus on enjoying your journey more.
9. It’s The Only Vehicle You’ll Need
When you head out on a journey in a camper van, you don’t need anything else. Your van serves as your home on wheels but it also serves as your get-around vehicle.
If instead, you travel in a larger motorhome or a travel trailer, you will need another vehicle that you will be able to use to get around once you are at your location.
Many RVers tow another vehicle behind their motorhomes such as a Jeep or a smaller car that is lightweight. Those who travel with trailers or fifth wheels use the vehicle that they used to tow the trailer.
Towing a second vehicle adds to the size and load which also affects your fuel economy and puts more strain on your engine. This is something to think about as you consider the long term costs associated with the RV you choose.
With a Class B, you can drive it to your location and then you can travel around using the same van. It becomes your personal vehicle once you get to where you are going. This is convenient and makes traveling much simpler and easier.
10. It Costs Less
Although some camper vans can be very expensive, the overall cost can be less when you consider the costs associated with a typical motorhome solution.
As mentioned in #9, when you choose to purchase a Class B RV, you will not need another vehicle. You will spend your money on the van and nothing else. Along with that comes exceptional fuel economy, lower maintenance costs and overall ease of use.
Compare that to purchasing a Class A motorhome. When you buy this type of large rig, you will probably need a smaller vehicle to tow along behind you.
The cost of the RV and the car will most likely be more than what you would pay for a camper van. Moreover, you will have higher fuel costs with the larger rig and also higher maintenance costs. Not to mention the inconvenience of driving the massive rig.
The same can be said with a travel trailer or a fifth wheel. Although, this will depend on whether you purchase new or used and whether you already have a vehicle to pull it. Purchasing a travel trailer and a vehicle to pull it can certainly put you at a higher cost than a camper van.
I looked at doing this very thing but decided in the end that a van would cost me less and I would enjoy driving it more.
Conclusion
Owning a Class B motorhome can be a lot of fun. It makes traveling exciting and allows you the freedom to go anywhere you want. The 10 reasons listed above are what I discovered during my search for the perfect RV.
My search began with Class C type motorhomes and I quickly moved onto travel trailers. In the end, I found camper vans and decided that this type of motorhome was perfect for my needs.
It offered everything I needed without being too expensive.
If you have a large family that will be traveling, a Class B may not be the right choice for you. However, if you are an adventure seeker and you like to have freedom when you travel, a Class B could be the perfect option.
There are probably many other reasons that you should purchase one and some might argue against these reasons but hopefully this will give you something to think about on your journey to find the perfect motorhome.
Building a custom camper van can be a huge challenge. Especially for those who are not proficient in DIY construction projects or those who don’t have tools or a place in which to work.
I know that it can be difficult because I went through the process.
I started from an empty cargo van and ended up with a finished camper van that I am extremely happy with and proud of.
There were many times throughout the process that I considered quitting and just selling the van as-is so that someone else could finish it. It was difficult and was also exhausting as I spent so much brainpower trying to figure everything out.
I worked hard on it but there were times I felt like I was getting nowhere. I set deadlines for each section only to see those deadlines come and pass while I wasn’t even close to being finished with that section.
Yep, my enthusiasm was waning with each day of this build.
I’ll be the first to admit that my build would’ve gone much smoother if I had just settled for certain things. Instead, I was meticulous in the process and wanted my finished van to look as though a professional had done it. I take pride in my work and wanted my camper van to show it.
If you are looking to build a van, I hope the following instructions can help you. I’ve already done the hard work and I hope that I can explain what I have done so that It won’t be so difficult for you.
After all, the hardest part is figuring out how you will do it and the exact tools and products you need.
The outline below details the exact steps and in the same order that I completed them in order to arrive at a finished camper van.
It would be a super long post if I were to go into detail on each item. Instead, I have given a summary and provided a link to a more elaborate post for each section in case you want the entire story.
Parts & Tools I Used
Before we begin, learning what parts you need and the tools that can make the job easier is essential for completing the job with your sanity in place.
I was lost when I first began my build. I thought I knew exactly what I needed but I was way off on some parts. Building a custom camper van is not a standard practice so you will have to search high and low for solutions unless you know specifically what you are doing.
The first step in the process was to decide upon a van that I would use for the build. For this, you need to decide what you want. Initially, I planned on purchasing the smallest van I could so that I would have a cheap van that I could use. I didn’t want to spend a fortune on the build.
However, once I really got into it, my needs changed. There were some important questions I had to ask myself during the process to come to a conclusion.
Do I want a van that I can stand up in?
Do I want a new van or is a used one ok?
How small is too small?
Would I rather have a van that uses gas or diesel?
By asking questions like these, I was able to narrow down my search and learn exactly what I wanted.
My goal was to have a minimalistic solution to a camper van so I didn’t want something huge but it couldn’t be too small either.
The sweet spot van for me was the RAM Promaster 2500 159″ wheelbase.
My simple layout plan at the beginning of my build
The fun part comes during the layout process where you can dream a little and design your van the way you want it. This is where the benefit of building your own van versus purchasing a manufactured camper van has its benefits.
With a manufactured class B motorhome, you are stuck with whatever floor plan the manufacturer has chosen so if you don’t like one, you have to find a whole new brand or manufacturer.
With a custom build, you have a blank slate and can do what you wish with the space you have.
This doesn’t have to be a difficult process and you don’t need fancy software or an app to perfectly design your van. You just need an idea in your head, a pencil, and paper or a tablet with drawing capabilities (I used the iPad with the Apple Pencil).
Prepping Your Van
If you purchase a used van, there will probably be some work to do before you can get started. There may be commercial shelves installed, holes in the floor or other things that you’ll have to clean up before you can begin.
In my case, my van had tie-downs mounted to the floor. There were also metal tracks and other wood planks mounted to the floor.
I purchased my van used and someone used it to haul a motorcycle and used these tie-downs to strap the bike in. I had to spend a lot of time uninstalling these and then patching the holes and sanding areas that needed it.
After that, I applied a Rustoleum rust-prevention paint to the floor. It looked like a brand new van floor after I was done with all this work.
After my van was prepped, I started on the subfloor and this was my first experience into the van build. The subfloor is the obvious place to start and probably the first place that anyone would start.
You have to do the floor before you can do anything else so this is typically the beginning point to any van build.
My subfloor consisted of 1×2 furring strips to build up an area in which to add insulation and a final 1/2 inch plywood flooring that would allow me to have a straight and even floor throughout the van.
Although many people do not use insulation on the sub-floor, I found it to be a great added addition and besides adding some insulation from heat and cold, it also helped to deaden the road noise making for a quieter camper van.
If you don’t install a roof fan in your van, you are asking for a hot and stale van in the summertime. A roof fan can be great for allowing airflow whether you are pulling air in or out of the van.
My roof fan works in conjunction with windows to move air through the van. This makes all the difference when you experience a warm summer night and need airflow in which to make the experience more pleasant.
A roof fan can also be used as an exhaust for when you are cooking or taking a shower in your van. My roof fan is used to pull moisture out of my van when I’m taking a shower since it is located right next to it.
It is also close enough to my kitchen that it will pull moisture and cooking odors out of the van allowing me to remove unwanted smells from the living area.
I chose the Maxxair fan for my van and I love it. Although it can be one of the scariest things to install, it’s really simple and I have documented my process.
Insulation can be a tricky part of the van build because some people skip this or do a minimal job on it. I, however, feel that this part is required if you prefer a more temperature-controlled environment.
Installing insulation doesn’t mean that you are making your van immune to the hot or cold weather. It simply means that you are adding additional layers that allow heat transfer to be slower than it would otherwise.
This can allow your van to stay cooler in the summer and trap heat better in the wintertime.
Many people argue over the best type of insulation because there are many different options that you can use. I used Thinsulate by 3M in my build and I am glad that I went with it.
It was super easy to install and although it was probably one of the most costly ways, I saved a ton of time by using it.
I was able to insulate the ceiling, walls, and floor of my van using a combination of Thinsulate and rigid foam board. I also used quite a bit of Reflectix in the process as well.
The Reflectix was installed over top of the Thinsulate with a small gap in between in order to help keep the heat transfer to a minimum.
Perhaps the most important part of the van build is the bed that you will sleep on during your travels. The bed needs to be comfortable and not just a makeshift item.
I wanted my bed to be something that was just as comfortable as what I was used to in my house.
My bed-frame is very simple and was one of the first items that I built in my van. My bed consists mainly of two support braces on each side of the van with three supports spanning between the two support braces.
On top of that, there is a slat system where my mattress rests.
I built my bed high enough so that I can store items underneath it and especially my bikes. I intend to have my mountain bikes with me during my trips because I love to ride.
I finished my bed off with a comfortable memory foam mattress. This mattress works well for my camper van and provides a nice comfortable place for me to sleep while out on the road.
The next step in my build was to install furring strips on the ceiling so that I could install the cedar wood covering. This is a step that I consider necessary but many people may screw their finished ceiling directly to the metal roof.
Why did I choose to use furring?
I wanted to create a small gap between the ceiling and roof so the insulation would be more effective and also have room for electrical wires.
I wanted to utilize the holes in the ceiling braces to install the furring strips. Once the furring strips were installed I could screw my ceiling to it, giving me a more secure final product.
I used poplar wood for the furring strips and was able to utilize the wood that was in my van when I purchased it. I cut them into small strips and attached them to each support of the ceiling in three sections.
This worked great for me and allowed me a sturdy ceiling in which I could easily screw in my cedar planks and also staple wires for my lights.
I was able to utilize the holes that were already in the ceiling supports by using Rivet Nuts. I installed them using a rivet gun so that I could attach the furring strips using bolts.
This meant that I didn’t have to drill any holes. Although, there were a couple of places where I did end up drilling new holes.
The rivet nuts hold strong and gave me a very sturdy base for my ceiling.
Shower Framing
After the ceiling furring was installed, I wanted to start on framing the shower walls before installing the finished ceiling.
I will have a different finished ceiling in the shower so it made sense for me to do this so that I could build the main area ceiling around the shower.
The shower walls were built and attached to the floor as well as the ceiling furring. Installing the shower at this point allowed me to frame some walls that were completely squared and straight.
Those walls would become the source for aligning other structures that were built later on.
At this point, I built the side walls and the rear wall frames. This included finishing the outside of the shower with 1/4 plywood walls.
I did not close any of the inside walls up because I would still need to install insulation in the walls and run wires for the shower light and switch.
Framing the shower was my first realization that this build was going to be difficult to get things straight and square. It isn’t like a house where you are already starting with a squared structure. With a van, you have to deal with the curvature of the van as well as the likelihood that it will never be level.
Once the furring strips were in place and the shower framing was installed, the wiring was next. My floorplan had 7 LED lights in the ceiling. I needed to run wires from each of these 7 locations to where the light switches would go.
I made sure to do this before I had installed anything over the walls or ceiling so that I would have full access and space to run the wires.
I used 14/2 wire for this application which is overkill for these types of small voltage devices. However, it’s always better to use the thickest wire you can when you are dealing with electrical devices. At least, that’s my thinking.
The LED lights that I chose use very minimal voltage and current.
Installing the wiring was an easy process. I connected each light in parallel on the circuit where multiple lights were on.
In simple terms, this just means that all lights connected to the circuit by connecting red to red and black to black.
Each circuit went to a switch that will be used to control the lights on the circuit. In my case, I had three different circuits; front lights(4), rear lights(2) and shower light(1).
Now that the wires were all run for the lights, I could move forward with installing the wood covering for the ceiling.
Ceiling Cedar Wood Covering
I chose to use cedar on my van ceiling for a few reasons.
I love the look and smell of it.
It is resistant to mold and mildew which is important in a small living area that is prone to moisture buildup.
It’s very lightweight so it’s perfect for the ceiling.
Installing the cedar wood was easy for the most part. It’s much easier if you have two people doing it but a single person can get it done just as well with a little patience and maybe a few four-letter words.
The cedar planks that I chose were 1/4 inch tongue and groove so the key was to get the first one perfectly straight and then all of the other pieces fit onto this one to provide a straight, perfectly finished ceiling.
I used #6 3/4 inch screws to hold the planks into place and I screwed them directly to the furring strips that I had already bolted to the frame of the van ceiling.
I used a miter saw with a 60 tooth fine-finish blade to cut the planks to lengths as I was installing them.
I also cut holes that were 2 1/4 inches in size in the pieces where the lights would go. The lights that I chose simply push into the holes and hold themselves into place with spring clamps.
This was the first point in my van build that I felt a sense of accomplishment. Looking up at the finished cedar ceiling, made it feel like it was finally taking shape and I was excited to keep moving forward to see how the finished product would turn out.
Once the ceiling wood was all installed, I was left with a few holes throughout the van. There were six holes in the main living area and one in the shower.
All of the wires had already been run to each hole so all that was left to do was to connect the wires to the lights and then push the lights into the holes.
Before doing this I had placed some small, 3/4 inch pieces of wood above the cedar wood at each hole location to provide a tiny bit of spacing for the lights. I did this because I did not want the lights touching the insulation.
I wasn’t sure how hot the lights would get so I wanted to make sure there was enough breathing room on the backside of the lights for them to dissipate heat.
You can feel some heat coming off the back of the lights so I didn’t want to take any chances on the lights heating up the Reflectix and causing a fire.
The lights fit perfectly into the holes and the connections were easy to make.
Cabinets
I decided to go with a unique area in the front of my van that would be a combination of different cabinet types. I came up with this idea after a lot of thought on how I wanted the area to be once it was finished.
The top cabinet, as well as the long, floor to ceiling cabinet that is installed next to the shower wall, is designed to enclose an area that will have a bench with a lagoon table as the dining area.
I chose this location because I wanted the bench facing towards the sliding door. There will be a window on the sliding door and I want to be able to sit on the bench with a full view of the outdoors.
Besides that, I can always have the sliding door open on nice days and enjoy full views.
Since I already had installed the shower walls, it was easy to build the floor to ceiling cabinet next to the shower. Once that was built, I just continued another ceiling cabinet towards the front of the van.
These cabinets will provide ample space for storage. The bottom area that comes out the same distance as the shower wall, will be a drawer and also a small area with seating.
Having part of the cabinet set back like it is opens the area up more when you are sitting on the bench. Otherwise, you would feel more closed in without as much of a view towards the rear of the van.
This front cabinet contains one of the electrical outlets that I’ll be installing so a wire was run for this during the process. The wire was run through the cabinet and the shower framing and will be routed to the solar charger under the bed in the rear of the van.
The rear of the van has one wall of cabinets that I added over the bed. I will only have rear cabinets on one side. The other side will need more space to provide plenty of headroom while sleeping.
These are done the same way the front cabinet is utilizing furring strips that I had installed on the wall.
Front Bench – Dining Area
Initially, I found the perfect bench online and considered ordering it. It was a perfect size and would fit perfectly in this area with just a tiny bit of customization. The problem was that it would have cost around $700.
I decided to tackle the build myself and copy the bench I had found. I built it to look almost exactly like the one I had found and after it was built, I installed it in the van. It was a perfect fit and the bench itself adds to the storage in the van.
The bench area raises, revealing an open space for storage and also the back of the bench opens forward to reveal even more space for storage.
I purchased the cushioning online at Ballard Designs which fit perfect. I had built the bench to fit the dimensions of this cushion. For the small square seating area, additional fabric was ordered and I had a small cushion created to match the larger one.
All of the cabinets and the bench were attached to the van using furring strips that I had installed on the wall in this area. I installed furring strips using rivet nuts as I had done on the ceiling.
The walls of my van were not done all at one time. I did them in sections starting with the front of the van. After the front cabinets were installed, I completed that area by closing the wall in using shiplap.
I love the look of shiplap and decided to use it throughout the van. It’s really easy to work with and looks great when finished.
The same shiplap was used in the rear of the van but there was an additional problem in the rear. I needed to create more space at the bottom of the wall where the bed goes. I did this by using furring strips to frame around the van supports on the wall.
It was a challenge getting everything straight but that’s where my creativity came into play and I figured it out. By doing this, I provided more head and foot room when the bed was installed.
This was a great choice to do and I recommend that you try to utilize all the space you can like this if you are going to be installing your bed sideways.
I chose to use simple electrical outlets that have built-in USB ports. These are basically power strips that are made to be mounted like a standard outlet. The other end will plug into a standard plug providing you with an extended outlet.
This works great for my build since I am using the Yeti 1400 from Goal Zero for my power source. This unit has two 120 volt plugs that I simply plugged these outlets into.
I chose to use dimming light switches for the living area and just a standard on/off switch for the shower. It’s nice having the dimmable option because the lights can be a little bright at times and it’s handy to be able to tone it down a bit.
It’s great for setting the mood.
The outlets and light switches were simple to install since I had already run the wires. I just cut the appropriate opening in the shiplap and on the cabinet wall where the outlet would go. They are held in with screws.
At this point, I still had one more switch left to install but it was to be installed in the kitchen cabinet and I had yet to install that.
Solar Panels
I Installed my solar system in various stages. The first step was to mount the solar panels to the roof of the van. When the time was right, I ran the wires from the solar panel to where my solar charge controller will be.
I ran my wires a little unique from the way most people do. Instead of drilling another hole in the roof of my van to run the wires, I utilized the rear back-up camera housing.
By doing this, I avoided the possibility of leaks from a new hole in the roof.
When I installed the wires through the camera housing, I used waterproof pass-throughs that does not allow water to enter.
If I decide to ever get rid of this, I can easily take the wires out of the camera housing, plug them up or even purchase a new camera housing for fairly cheap.
The solar panels are the flexible type and I mounted them on top of two layers of corrugated plastic and then I used double-sided tape along with Everbond to stick them to the roof. Again, I didn’t want to add new holes to the roof by bolting or screwing the panels down.
Tip: if you are installing flexible solar panels, you should use corrugated plastic or something that allows the solar panels to sit up off of the metal roof. This helps them to stay cooler and may increase their lifespan.
Many people have overheating issues with flexible solar panels mounted directly to a metal roof. Do yourself a favor and avoid this mistake.
Rear Half-Slider Window
At this point, I had most of the walls except for a small area in the rear where the window would go. I left this open as I waited for the window I had ordered to arrive.
Installing the window was another scary part of the process because another hole had to be cut. There is no room for error when you cut something like this and I certainly didn’t want to mess up and end up with leaks.
I paid attention and created a template that was a bit on the tight side. If you are going to cut a hole like this, it’s important to always err on the side of being safe rather than sorry.
I traced the template and cut the hole and it ended up being perfect. It was tight but a perfect fit.
After all was said and done, it was really simple to install once you get over the fear of cutting a hole in the side of your van.
Kitchen
My kitchen is pretty simple. It consists of a cabinet with doors and a few drawers and on top of that is the countertop with a sink and faucet.
I chose not to do a built-in grill or anything fancy. I prefer to use a portable propane stove so that it can be used inside or outside whenever I choose.
The hardest part of the kitchen build was the base for the cabinet. This is also called a kitchen sink base and I considered purchasing one unfinished from my local hardware store in the beginning.
However, if I was to do this I would’ve had to cut some of the back of it off and refinish it since the ones designed for homes are deeper than I needed mine to be.
In the end, I chose to build my own. I simply used my kitchen sink base in my house as an example and built it exactly like that except not as deep.
The sink I chose was not very deep but it is deep enough and provides a nice area to wash dishes and do your other normal kitchen activities.
I have plenty of counter space in which to place my grill when I want to use that. Once the kitchen base was installed, I was able to then place the light switch at the end of the base in an area where you can reach it as you walk inside the van. This is a handy spot and gives you access to it quickly as you enter the van.
I used butcher block for the counter and stained it with a honey stain and then covered it with multiple coats of lacquer.
I also installed the electrical outlet and a light switch for the rear lights in the wall behind the counter.
This is a handy area because I can use if for kitchen appliances and also reach it from my bed for charging my phone and using other small devices.
Swivel Seat
A swivel seat has been a difference-maker in the front section of my van. Once installed, it has allowed for a larger area upfront and is used in conjunction with my lagoon table to create a nice dining area.
The only problem is that you have to fight with someone to use it since it is the most popular seat in the house.
Eventually, I will add another swivel seat on the driver’s side but I have not done that yet. The reason I have been hesitant about this is that the swivel seat adds about an inch and a half in height to the seat.
I think that this might be a little uncomfortable for the driver.
However, the benefit of having the extra swivel seat may be worth the added height.
I waited until most of the construction work was done before installing the finished vinyl flooring because I didn’t want to damage the flooring with heavy items or tools. At this point in my build, the floor had been just a 1/2 inch plywood.
I even covered the plywood with a protective construction paper so it would stay pristine. It was time to install the finished flooring once all the built-in items were in place including the shower, cabinets, seating and kitchen base.
I worked around all of these items as I installed the flooring.
I wanted the finished flooring in the van before closing off the bed area and installing the fridge.
The vinyl plank flooring was really simple to install and it turned out great. I installed it on the entire van floor including underneath the bed. I used three 20 square foot boxes of the product and still had some leftover.
I would estimate that the entire van took around 50 square feet.
The plumbing was done in various stages since I needed water supply on both sides of the van.
My plumbing system is very simple and consists of one large 16-gallon freshwater container. This container supplies water to my shower as well as my kitchen sink faucet.
I used PEX tubing for my supply lines since it is so easy to work with and if done right, is leak-free. It took me a while to decide to use PEX. Initially, it was a bit intimidating since I don’t know much about plumbing.
Once I started working with it, I realized it was simple to use and perfect for a van build.
For my kitchen gray water, I use a 5-gallon container under my sink that the water drains into and it gets dumped as needed.
For the shower, my current solution is to let the water drain right out of the bottom of the van. This will change in the future as I install a permanent gray water tank underneath the van.
The plumbing isn’t much and didn’t require very long runs of tubing to accomplish.
Refrigerator
One of the more difficult items to install for my build was the refrigerator. I went with a top-loading, Dometic CFX 75DZW.
After all my research, I determined that this one would provide the most refrigerator/freezer space while using the least amount of electricity.
It also allowed me to store it under my bed out of the way. I used full-extension slides to mount it under my bed and then created a shiplap wall that it neatly blends in with.
When you want to open the fridge, you pull it out like a drawer, open it up and get what you need. Once you are finished, just push it back in and it’s out of the way.
I used latches to keep it closed. Although, this may change because the latches that I chose make a little rattling noise while driving.
Initially, I purchased the slide specially made for this refrigerator but I ended up not using it the way it was because it doesn’t have full extension. It was a big letdown and I don’t suggest buying it because it’s easier and cheaper to create your own solution.
I did modify it since I had already purchased it and made it work. In the end, it worked out fine but only after completely modifying it.
I had already taken some trips in my van before I installed any of the cabinet doors. I had no issues with items moving around or falling out but I wanted to complete the cabinetry by having doors on them.
This was a time-consuming process as I had to build each door by hand and paint each one. I also had to install the hinges and align each door properly. I took my time on this because it wasn’t a necessary part of the build in order to use the van.
I stuck with the Shaker style in my design for the cabinet doors which I custom built. It was made easy by using a router with a tongue and groove bit.
It was a challenge getting them to look perfect but I got the hang of it after a while. With the help of a Kregg Jig and lots of clamps, I was able to create doors that I’m happy with.
Final Touches
The final touches on a van will never end but some of the final touches and clean-up I had to do after all was said and done include the following.
Paint all walls & cabinets
Install door knobs & handles
Install latches to hold doors closed
Patch any remaining nail holes and paint over them
Cover open areas in sliding door and rear doors with a cloth covering
Neaten up wires on the electrical system
Clean up any messy areas
Add tie-down eyelets in areas where needed (shower, under kitchen cabinet)
Install paper towel holder
Install towel holders
Install front security curtain
Add running boards on each side of van
The list goes on and on and I’m sure I will find more items to touch up or improve on as time goes by. When you build something custom like this, there’s always something that you can find and improve regularly.
Tips
If you have never built a custom van for yourself or do not have a lot of experience building anything, you are in for a roller coaster ride.
There are many ups and downs along the way and there will be times when you feel like you are not accomplishing anything. On the other hand, there will be different stages of your van build where you will feel as if you have accomplished a lot.
Here are a few tips that I have learned from experience and hopefully they can help you along the way on your conversion.
Be flexible in your design plans because not everything is going to go as planned and you may need to change things around.
Don’t spend too much time on insulating your van. I spent way too much time on this and in the end, it doesn’t make that much of a difference.
Take your time, unless you are in a hurry to get it done. Slow and steady will ensure that you end up with a properly designed and built van.
Budget more than you think it will cost because it will likely cost more.
Do everything with the end in mind. Build everything with the knowledge that you could possibly sell it someday. This will help to ensure that you won’t cut corners and it will be done right.
Final Thoughts
Building a van is quite a challenge but is not so difficult that it can’t be done. I’m living proof that a van can be converted to a camper and become a nice living space.
I’m extremely happy with the way my van turned out and I’m proud that I was able to make my plan work out in the end.
I believe that creating a custom conversion van is a great way to acquire a motorhome while spending less money. It gives you a chance to do it your way and create something that suits your needs.
Research and plan accordingly and your build will be much easier. There are many moving parts to a properly converted van so make sure you take your time and plan each system in advance and you will end up with something that you can be proud of.
DIY camper van conversions are popular for good reason; they save on costs and allow you to build a camper van to your exact specifications.
Rather than purchasing a manufactured motorhome that may have amenities that you don’t like or need, a custom-built conversion van allows you to make use of the space within the van to create a living area the exact way you want it.
In general, when converting a camper van, you will take a work van or passenger van and convert it to a camper. This is accomplished by installing a living area inside of it so that it can become livable. A van like this can be used for traveling or camping.
Many people even use vans such as these as their main residence. It’s a good option if you like to travel and you want to live life instead of just going through the motions in life and waiting until you’re retired to be able to enjoy life.
A van like this can make for an awesome living area that makes a great miniature RV that can easily be driven around and taken from place to place. It makes it super easy for traveling.
While it is a fun adventure to convert a van like this, one would have to wonder how difficult it is?
It can be a challenge to convert a van to a camper but it is easy to accomplish as long as you have a plan. There are more challenging layouts and features but for a basic camper van that provides a safe place to live, the process can be surprisingly simple.
The biggest challenge is figuring out what you want and how to accomplish it.
This is what I experienced when I built my camper van. I didn’t know what I was doing, although I was very handy with woodworking and general construction projects.
I still had to rack my brain quite a bit to come up with each system that I had in my van build layout to make sure that it was in good working order and looked high quality.
My build consisted of a lot of four-letter words and creating things only to tear them back out and re-create them the right way.
I was the only one working on my van so it was a challenge because I didn’t have anyone to bounce ideas off of and help me to stay on track with what I was doing. I really had to dig deep and stay immersed in learning and research what I was doing.
There were various parts of the van that I would say was much more difficult than other parts. Of course, this will depend on what you’re good at and what you’re not and what you have experience in and what you don’t.
For example, in my case the plumbing, as well as the shower install, was the most difficult part of my van build.
This required the most thought as far as building the frame for my shower and making sure that it was not going to leak. Being able to plumb the right way was a challenge because I knew nothing about plumbing.
I didn’t want to just put things together in any old way because I wanted to maintain good resale value and so doing it the right way was critical to me.
I wanted to make sure that when I’m done using it, someone can buy it from me and feel confident that everything in it was done up to professional standards.
I’m very picky with the way I do things so you can bet my van was meticulously done and so the experience I had with building mine may have led me to be more challenged than others.
With a custom van conversion, there isn’t a one-size-fits-all manual for doing the job. Each van and layout is different so it’s often difficult to initially frame the van so that things are square.
Deciding on a floorplan can also be a challenge but it is crucial to understand what you want before you begin building it.
Even after deciding on a floorplan that you love, you can bet that there will be something you wish you had done differently in the end.
Best Van For Camper Conversion
There isn’t such a thing as the best van. For everybody, this is going to be different. For me, the best van was a RAM Promaster cargo van because this was the size that I needed and it was also fairly straight-walled inside so that allowed me to frame the van easier.
I also liked the width of the Promaster because it is wider than most other vans on the market. The width allows for a bed to be positioned sideways which is exactly what I wanted.
Many vans are too narrow to do this. If you choose a Sprinter or a Ford Transit, these will not allow you to do this unless you are super short.
I’m 5 foot 10 inches so I am definitely not tall but I am not super short either. The Promaster allows me to sleep completely stretched out in the bed and still have room on either side of my head or my feet.
I would not be able to do this in the Mercedes Sprinter or the Ford Transit.
Of course, you don’t even have to use a cargo van or a work van of any kind. You can choose to use a passenger van and often these work good for van conversions.
If you do not care about a van that allows you to stand up and want something that will allow you to travel and sleep in it, a passenger van could be the answer for you.
Passenger vans are reliable and are easy to maintain so they make the process of owning one as simple as owning a family car. Not to mention, it will likely be cheaper if you decide to go with a passenger van.
Other cheap options that you can choose might include the older Ford Econoline or the Chevrolet express. These two are both work vans but they are low roof and don’t allow you to stand up and move around very easily.
So, the best option will be different for each person but if you are looking for something that you can convert and have the end result similar to a manufactured class B motorhome, you’ll probably want to lean towards one of the high roof cargo vans.
How To Convert a Van Into a Camper Van
Converting a van can be rather detailed and too long to write about in a blog post. That’s what this site is about and details my journey into doing this very thing.
I converted my Ram Promaster cargo van into a camper van and I’ve written much about each section and I’m still writing as I complete each section or make changes to my van build.
Converting a camper van consists of a few major areas with a lot of minor details in between. These major areas can be summed up as follows:
Choosing a van
Insulation
Installing a roof fan, windows, vents, etc.
Installing a bed
Installing a dining area, seating area
Storage areas
Flooring
Refrigerator
Electrical, lights
Plumbing
After these main areas have been chosen and created, most people choose to go even further and make it more of a home by installing other features.
Things such as:
Shower / Toilet area
Heating
Air conditioning
Roof racks
Solar
A van conversion can be made easier by going one section at a time. For example, my main concern when I first started on my van conversion was doing one thing at a time. My first order of business was to install the sub-flooring.
Once the sub-floor was finished, I moved on to another section which for me was the insulation. I worked on one part at a time and never thought about the other parts until I was done with the one I was working on.
When you chunk it down like this, it makes the entire process seem much easier.
Read more about my entire van build here.
How Much Does a Camper Van Conversion Cost?
The final price of a camper van conversion comes down to the type of van you purchase combined with the complexity of the layout and the finishing touches that you use.
Not counting the price of the van, you may find yourself spending upwards of $30,000 for a van build.
On the opposite end of the spectrum, some people spend as little as $1000 or even less for a simple and basic camper van conversion.
My van build cost around $10,000 to outfit the empty cargo van that I purchased. In total, I spent around $33,000 to purchase an empty cargo van and convert it to a fully finished camper van.
I could have certainly done it for less and in the beginning, I planned to spend only $6000 to outfit my cargo van. However, this was naïve thinking and my inexperience talking. It’s difficult to know what you are going to spend in the beginning when you have never done this.
A conversion can be fairly pricey and you should know going into one that you will likely spend more than you planned and it will take longer than you thought it will.
Conclusion
Like any project, converting a van to a camper takes planning, research, patience and a lot of hard work. A little bit of skill and experience also helps but is not required.
I did it without a lot of experience although I do have experience with woodworking and I have a creative mind that helped me along the way.
The good thing is, you can learn anything on the Internet nowadays and people are willing to share with you just how to accomplish nearly anything.
Saying that it is not difficult would be lying because it is difficult and it is a lot of hard work.
However, the end result is so worth it. Once you have planned your van and put in the time and money into making it a reality, the result will allow you to enjoy traveling and seeing the world on your own terms, and in style.