
Disclosure: Some of the links in the article below may be affiliate links. This means that I may earn a small commission if you click on them and make a purchase.
Rivets nuts are a popular way to fasten bolts to thin metal or other materials. These can be installed in order to create a threaded location for inserting bolts. I used Rivet nuts throughout my van conversion and have experienced the good and the bad along the way.
Rivet nuts work very well in certain situations and can offer a strong, secure hold that won’t vibrate loose. They work great when you only have access to one side of the material. You can simply install them securely from one side without having to touch the other side.
Once installed, you simply screw your bolt in tightly as you would in any threaded bolt hole. If you are converting a van, there are numerous holes throughout a cargo van that you may be able to utilize. You can simply purchase the correct size of Rivet nuts to install in these holes giving you places to bolt to without creating new holes.
Rivet Nuts For Van Conversion
Whether you are converting a Sprinter van, Promaster, Transit, or any other type, chances are there are holes already in place throughout the cargo area. Some of these holes can be utilized so that you don’t have to drill new ones. Many people use self-tapping screws to hold the ceiling, walls, and other items to the metal van framing. However, these require you to drill and screw directly into the metal, creating new holes in the process.
Either way is fine but using Rivet nuts can give you a clean and sturdy bolt hole in which to thread items into tightly.
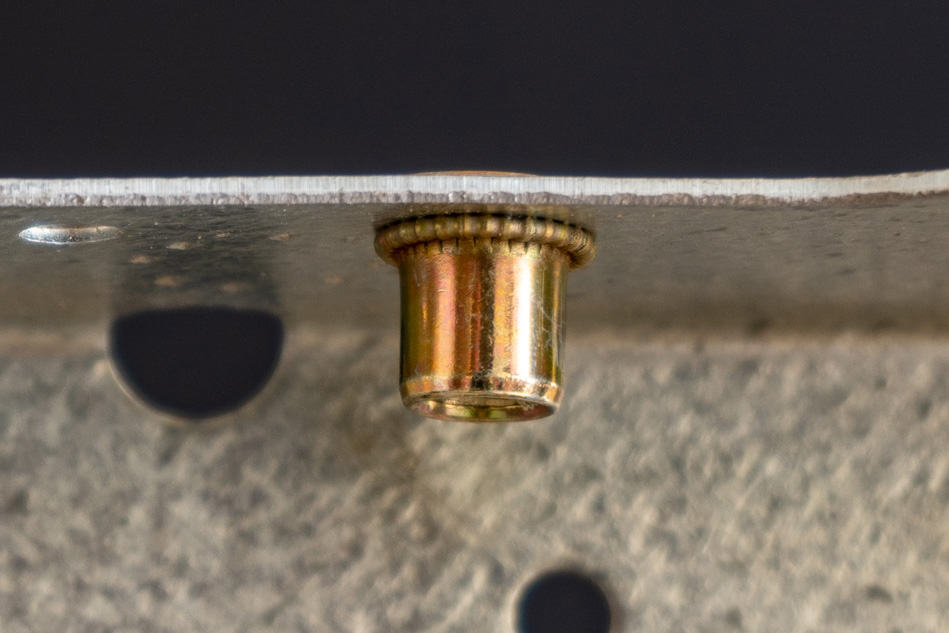
The following image shows some of the pre-drilled holes in my Ram Promaster.

There are various sizes throughout a van but the most common sizes in the Promaster van are:
- 1/4″ 20
- 5/16″ 18
- #10-24
You can purchase them in different materials including stainless steel. I chose to use mostly stainless steel ones but it really doesn’t matter in the case of a van conversion since they won’t be directly affected by the weather. If you want to be extra cautious and prevent corrosion from happening over the long term, I would suggest using stainless steel.
What is the Best Rivet Nut Tool?
If you are installing Rivet nuts, I would strongly suggest a proper tool for their installation. It may be an extra cost in the beginning but it will save you so much time and headache. Not only that, you’ll be confident each time that they are installed correctly. There are many tools on the market with each being similar in the way they function.
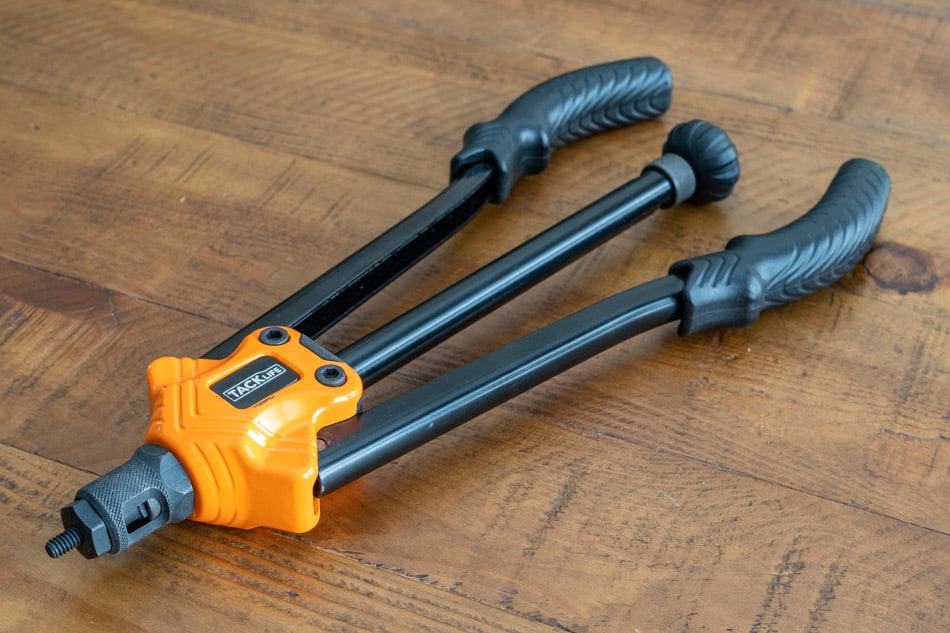
I own the TackLife Rivet Nut Tool and it has been a great tool that works well. This tool makes quick work of the process.
You can install these without a tool by using your own DIY solution but I wouldn’t recommend it. It’s more difficult to do, takes longer, and doesn’t produce as good of results as using a tool that is made for it. If you are set on doing it without a tool, this video will show you exactly how it’s done.
I tried going this route at first but decided pretty quickly that purchasing the right tool would be the way to go. If you are only installing a few of these nuts then a homemade solution will work fine. However, if you are using dozens of them throughout a van build and want to make sure there is a consistent installation, a tool is the way to go.
Installing Rivet Nuts
A Rivet nut works by creating a bulge on the nut that is on the backside of the material. Once the bulge has been created and tightened against the material, the Rivet nut is there to stay.
The following is an example of how these install.
Step 1: Drill or find a hole that is the exact diameter needed for the specific Rivet Nut you are using. The nut should fit in the hole snugly but not tightly. You should be able to insert it into the hole without any force.
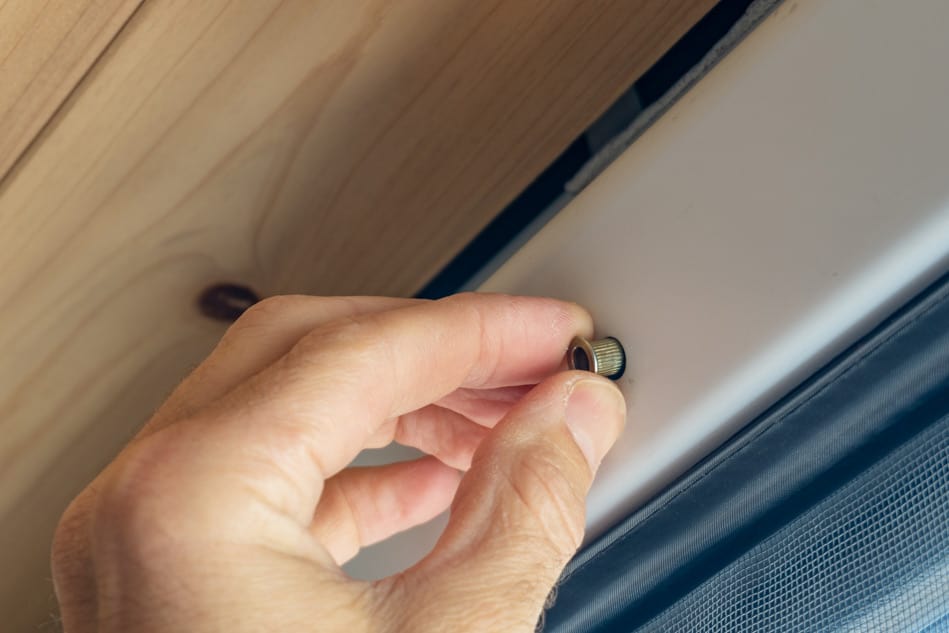
Step 2: Thread the Rivet Nut onto the threaded end of the tool using the proper sized attachment.

Step 3: At this point you’ll want to get your tool into the correct position and insert the Rivet Nut end into the hole. For the TackLife tool that I use, the handle should be in the open position as seen in the picture. This is typically the way it will work no matter what tool you are using.

Step 4: Once inserted, hold the tool tightly against the material and then squeeze the handles down. This will put pressure on the Rivet nut and create the flange on the back that is necessary. Be sure to hold the tool straight as you squeeze the handles so that the Rivet nut will be perfectly seated.

Once this is done, your Rivet nut should be tight and properly seated. You can check it by making sure you can’t move it with your fingers. You can also thread a bolt into it using a bit of torque and make sure it doesn’t move. If you find the Rivet nut still moving and not tight enough, you can re-insert the tool and squeeze a bit more. This may happen if you aren’t used to using the tool or don’t have it set up properly.
This happened to me at first a couple of times because I was scared to tighten down on it too hard. However, once I got the hang of it, I never had the problem again.
Each tool may be different so be sure and follow the instructions included with the one that you have.
Downsides of using rivet nuts
While Rivet nuts provide a great way to bolt something blindly to various types of materials, there are a couple of downsides to using them.
- Cost. There is an initial cost to using these since you’ll need to purchase the Rivet Nuts themselves along with the tool to install them. Bolts are also extra so all of these combined will be considerably more than using something like a self-tapping screw or a bolt and nut if you have access.
- Hard To Remove. Once you install these, you won’t be able to get them back out without doing some damage. If for some reason, one was installed incorrectly, you may need to remove and replace it. This can be done by drilling them out but it can be a pain in the butt to do.
Conclusion
Rivet nuts provide a great way to utilize an area where you only have access to one side. In the example of my van conversion, there were holes throughout the interior of my van. Rather than drilling anything new, I tried to use these holes as much as I could. These were used throughout the van and all of my ceiling and wall furring strips are attaching using this method.
They have held up well and after lots of trips over two years now, they haven’t come loose and everything bolted into them is just as tight as it was on day one. It’s a clean way to secure items in your van or anywhere else you may find a need for them.


