RV Park Alternatives – 8 Places To Park Your RV

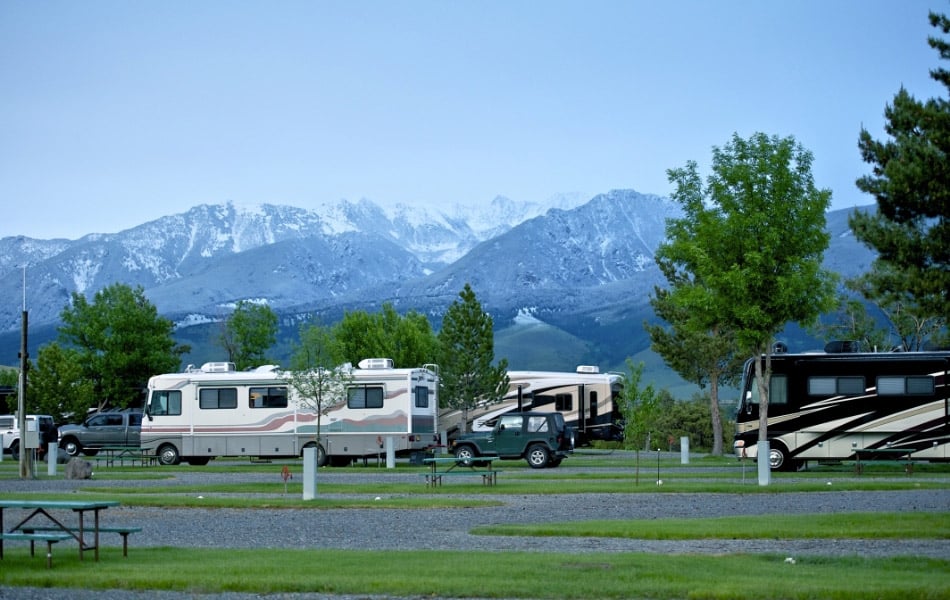
An RV park is an obvious place that someone would park their RV while on a trip. However, it isn’t the only place as there are many different alternatives that have more advantages when compared to what an RV park can offer. The problem with parking in RV parks is that they are often crowded and leave little room for those who like their privacy. Of course, some are a lot nicer than others but the overall experience of an RV park isn’t always the best.

Fortunately, you don’t have to settle for an RV park unless you want to. Although they do have advantages that we’ll discuss later on, they also come with negatives to go along with it. Some of the options below will provide a better overall experience than what you might find in a crowded and often expensive RV park.

This list will be based on my opinion and experiences and not everyone will agree that these are viable options for avoiding the RV park crowd. However, I have stayed in almost all of these places and also in my fair share of RV parks and campgrounds. I have determined some viable alternatives as outlined in the list below with my favorites being listed first.

Most of the places listed below will be suitable for self-contained RVs but a couple may also allow those who are not self-contained.

1) Harvest Hosts

By far my favorite alternative to RV parks is Harvest Hosts locations. I have been a member for about a year now and have stayed at many different locations. All of the locations I have stayed at have been wineries and farms. These locations are usually always a welcomed stop on my journey and I look forward to connecting with the people behind the business as well as having a quiet refuge for the night.

These places differ from RV parks since they typically only allow for a few RVers at a time. Most of the places I have stayed at had limited spaces and I was often the only one staying the night. There have been a few times when other campers were around me but well-dispersed. I have always had a peaceful experience when visiting one of these locations.

I have written about my experiences with various Harvest Hosts locations. You can read about it here.

2) Hipcamp / Private Property

Hipcamp is like Airbnb for camping. With this service, you can purchase a night or two or more on someone else’s land and pull your RV in and stay awhile. The price is reasonable for most listings and there are listings available all over the United States. Similar to Airbnb, you just choose your dates, pay the fees and you are all set. All you will need to do is show up at the location ready to enjoy your stay.

All of the places I have visited using Hipcamp have been excellent. Of course, you’ll need to read through the reviews to make sure that the place you are going is suitable and well recommended. However, some of the popular destinations stay booked so you’ll need to plan in advance if you expect to get in at some of the better places.

Most of these properties offer limited available spaces. Some only offer one space at a time which usually gives the guest a quiet and private experience. However, some may offer more spaces so that other campers can stay on the property at the same time. It’s pretty easy to find a secluded spot that will be a quiet refuge without breaking the bank which is why I love using this service.

The price for a quiet and safe place to stay is comparable to that of an RV park and usually less.

3) Boondockers Welcome

Similar to Harvest Hosts, Boondocker‘s welcome is another service that allows you to stay for free on other people’s property. While Harvest Hosts has a large portfolio of wineries, farms and other small businesses, Boondocker‘s Welcome generally consists of individuals who have extra space on their land that you can stay for free. These people are usually RVers themselves and enjoy helping other RVers out.

With this service, you may end up staying in someone’s front yard or parked on a nice piece of land on a farm. There are numerous types of locations that you can choose from and these span throughout the United States. For one small yearly fee, you will have access to be able to stay for free on other people’s private property. All you will need to do is set up the dates and request to stay and once approved, you are all set.

4) Free Dispersed Camping Locations

Free camping is what we all dream of but unfortunately, unless you live in the western United States, you will not find these types of locations. This would probably be my first choice if I lived in an area or traveled through an area more often where these locations exist. However, these are few and far between where I live in the Midwest.

For those who live or travel in Western states, these locations provide you with amazing locations to park and have a peaceful stay. You may end up out in the middle of nowhere with no neighbors in sight which is a good thing depending on how you look at it.

These locations are managed by the Bureau of land management and are available to anyone on a first-come, first-serve basis. If you would like to find out more about where you may be able to find these types of locations you can visit the BLM website.

5) Storefront Parking Lots

Some large businesses allow RVers to stay in their parking lots for the night. The primary businesses that we all know about include Walmart, Cabela’s, Cracker Barrel, and some Camping World stores. These places often allow self-contained RVs to stay for the night and some may require that you check in with the manager first before assuming that you can stay. I would suggest always doing this no matter what store it is so that you know that you have permission to be there.

These stores are nationwide but not all of them have the same policies so some may allow you to stay and some may not. You can visit RV Parky to get an idea of the locations that will allow RVs to stay for the night. Still though, you will still need to speak with the manager to make sure. Of course, if you are in a stealthy van, it is likely that no one will even know you are there in the first place. This is especially true in 24-hour businesses that have people coming and going all night long.

The downside of parking in one of these storefronts is the noise and lack of privacy. You will hear cars coming and going all night long and if you are a light sleeper, this is probably not a good option for you. On top of that, these stores are generally located near an interstate so you will hear the roaring of loud trucks and cars driving down the interstate all night long.

The good thing about parking in one of these locations is that you will be able to do some shopping while you are there. If you are parked in a Wal-Mart parking lot, you will be able to go in and stock up on goodies. You’ll also be able to use the restrooms if you don’t want to use your own private one in your van or RV.

These types of places are my last resort when I am out on the road and need a place to park. I do not sleep well when there is a lot of noise around and usually have to use earplugs and a white noise generator to drown out as much noise as possible.

6) Residential Neighborhoods

If you are traveling and need a place to stay for the night, you may have to get sneaky and work your way into a residential neighborhood. Of course, this isn’t likely going to be an option if you travel in a large motorhome. However, a camper van that is made to be stealthy can easily get away with parking for a night in a location like this.

The main trick for doing this is to arrive late and leave early so that you do not look suspicious. Your only goal is to be able to park your vehicle and get a good restful sleep and then leave before you are even noticed. You’ll have to master the art of where to park your van without drawing attention to yourself. You will likely be parking directly on a street and covering all windows so that no one knows whether you are a parked van that is visiting someone or not.

7) Rest Areas

Similar to the store parking lots listed above, rest areas are also loud areas that you may be able to park your RV for the night. All states have a different policy on this so you will need to make sure you are abiding by the law when you pull into one of these places. These are often great places to pull over and grab a bite to eat and rest your eyes for a bit but some states will have limited hours that you can stay.

To find out where each state stands on this, click here.

8) Truck Stops

A truck stop would be my absolute last resort but it is often an available option to stay a night. It’s going to be loud and it might not feel very safe for some. Love’s is one that you will see along the interstate that often allows for overnight parking. These are great for those times when you are traveling long distances and need a place to pull over and rest for the night.

Reasons To Stay In RV Parks

1) Amenities

When you stay in an RV park, you have access to amenities that you will not have in the locations mentioned above. This makes it more attractive to stay in an RV park if you need to have access to amenities such as showers, dump stations, electricity, water, Wi-Fi, and all of the other modern conveniences that you may be used to.

2) Safety

Staying in an RV park will often be a safe environment since there is usually management on duty and other great people also enjoying their stay. Some of the other alternatives mentioned above may leave you in areas where you don’t feel as safe. Besides Harvest Hosts and the other paid alternatives, some of the free camping locations may open you up to potentially dangerous situations. This isn’t always the case and you can usually tell when the place just doesn’t feel right.

An RV park usually has a community of RVers to watch out for one another and is a great environment overall. You will generally be surrounded by very friendly people.

3) Dump Tanks & Fill Water

RV parks can be a great place to swing by on occasion even if you don’t stay in them all the time. It’s a great place for you to fill up your RV with freshwater as well as dump your wastewater and trash. If you are always staying in alternative places to RV parks, you may run into situations where you need to dump your wastewater. None of the alternatives mentioned above offer this service except for some truck stops. You may be able to dump a cassette toilet in a standard toilet at some of the other locations but an RV park ensures that you will have a place to get rid of any waste that you may be carrying.

4) Easy To Find

RV parks are all over the place and are very easy to locate. There is an RV park in nearly any town that you travel through so if you are ever out on the road and need a place to stay, an RV park is likely somewhere close by. They may not always have availability but this will depend on the location you are in and the popularity of that location.

5) Meet Other Like-Minded People

Traveling in an RV, camper van or other camping set up can often get lonely, especially if you stay in remote areas. I am an introvert so I prefer solitude and being away from the crowd. However, there are times when it’s good to see other people and make conversation. This can be easy to do when you are staying in a community of RVers. Even if you are just looking to say hello to others, it can be a welcoming experience to see a friendly smile from another when you have been off the grid for a while.

This doesn’t mean that it’s not possible to meet other great people through some of the alternatives listed above. For example, all of the Harvest Hosts locations that I have visited have allowed me to meet so great people.

Reasons NOT To Stay In RV Parks

1) Lack Of Privacy

When you are staying in a crowded RV park, you will not have the privacy that you may get from staying somewhere where you are all alone. Whether you are staying on private property or a dispersed camping location, alternative places generally leave you with more privacy unless you are staying in a storefront parking lot, rest area or truck stop.

2) Noise

The noise level can be considerably more in an RV park due to the number of campers along with the location of the park itself. These are often located not far from the interstate so traffic noise can often be a problem. I have stayed in RV parks where the sound of the roaring interstate kept me up late at night. However, I have also stayed in RV parks that were quiet and peaceful. You’ll need to do your research on this before booking your stay to make sure it will suit your noise-level preference.

3) Pricey

This type of camping can be quite pricey, especially in popular destinations. Although not quite as expensive as a hotel room might be, you can still end up spending quite a bit of money over time by staying in RV parks. Most of these parks are reasonable but it still adds up when you consider the free or yearly membership alternatives that are available.

Conclusion

Whether you choose to stay in an RV park or use an alternative location, camping in an RV is a great way to experience the great outdoors. It’s likely that you will stay in all of these locations at some point on your journey if you intend to travel often. However, only time and experience will tell which ones that you prefer over others. I prefer to use paid membership hosts as much as possible such as Harvest Hosts and Boondocker’s Welcome. These provide awesome locations to enjoy solitude on private property.

However, there are times when I do enjoy staying in RV parks, especially when I need to have amenities such as Wi-Fi, and dumping stations. RV parks are handy and can be found anywhere so you are usually a short drive away from one matter where you are.

If you intend to travel in camp in your RV, know that there are alternatives to the usual RV parks. These aren’t the only place to stay and there are other good alternatives as we have seen in this article. I recommend trying some of them out and you’ll eventually settle on the ones you like the best.

Buying a Used Camper Van – How NOT To Get Ripped Off

If you would like to purchase a used camper van, especially one that has been converted by an amateur, there are many potential problems you should be aware of. Camper vans are often converted by amateur hobbyists so things may not be done up to the standards the way that they are on a manufactured Class B van. On the other hand, it could be that it is much better than a manufactured Class B.

There are many skilled amateur van builders who do a great job and create masterpieces in a van living space. It is possible to find a great used camper van that will serve you well on your journey. In fact, it is usually best to purchase a used one as long as you have done your research and know what you are getting.

If it’s a manufactured Class B that you are seeking, you will usually get a better deal on a used one. The first owner is the one who will take the loss of the initial depreciation. You’ll jump in after it has taken that depreciation and end up with a potentially good van for a good price.

If you are seeking a conversion van, you will need to know what to look for and some of the signs a job not-so-well-done.

Just because a van looks great doesn’t mean it is built solid. There could be potential problems down the road if you don’t look closely. Van builders often put a steep price on their builds, with some even being downright ridiculous for what they are. A high-priced conversion van doesn’t necessarily mean that you are getting a high-quality product.

Likewise, if you are looking for a Class B RV that has been manufactured by a well-known company, there are also things to look for. A van is a van and while the living space may be done differently between a professional Upfitter and an amateur, the van itself will present some of the same issues. Parts break and wear out and you must be able to make an educated decision about which ones are winners and which ones you should walk away from.

I grew up with a step-dad who was a used car dealer most of his life so I have heard a few tips over the years about buying and selling vehicles. These same tips will apply to any vehicle that you are going to buy. It may be even more important with a camper van since the price is steeper than what you will pay for a personal car. Buying a dud will not only make you mad but it could potentially make you stuck with a van that you might not be able to sell or have to sell at a reduced price down the road.

Let’s look at a few tips that can help you avoid being ripped off.

Inspect The Van In-Person

Anything can be purchased online nowadays but if you want to reduce your chances of purchasing a dud, you need to see it in person. There are many things that could be wrong with a van or any vehicle in general that viewing it online won’t show. Don’t trust online listings or assume that everything is as stated. Always make sure that you do not agree to anything until you have seen the van in person and have had the opportunity to check it out.

If you are dealing with someone who is trying to create urgency and have you put down a deposit, it may be best to walk away. There is no need for this when there are tons of camper vans on the market and it’s not like they are flying off the shelf. You have time to make an informed decision rather than buying one from a distance just because of false urgency.

Check The Engine & Drivetrain

Perhaps the most important thing you can do is check the engine and drivetrain of the van to make sure there are no potential problems. I would suggest making this a priority on your search. After all, what’s a camper van without a properly functioning engine, transmission, and other parts of the drivetrain?

Many people buy used camper vans or other RVs and just assume everything is okay because it looks good. This may be a mistake because looks alone won’t tell you much about how an engine and other critical parts are functioning.

No matter how awesome the interior looks or how great of a job the conversion van is, if the engine is about to fall apart, it probably isn’t the van for you. For this to be effective, you should have the van checked by a mechanic or a friend that has a lot of knowledge of vehicles.

Drive The Van

You MUST drive the van before making any decision. If for some reason, the owner does not want you to drive it or makes excuses, you should walk away. Driving the van is the only way you are going to know that you are getting a van that is in good working order. Not only do you want to drive it, but you want to make sure you drive it in various situations.

Drive it on main street roads as well as get it up to speed on the freeway. During this drive, you’ll be able to listen for noises and feel for anything awkward as you are driving. If you have a mechanic or knowledgeable friend with you, this drive will help them to determine the overall working order of the van. You might hear some unwelcome noises that you will need to look further into.

If you are buying a van over the internet, be sure not to sign anything until you have met the person and driven the van. This is an important part of determining whether the vehicle is worth buying or not.

Look At The Small Details

A lot can be learned by looking at the smallest of details. You can generally tell when someone has taken care of an item by looking closely at small details that others might miss. In the case of a camper van, especially if it is one that has been converted by someone, there are a few details to make note of.

  • Dents and dings. Nearly any used vehicle will have them and especially a camper van. However, you can generally tell if they are just simple wear and tear type issues or the type that has been caused by mistreatment. This is a subjective matter and some may not care about small dings but some will.
  • Tire wear
  • The general condition of things under the hood
  • Check the oil and all fluids
  • Look underneath the vehicle for leaks
  • Check the interior for loose or broken hinges, screws, panels, etc.
  • Check the roof for signs of problems including poor caulking jobs, rust, holes or other areas that could allow for leaks
  • Turn on and test the electric equipment, outlets, inverters, etc.
  • Notice loose items and how the craftsmanship looks. Are the cabinets sturdy? Floors squeaking?

When you go to inspect the vehicle, just make sure you are extra observant of everything. You don’t want to miss anything that might be problems. If there are small issues, these aren’t usually a problem but you may have to fix them so it should be calculated into your final offer for the vehicle.

Check For Signs Of Leaks

Leaks are one of the biggest problems in used RVs and if you don’t look closely, you may let one slip by. It isn’t always possible to find leaks unless it happens to be raining during the time you are inspecting the van. If it isn’t raining, you’ll need to look for signs that it has happened before. You’ll need to know what these signs look like.

Here are some things that you should look for when inspecting for water leaks.

  1. Stains on the ceiling
  2. Musty smell in the van
  3. Signs of mold or mildew
  4. Warped areas in the ceiling or other places where water may drip

All of these issues are dead giveaways that there is some type of water leak. They could be current leaks or leaks that have been fixed but make sure to discuss this with the current owner.

Besides looking for leaks from the outdoor environment, be sure, and also check the plumbing system for leaks. Turn on all the water faucets to make sure all is functioning properly and then look underneath sinks in all areas to make sure no water is leaking. You’ll want to make sure to create a decent flow of water through the system so you may be able to spot any problem areas.

Hopefully, the owner will let you know of any issues but it isn’t always possible for the owner to even know about them. It doesn’t mean that they are trying to screw you, it could be that they truly don’t know.

Don’t Get Emotionally Involved In It

It’s a financial transaction and if it doesn’t work out, move on. Similar to buying a car or pretty much anything else, it’s easy to get attached to something that you love about a particular van. However, there may be other issues that are front and center that are warning signs. The problem is that when you get emotionally involved in something, you will tell yourself anything to overlook the bad parts.

When you are emotionally involved in purchasing an expensive camper van, you will probably make a decision based on those emotions. Instead, you should look at it as a financial transaction and you should look to make the best financial move that you can make. Having the perfect van is not going to exist. There are plenty of vans on the market and for the most part, updating bits and pieces to fit your personality better will be a simple process.

If you find a van that has the perfect living interior but the engine of the van is questionable, you should move on. Don’t spend your time looking at something that has questions around it. Don’t allow yourself to become emotionally attached to any one van. Look at each van as though it is a contender but do not even consider purchasing it until you have thoroughly inspected it and driven it and taken into consideration the other precautions on this list.

Don’t Buy Alone

When you go shopping for an item as expensive as a camper van, you can’t possibly see all of the downfalls that might come your way. It is better to have someone with you when you go to look at a van. However, make sure this person has a good head on their shoulders and isn’t emotionally attached to the process like you are. People like this can help you to see problem areas when all you see is the beautiful camper van that you were looking at. While you are imagining parking the van in a nice location overlooking the ocean, the other person might be finding problems and issues that you would have overlooked.

Having a person with you during this process will help to ensure that you do not make quick decisions and that you have not forgotten areas that could be potential problems. Even better, take someone along that knows a lot about cars or vehicles. A person like this will be able to spot potential problems even better than a random friend.

Shop Around

Don’t buy the first one you see just because you like a layout.

It can be an exciting undertaking when you begin searching for your perfect camper van. It’s easy to get hung up on one just because you like the way certain areas of the van are designed. This is understandable but it’s a good idea to step back and think about things before pulling the trigger. There are plenty of vans on the market so don’t settle on the first one or two that you look at unless you are absolutely sure that it is the one you want.

When you become fixated on one particular van, it can be easy to forget about the budget. You begin to rationalize the reasons that you MUST have it. It’s as if it is the only one in the world and you’ll do anything to have it. Don’t allow yourself to get into this mindset. This is where having someone who is levelheaded to come along and help you during your search can be very helpful.

Use Common Sense

Last but not least and perhaps the best advice that I can give is to use common sense when you are purchasing a camper van. Sometimes you can just tell that a situation is not right or a van does not meet the requirements that you have set out to adhere to. Sometimes the emotional roller coaster involved in finding that perfect van can cloud your thinking and make you purchase something that you shouldn’t have.

The perfect van will show up but you will need to use common sense during your search. Without a little bit of common sense and a clear thought process, you may end up buying something just because you get excited about the way one part of the van looks.

Bottom Line

Buying a camper van can be a rewarding experience when you finally drive away in one that was a good purchase. However, too often, people get sucked into purchasing vans that are less than stellar and they might have seen this had they done more due diligence during the process. Pay attention to the small things and don’t worry about hurting the current owner’s feelings.

You need to inspect everything about the van. It’s you who will be stuck with the purchase after the paperwork has been signed. You need to know that you are making the right decision and that you will have no regrets.

Hopefully, the tips above will help you get your journey started with a van that you will be happy with. Camper vans provide a great way to travel and enjoy the world but you don’t want to be fixing problems that could have been avoided if you had paid more attention. Enjoy the process, take your time and the perfect van will eventually show up.

Ram Promaster For Van Conversion – Everything You Need To Know

If you are converting a van, the Ram Promaster is likely on your list of possible vans to use. The Promaster is one of the best options on the market when it comes to building a custom camper van. Not only do amateur van builders use this type of vehicle but also manufacturers base a lot of their class B RVs off of the Promaster chassis.

There are quite a few manufactured class B RVs on the market that use this van. Below, is a shortlist of some of the RVs that are currently built using the Promaster.

All of these RVs start out as a basic Ram Promaster cargo van and are then converted into a professionally assembled RV. Why is it that this particular van is so often used by Class B RV builders? A few reasons may be because:

  • It comes in a high roof
  • It’s readily available
  • It has a proven track record
  • It’s a solid built van from a major car manufacturer
  • It has a workhorse of an engine and gets great gas mileage
  • It’s large and roomy and comes in different sizing options
Empty Promaster cargo van

I chose the Promaster for my van conversion and have been very happy with it. For the most part, it is a very easy van to work with and provides a great shell to hold your mobile home. If you are like me, there are probably a few vans on your list to be considered. There are usually three different vans that people look at when they take on the challenge of converting a van.

  1. Ram Promaster
  2. Mercedes Sprinter
  3. Ford Transit

I looked at all of these models before I settled on the Promaster. Let’s look at how these vans stack up to the Promaster van.

Ram Promaster Vs Mercedes Sprinter

The Sprinter van has been a very popular model for van conversions. It’s almost as if this van is seen as a status symbol in the van life community. Sprinter vans can be quite expensive depending on the type and size that you purchase. They can also be purchased in four-wheel-drive which adds a considerable amount to the price tag.

When comparing the Sprinter to the Promaster, there are a few distinct differences that typically stand out.

  1. The Sprinter is available in diesel. Many people swear by the diesel engines and prefer to have this over a gasoline engine. However, I have been more than happy with the gasoline engine in my Promaster van.
  2. The Sprinter van has the longest vans available on the market. If you need a lot of space or have a family that will be in your van, the sprinter 170 Extended will be a great choice for you. This is larger than what the Promaster can offer at its largest size.
  3. Sprinter vans are more luxurious. When driving one of these, you have all the luxuries and technologies that you would expect from a Mercedes. This may be important to some people and could be beneficial if you do a lot of driving. However, for the most part, the Promaster has all that you need to ride in comfort.
  4. The price of a Sprinter is more than a Promaster. If you were to purchase a brand new Sprinter, you will pay a considerable amount more. Currently, in 2020, a brand new Sprinter 144″ High Roof cargo van will start at $37,270.
  5. The Sprinter costs more to maintain. You will need to have it serviced at a certified Mercedes dealer. These services can be much more costly than the Promaster. Parts and labor will come at a premium price.

Ram Promaster VS Ford Transit

The Ford Transit is another popular option for those converting a van. With its high roof option, the Ford Transit has the largest amount headroom in its class. Taller people will appreciate the extra headroom offered by the highest roof version of the Transit.

The following is a list of differences between the Ford Transit and the Ram Promaster.

  1. The Transit has a higher ceiling. If you choose the high roof option of the Transit, you are looking at a roof height of 77 inches. This is plenty of room for people up to 6’4″.
  2. The Ford is not as wide as the Promaster. If you intend to sleep sideways in the van, the Promaster is your option. The Transit will not accommodate most people sleeping sideways so similar to the Sprinter, you’ll need to plan on a bed that runs long ways in the van.
  3. The Ford Transit can be serviced nearly anywhere. There are Ford dealerships all over the country in the United States so you are never very far from being able to have your van serviced. This is similar to the Promaster but I have often been to Dodge locations where they will not service commercial vans.
  4. The Transit is available in four-wheel-drive. If off-roading is something you are interested in, the Transit provides a four-wheel-drive model that will help to get you off the road and into hard to reach locations. The Promaster is not the best option for this.

Ram Promaster Models, Size & Weight

The current chart shows the different Promaster models along with their interior size and gross vehicle weight. These are all cargo vans and make great options for a van conversion.

ModelInterior WidthInterior LengthInterior HeightGross vehicle weight rating (GVWR)
118″ Wheelbase 1500 Low Roof75.6″106.7″66.3″8,550 lbs
136″ Wheelbase 1500 Low Roof75.6″122.8″66.3″8,550 lbs
136″ Wheelbase 1500 High Roof75.6″122.8″77.1″8,550 lbs
136″ Wheelbase 2500 High Roof75.6″122.8″77.1″8,900 lbs
159″ Wheelbase 2500 High Roof75.6″146″77.1″8,900 lbs
159″ Wheelbase 3500 High Roof75.6″146″77.1″9,350 lbs
159″ Extended 3500 High Roof75.6″160.2″77.1″9,350 lbs

9 Reasons To Choose A Promaster For A Van Conversion

1) It’s the widest van on the market

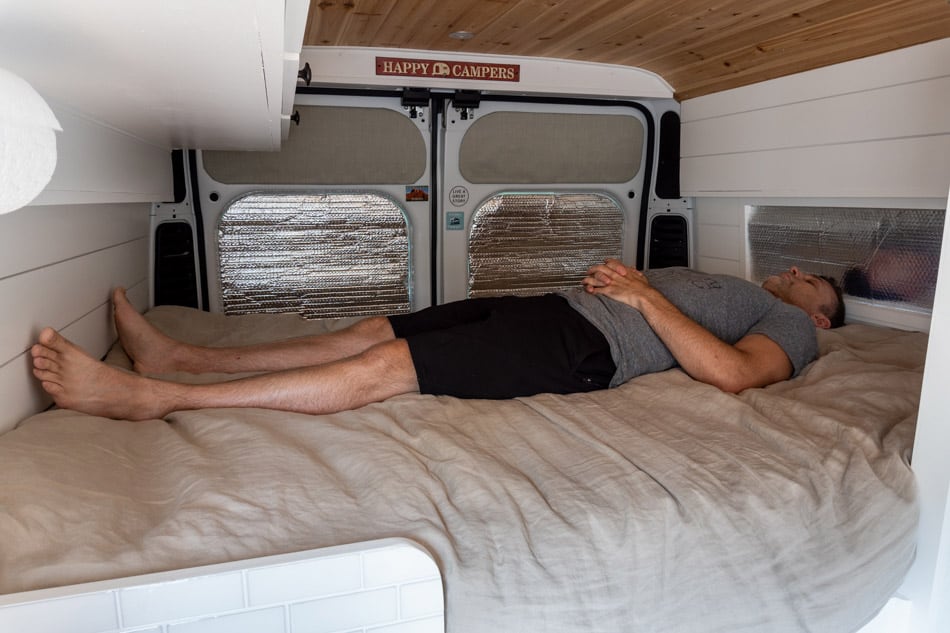
If you’re looking for a van that will allow you to create more space width-wise, the Promaster will accommodate best. With the Ram Promaster, you are able to set up your bed to go crossways in your van if you are average height. As you can see from the chart above, all of the Promaster vans have an interior width of 75.6 inches.
Taller people will still need to create a bed that goes lengthwise of the van. However, for most people, a bed that goes side to side is achievable and it’s exactly how I built my bed in my van. The van gives you more room from side to side so that you can create a little more roomier living area than what you might build in a narrower van.

Laying in bed in a Promaster van
Me lying in the bed. At 5′ 10″, I can fully stretch out without touching the walls.

Of course, you’ll have to consider the width of the walls in your conversion but the skeleton of the Promaster gives you a good amount of space to work with.

2) It’s An Affordable Option

A Promaster can be purchased for a reasonable price whether it is brand new or slightly used. I would recommend searching for a slightly used one but be careful as these are often driven hard and not well taken care of by companies that own them. You will need to do your due diligence when searching for one of these vans on the used market.

You can find great deals out there but just know what you are looking for and the price you are willing to pay. Don’t settle for less because as they say, there are plenty of fish in the ocean (although that’s becoming debatable nowadays).

3) It’s a Reliable Van With a Long History

The Promaster is also marketed as the Fiat Ducato in Europe and has been produced since 1981. It has a proven track record and is a reliable van for many businesses that depend on them. It came to the USA in 2014 as the Ram Promaster and has been growing in popularity since. If taken care of properly, these vans can last a LONG time and give you many years of dependable service.

4) Great Fuel Mileage

I get nearly 20 miles per gallon on average in my converted Promaster van. This is great fuel mileage considering you are hauling your home around with you everywhere you go. Of course, you’ll need to make sure to convert your van as light as possible so that you aren’t adding unnecessary weight which could be detrimental to the overall fuel economy.

5) Powerful Engine

Many people don’t like that the Promaster is only available with a gasoline engine. However, I have been more than happy with the amount of power the engine has. Again, you’ll want to make sure the van isn’t overloaded in weight. I have not had any problems getting up large hills and over mountains. I generally find the power of the 3.6L V6 to be more than enough for my needs.

6) Great Turning Radius

I am used to driving my Nissan Frontier truck so when I first drove the Promaster, I was surprised at how great the turning radius was. My truck is terrible and needs a large space to be able to turn around in which is strange considering it is a smaller truck. The Promaster uses less space to turn around in so I can whip a U-turn without worrying about whether I’ll make it or not. With my truck, I am always calculating whether I’ll be able to make a sharp turn.

7) High Roof

The van comes in various options and a high roof is the most obvious choice for a van conversion. The roof extends high enough to accommodate most people of average height or a little more. I’m about 5′ 10″ and have no problems walking around and standing up straight with a few inches left to spare.

You can also choose a low roof if you are looking to build a stealthy van but these come with their own issues. You may have to hunch over all the time when walking around and you just won’t get the feel of having a truly livable camper van.

8) Easy and Cheap to Service

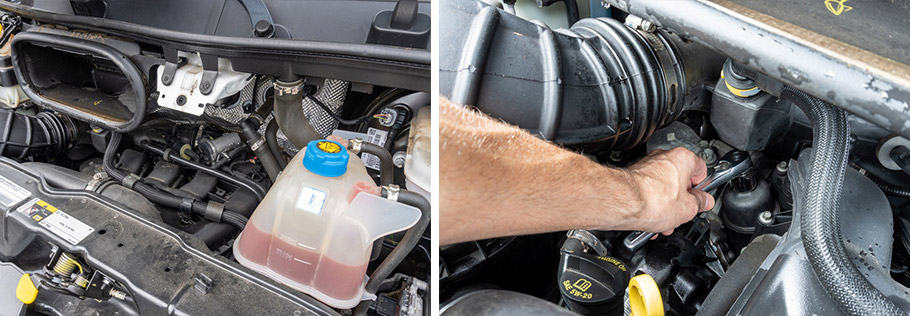
Engine on Ram Promaster van

For the most part, the Promaster is an easy vehicle to work on. You can take it to nearly any Dodge / Ram dealer in the USA or FIAT dealer if you live in Europe. Most places can accommodate simple service to the vehicle and for an affordable price similar to what you would pay in your personal vehicle. Unlike the Sprinter that usually comes at a more expensive cost during service visits, the Promaster is cheaper in this regard.

What’s more, you can do basic service yourself on the Promaster. Changing the oil is the most commonly needed service and it’s easy and cheap to do yourself. I have always changed the oil myself in my van and once you have all the tools you need, it’s a breeze. Of course, it may not be as easy if you are full-time on the road but finding a RAM dealer is also easy.

The only difficult part is finding a dealer that has a bay door high enough to accommodate the high roof van. Keep this in mind and know that some remote areas may not be able to perform some services due to the height of the van.

9) It’s easy to convert

The Promaster makes for one of the easiest vans to convert into a living space. This is mostly because of how the van is structured. The walls rise up fairly straight and it doesn’t have the contours of some of the other vans. Although squaring your building areas within the van is a challenge, the Promaster makes it about as easy as it’s going to be.

The structure of the inside of the van is easy to mount things into and has pre-drilled holes that are useable depending on what you are installing. I looked at numerous van models and determined that the Promaster would make the most sense for the custom build I did.

Cons of a Promaster

1) Low Clearance

Low clearance on a Ram Promaster van

If you look at the bottom of the Promaster, you’ll see that the rear axle sits less than 7 inches off the ground in its stock configuration. This doesn’t leave much room for driving in areas where rocks and other items might be on the road. Some people who want to get off the road will need to consider a lift kit so that the rear axle doesn’t sit so low. This will keep the van from bottoming out when the road isn’t paved. This isn’t a big deal for those who will stick to well-traveled roads and know the limitations of the 2wd Promaster.

I’ve never had an issue with this but I know my limitations and don’t take my van into suspect areas.

2) Not The Most Comfortable Vehicle To Drive

Driving a Ram Promaster van

At first, the van seems as though it is comfortable but the further you drive, the more you notice things that could make it much better.

  • The front seats sit up high. The steering wheel is also low with not much adjusting to be done. You have to extend your arms out quite a bit to reach the steering wheel. Driving for long distances always makes my upper back hurt. It’s even worse if you intend to add swivel bases to the front seat.
  • Cruise control is an option. The model I ended up with didn’t have cruise control. I never even thought to check when I went to purchase it. I assumed cruise control would be a standard feature nowadays. I was wrong and didn’t even notice it until the drive home. Be sure and check this because cruise will make it so much better. You’ll have to install an aftermarket one if you make the mistake I did.

3) No 4×4 Option

For some, this is an important area to consider in a camper van. Going off-road is important and boondocking often leads you to places where a 4×4 is necessary. However, you are out of luck as of 2020 for a four-wheel-drive option on the Promaster. It does have front-wheel-drive which does very good in most cases, especially if you have all-terrain tires on it. If you want something a little more suited for off-road adventures, you’ll have to choose a Sprinter or a Transit which are both available in four-wheel-drive.

You can also choose to go with a truck camper and then choose whatever 4×4 truck you want. This is a popular way to go for those who spend time off the beaten path.

4) Step Up In the Interior to the Cab Area

Promaster interior step

When going from the cab of the van to the living area, there is a step of about 4 inches that you’ll have to cross. This causes an issue if you are installing swivel seats because when you swivel the seat around, your feet will be dangling like you are a child. Rather than having your feet resting comfortably on the floor, you’ll have an awkward feeling of not knowing where to put them.

Many people build an area that extends the cab area and creates a flat area to put their feet. Other people, like me, use something to put their feet on. I use my bench seating or my collapsible ottoman and it makes the front seat very comfortable when swiveled around.

5) Stock Sound System Is Terrible

If this is important to you, you’ll probably upgrade this system anyway so it may not be a big deal. Mine came with a simple radio with an MP3 player in it. The sound was terrible and I quickly changed it out with a Sony XAV-AX1000 that allowed me to also connect a rear backup camera. It also made the stock speakers sound much better than they did with the factory radio. There are various packages you can purchase so make sure you are aware that some of them have a subpar sound system.

Converting a Ram Promaster To A Camper Van

If you have decided to use a Promaster, there are few approaches that you might take in the conversion.

1) Self Convert

The most obvious way to convert your van is to do the conversion yourself. This is where you start from scratch and build everything custom inside the van. This is the most popular option that you will see all over the internet. It’s the option that allows you to set your van up the exact way you want it. You can impress your friends and end up with a living space that is completely you and serves your needs.

The problem with this type of conversion is that it is a difficult and time-consuming process. You will need to have some handy skills to pull it off and it won’t be easy. If you are not fluent in some type of building trade, the process will be one challenge after another. What’s more, you could end up with a conversion that is done improperly and may present dangerous situations.

The Promaster does make the process easier than some of the other options but it is still a challenging undertaking.

2) Conversion From a Kit

The second option is to purchase a conversion kit that is specifically made for the Promaster. These are designed to fit into the van and make the conversion process as simple as possible.

If you want to go this route, you will be in for a much simpler installation. Since most of the work will be done for you, you will simply install the pre-designed parts into the van. While it won’t be a custom setup or look near as good as a custom build, it will still make a nice van conversion that will be much quicker to complete.

The best company on the market currently is Wayfarer Vans. They offer conversion kits for the Promaster as well as the Ford Transit. While quite expensive, these kits do save time and a lot of headaches of trying to figure it all out yourself.

Buying a Ram Promaster For Van Conversion

Finding and buying a Promaster for your van build may be the most difficult part. Depending on where you live, you may have limited options available and will have to drive long distances to look at potential vans.

I scoured the internet for a long time trying to find the perfect van and while you can get great deals, they usually happen to be further away. Unless you live in a large metropolitan area, you may have to drive a bit to find your future van conversion.

Personally, I had the best luck by using Carfax to do all of my research. You can usually see the history of the vehicle by using Carfax and although it isn’t totally reliable, it’s better than nothing. I found the one I purchased on Carfax and it was only 50 miles from me. I went to look at it and immediately knew that it was the one.

Bottom Line

Who is the Promaster best suited for?

The Promaster is the best choice for those who want to convert a van that includes the most space from side to side. If you want your layout to include a bed that is always set up and extends from side to side, you will be happy with it.

It’s for those who want a basic, dependable van that doesn’t have a lot of bells and whistles. It will get you from place to place as long as you are not planning to go off-road. While you may be able to do a little bit of off-road driving due to the very capable front-wheel drive, you won’t want to get too far off the road. Add some upgraded all-terrain tires to the van and it will be more than capable of going most places.

It’s a cost-effective option for people looking to start with an empty cargo van and build an awesome, custom home. It’s a lot of work but in the end, the Promaster is a great choice for allowing you to have an amazing van conversion.

Van Life Upgrades – 40 Must-Have Accessories For Camper Vans

Living or spending time traveling in a van can be a challenge if you value your space. Since a van is limited in this regard, you’ll have to get a little bit creative to make the space as comfortable as possible. There are many things that you can do to improve the quality of your life while living in such a small area. There are a variety of accessories that can help you to overcome the challenges often associated with such small living spaces.

These types of accessories can help keep your space organized and keep you sane in the process. I have discovered a few things that are almost a necessity and would help nearly anyone in the same situation. If you have a camper van or other small RV or are considering building a van conversion, you will want to take a look at some of the items listed below. These are all items that I personally use and find great value in having in my van.

Kitchen / Cooking

1) Ratcheting Paper towel holder

Paper towel holder

This ratcheting paper towel holder works great for moving vehicles. If you were to use a standard paper towel holder, it’s likely that your paper towels would be unrolled by the time you got to where you were going. This ratcheting system keeps your paper towels nice and tidy and it’s easy to pull off what you need when needed.


2) Lightweight Bamboo Dinnerware

Bamboo plates, bowls and mugs

For dinnerware, it’s good to opt for dishes that are lightweight and non-breakable. Since you are driving around in a vehicle with things shifting occasionally, standard ceramic plates will be prone to breakage and are also heavy. These bamboo dishes are super lightweight and you won’t have to worry about them breaking as you are driving. Even if they fall and bounce all over the van, they’ll still be fine. Plates, bowls, mugs.


3) Sea To Summit Sigma Pots

Sea To Summit Sigma Pots

Any cooking pots will work but having pots that can fold up is a huge plus in a small space. These pots have a handle on them that twists around to take up less space. The small one will fit into the large one and both of these pots together take up a very small space. They are also made of thin stainless steel so they are light and your food heats up very quickly. You just have to be careful to watch your temperature because they get hot so fast, you may burn your food. I keep these stored easily in one of my kitchen drawers. I use the 2.7 liter pot and the 1.2 liter pot. You can buy them as a set at REI.


4) Collapsible Kitchen Accessories

Collapsible cutting board and measuring cups

There are many things you can buy that are collapsible. These items are perfect for the small space of a van or any small RV. You can collapse them when not in use and open them back up when needed. I use a cutting board with a removable colander and measuring cups that store away nicely when they are collapsed down.


5) Coffee Kettle / Ceramic Coffee Dripper

Coffee kettle and dripper

If you are a coffee drinker, a coffee kettle is a must-have. The kettle that I have and recommend has a temperature gauge on top so that you know when the water is at the perfect temperature for your brew. Combine a good kettle with a good coffee dripper and you have an awesome, premium coffee brewing machine. Of course, you’ll need a stove to heat the water. You can use your built-in stove, or a propane camp stove. Don’t forget the coffee filters.


6) Jet boil

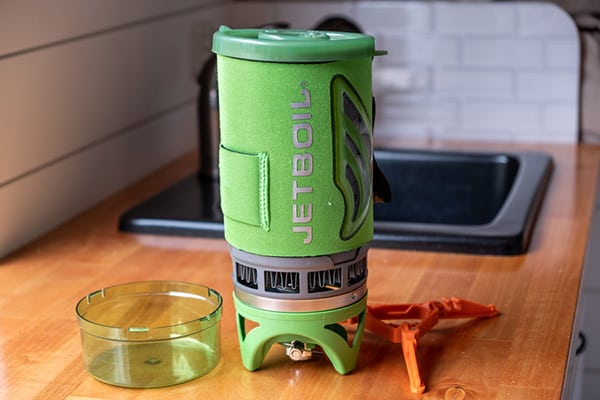
Jet boil on kitchen counter

A Jet Boil system is great to use as a quick way to boil water or as a backup to your cooking system. It’s also great to take on hikes or wilderness camping trips when you leave the comforts of your van. I often use the Jet Boil Flash Cooking System when I want to boil some water quickly for some oatmeal, coffee, or tea. It’s easier to set up and put away and quicker than my camping stove. It brings the water to boil in only a couple of minutes.


7) Eureka Camp Stove

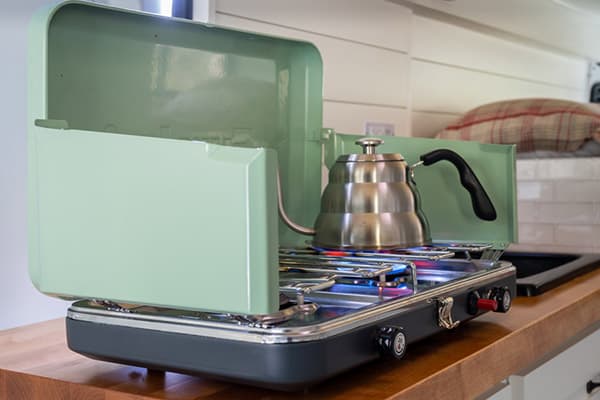
Eureka camping stove

My camping stove of choice has been the Eureka Ignite stove. If you don’t have a stove built into your van, a camping stove of some type will probably be your best bet. I have used my Eureka stove and have been happy with it. You can read my review on it here.


8) Dish Mat

Dish drying mat

It sounds so simple but it is essential in my van. I don’t have a ton of counter space and this type of absorbent dish mat gives me a place to lay wet dishes so that they can dry off without getting my counter wet. Having this type of dish mat allows you to have an additional area where you can sit down your wet items and not have to worry about them getting the area wet.


9) Magnetic bag clips

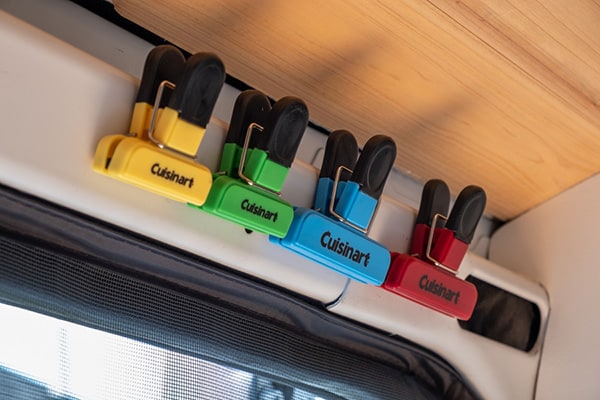
Bag clips

Another simple item but these are super handy to have because you never know what you’ll need to keep closed. Magnetic chip clips will easily stick to the sides of the van and you’ll have them quickly on hand when you want to close a bag of chips or cookies.


10) Instant Pot

Instant Pot on van counter top

The Instant pot provides a simple way to throw some great meals together. It cooks foods super fast so even though it does initially need a lot of electricity to get going, it doesn’t use a lot of electricity as it is cooking. I cook all kinds of meals in the Instant Pot and it’s perfect for my morning oatmeal that takes me 4 minutes to cook steel-cut oats. My Goal Zero Yeti 1400 handles it with no problems.


11) Water Filter

Berkey water filter

If you will be filling up with water as you travel, a water filter will be a necessity. The Berkey is one of the best on the market and great for van-lifers because they require no electricity. You simply pour the dirty water in the top and it filters through to the bottom. The Berkey removes most everything from the water and can even be used to filter pond water. I wouldn’t go that far unless it was an emergency but it is a great solution for making sure tap water is always filtered.


12) Insulated Reusable Bottles

Insulated bottles on table

Double-walled, insulated bottles are great for keeping your drinks cold or hot. They also don’t sweat and they are easy to clean and reuse. You can usually find these on sale and it’s a great idea to stock up on a few when you do. REI often has these for a great price in their clearance items.


13) Camp Stove Toaster

Camp stove toaster

If you like toast but don’t have a toaster in your van, a camp stove toaster may do the trick for you. Typical toasters take up a lot of electricity so there is not enough to go around in a typical van electrical setup. The camp stove toaster makes use of your propane stove to create crispy toast. Although it may not be as good as your home toaster, it will get the job done when out on your journeys.


Storage

14) Collapsible Ottoman

Collapsible ottoman for camper van

I use this ottoman as a step to get up on my bed. It makes the perfect place to step onto since it is very sturdy and besides being a step, it serves as a great area for additional storage. I often use it to store shoes in and other items that I might need to get to rather quickly when leaving my van. These collapsible Ottomans can be set up in no time and collapse down to a very thin block when not in use. Besides using them as extra storage, these are also great to use as additional seating for when you have visitors.

Mine measures 15 in. x 15 in. x 15 in. but can also be found in smaller or larger sizes. I picked mine up at my local Home Depot.


15) Hanging Storage

Mesh netting storage on van door

Hanging storage is such a simple solution and having various hanging compartments like this in your van or RV can make a big difference. I use this type of mesh storage on my back doors to hold shoes and other items that may be hard to store in other places. It’s great for items that you need to get to often. I can reach down from behind my bed and grab stuff out of these mesh nets or I can open the back doors and get them out just the same. It’s a cheap solution that can be cut to the dimensions you need depending on where you are installing it.


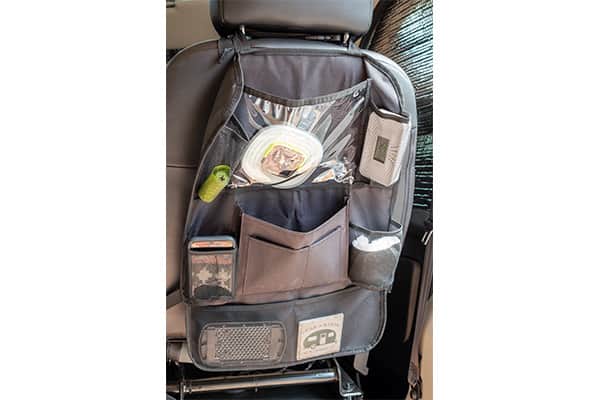
16) Behind The Seat Organizers

Organizer on back of car seat

One of the best ways to store small items out of the way is by using one of these behind the seat organizers. These are great since this area is often wasted space and can be used to keep track of small items such as phone chargers, flashlights, dog poop bags, maps, books, and other small items that you might have lying around. This type of organizer keeps things up out of the way so that you always know where they are.


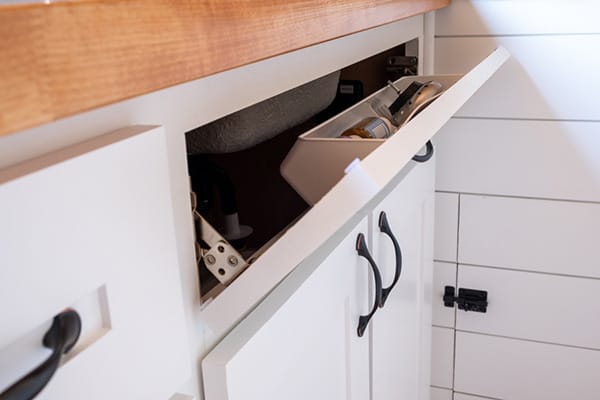
17) Rev-A-Shelf

Rev-a-shelf for van

If you have a sink base in your camper van, you may have a blank space that could be used for extra storage. This hidden shelf is a great place to store items like sponges, drain stopper, dishwashing liquid, and other small items. It keeps my countertop clean and neat and allows me to store these small items out of sight. It’s a cheap upgrade that will provide additional storage and you can never have too much storage in a camper van.


18) Organization Boxes

Storage boxes

If you need a way to keep your stuff nice and tidy, these boxes will help do the job. They are great for storing small clothing items in so that it doesn’t become messy in your cabinets. They come in lots of different sizes so you can pick a size that fits your specific cabinets.


19) Laundry Bag

Laundry bag

A laundry bag is another much-needed item for a van. Typically, dirty clothes get strewn about all over the place or end up in a trash bag. It’s great to have a dedicated laundry bag that is used only for that purpose. Once you get to where you can do laundry, a bag like this is easy to take out and take your clothes to the washer. This an often overlooked solution for those living in vans or other small campers.


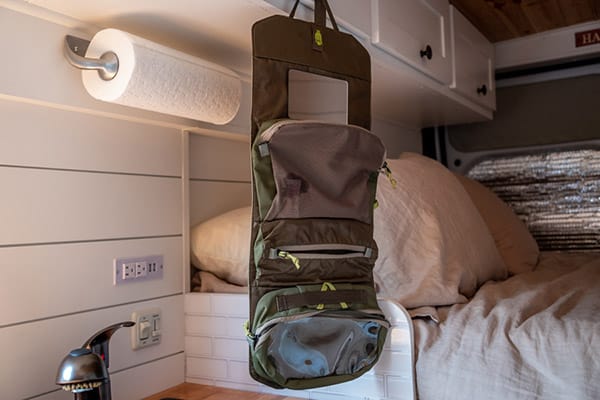
20) Toiletry Bag, Packing Cubes.

Toiletry bag hanging in van

Packing cubes are great for keeping your clothing items neat and tidy. Rather than having them strewn about the cabinets, you can have cubes for different types of clothing making it easier to keep the place picked up. REI sells some great little cubes for this. The REI toiletry bag stores all of your essential toiletries and can hang from a cabinet handle and give you a small mirror to use. Pack it away when you are done and it takes up hardly any space.


Tools And Safety Products

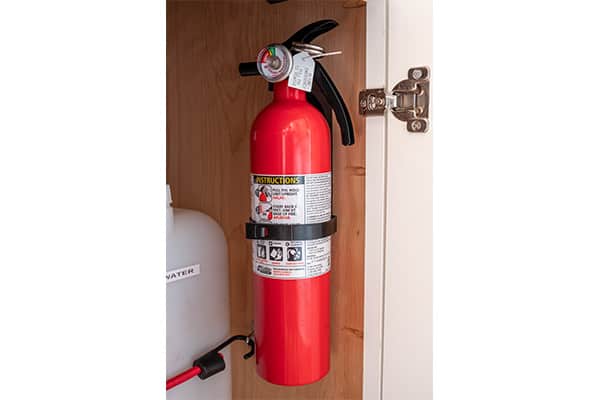
21) Fire extinguisher

Fire extinguisher installed in van

Don’t make the mistake of not including a fire extinguisher in your van. In an emergency, you’ll be glad that you had one. A small fire extinguisher can easily be mounted under the sink or in another location that’s easy to get to. This is an invaluable accessory that must be included in case a fire were to break out. Things happen and if you are cooking inside a small area, there is always a chance that a fire could start.


22) Carbon Monoxide Detector

Carbon monoxide detector closeup

A CO detector is an essential item that everyone should have. A van is a tight space and if carbon monoxide is ever present, you would want to have a warning. This is especially true for those who use any type of propane cooking device or heating. Anytime you are in an enclosed space like this with different gasses being moved through from cooking, heating, and engine running, it’s a good idea to have a protective warning in case the CO levels reach dangerous levels. I use this one. It detects CO and also displays the current temperature.


23) Tool kit

You never know when something will break when you are out on the road. Having a tool kit is another essential item that you just don’t want to be without. This kit should contain the standard tools that you might need to use. Screwdrivers, wrenches, plyers, wire cutters, extra screws, etc. If you are converting a van, it’s a good idea to create a toolkit as you go. This could contain extras parts that could be used to replace broken ones. Odd bolts, screws, washers will come in handy if you ever need to fix anything while on a trip.


24) Roadside Emergency Kit

Roadside emergency kit

An emergency kit is an essential part of every RV and should be included in your van. This type of kit contains items that you will need in case of an emergency or when you are broken down on the side of the road.


25) First Aid Kit

Van life first aid kit

Similar to an emergency kit, a first aid kit is also important. Those of us who travel in vans often find ourselves in remote areas boondocking so it’s important to have essential first aid items in case something goes wrong. These kits are affordable and small enough to store anywhere out of the way in your camper van. However, you will be glad you have one if the need ever arises.


26) Jump Starter

Car jump starter

A jump starter can be a nice item to have should you find yourself stranded on a dead battery. Rather than finding someone to jumpstart your van, you can hook up the cables to your battery and jump yourself. It’s a must-have item that I keep in all of my vehicles and it makes me feel safer when I travel.


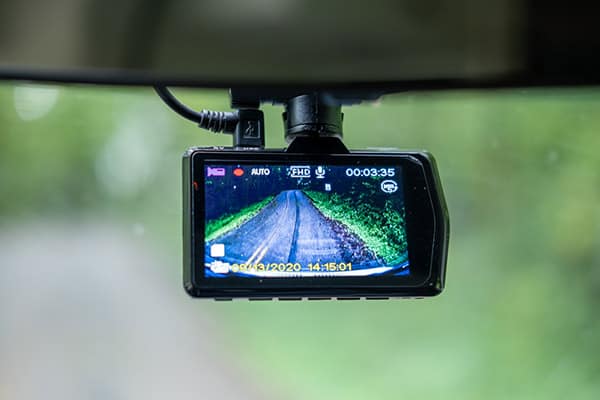
27) Dash Cam

Dashcam on windshield of van

A dash cam is becoming an essential item these days and gives you a great way to provide your insurance with the exact details of an accident. A high-quality dash cam will help to ensure that you can catch problems on camera rather than having to explain what happened. It’s an item that will give you a little more peace of mind as you go about your journey. Most of us in camper vans spend a lot of time driving from place to place so it just makes good sense to have one of these.


Other

28) Trash Can

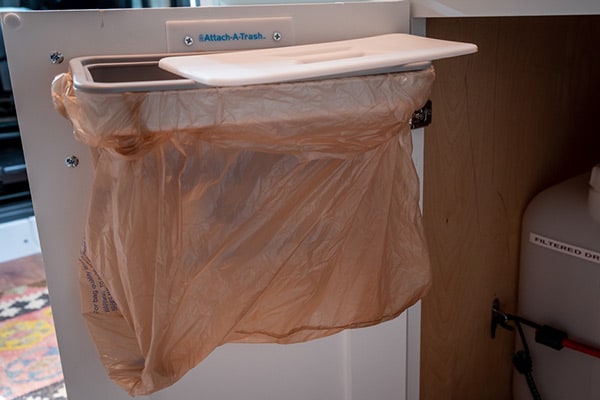
Trash can hanging on cabinet door

A trash can is needed but a camper van often has limited space. I made use of this mountable grocery bag holder to serve as my trash can. What would be wasted space typically becomes an area used to hold a grocery bag that can be re-purposed as a trash bag. The good thing about using A small grocery bag for trash is that you can only put so much in it. You are forced to dump the trash more often when you have a small solution like this. The one I have is plastic but it bends quite a bit as the trash gets full. I recommend a sturdier metal one.


29) Rubber Flip Flops / Shower Shoes

Camping shower shoes

Don’t leave home without these if you intend on using campground showers or other public showers. It can be pretty disgusting walking barefooted on some of the floors that I have seen in various campgrounds and public showers. Having rubber flip-flops or some type of shower shoes allows you to keep your feet clean without having to walk through who knows what that has been on the floor where you are showering.


30) Broom / Dust Pan

Broom and dust pan on floor

Small areas such as those that are in a van can get quite dirty very quickly. Having a dustpan and small broom on hand is a great way to keep things picked up and cleaned along the way. You don’t need a large broom but a small one such as this one is great because it gets the job done and stores away easily when not in use.


31) Mini Space Heater

Mini space heater in a camper van

If you travel in colder temperatures, having a mini space heater will come in handy as long as you have a place to get plenty of electricity. I keep a space heater in my van for those cool nights when staying somewhere with electrical hookups. You can also choose to use a propane type of heater like the Little Buddy heater although I haven’t had good experiences with these.


32) Goal Zero Collapsible Lantern / UCO Flashlight

Flashlights on camper van table

Lighting is something that you can also never get enough of. When in a van environment, you never know when you’ll be out of electricity or require additional light. The Goal Zero collapsible lantern collapses flat and can easily be stored in a very small area. I keep mine in the storage netting hanging on the back of my seat so that I always know where it is. Another great light is the UCO flashlight which is a super small light that doubles as a lantern. It’s a great choice for wandering off from your van during times of low visibility.


33) Bug Screen

Bug screen on sliding van door

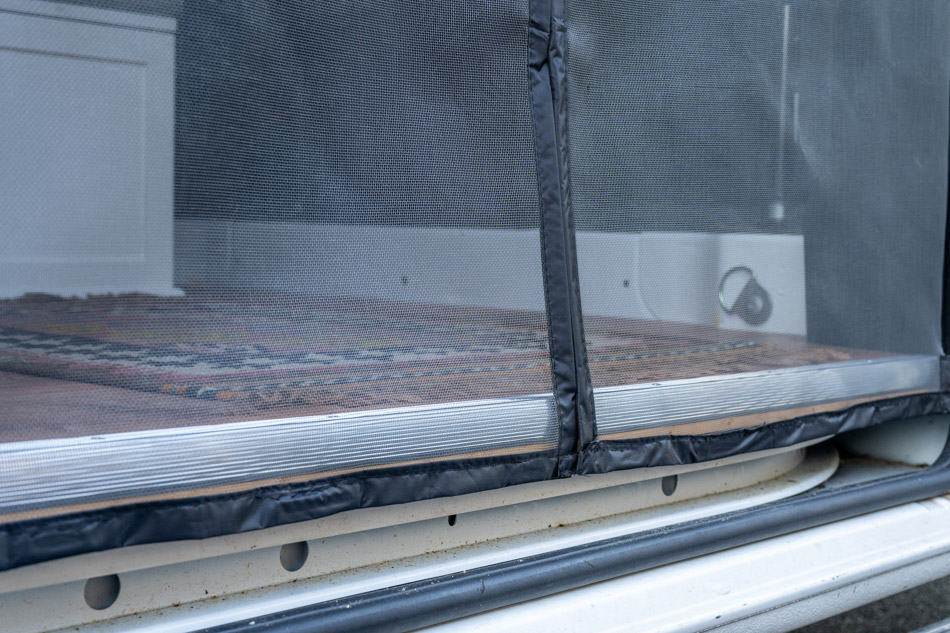
Bugs will annoy you to death if you don’t have some way to keep them away. Having a bug screen on your van door is a great way to keep them out while you enjoy your time inside. You can keep the side door open while enjoying the airflow and keeping your sanity. Bug screens are available that fit specific van models or you can easily make your own for MUCH less. Read my post about how I created my own bug screen for my sliding side door.


34) Cleanwaste Go Anywhere Toilet With Bags

Portable toilet in grass

Whether you have a toilet in your van or not, it’s always a good idea to have another emergency option. There may be times when you can’t dump your black tank or something is malfunctioning on your cassette toilet. Having a simple toilet solution like the Go Anywhere toilet gives you an extra option when needed. Read my Go Anywhere Toilet review.


35) Reusable Shopping Bags

Reusable shopping bags

If you are in the USA, shopping can be a wasteful endeavor because of all the plastic shopping bags. Storing reusable shopping bags in your van is a great way to be more responsible and keep your van less cluttered. If you do happen to end up with the occasional shopping bag, you can always use it in the trash can attachment that I discussed above.


36) Portable Fan

Portable USB fan in van

No matter where you intend to go, there will probably be times when the weather is hot. Even if not hot, it can get quite stuffy in a van so you’ll want to have some way to move the air. While a roof fan combined with vented windows can do a great job, having a portable fan that can be pointed directly at you is a great way to beat the heat. A small fan can be positioned where you want it when you need it most.


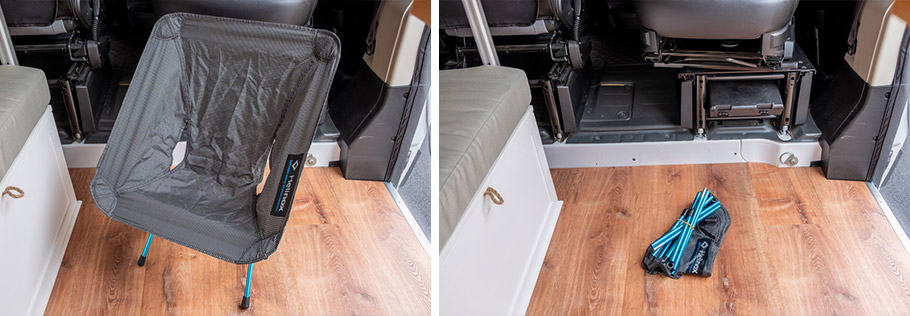
37) Camping Chair

Portable chair set up and broken down

A camping chair is a must and a van needs a chair that folds up small and weighs as little as possible. Of course, small chairs aren’t always comfortable. Enter the Helinox Chair Zero that is super lightweight and folds up small and stores aways in the smallest of spaces. It’s great for sitting around the campfire or taking on a hike. This chair stays in my van at all times and is always in my backpack when I go on long hikes. It’s nice to have a comfortable chair to take a break in while out on the trail.


38) Bungee Cords Galore

Bungee cords

Bungee cords are essential if you want to keep items from moving around all over your van. There is always something that needs tied down and you can never have too many bungee cords to keep everything secure. It’s best to have a large supply of them on hand for when you need them.


39) Portable Solar Power

Portable solar in camper van

Whether you are a fan of solar or not, having a backup solar power system can be a great way to ensure that you always have electricity. You can purchase a small Jackery unit that powers your devices and more so that you have it to use when you have no other way of getting power. If you don’t have a built-in solar system in your van, a portable solar power solution can be a huge help when boondocking off the beaten path.


40) Portable Clothesline

Portable clothes line

I have a shower in my van that has a shower rod where I hang dry my wet items. However, if you don’t have this, a portable clothesline will do the trick. You can stretch this out across wherever you want whether it’s inside or outside your van. It gives you a place to hang wet, sweaty clothes or use it for drying clothes that you have washed in the sink.


Van life is a good life but can be made so much better by all of these modern innovations. Each of these items on my list serves a purpose and makes your life easier or eases your mind of the stresses that you might normally have.

Living in a van requires that you become innovative in your approaches so these accessories will be welcomed indeed. You don’t have to live an uncomfortable existence or do without the luxuries that you may be used to. Instead, you need to find different approaches that fit the lifestyle of going small.

Each accessory you have in your van should solve a problem or make your life easier without taking up a ton of space. Hopefully, these accessories I have included will make your life easier as they have mine throughout my travels.

Thetford Cassette Toilet Review – Is It A Good Choice?

When considering a toilet for a camper or other small living environment, there are a few different types that you can choose from. Cassette toilets are among the most popular and are also very convenient and easy to use. These types of toilets are affordable and portable so they are easy to use in many different scenarios.

They are similar to the type you would find in your home. They contain a bowl that will hold freshwater that you do your business in and then flush it down into a waste holding tank. The only difference is that when you flush it down, you have to eventually dump that waste tank.

While similar to the standard toilet in a home, there are also many differences. There are a variety of different brands, types, and models on the market. Among some of the top brands that you can choose from and include:

  • Dometic
  • Thetford
  • Camco
  • Coleman
  • And a bunch of lesser-known brands that you can find at online retailers

The one you choose is simply a matter of the features that you want and how much you want to spend. Some of these brands have been around for a while and are tried and true. Dometic and Thetford are among the most trusted names in the camping industry so these are always a good choice. You probably know the name Dometic from the refrigeration products that they make. I installed a Dometic refrigerator in my van and it has been a great product. Let’s talk about toilets though.

I chose to use the Thetford Porta Potti 365 for my camper van simply because I liked the features that this toilet offered. I also liked the size of it as it would fit perfectly in the location that I had designated for it. The price is good and the product seemed like a high-quality product that would get the job done.

This series of toilets also has other models that you may prefer.

  • Porta Potti 565 – The largest toilet that Thetford offers with a 4-gallon freshwater tank and a 5.5-gallon wastewater tank. It features a standard-sized toilet seat and also has an electric flush on it that uses batteries. It even includes a hidden toilet paper holder.
  • Thetford Porta Potti 345 – A smaller toilet that still maintains a 4-gallon freshwater tank but only a 3.2-gallon wastewater tank. You’ll have to dump this one a little more often.
  • Thetford Porta Potti 335 – Even smaller with a 2.6-gallon freshwater tank and a 2.6-gallon wastewater tank.
  • Thetford Porta Potti 135 – Same size as the 335 but offers a pump flush rather than the standard piston flush like the other models.

The main difference in these toilets will be the size. The amount of space that you have for a toilet will probably be the deciding factor on the one that you choose. I wanted something as small as possible but also big enough to feel as though it was comfortable and not so awkward.

Thetford Porta Potti 365 Quality and Features

The Thetford Porta Potti 365 toilet that I purchased and use in my camper van is basic. I prefer products like this since there is not much to them and very limited functionality that can go wrong. It is a simple toilet that has a freshwater reservoir at the top along with a wastewater tank.

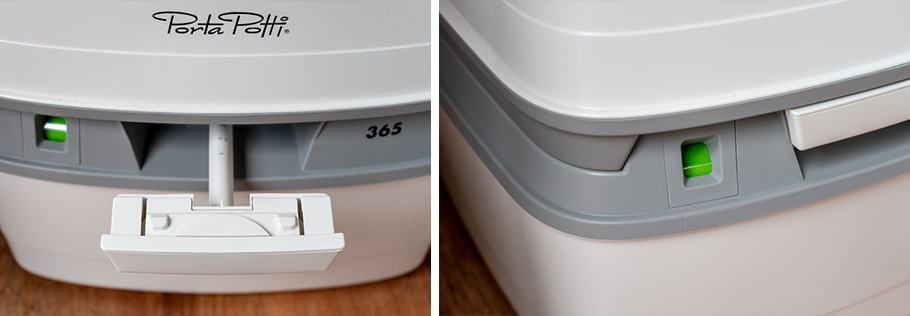
As with all of these toilets, this one has a flushing mechanism that pulls out and makes it easy to flush the waste down into the blackwater tank. It also features a gauge so that you can determine when your wastewater holding tank is full. Personally, I never really use this because I generally know when it’s time to change it. I keep my toilet changed every day or two when I am out on the road so that the gauge never really comes into play.

Cassette toilet flush mechanism and gauge

However, this is a good feature if it’s something that you want to use. If you intend on going longer periods between dumping your toilet, this gauge might help you to keep from overfilling your wastewater tank.

Using The Thetford Porta Potti 365 Toilet

Using this type of toilet is very simple. It doesn’t require anything special which is why I like it. It isn’t wasteful since you only need to put water in it and possibly some type of chemical or even vinegar to help with smells. I use Walex Bio-Pak chemicals in mine. These work great at keeping the smell down but they do have a bit of a chemical smell to them that can permeate your van or small camping area.

Adding chemical pack to toilet

The smell is pleasant but some people might not like this type of chemical smell around. It smells like a typical fresh toilet smell and nothing special. Oftentimes I do use vinegar but I have found that these chemical packets Keep it smelling fresher for longer. You only notice the smell of the chemicals when you flush the toilet and some of the chemical smell escapes.

The first step to using this toilet is to fill the top reservoir with fresh water. This will be the water that will be used to flush the toilet when you use it. In the case of the Porta Potti 365, this reservoir is 4 gallons. I generally fill it up almost to the full level. To accomplish this, you simply use the piston pump to pump the freshwater into the bowl.

Piston pump on a cassette toilet

Once this is filled with water, you will want to add some type of deodorizer and waste breakdown chemical to the waste holding tank. This is not a necessary step but I have found that it makes a big difference in how long you can go without dumping your toilet or having unpleasant odors in your living area. It’s easy to do with the tablets mentioned above. You can simply drop one in and it will do the rest for you.

Once this is done, you are ready to begin using the toilet.

To use, pump a little bit of freshwater into the toilet bowl so that the bowl has water in it like a standard toilet. Once you have done this, you can relieve yourself. After you have done your business, you can simply flush this waste down by pulling the lever in the front of the toilet. The waste will be flushed into the wastewater tank below. This wastewater tank is sealed off so that no smells should escape.

Seat on a cassette toilet

To dump the toilet, you will simply need to remove the top portion of the toilet by using the lever on the back. Once you have removed the top from the bottom, you will then be able to dump the bottom portion into an approved waste dumping site. You may also choose to dump it into a standard toilet, a pit toilet, or a portable toilet that can often be found in construction areas.

This toilet has a button that you push while you are dumping it so that airflow allows the wastewater to flow more easily. Pushing this button gives the toilet a good smooth flow. This toilet is easy to dump at a standard RV dump site.

I would suggest wearing rubber gloves when dealing with dumping the wastewater tank. However, it really isn’t a messy job if you are careful. I have never had an issue with any of the waste leaking or getting onto me in any way. The process is easy to do and the wastewater flows out of the pour spout easily.

Thetford Porta Potti 365 For A Camper Van

If you are planning to use this toilet for a camper van or other small camping unit, it is a great choice. It is a good size and can easily be stored away if you do not have a place that it can remain continually set up. Many people use a sliding drawer or a bench seat that the toilet can easily be stored into. Once The drawer is pulled out or the bench is raised, the toilet is revealed making it out of sight and out of mind for the most part.

Many people are afraid of the odor that might persist from having a toilet like this in a small space. However, my experience has been positive with this cassette toilet. I have not found this to be the case and for the most part, the toilet has no smell that comes from it. Of course, this will depend on what you use the toilet for. If you intend to use it only for liquids, you should have no problems.

If you do intend to use it for solids as well, you will have a little more difficulty keeping the odor away. There really is no getting around this. While you can use deodorizing tablets that break down the waste and keep the odors down, they can only do so much. I would suggest that if you plan on using this type of toilet for solids as well as liquids, make sure that you have a plan to keep the toilet dumped out and cleaned on a regular basis.

My toilet sits in my shower all the time and is held in with bungee cords when I am driving. It sits tight and is always ready to be used. It’s convenient for me to be able to pull over at any location and hop back into the living area and relieve myself. All of this without ever leaving the van. It’s super handy when you are traveling long distances or are in a location where it may be difficult to find a public bathroom.

I would not want to be without this toilet in my camper van. I would much rather use it then have to go into a convenient store and use public facilities. Since the toilet is so easy to maintain and dump, it gets used quite often in my van and has been a great choice overall.

Pros And Cons

Pros

  • It’s convenient. Having a toilet like this that can travel with you gives you a convenient place to relieve yourself when you don’t want to stop at a public restroom.
  • It’s well-built and high-quality. It feels like a substantial toilet when you sit on it so you won’t feel like you are copping a squat on a flimsy toy. This toilet is built to be used and should last for years if properly maintained.
  • It’s an affordable option compared to other types of toilets. You can spend over a thousand dollars on some types of toilets. A cassette toilet allows you to create a convenient throne in your camper for less.
  • It’s small and doesn’t take up much space. You can keep it out in the open or you can store it away easily. If you build a custom bench or cabinet for it, no one will ever know it exists.
  • It’s easy to maintain. Fill it with fresh water and then dump the wastewater as needed. Clean it as needed by sloshing some water and vinegar in the waste holding tank and that’s about it.
  • It does not put off unpleasant odors. I have used mine for over a year and have not noticed any unpleasant odors. It does a good job of keeping any odors sealed in as long as you take precautions and use deodorizing chemicals and keep it dumped and cleaned.

Cons

  • Not as comfortable as a home toilet or the larger models. Although it is well built, it is not nearly as comfortable as the home toilet you may be used to. The Porta Potti 365 is not a full-sized seat so it does hurt a little if you sit on it for any length of time.
  • Has to be dumped and maintained. Although easy to do, dumping a toilet can be a dreadful chore when out on the road. However, you’ll have to do this no matter what type of toilet you have in your rig. It’s just part of the fun.

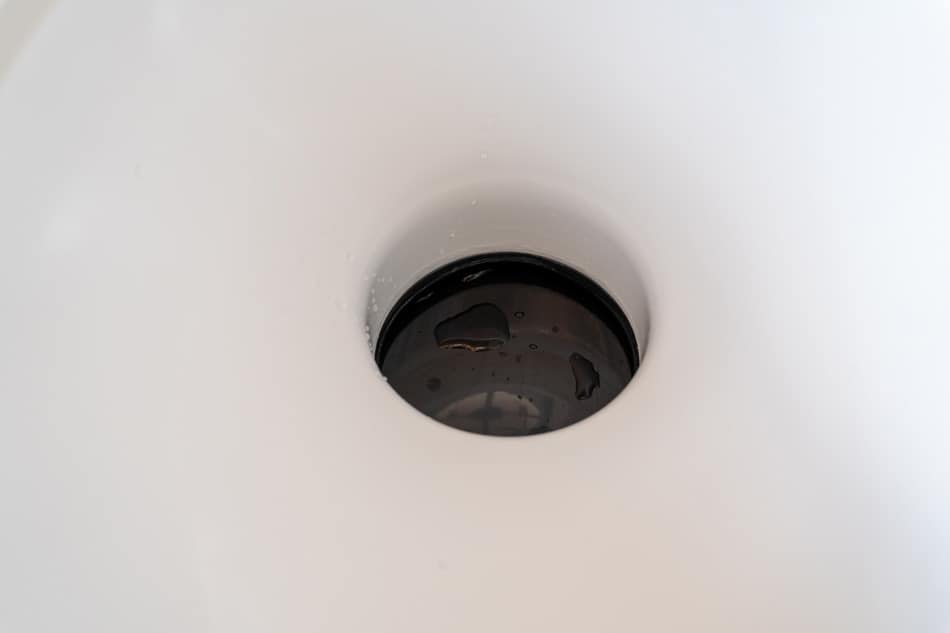
UPDATE: I have noticed a problem with the seal between the freshwater tank and the wastewater tank over time. There are times when the toilet bowl does not hold fresh water and it will drip immediately into the waste holding tank. So, when you relieve yourself in it, the liquid just flows right into the waste tank without having to flush it. I haven’t figured out why it does this but it seems like the weather affects the seal and you must make sure the top part of the toilet is seated perfectly onto the bottom part.

Cassette toilet seal

Bottom line

A cassette toilet is a great option for those who want a toilet in their mobile living space. The Thetford Porta Potti 365 has been perfect for my camper van and it would provide a great way to have any portable toilet in any type of camper. Overall, this toilet is an excellent choice for those needing something large enough for multiple adults to use but small enough to be able to store away easily.

For the price, a cassette toilet is a good way to include an easy-to-use toilet in any situation. Whether it is a van conversion, a truck camper, a tiny home, cabin, or any other situation where you could use a mobile toilet unit, it will serve your needs well.

The Thetford line of toilets offers something for everyone. Whether you want the large fancy model or a small basic one, they are all high-quality and the only difference is features and capacity. It’s an affordable choice for those looking to include some type of toilet in a camping type of living environment.

Is A Camper Van Self Contained? Why It Matters

If you have looked at various types of RVs, you have probably heard the term self-contained. Some types of RVs are and some types aren’t. Besides the convenience factor, having an RV like this can be especially useful in some scenarios depending on the type of camping you want to do. Some RV parks and other places such as Harvest Hosts locations may require that you have a self-contained RV.

Most large motorhomes and trailers contain everything that you could ever need inside them. What about camper vans though? Since they are much smaller than a Class A motorhome or even a Class C, one would think that a camper van might not meet this description.

A camper van is usually self-contained as long as it has freshwater holding tanks as well as gray and black water holding tanks. If you can run water, take showers, cook, and use the toilet without leaving your van, it is considered self-contained. Only the smallest and most primitive of van setups do not contain all of these amenities.

If you have to step outside your van to use a hanging shower or your water drains directly onto the ground, it would not be considered self-contained.

Having a self-contained camper van is a good idea if you intend to stay in locations that require it.

Self-Contained RV vs Non-Self-Contained

Let’s look at the difference between these two types of RVs. In a self-contained unit, all of the facilities that you need to use will be located within the unit. There will be no need to go outside of the unit to do any of your usual tasks such as using the toilet, cooking, taking a shower, lounging, and sleeping.

All of the amenities are contained within the RV so that nothing has to be done outside of the RV. This makes you completely self-sufficient and able to do all of the things that you need to do without ever leaving the confinement of your RV.

When you think of an RV like this, you may think of a large motorhome such as a Class A. You may also think of a large travel trailer such as a fifth wheel. These types of RVs are large enough to contain all of the items that you need inside without ever needing to leave.

It’s similar to a home in which you can do all of the tasks that you need to do without having to go outside. Everything is contained within the house just as it is with these RVs.

However, it doesn’t have to be a large RV like this to be self-contained. There are many small RVs there are also self-contained. Camper vans often have everything that is needed for living inside of the RV. In a manufactured Class B motorhome, these amenities are often standard and included with even the lower-cost models.

Most of them have some type of toilet or at least the option available. The toilet may be a wet bath which also includes a shower. A kitchen with a sink is also standard and all of these source their fresh water from a water tank or multiple water tanks and then dump the gray and black water into a waste tank mounted underneath the RV. The only difference being that the holding tanks are generally much smaller than they are with the larger RVs mentioned above.

Now let’s look at some RVs that are not self-contained.

These types of RVs are generally more primitive and offer a camping experience without including the luxuries found in self-contained units. These might include camper vans that are set up with a very minimalistic layout or these could be pop-up campers or small teardrop trailers where items are located outside of the vehicle. In a typical teardrop trailer set up, the kitchen is located outside so one has to venture outside of the living area in order to cook meals.

A small teardrop trailer also does not have a shower inside and often does not include a toilet unless it is a portable cassette toilet or another type. With this type of RV, you may be required to use an outdoor shower if you want to wash off. Some of these trailers provide a built-in outdoor shower that can be used or you may choose to use a hanging portable shower.

An RV that is not self-contained is often seen in a more primitive location such as a campground or off the grid in a location that has no hookups. Someone camping in this type of an RV we will probably enjoy venturing outside of the structure rather than doing it all within. To use the bathroom, one may venture off into the woods with a shovel and some toilet paper. This is more true to wild camping than that of a luxurious, self-contained RV.

Why A Self-Contained RV Matters

Having a self-contained RV allows you to stay in locations where you might not be able to stay otherwise. Many higher-end RV parks require that your RV be self-contained and have everything inside that you need. If you use the popular Harvest Hosts when you travel, these locations require that you have everything within your RV. This means that you shouldn’t be going outside to use the bathroom or you shouldn’t be outside cooking, showering, etc.

When you have to do these things outside your RV, you are drawing more attention and creating an eyesore for others that may be around. In the example of Harvest Hosts, you are staying on the property of someone’s business. You don’t want to cause an eyesore and have a negative impact on their business.

This is also the case when you use other services such as Boondockers Welcome. When using this type of service, you are staying on other people’s property so you want to be considerate. Having everything that you need contained within your van is an easy way to make sure that you will be welcomed in most places.

It’s also important to understand that if you do not intend to take a shower while you are in a location then a shower need not be in your van to be self-contained. It’s only the amenities that you will be using that should be within your van.

Converting A Van To Be Self-Contained

If you are converting a van and want to make sure that everything is self-contained, there are a few things to consider including in your van layout.

  • Toilet. This could be a simple cassette toilet, composting toilet, or an installed toilet that has a black water tank installed beneath the van. It doesn’t matter the type as long as you can use it without leaving the van.
  • Shower. If you want to take showers, you will need one installed so that you can do it inside the van. This could be a full-featured shower or a simple solution that allows you to spray off or wash from a bucket. It doesn’t have to be anything fancy as long as you can do it without going outside and as long as the wastewater is contained rather than flowing freely out of the van.
  • Kitchen. Most van conversions include a Kitchen and it’s important to have in a self-contained setup. You will want to build this so that you can prepare food, cook food, and wash dishes without leaving the confines of the van. This can easily be accomplished with a basic kitchen setup with counter space and a camp stove along with a sink and faucet that utilizes a simple water system.

These three areas are the biggest concern since all other activities are easy to manage within the van. These necessities are great to have built-in so that you never even have to leave your living space.

Bottom Line

Most camper vans are self-contained or at least have enough amenities to be able to live in comfort without leaving the van. There are many on the market that are decked out with features and are as luxurious as some of the larger motorhomes although much smaller.

If you are on the market for a manufactured Class B motorhome, you’ll have no problem finding one that is self-contained. Most of these have different options so you can choose exactly what you want inside your van and the layout that you like. If you are converting a van, it’s easy enough to build everything inside that you need.

Having a self-contained camper van is great especially when you can pull into a place and never even get out of the van. This isn’t often the case but it’s great to be able to have this option when you park somewhere where you don’t care to venture outside.

Camper Van Bug Screen – Cheap DIY Solution

Having a bug screen on your van is necessary if you intend to stay sane in bug-infested areas. It’s hard to escape bugs no matter where you are so it’s likely that you’ll end up in many places where bugs are a problem. With a bug screen installed on your sliding door, you can help to ward off these pesky creatures and not allow them into your van.

There are several pre-made bug screens that you can purchase and these will probably do a great job. However, they are very pricey with some being priced at nearly $500! Although it is nice to have a product like this that is custom made to fit your van, the price is a dealbreaker for many (including me).

I looked at various bug screens on the market and decided I would attempt to create one on my own. After custom building an entire camper van, I decided that a small project like this couldn’t be very difficult.

Instead of purchasing an expensive bug screen, I chose to purchase a pre-made home bug screen and customize it to fit my van sliding door area. My van is a RAM Promaster 159″ 2500 high roof but the same process will apply to any van. You will just need to purchase a bug screen that is wide enough for your doorway and you can cut it as needed to make it fit nice and neat.

Products & Tools You’ll Need

You’ll need some type of screen material to start with. There are plenty of magnetic screens that are made for houses that you can choose from. This is what I chose to do. You can find these in various sizes so you’ll want to make sure that you buy one that is a little larger than your door opening.

For the RAM Promaster, you’ll need something around 54 inches wide and 72 inches tall.

I purchased this bug screen. It measures 62 inches wide and 87 inches tall. This is much larger than needed but it is as close as I could find.

This screen comes with all the hook & loop material that you will need to install it. It has a magnetic closure on it so that the screen closes on its own when you go in and out of the door.

You will also need some magnets to hold it closed at the bottom (if you want it to do this). You can use some of the magnets that come with the screen or you can purchase additional ones that can easily be sewn or glued into the material.

I used these magnets that I had leftover from another project along with the ones that come with the screen (in the excess material that I cut off). However, the ones I used are very strong so you may want to go with something smaller like these magnets.

Other products and tools you may need:

The fabric glue is a good choice if you decide not to sew the trim onto the bug screen. Sewing isn’t completely necessary but it does give it a nice finished look that will hold up over time, especially if you will be removing and re-installing the screen at various times throughout the year.

The supplies needed for this project are minimal and should cost only a fraction of what you would pay for a pre-made bug screen. It helps to be able to sew or know someone who can sew it for you but as mentioned above, it isn’t totally necessary to end up with a nice-looking, custom fitting bug screen by just using fabric glue.

My wife sewed ours with her sewing machine and was able to get it done fairly quickly. I wouldn’t suggest hand sewing it. If hand sewing is your only option, you will be better off using fabric glue only.

Measuring & Cutting

Step 1 – Temporarily install the screen

The first step is to install the screen in your van so that you can mark it for cutting. I started by installing the hook and loop tape at the top of the door frame all the way across. Once installed, you can connect your bug net at the top while leaving the side undone. I chose to line mine up perfectly on one side so that I would only have to cut off the excess on the other side and on the bottom.

However, my kitchen takes up part of the doorway so this worked fine in my case. If you have a full, open doorframe, you may want the entrance lined up in the center. In this case, you’ll need to center the bug screen and then trim each side of it to line up.

Bug screen installed with excess hanging off
Temporarily install screen and tape off where you will need to cut off the excess.

As you can see from the picture, I installed the screen so that it fit perfectly on one side. I tucked the screen into the weatherstripping on my kitchen side and had about a foot of excess on the other side. I was able to make the screen stick to the hook and loop strip and hold it into place long enough for me to mark it. I marked it using blue painter’s tape. The only tricky part is the corners where you will have to be extra careful that you mark it correctly. Make sure the other areas are pulled tightly and into place before marking the corners.

It’s also important to note that I removed the foam block that is installed in the Promaster. You don’t have to do this and you can choose to run the bug screen right over the top of it but I didn’t want that. I wanted it to sit flush on the door frame.

I took the foam out and sawed off a couple of inches of it and then re-installed the foam. Be careful if you decide to do this because there is an airbag located near it. You don’t want to damage any of this in the process.

The foam is held in by one push clip but you’ll have to remove a few of them in the headliner to get to it. You’ll probably need to use some kind of removal tool made for this. I used this auto trim removal kit and it’s the same kit I used to take off other panels in my van during my van build.

Full length view of bug screen
Painters tape works great to mark exactly where you will need to cut.

Step 2 – Cut the screen to size

Now that you have the screen marked with tape, you’ll need to cut the screen at this point. I used a good sharp pair of scissors to do this. Any scissors should work just fine. Once cut, you should have a screen that will fit perfectly within your door frame. If you have already installed the hook and loop strip around the door frame, the screen will stick to it (sort-of) so that you can see what it will look like.

Cutting the bug screen to fit
Cut using sharp scissors and then place screen back on door frame to make sure it fits.

Next, you’ll need to take off the trim piece from the part(s) you cut off and then sew or glue it back onto your new cut edge. To remove the trim, you can use a pair of scissors or a seam ripper. I used a seam ripper and it made quick work of the job. If you are having someone sew the trim for you, they probably have a seam ripper and can easily do this for you.

Screen Bottom

Once the side is cut, you’ll have a screen that lines up perfectly within your door frame. You’ll also be left with a lot of excess hanging down at the bottom of the door. You’ll want to tape this off in the same way that you did the side and then cut. I lined mine up to where it would meet with the metal of the van. This is because I will have magnets sewn into this bottom part and this will give the magnets a nice metal strip to cling to.

trimming bottom of bug screen
Mark the bottom and cut so that the bottom lines up with the metal and is out of the way of the sliding door.
Important: make sure that the bug net will not be in the way of the sliding door closing. You want to be able to still close the sliding door while the bug net is installed.

Once you have the bottom cut, you will be able to see exactly how your screen is going to fit. It should fit perfectly within your door frame, assuming you measured and cut it correctly.

The only thing left to do is to sew the trim back onto the newly cut sections.

Sewing OR Gluing The Trim Back On

Sewing trim on net
Remove trim from the screen that was cut off and sew or glue the trim back onto the newly cut areas.

Sewing the trim back together is the most challenging part of this process, in my opinion. Just the size of the bug screen makes it difficult to work with. Once you have removed the trim from the cut sides, you can now place it on the newly cut areas.

Be sure the netting is inserted all the way inside the trim before gluing or sewing.

We used pins to hold the trim into place and then took them out as the trim was being sewn. You won’t have to worry about doing this if you are simply gluing the trim back on. Just make sure the net is all the way inside the trim and glue it down using good fabric glue.

Bottom Magnets

For the bottom of the net, I chose to install magnets that will pull the screen tight to the van when closed. This really helps in keeping the screen totally sealed so that no bugs can find their way in. Without it, you’ll have a gap at the bottom that will blow in the wind when it’s closed. This will create an air gap for bugs to fly right up into your van.

Bottom trim of bug net
Install magnets inside the bottom trim so that it sticks to the metal, creating a snug fit.

The best way to avoid this is to seal off the bottom and it’s easy to do with magnets. I was able to use some of the magnets that came out of the extra length that I cut from the net. I also added other neodymium bar magnets that are really strong. I would suggest something a bit smaller than the ones I used. The ones I chose are a little too strong and make the screen cling a little too tightly.

These magnets would probably work perfectly in this scenario.

I glued the magnets into the trim and after it dried, sewed the trim onto the net just as I had done on the other sections. Once finished, you have a nice trimmed bottom with magnets in it that will latch onto the van and give you a sealed bug screen all the way around.

Installing & Using

Installing the screen is as simple as connecting it back to the hook and loop tape that you have already installed, only this time it will be a finished product. It should fit perfectly in your door opening and look like it was custom made for your van.

You should be able to go in and out easily and the magnets should close the screen back together when you are through it. The magnets will also pull the screen snug to the van at the bottom so that all areas are held tightly in place and will do a good job at keeping those pesky creatures out. You’ll be able to close your sliding door with no problems as long as you have measured it correctly.

This project was very affordable and I ended up with a screen for my van that has worked out very well. I would consider this to be a simple DIY project that can save you a lot of money when you compare it to the ready-made screens on the market.

Conversion Van Interior Lighting – LED Lights Installation

Installing lights in a conversion van is a necessary step if you want to have sufficient lighting to brighten the living space up. A camper van can be quite small so choosing the right kind of lighting can make all the difference. Too much lighting and you’ll feel like you are living on the sun but too little lighting can make your tiny space feel even more depressing.

In my opinion, the perfect solution is to utilize LED technology with dimmer switches so that you can control the amount of brightness in the van. This is exactly what I chose to do in my van. Before I get into the details of how I designed and installed my lighting system, let’s look at the products I chose for the job.

Products I Used

Acegoo LED Lights

Acegoo LED lights have become a popular choice for camper van conversions and for a good reason; they make great lights since they are small, lightweight, use very little energy, and look great. Acegoo has different types of light configurations but I chose to use the recessed LED lights in silver. I personally like the silver look against the cedar wood planks that I used on my ceiling. You can also choose white if that is what you prefer.

Acegoo recessed lights closeup

These lights are very bright for their size and energy usage. Likely, you will not need very many of them to complete a well-lit area within your van conversion. I purchased two 4-pack boxes. With a total of eight lights to work with, I had plenty to get the job done with sufficient lighting for my entire van. I ended up using only 7 of the lights so I had one left over.

As you can see from the image below, these lights measure in at 2 3/4 inches in diameter. Each light weighs approximately 1.6 ounces (46g).

Measurement of LED light

Of course, Acegoo isn’t the only option available but these lights are tried and true in the van conversion community. They have a lot going for them and I highly recommend them.

Installing Recessed LED Lights In Van

The installation of these lights is pretty simple. You will need to drill 2 1/4 inch holes for the lights to fit into. These can easily be drilled using a Forstner bit. This type of drill bit is great because it creates a very clean cut and bores through the cedar wood ceiling as if you are cutting through butter.

I cut these holes during the process of installing the cedar planks on the ceiling. I had marked the location of each light on the ceiling before installing my cedar planks. Once I came to a location that required a hole for a light, I drilled the hole after I had measured my cedar plank.

After the cedar planks were all installed, I had a finished ceiling with six holes throughout the living area that all had wires ready to be connected.

Light hole in ceiling with wires hanging out

Before installing the lights and connecting the wires, I wanted to make sure that there was enough air gap so that the lights would not be touching the insulation. At the time, I was not sure how hot these lights would get so I wanted to be sure that nothing will overheat and catch fire. I realize that LED lights do not put off a lot of heat but during my testing, I did notice at least some heat coming from them.

To do this, I cut some small pieces of wood and glued them on the upper side of the ceiling where the holes are. This allowed me to push the insulation up at each light location so that it did not touch the light. It created a small air gap so that any heat coming from the lights could be dissipated before reaching any kind of material.

Air gap above ceiling light

This is just a precautionary measure that I took to make myself feel better. It may not be necessary but I feel better having created an air gap like this.

After this was created, the next step was to wire up all of the lights.

Wiring 12v Lights In Parallel

Installing 12v LED lights is a fairly simple process. With the Acegoo lights, you have two wires that come off of each light. One of the wires is positive and the other is negative. In a simple setup, the red will go to the positive side of your battery and the black will go to the negative side. However, when you have more than one light to install, you can easily install them in a parallel configuration.

This simply means that all of the positive wires will connect together and all of the negative wires will connect together.

Light diagram for camper van

In my light configuration, I had three zones of lights.

  • Zone 1 – my bedroom lights which includes two lights that will be controlled on the same dimmable light switch.
  • Zone 2 – the living area lights that encompass the kitchen, dining area, and living area. This zone contains four lights that will all be connected together and controlled by one dimmable light switch.
  • Zone 3 – one light in the bathroom controlled by an on/off switch.

To install these, each light in a zone was connected to each other by connecting red to red and black to black. This left me with a red and a black wire from each zone that would run to a light switch so that the zone could be controlled.

Light Switches

There are a plethora of light switches that you could choose in a van conversion. Anything from simple on/off switches to touch screens or even wireless controlled switches. No matter what you choose, I would suggest that you choose a dimmable switch because this will give you more control over the brightness in your van.

Being able to dim the lights as needed is a huge plus and you will be glad that you chose them once you are finished with your conversion.

I settled on American Technology Components dimmable switches. These switches are nothing spectacular but they get the job done. They aren’t like some of the fancy touchscreen switches that you might find in some van conversions.

Instead, these are simple but they allow you to control the amount of light you have in your van and provide you with a snappy on/off switch that is satisfying to push. These types of switches are commonly found in RVs.

The interior lights in my van are controlled using the dimmable versions of this switch. All of my lights are wired in a parallel fashion and that leaves me with two wires from each light circuit. These two wires are connected to a light switch, and the light switch is connected to the fuse block.

Light switch wiring

The dimmer switches have 3 wires coming from them. This is how I have mine connected:

  • Red wire – attaches to the positive terminal on the fuse block.
  • Black wire – attaches to the negative terminal on the fuse block AND also to the negative side of the light circuit.
  • White wire – attaches to the positive side of the light circuit.

The fuse block provides constant power but the switch is what either interrupts the current or allows the current to flow to the light circuits.

These switches are simple to install, are very lightweight, and screw in easily if you have a solid wall. I was using wooden walls in all the locations that I installed my switches.

Besides the dimmable switches that I installed for the main circuits in the living area, I also installed a simple on/off switch for my shower. I didn’t feel like this area was worthy of having the more expensive dimmable switch. The light in this area is only used for short amounts of time when I am either taking a shower or using the toilet.

This light switch is a simple connection of red to red and black to black and the switch only controls a single light mounted in the ceiling of the shower.

shower switch and light in shower stall

Acegoo LED Recessed Light Review

Having used the lights in my van for quite a while now, I have had a chance to put them to the test. Overall, these have been great lights and I am glad I chose these for my van conversion. They look great, they put off a lot of bright light, and they use minimal power.

One thing to note is the heat that they produce. As mentioned earlier, I took precautionary measures and created an air gap over each light. This was so that they would not overheat and become a potential fire hazard. The lights do get fairly warm but not to the point of catching something on fire.

Using an infrared thermometer I measured the outer metal ring of the lights at around 120° when they are turned on. This reading was taken in summertime after the lights had been turned on for about 10 minutes.

My advice would be to take this precaution and make sure that the lights are not directly touching something that may be heat sensitive.

Van Conversion Garage Lights

I also installed lights in my garage but they are of a different type than what I used throughout my living area. The lights I chose for my garage are also LED but they have a switch built-in. These also install the same way that the recessed lights did. Each light has two leads coming off of it and these leads go directly to the fuse block. It is a simple positive and negative lead.

Lights installed in van garage

The switch on the light controls it so it’s an easy on and off light and it gives off great lighting for the entire garage area. This is super handy when you need to get something out of this area at nighttime. No need for a flashlight, just flip the switch and the whole garage area is lit up.

Camper Van Lighting Ideas

There may be times that you need additional lighting when you are out on the road. Some of the following are different types of lights that I use for various purposes and have come in handy during my travels. These lighting ideas are typically used for emergency or as a solution for when I wander away from my van in a dark area.

Crank flashlight lantern. This light is great to use in an emergency and it’s great to have in the van. I keep this in my emergency kit so that I always have light no matter what. If the batteries are dead, a couple of minutes of cranking will provide plenty of light.
Goal Zero Crush Light. This light is also great to use in emergencies but I also use this as a flashlight of sorts when I am outside of my van. This is a great little light that is super bright and can easily be charged using the sun with the built-in solar panel on top of it. It crushes down and stores away in a very small space.
UCO Leschi Lantern / Flashlight. This flashlight is one of my favorites since it is so small. Not only is it a flashlight, but it can also be used as a small little lantern. This is my go-to light when camping or hiking and it also comes in handy when you have to venture outside the van but need something small to keep in your pocket.

I have lighting covered fairly well within my van conversion. Some people may say that I have too much light but I don’t think you can have too much lighting. The lights that I have installed in my van do get very bright and I have no problem seeing at all in my van. However, the good thing about it is that I can control the brightness with the dimming switches that I installed.

No matter what type of lighting you choose for your van, most 12 V lights will work the same way. The installation will be similar to what I experienced and with the light choices on the market today, you will have no problem finding lights that provide a sufficient amount of light for your living space.

Camper van ceiling with LED lights

RV Park VS Campground – What’s The Difference?

RV parks and campgrounds are often used interchangeably as a place to either park your RV or pitch your tent. You might notice that searching for either one on the internet will yield very similar results for the area you are searching for. This was something I always wondered about and came to a conclusion once I began to travel to different locations in my camper van.

An RV park and a campground is generally the same thing and both typically provide campsites for RVs or tents. RV parks are built mainly for RVs and some exclusive RV parks or RV resorts only allow motorhomes of a certain size. Campgrounds have a more relaxed, casual feel and an RV park usually has more premium amenities.

Luxury RV parks are often known as RV resorts and offer a premium atmosphere for those traveling in large motorhomes. These are high-end resorts that weed out smaller campers and tents and maintain a list of rules and regulations for those looking for peace and quiet.

With a campground, you are looking at a more relaxed environment where all types of campers may be present. You’ll see motorhomes, trailers, and tents all in one place. It may be a bit noisier as you have different groups of campers sitting around the campfire laughing and having a good time.

At the typical RV park I have visited, most campsites are dedicated to different sizes of RVs. Some of them have a limited number of primitive spots where people can set up a tent or use other small camping solutions.

Some RV parks require that your RV meet some requirements. The main requirement may be that it is not an old, run-down model. This is so that the park doesn’t become cluttered with sketchy looking campers that might be an eyesore for other RV travelers who are looking for a place to camp. They want to keep the place looking clean and up-to-date. This can make it a more attractive place to stay.

RV parks often have amenities such as 30/50 amp electric hookups, water, and sewage hookups, cable TV, wifi, on-site showers and bathrooms, laundry facilities and other amenities.

Difference Between Campgrounds, RV Parks, RV Resorts

Let’s take a look at some of the types of locations that you might visit during an RV or a camping trip. I’ll also give you some examples of each in various locations throughout the United States so that you can see some of the differences between them.

Campgrounds

Perhaps the most common of all camping locations are campgrounds. Campgrounds generally have a casual feel to them and offer camping sites to all types of campers. These types of places allow for tent camping as well as RV camping. Many of them may have limitations as to how large of an RV that they can allow.

Campgrounds are often found in state parks as well as privately owned properties throughout the country. These are quite common and chances are, you have stayed at one of these before if you have spent any time camping. The good thing about these is that they are generally easy to find and they are an affordable option no matter what type of camping you are doing.

Pros

  1. They are affordable. You will generally pay an affordable price to stay in a campground.
  2. They are plentiful. No matter where you are, you can generally find a campground that allows for all types of camping.
  3. Some have amenities available. Most campgrounds have at least some amenities including bathrooms and electrical and water hookups. This isn’t always the case but it’s becoming more and more common to find campgrounds with these amenities.

Cons

  1. They are not always well maintained. Some campgrounds are not maintained properly and you may discover trash and other things that may turn you off to the location.
  2. They might be noisy. Many different campers stay in campgrounds and some like to party, sit by the fire and be louder than what you want to hear.
  3. Rules aren’t always enforced. Some campgrounds are not managed so you may have neighbors that do not know about the rules. This might result in noisy neighbors, barking dogs, and other inconveniences that could ruin your trip.

Examples of campgrounds throughout the United States

NameTypes Of Campers
Mather Campground (Grand Canyon National Park)Tent & RV, no hookups
Jekyll Island Campground (GA)Tent & RV, full hookups available
Greenbrier Campground (Smoky Mountain National Park, TN)Tent & RV, full hookups available

RV Parks

RV Park in Montana

RV parks usually are a step above campgrounds and offer campsites mainly for those traveling in an RV. These types of parks are usually set up for large motorhomes and RVs and have availability for larger rigs than what you might find at a campground. Many of the RV parks that I have visited have campsites for even the largest of RVs. They are generally well maintained and managed so that you can experience a quiet and peaceful rest.
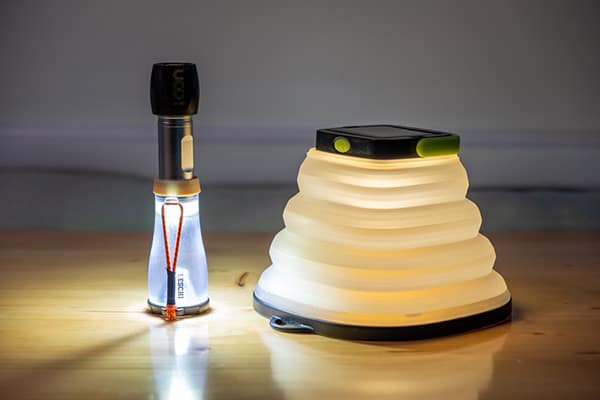
Pros

  1. They are set up for RVs. Most campsites will have full hookups including 30 and 50 amp electrical service, water, and sewage. They have campsites for the smallest of RVs as well as the largest. This includes back-in and pull-through sites.
  2. Amenities. Campsites in RV parks will also tend to have other amenities such as cable hookups, Wi-Fi, showers, bathrooms, community centers, and other useful services for RV travelers.
  3. Some offer primitive campsites. Although these types of parks are built for RVs, many of them also have primitive campsites for those looking to stay off the grid in a tent or other primitive camping structure.
  4. Managed and maintained. Most RV parks like this are managed well and maintained to look nice. Rules are generally enforced and you will generally have a quiet time when you are in one.

Cons

  1. More expensive than a campground. You will probably find higher prices in an RV park, especially if you intend to use full hookups. Of course, this will also depend on the popularity of the place and location that you are in.

Examples of RV parks throughout the United States

NameTypes Of Camping
MainStay RV Park (ME)Self-contained RVs
Emerald Beach RV Park (FL)Registered RVs only, No tent sites
KOA Cape Hatteras (NC)RV & Tent

RV Resorts

RV resorts are usually the cream of the crop when it comes to places to park your RV. These also come with the highest price tag as well as restrictions that might exclude some RV owners. Many of these offer campsites for different types of RVs but some allow only motorhomes that are over a certain length.

Besides rental reservations, campsites can often be purchased so that you own it outright. The following video is a tour of the Hilton Head Island Motorcoach Resort.

Pros

  1. Premium campsites. An RV resort is usually the highest quality place that you can stay when traveling in your RV. These are often exclusive and may not be available to all RV types.
  2. They are usually in the best part of town or in a prime location. These resorts usually make the price worth it since they are usually located in prime areas.
  3. They are usually safe and well-managed. These types of resorts are often gated and have security as well as management that maintains rules and regulations that must be followed.

Cons

  1. All RVs are not welcomed. Many of the RV resorts only allow large class A motorhomes. They often do not allow vans or smaller RVs that are under a certain length.
  2. They are expensive. These are usually the priciest places for you to stay in an RV. Although they are usually in a nice area with nice views, the price may make it out of reach for some travelers.
  3. Some only allow campsites for owners. Many resorts only have campsites that must be purchased rather than rented.

Examples of RV resorts throughout the United

NameTypes Of RVs
Hilton Head Island Motorcoach Resort (SC)Motorhome Only (Class A, Class C, and Super B motorcoaches with a minimum length of 18 feet)
Pacific Shores Motorcoach Resort (OR)Class A and Class C Motor Coaches, 25 feet or greater in length and in “Like New” condition
Mountain Valley RV Resort (UT)Only well-kept RVs allowed (Motorhomes, Trailers, Truck Campers

Conclusion

Unless you are talking about RV resorts, the difference between campgrounds and RV parks usually comes down to the language itself. There really is no difference in many instances and RV parks are often no different than campgrounds may be. I have been to RV parks and other places that referred to themselves as campgrounds yet they both seemed about the same to me.

However, I have also noticed the common theme in the differences as outlined above. Just think of a campground as being a place for any type of camper including an RV or a tent. An RV park is generally designed with RV parking in mind first but most also allow for those who are camping in tents.

The only real difference will be the RV resorts and other exclusive places where only certain types of RVs are allowed. As for campgrounds and RV Parks, these are often the same thing but just named differently.

IcyBreeze Cooler Air Conditioner Review – Is It Worth It?

As we all know, the summers can be hot and they are only becoming hotter. If you travel in a van or RV of some kind, you know that it can get miserable at times in the sweltering heat and high humidity. It can be a welcoming relief to have some kind of air conditioning to be able to get away from the misery outside.

The problem is that air conditioning uses a LOT of electricity and isn’t always an option unless you are plugged up to shore power. Some RVs aren’t even equipped with an air conditioner, including my camper van. If you are tent camping, forget it! You are stuck with the heat that comes along with being in nature.

Unless…you have another option that can keep you cool that only uses a little bit of electricity.

That is why I chose to give the IcyBreeze v2 cooler a try. It promises to cool the air around you and work as a personal air conditioner as well as a cooler to keep drinks and other items cold. I don’t really need it for the cooler but I did think the concept of blowing cold air was neat.

Of course, you can make your own for much less but I’ve seen reviews on these that are less than stellar. Some leak, some blow moist air, some are huge and look awful, and some don’t do much of anything. I chose to try the IcyBreeze because I figured that the engineers that built it had it figured out better than what I could do.

Besides that, they claim that it blows dry air which is very important for RV living. You don’t want to fill your rig up with damp air that will add more problems with mold and mildew down the road.

The IcyBreeze seems like a great solution, albeit costly, for those off the grid and need a way to keep cool. I ordered mine directly from their website on a Friday and it was delivered to my home on the following Tuesday.

Let’s take a look at this cooler and see what it’s all about.

The Cooler Build & Parts

Icybreeze cooler opened up

For my configuration I ordered the following:

  • (1) IcyBreeze v2 Cooler (molten red)
  • (1) 12-Volt power supply
  • (1) Extension Tube
  • (1) IcyBlock Block Ice

Visit IcyBreeze to configure your cooler

The total price for the parts I ordered came to $349.92 (with shipping). Quite expensive for a setup like this so I expect it to perform well. To compare, I recently spent $309 for a portable air conditioner at Lowe’s that I use in a small bedroom in my home and can also be used in my camper van (when on shore power). I’m anxious to see how well this cooler works and why they charge such a premium for it. Of course, I don’t expect it to work as well as a home air conditioner and they make it clear that it isn’t designed for that.

The build is about what I would expect. It’s neat and clean and much better than the DIY solutions found online. For the most part, it seems to be a high-quality product. It’s lightweight but fairly large and will take up quite some space. I have made space for it out of the way in my van under the bed so it should not be a big deal for me.

Inside the Icybreeze cooler
Vents on the Icybreeze cooler

Setting It Up

Setting this cooler up is easy enough. As mentioned above, I have a space for it under my bed. I purchased the extension tube so that I can route the air hose up to the bed area to give me a personal “air conditioning” solution while I sleep. In theory, it sounds great but we’ll have to see how it works in a practical sense.

For setup, I’ll set the cooler up in my van and I’ll use bagged ice that you can get nearly anywhere you go. I want to make sure it works well with this type of ice because it’s what I’ll likely be using most of the time when I need to use the cooler.

I ordered the IcyBlock with the cooler but will try that out at another time. Perhaps when I take it on an actual trip, I’ll record my results using it and see how it works. They say for best results, you should use block ice so we’ll see.

Bagged Ice

I poured 30 pounds of ice in this cooler to do a good test with it. I wanted to fill it to the max to give it a chance to show me what it can do. Hopefully, I won’t have to always fill it with this amount of ice for it to be effective.

After the ice was in, I poured in 2 quarts (8 cups) of water as required.

Testing The IcyBreeze Cooler / Air Conditioner

After adding ice, I turned the unit on medium and tested the temperature of the air coming out. One thing I noticed after turning it on is that it is louder than I thought it would be. I’m used to sleeping with an oscillating fan in my bedroom but this is much louder than that.

The air blows out at a decent rate so I think it will be able to fill my van sleeping area quite well. Medium is what I would probably use most of the time since it seems to blow out at a sufficient rate.

Cooler full of ice
30 pounds of ice in the cooler

Initial Temperature Reading

The initial temperature coming out of the vent was pretty cold at around 55 degrees Fahrenheit.

The ambient temperature in my van at the time of this reading was 82 degrees Fahrenheit.

I started the test around 6 PM and ended at around 10 PM in mid-June.

For this test, I wanted to run the air conditioner for 4 hours and see what happened. This was my initial test of the product so I didn’t know what to expect. From this test, I wanted to learn a few key things that would help me decide if this may be a good solution in an actual camping scenario.

  1. How cold does the air coming out get?
  2. How long does it stay cold?
  3. Can It cool the entire van?
  4. Does it increase or decrease humidity levels
  5. How long does the ice last?

I planned to turn the cooler on, close the van and let it run. I would check it every 30 minutes for 4 hours OR until the ice was all melted and record numbers at each 30-minute interval.

30 Pounds Of Bagged Ice Results

Time (h:mm)Temperature Coming From Vent (°F)Temperature In Van (°F)Humidity In Van
:055°81°32%
:3051°79°31%
1:0053°77°31%
1:3054°75°31%
2:0056°73°31%
2:3054°72°34%
3:0057°72°35%
3:3058°70°36%
4:0060°70°40%
Icybreeze temperature readings
Temperature at the lowest (about 51°) and at the end of my test (about 60°) – 4 hours

As you can see from this test, the van cooled down quite nicely. It was still around 80 degrees outside at the end of the test so the cooler definitely helped to cool the inside of the van down. However, I did notice that the humidity levels seemed to rise as the ice melted and turned to water. It didn’t feel any more humid in the van but the hydrometer read higher.

It took around 4 hours for the ice to completely melt and all that was left was ice cold water. With this cold water, the fan was still blowing out 60-degree air. As the ice melted, the air coming from the vent gradually got warmer and warmer.

Ice melted inside cooler
Ice completely melted after 4 hours of running the air conditioner feature

Power Requirements

If you choose not to use the battery that IcyBreeze sells, which adds to the already steep price, you’ll need a different power solution. For me, I use my Goal Zero solar generator which is plenty to power this cooler. You can choose to use a 12-volt connection or a 110-AC connection that IcyBreeze sells.

The 12-volt will plug directly into a cigarette lighter style port. The following chart below shows the exact amounts that my unit was drawing (according to my Goal Zero Yeti 1400) while running at different speeds.

SettingWattsAmps
Low20 watts1.6 amps
Medium31 watts2.6 amps
High42 watts3.5 amps
Power controls on the cooler

Using It In A Real-World Setting

I took a trip with this cooler to the deep south of the United States in June. I, my wife and dog went to Jekyll Island Georgia for a week to enjoy some time off. This provided the perfect opportunity to test this cooler out in a real-world situation rather than the simple test setup that I performed in my driveway on a pleasant evening.

Vacationing in Georgia in June can be somewhat uncomfortable with the heat and humidity. I wanted to see if this cooler would be up to the challenge of keeping us cool and happy for the entire trip. I didn’t expect it to be a replacement for a true air conditioner. All I wanted was for it to be able to cool us down when needed so that we could be comfortable inside the van.

Unfortunately, my results weren’t as good as I had hoped they would be. We got to test the cooler out on a warm late afternoon when the temperature was around 88 degrees outside.

The following is the setup I used:

  • Cooler
  • 20 pounds of ice
  • 1 IcyBlock frozen with water and a little salt (as recommended in the user’s manual)
  • 4ft extension tube
Icybreeze set up in van
Cooler set up under my bed with the extension tube blowing cold air into the sleeping area

After the cooler was set up and turned on medium, the air coming from the cooler was very pleasant and cool just as I had experienced from my test at home in my driveway. However, I did notice that the air wasn’t as cool when using the extension tube. By the time the cold air reached the end of the extension tube, it was 5 to 8 degrees warmer.

The cold air coming from this was good enough to keep cool within our bed area but not much more than that. It was pleasant with the air aimed right at you but otherwise not very effective. It was performing the way the product was designed and keeping us cool as long as we were sitting close to where the air was coming out.

The real problem was how long the ice actually lasted. As with my test back home in my driveway, the ice was completely melted in around 4 hours. This was even with using the IcyBlock which is supposed to make the ice last longer. It seemed to do nothing.

Four hours after turning the cooler on, all that was left was ice cold water. The air coming out of the vent had warmed up some and wasn’t as effective as it was in the beginning, especially since we were using the extension tube. We chose to turn it off and not use it any longer. Instead, we opened our Maxxair fan and our back window and created a breeze that kept us comfortable.

I could have kept using the cooler but I would’ve had to buy more ice to add to it. This wasn’t feasible in our situation so I decided to stop using it for the day.

Bottom Line – Is It Worth The Money?

While it may have its place for keeping you cool, I’m not sure a camper van is that place. It was somewhat effective for a little while but it lost its effectiveness after the ice melted. I was using it in weather that was less than 90 degrees which isn’t even as hot as it will get in Georgia in the summer. In a hotter temperature, it would’ve been even less effective.

Is it worth the money? It depends on what you are looking for it to do.

I would say that this product is not a good choice if you are in the same situation I am in and need something to cool down a small area for a longer period of time. There may be other situations where it could come in handy but staying cool in a camper van is probably not the best use of it. Especially if you intend to boondock. You would need to be able to go and get ice each day if you wanted to be able to use it on a regular basis.

Here is a list of pros and cons from all of my testing.

Pros

  • Requires minimal electricity. As you can see from the chart above, the power draw on this system is minimal so it can be used anywhere.
  • Blows ice cold air for a while. While the cooler has ice in it, it blows out ice-cold dry air. However, once the ice is melted and you are left with water, the unit becomes less effective. Four hours was about the limit on the amount of time I could make the ice last.
  • The air is dry. Rather than working like a swamp cooler, this one actually blows out dry air that won’t add moisture wherever you are using it.
  • Doubles as a cooler. You can keep your drinks cold but if you use the air-conditioner regularly, the ice will melt so you’ll probably need to use it as an air-conditioner OR a cooler. The ice is supposed to last for about 7 days if you don’t use the air-conditioner.

Cons

  • It’s expensive. It’s a well-made product but I think the price is a little steep for what it is.
  • It’s louder than I expected. I was really surprised at how loud the fan on this was. I was expecting it to mirror the sound of a standard box fan but it was louder.
  • Ice melts too fast. Even with using the IcyBlock, 20 pounds of ice was gone in 4 hours in 88-degree weather. I was expecting to fill the cooler up with ice and it last at least an entire day or more.
  • IcyBlock did not work very well. I expected this product to maintain my ice for a longer period of time but it seemed to do nothing.
  • Takes up a lot of space. I had plenty of space for it under my bed but if you are short on space, this big cooler will just be in the way.

We chose to use it for one afternoon on my trip but after that, we just used the vents from our van to keep us cool. This is usually sufficient for sleeping at night and it keeps it fairly pleasant during the heat of the day as well. To use IcyBreeze, we would’ve had to buy ice multiple times per day and it was just too much trouble. We were parked in the shade so the heat never really got out of control.

The IcyBreeze is marketed as a personal air-conditioner and that’s exactly what it is. If you aim it right at you, it feels great. However, I would also say that it is designed to only be used for short amounts of time. If you just turn it on and leave it on, the ice doesn’t last very long.

Turning it on for a couple of minutes here and there is probably the best use of this cooler.

Many RVers and van lifers are seeking something like this to keep them cool inside their rig. If you expect it to cool down your living area on a hot day, even a very small one, you will probably be disappointed. My van is very well insulated and very small and it didn’t do much on a hot day.

If you expect it to cool you down as needed by sitting right in front of it, it will work great for you. If you want it for tailgating or another activity where a quick cool off might feel good, it is a great solution. It would be great to have on the sidelines at a sporting event such as soccer, football, baseball, etc. The cold air that it blows would feel awesome to an athlete who is on the sidelines cooling down.

It would also be great for the primitive camper who can use the cooler to hold food and beverages while having a solution to cool down for small amounts of time. If you purchase the battery option with the cooler, you’ll be able to take it anywhere and have cold air no matter where you are.

It’s a great product but you have to use it the way it was intended to be used. Don’t expect it to be an air conditioner for a living space. Instead, think of it as a way to get some relief from the heat by turning it on in short spurts in order to cool down by sitting close to it. It does blow cold, dry air, and feels really good when you are directly in front of the vent.

Jekyll Island Campground Review – Read This Before You Go

Jekyll Island Georgia has always been one of my favorite places to vacation. It’s hard to beat the quaint island feel that offers easy-going bike riding, sightseeing, and wide-open beaches. There’s just something about this place that seems magical and it’s a great way to get away from the crowds of the bigger cities.

Jekyll Island is mostly uncrowded since the island has limited access to development. This makes it a wonderful choice for those looking to get away on a camping trip. The campground on Jekyll Island is a popular place and it is often difficult to get a campsite during the season. Sometimes you can get lucky and snatch up a spot that someone has canceled. Otherwise, campsites may need to be reserved far in advance to make sure that you will have a place to park your RV.

I have been to Jekyll Island many times and have always driven past the campground but never stayed in it. Recently, my wife and I had the chance to stay for a week at the campground in our camper van. We were finally able to see why this place is always so popular. As a photographer, I enjoyed being at the campground and within walking distance to one of the best gems on the east coast for photographers, Driftwood Beach.

Our Experience Staying At The Campground

The layout of this campground is a little different from most campgrounds that you might stay in. It’s a little messy when you first look throughout the campground and notice that RVs are parked all over the place. It seems as though RVs are just parked in any place they want to be. Most of the campsites are not marked with a parking area so you have to pull in to your campsite the best you can.

This seemed a little off-putting to me at first but it’s not as bad as it seems once you get parked and settled in. During our stay, we got to stay in two different campsites.

To view a current map of this campground as well current rates, check out the Jekyll Island campground website.

First Stay – Location T-1

Parked in a campsite at Jekyll Island

Fortunately, the camping spot that I chose when I reserved my stay was an excellent location. The location was T-1 and after staying in this location for two nights and strolling around the campground quite a bit, I would consider it one of the best campsites in the whole campground.

It is a pull-through site that loops around. It’s large and allows you to be further away from your neighbors than you would be in other spots throughout the campground.

I parked my van in a way that the sliding door was facing nothing but trees. We had complete privacy upon opening our sliding door without other campers in sight. All hookups were located right next to our parking spot including sewage so it was easy to connect to shore power and dump grey and black water tanks (cassette toilet in our case).

The only problem with this location was that there weren’t as many trees as there are deeper inside the campground. There were a few trees that gave us shade in the afternoon. However, this wasn’t all bad because it allowed us to keep our solar system fully charged.

We were only able to stay at this campsite for two nights of our stay and then we had to move to a different location for the next two nights because of availability when I reserved my dates.

Second Stay – Location G-13

Van parked in shady campsite

The second location that I stayed in was G-13. This location was not near as private as my first one as I had RVers all around me. This was just a basic spot where we were able to park. It wasn’t particularly enjoyable since I had campers on all sides of me so there wasn’t much privacy. On a good note, there were plenty of trees that gave us plenty of shade and helped to keep us cool.

This campsite had no defined parking area and the ground wasn’t paved or gravel. Instead, it was dirt and covered in leaves from all the trees towering above. It didn’t rain while we were there but I would think that this type of campsite could get a little messy during rainy days.

My Thoughts On Staying At This Campground

I’ll have to admit that I liked the first campsite much better than the second one. If you are like me and want to be further away from neighbors, the T loop is a great place to be (my preference would be one of these: T1, T2, T3, T10, T11). Either way though, we had a pleasant experience with this campground and thoroughly enjoyed our stay for the entire time we were there.

The campground has lots of rules and they seem to be enforced very well. There was very little noise at night and I slept well with my windows open and didn’t hear much of anything. People seem to abide by the rules and keep it a quiet and joyful place for others.

The campground is a very family-oriented place and you will see children laughing, playing, and riding bikes throughout the day. However, once night falls, the campground becomes a peaceful and quiet place to stay.

Sewer and electrical hookups at campground

Amenities

There are plenty of amenities that you can enjoy while you are at this campground. Although we didn’t utilize any of these amenities, they do have a community center, laundry mat, basketball court, a store, and bathroom facilities on The premises. They also have free unsecured Wifi that we didn’t really use. The service was very slow so we just used our LTE (Mint Mobile) which is available all over the island.

We did utilize the showers and bathrooms on occasion while we were there.

Bathrooms & Showers

There are two separate bathhouses in the campground and the bathrooms are typical of what you will find in standard campgrounds. They are certainly nothing to write home about and will get the job done if you need to use the bathroom or take a quick shower. They are typical of American public bathrooms with little to no privacy and cleanliness is not always the greatest. They were fine but anytime you have a bunch of people coming in and out of public bathrooms, they are going to get messy.

They have stalls with toilets and sinks in the bathroom areas. In the shower area, there are multiple shower stalls with curtains on them for privacy. While not the greatest, they get the job done and allow you to stay nice and clean with a hot water shower while on your vacation.

It would be nice to see more private areas but this is typical of campgrounds. Some RV parks I have been to have private rooms that contain a toilet and a shower in one space. If not this, it would be great to see private toilet rooms. I am not a fan of public restrooms and specifically the stalls with walls that don’t go all the way down to the floor. I avoid them for the most part.

The showers were fine and they provide ample space and privacy to take a nice hot shower. There is one shower stall that has a privacy door on it and all the others have a basic shower curtain. Seems that there is always someone in the one with the privacy door so you will have to be lucky to get that one.

Pros

  • It’s nice and quiet. I was able to sleep well the entire time I was at the campground. I was able to relax and enjoy my stay without distractions the entire time I was there.
  • All sites have full hookups (except the 12 primitive sites). This included electrical connections, water, cable, and sewer. I didn’t use the cable connection but I did use the electric and water as well as the sewer to dump our greywater and cassette toilet tank.
  • Nice community of RVers. The campground was filled with the typical RV crowd that is mostly nice people looking to enjoy their stay just the same as you are.

Cons

  • Bathrooms aren’t the greatest. As mentioned above, the bathrooms aren’t the greatest that I have seen at campgrounds I’ve been to.
  • Some spaces are not well-defined. People seem to park all over the place with some of the parking spaces not well-defined. You have to just shimmy your way into a spot. This is not true of all of them but keep in mind that some may be this way.
  • Some spaces are not paved. One of our campsites had a soft floor that will get a little messy during the rain. However, the other site we had was on gravel.
  • You’ll need a way to get around. The campground is located at one end of the island so you’ll need a way to get into the heart of Jekyll Island if you intend to explore. You can always walk but it will help to have a bike, golf cart, car, etc.

Can You Camp On The Beach At Jekyll Island?

It would be nice if you could but it is against the rules and I wouldn’t want to chance it. You are better off sticking to the campground on the Island. In our case, we took our van to a beach access parking area during the day to hang out and have lunch. It gave us a chance to be near the beach and have our little home with us. You’ll see a lot of people doing this in the large beach access parking lots. However, they will be gone at night time.

Georgia state police patrols the area so I wouldn’t want to be caught trying to chance it. I would assume that there would be a hefty fine if you get caught doing it. Just follow the rules and stay at the campground. It’s close enough to the beach that you could just walk to it anyway.

Are Pets Allowed At Jekyll Island Campground?

Absolutely they are but there may be a fee associated with it. This is common and is currently only $3.75 per day for each pet. As you walk through the campground, you will see lots of pets as you generally do in campgrounds or RV parks. We took our dog with us as Jekyll Island is a very pet-friendly place. You can enjoy walking your dog along the bike paths or the beach.

Mini Goldendoodle dog on Jekyll Island beach

For the most part, people keep their dogs under control throughout the campground. You’ll hear the occasional bark but I never heard anything at night. We did hear someone complaining in the front office about some campers that had dogs that were barking enough to be annoying. This seemed to be taken care of pretty quickly by the campground staff so it’s good to know that they do enforce the rules when necessary.

Just a reminder to be courteous to others around you if you have a dog. Make sure your dog isn’t creating a nuisance for others around you. People don’t want to hear your barking dog and it isn’t cute to them like it may be to you.

Historical Sites Close To Jekyll Island Campground

No matter where you are on Jekyll Island, you have access to some rich history. Jekyll Island is a small island so everything is pretty close by. Of course, it will help if you have a car to use to get you to various locations. If not, you may want to consider bringing or renting a bike or golf cart on the island. Red Bug Motors is what we always use when we are there.

You can take it and explore the historical area of Jekyll Island which is only a few miles down the road from the campground. You’ll be able to see the historic district where lots of historical structures exist. You can also pay to take a trolly tour so that you can learn about the area. The trolly tour is well worth the price.

The following locations are some of the places you might want to visit and are within close access to the campground.

  • Horton House. Constructed in 1743, this house belonged to Major William Horton. It’s one of the oldest buildings in the state of Georgia and makes a great photo backdrop. It’s the closest historical building to the campground.
  • Jekyll Club. It’s the stomping grounds of the wealthy from days past including the Morgans, Rockefeller’s, and the Vanderbilts. It is also the place where the Federal Reserve was created. Today it is a hotel but it certainly has an interesting history. If you haven’t read The Creature From Jekyll Island, I highly recommend it.
  • Historic District. The DuBignon Cottage, Goodyear Cottage, Hollybourne Cottage, Indian Mound Cottage, Mistletoe Cottage, and Moss Cottage are among the historical structures that you will find in the historic district. It’s a really cool area to walk around and experience the history around you.
  • Driftwood Beach. Not really a historical site but it is a unique and popular place to visit. It’s within a short walk from the campground. With its gnarly, dead trees scattered about, it’s a wonderland for photographers and you will see lots of them in the early morning and evening hours.
Gnarled tree in the water at Driftwood Beach Jekyll Island

Bottom Line

Jekyll Island makes a great place to vacation if you like places that aren’t so crowded. It isn’t your typical packed beach experience. It makes the perfect location for those who travel in RVs. Overall, the campground is a nice place to stay and provides all the amenities that you could ever want.

Whether you are driving a motorhome, pulling a travel trailer, or setting up a tent, the campground will accommodate you. The campground is popular for a reason and it is nearly always operating at full capacity unless you happen to go during the winter, which isn’t a bad idea.

The Jekyll Island campground can provide you with a nice little home away from home for a fair price. We enjoyed our stay at the campground and I know that we will be back for more stays in the future.

Camper Van Conversion Simple Water System

You can’t have much of an RV without a constant supply of freshwater as well as a place for greywater to go. The water system of a camper van conversion can be a difficult system to design and build but it doesn’t have to be. Some people make do with a simpler system, like me, that supplies a constant supply of water but is easy to build.

Some of the popular ways that people design their systems are by using a foot pump to pump water out of the faucet. This is basic in design and doesn’t need electricity to make work. It’s a good solution if you want to be able to run fresh water out of your faucet without having to build a complicated system.

For those looking for a bit more out of a water supply system, there are lots of different options. You can choose to build an all-out system that utilizes large freshwater tanks and large wastewater storage tanks underneath your rig. You can design these to work just as they would on any standard RV. You can also do what I did and utilize a combination of the two for a system that functions well but is easy to build.

Plumbing was one of the most dreaded parts of my build because I have always had a fear that water would somehow leak somewhere without me knowing. I wanted to make sure I built a system that was leak-free and idiot proof so that I would not have this problem.

I have experienced a leaky ice maker in my home refrigerator in the past that slowly leaked and damaged the hardwood flooring in my home. The entire floor had to be replaced so this came to mind as I was considering how I would approach this job. I didn’t want to have any damage from water slowly leaking somewhere that I didn’t know about.

Van Conversion Fresh Water Tank

My initial thought on a freshwater tank was to have it in a 5-gallon jug under the kitchen sink with a greywater jug right beside it. This is what many van conversions consist of. This makes it easy to take the freshwater jug out and refill it as needed.

This would have been my approach if I wasn’t also installing a shower in my van. Since water is needed for the shower and the kitchen sink, I wanted to combine them into one large freshwater tank. Otherwise, I would be fumbling around with multiple freshwater jugs; one for the kitchen, one for the shower.

I chose to use a 16-gallon tank that could be installed inside the van with a fill hose. This would be a shared tank for anything in my van that used water. In hindsight, I probably should have chosen a larger tank like a 23-gallon one. I would definitely want more water storage if I was living in my van full-time.

My tank sits in a location underneath my bed, out of the way, yet easy to access via a fill cap in the rear of the van.

Van freshwater tank installed in wood supports

Connecting The Freshwater Tank

The difficult part was figuring out all the pieces I needed to be able to connect this tank to everything else in the van. This is an unconventional set up so I couldn’t just go and buy standard parts to work with. Instead, I had to piece together parts to make it work. It was difficult finding exact parts online that I needed so I figured out myself for the most part.

The following details will explain the way I went about installing my water system and some of the parts that I used in the process.

For the installation of my freshwater tank, I created a waterproof area in my van where it would be mounted. This waterproof area was built with a wooden frame and FRP boards glued to the wooden frame similar to my shower. With caulk closing the gaps and creating a watertight seal, I know that if anything were to leak in this area, it wouldn’t go very far.

Besides that, I have a water detecter on the floor of this waterproof area so I will hear the alarm if any water begins to leak.

Having a waterproof area like this gives me a little peace of mind knowing that any potential leaks will be caught before they get very far. This area contains the water tank as well as the water pump and accumulator tank. If there are any drips from the connections on the pump and tank, the water will be routed directly into the waterproof area.

Freshwater waterproof area

The tank is held tightly into place with the frame of the wood that has padding on the sides that touch the tank. The tank doesn’t move as I drive down the road, hitting bumps and turning sharp curves.

For filling the tank, I used a fill hose that runs to the rear of the van. There, I installed a fill cap where I can easily fill the tank with a water hose that can connect to any standard spigot. This makes filling the freshwater tank easy and I don’t have to handle any heavy water tanks.

I used this lightweight flexible water hose that works perfectly for this solution. It’s 50ft when you are using it but after you are done, it contracts back down to a small hose that doesn’t take up much space. I can easily store it away in a waterproof container and keep it out of the way. I used a basic nozzle that I purchased from The Home Depot.

Water hose filling water tank

Van Conversion Water Pump & Accumulator Tank

In order to pull the water from the freshwater tank, I used the Shurflo Revolution water pump. I also installed the accumulator tank to it so that the pump would not have to run as much. This is simple to connect directly to the water pump and I would suggest you do the same if you are planning to use this type of setup.

The pump and accumulator tank come with everything you need to be able to connect to each other. You’ll have to come up with your own solution for connecting the accumulator tank to the rest of your system. You’ll also need a solution for connecting your pump to the freshwater tank. If the tank is close enough to the pump, I would suggest using the silencer kit.

Freshwater tank connections

With one silencer cable, you’ll be able to come out of the freshwater tank and thread the hose directly onto the pump. You’ll need to figure out a way to screw into the tank. This was a challenge for me since the tank has some odd size 3/8 threaded holes. I couldn’t find anything standard that fit these holes so I used a 3/8 inch PEX pipe that went down into the tank.

At the top, I attached a 3/8″ PEX x 1/2″ Male Threaded Adapter that the silencer cable could be screwed to. I filled in any remaining air gaps with food-grade silicone. This wasn’t a big deal with my setup since my fittings were on the top of the tank. If you have your tank facing where the fittings are on the side, it will be more important to create a watertight seal.

With the other silencer cable, you can screw it directly onto the accumulator tank and connect it to the rest of your plumbing. In this case, I used various PEX fittings that can be picked up at most home improvement stores. I chose to use the plastic 90-degree elbows to be able to run the PEX around corners.

Water system PEX connections

If you choose to use PEX, I suggest buying a good crimp tool to make sure everything is sealed properly. PEX is super simple to work with and to cut. They make tools for cutting it but I used a simple manual miter saw with a miter box to get quick, straight cuts. Once you crimp the crimps on, it is held tightly and you don’t have to worry about leaks if done right.

I also used a clear PVC hose to vent the tank and allow air to escape as I fill it up. The fill cap has a connection for this vent and it’s a necessary piece of the puzzle.

Van Conversion Greywater Tank

Although I chose a central freshwater system, I wanted my greywater tanks to be mobile so that I could easily dump them when needed. My greywater tank is positioned underneath my kitchen sink and for this, I used a 5-gallon Hedpack jug. I wanted to make sure it was clear or see-through so that I would know when it would need dumping at just a glance.

Sink drain

This jug is perfect for the setup I have because it connects easily to my drain system. For my drain, I used the Camco Flexible Camper Drain. This attaches perfectly to the Hedpack jug with a quick disconnect to make it easy to remove and dump. A standard garden hose quick-connect fits perfectly into the cap on this jug.

Quick connect on greywater jug

I also have an extra one that I can change out to if I am not able to dump the full one. Both of these jugs have quick disconnects installed, making it easy to switch them out.

For my shower, I didn’t install a greywater tank. I simply ran the drain out the bottom of the shower and it drains onto the ground. I only use biodegradable soaps so it isn’t a big deal when boondocking. If I am in a place where it can’t run onto the ground, I place my extra greywater tank under the van where the shower drains and it goes directly into the jug.

Greywater tank under kitchen sink in van

Using The Water System

Using this type of water system is similar to what you would be using in your home. Besides the sound of the water pump turning on and the hassle of dumping the greywater tank, everything else is business as usual. When you turn on a faucet, a difference in pressure in the system causes the water pump to turn on so that water is pumped from the freshwater tank.

If you have an accumulator tank, the pump will not turn on until the pressure in that tank reaches a certain level. The water is moved through the PEX plumbing and comes out the faucet just as you’d expect.

As it goes down the drain, it is routed into the 5-gallon jug beneath the sink. This jug has to be monitored so that it is not overfilled. Once it is time to dump it, you simply disconnect it from the drain and dump. Connect it back up using the quick connect and you are back in business again.

Filling the tank is easy and as long as you find a place with a spigot, the freshwater tank can be filled up in a matter of minutes.

Overall, this a great setup for someone converting a van, and I have been pleased with it during my travels. Of course, there are always things you wish you had done differently and the only thing I would have done differently is installed a larger freshwater tank. If your setup will be similar to this, buy the largest freshwater tank that you have space for. It will make for a better experience when you don’t have to fill it up so often.