Disclosure: Some of the links in the article below may be affiliate links. This means that I may earn a small commission if you click on them and make a purchase.

Installing lights in a conversion van is a necessary step if you want to have sufficient lighting to brighten the living space up. A camper van can be quite small so choosing the right kind of lighting can make all the difference. Too much lighting and you’ll feel like you are living on the sun but too little lighting can make your tiny space feel even more depressing.
In my opinion, the perfect solution is to utilize LED technology with dimmer switches so that you can control the amount of brightness in the van. This is exactly what I chose to do in my van. Before I get into the details of how I designed and installed my lighting system, let’s look at the products I chose for the job.
Products I Used
- Acegoo LED Lights – warm white
- 2 1/4 inch Forstner bit
- Dimmable Light Switch
- On/Off Light Switch
- LED Lights with built-in switch
- 14 Gauge Wire
Acegoo LED Lights
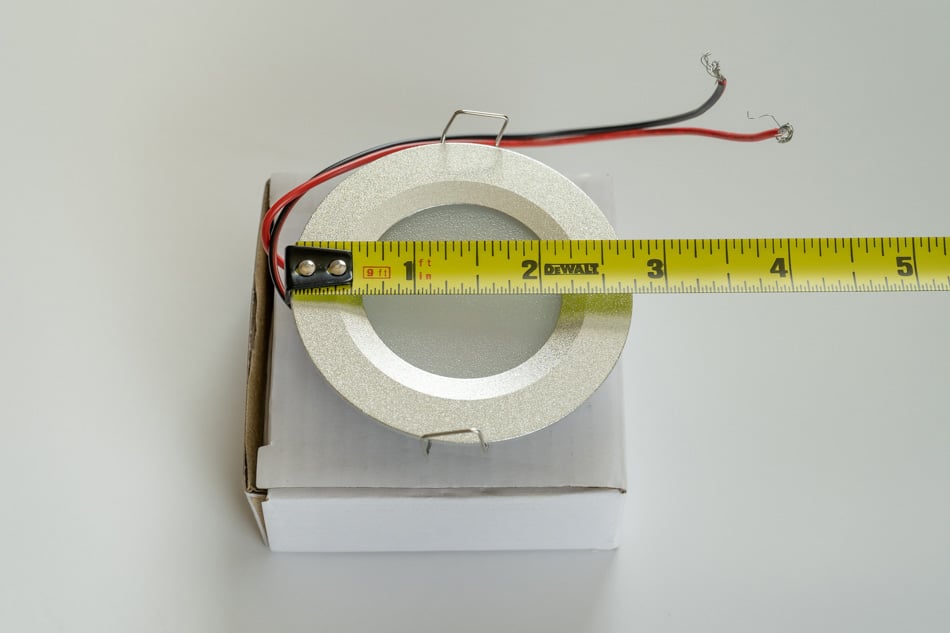
Acegoo LED lights have become a popular choice for camper van conversions and for a good reason; they make great lights since they are small, lightweight, use very little energy, and look great. Acegoo has different types of light configurations but I chose to use the recessed LED lights in silver. I personally like the silver look against the cedar wood planks that I used on my ceiling. You can also choose white if that is what you prefer.

These lights are very bright for their size and energy usage. Likely, you will not need very many of them to complete a well-lit area within your van conversion. I purchased two 4-pack boxes. With a total of eight lights to work with, I had plenty to get the job done with sufficient lighting for my entire van. I ended up using only 7 of the lights so I had one left over.
As you can see from the image below, these lights measure in at 2 3/4 inches in diameter. Each light weighs approximately 1.6 ounces (46g).
Of course, Acegoo isn’t the only option available but these lights are tried and true in the van conversion community. They have a lot going for them and I highly recommend them.
Installing Recessed LED Lights In Van
The installation of these lights is pretty simple. You will need to drill 2 1/4 inch holes for the lights to fit into. These can easily be drilled using a Forstner bit. This type of drill bit is great because it creates a very clean cut and bores through the cedar wood ceiling as if you are cutting through butter.
I cut these holes during the process of installing the cedar planks on the ceiling. I had marked the location of each light on the ceiling before installing my cedar planks. Once I came to a location that required a hole for a light, I drilled the hole after I had measured my cedar plank.
After the cedar planks were all installed, I had a finished ceiling with six holes throughout the living area that all had wires ready to be connected.

Before installing the lights and connecting the wires, I wanted to make sure that there was enough air gap so that the lights would not be touching the insulation. At the time, I was not sure how hot these lights would get so I wanted to be sure that nothing will overheat and catch fire. I realize that LED lights do not put off a lot of heat but during my testing, I did notice at least some heat coming from them.
To do this, I cut some small pieces of wood and glued them on the upper side of the ceiling where the holes are. This allowed me to push the insulation up at each light location so that it did not touch the light. It created a small air gap so that any heat coming from the lights could be dissipated before reaching any kind of material.

This is just a precautionary measure that I took to make myself feel better. It may not be necessary but I feel better having created an air gap like this.
After this was created, the next step was to wire up all of the lights.
Wiring 12v Lights In Parallel
Installing 12v LED lights is a fairly simple process. With the Acegoo lights, you have two wires that come off of each light. One of the wires is positive and the other is negative. In a simple setup, the red will go to the positive side of your battery and the black will go to the negative side. However, when you have more than one light to install, you can easily install them in a parallel configuration.
This simply means that all of the positive wires will connect together and all of the negative wires will connect together.

In my light configuration, I had three zones of lights.
- Zone 1 – my bedroom lights which includes two lights that will be controlled on the same dimmable light switch.
- Zone 2 – the living area lights that encompass the kitchen, dining area, and living area. This zone contains four lights that will all be connected together and controlled by one dimmable light switch.
- Zone 3 – one light in the bathroom controlled by an on/off switch.
To install these, each light in a zone was connected to each other by connecting red to red and black to black. This left me with a red and a black wire from each zone that would run to a light switch so that the zone could be controlled.
Light Switches
There are a plethora of light switches that you could choose in a van conversion. Anything from simple on/off switches to touch screens or even wireless controlled switches. No matter what you choose, I would suggest that you choose a dimmable switch because this will give you more control over the brightness in your van.
Being able to dim the lights as needed is a huge plus and you will be glad that you chose them once you are finished with your conversion.
I settled on American Technology Components dimmable switches. These switches are nothing spectacular but they get the job done. They aren’t like some of the fancy touchscreen switches that you might find in some van conversions.
Instead, these are simple but they allow you to control the amount of light you have in your van and provide you with a snappy on/off switch that is satisfying to push. These types of switches are commonly found in RVs.
The interior lights in my van are controlled using the dimmable versions of this switch. All of my lights are wired in a parallel fashion and that leaves me with two wires from each light circuit. These two wires are connected to a light switch, and the light switch is connected to the fuse block.

The dimmer switches have 3 wires coming from them. This is how I have mine connected:
- Red wire – attaches to the positive terminal on the fuse block.
- Black wire – attaches to the negative terminal on the fuse block AND also to the negative side of the light circuit.
- White wire – attaches to the positive side of the light circuit.
The fuse block provides constant power but the switch is what either interrupts the current or allows the current to flow to the light circuits.
These switches are simple to install, are very lightweight, and screw in easily if you have a solid wall. I was using wooden walls in all the locations that I installed my switches.
Besides the dimmable switches that I installed for the main circuits in the living area, I also installed a simple on/off switch for my shower. I didn’t feel like this area was worthy of having the more expensive dimmable switch. The light in this area is only used for short amounts of time when I am either taking a shower or using the toilet.
This light switch is a simple connection of red to red and black to black and the switch only controls a single light mounted in the ceiling of the shower.

Acegoo LED Recessed Light Review
Having used the lights in my van for quite a while now, I have had a chance to put them to the test. Overall, these have been great lights and I am glad I chose these for my van conversion. They look great, they put off a lot of bright light, and they use minimal power.
One thing to note is the heat that they produce. As mentioned earlier, I took precautionary measures and created an air gap over each light. This was so that they would not overheat and become a potential fire hazard. The lights do get fairly warm but not to the point of catching something on fire.
Using an infrared thermometer I measured the outer metal ring of the lights at around 120° when they are turned on. This reading was taken in summertime after the lights had been turned on for about 10 minutes.
My advice would be to take this precaution and make sure that the lights are not directly touching something that may be heat sensitive.
Van Conversion Garage Lights
I also installed lights in my garage but they are of a different type than what I used throughout my living area. The lights I chose for my garage are also LED but they have a switch built-in. These also install the same way that the recessed lights did. Each light has two leads coming off of it and these leads go directly to the fuse block. It is a simple positive and negative lead.
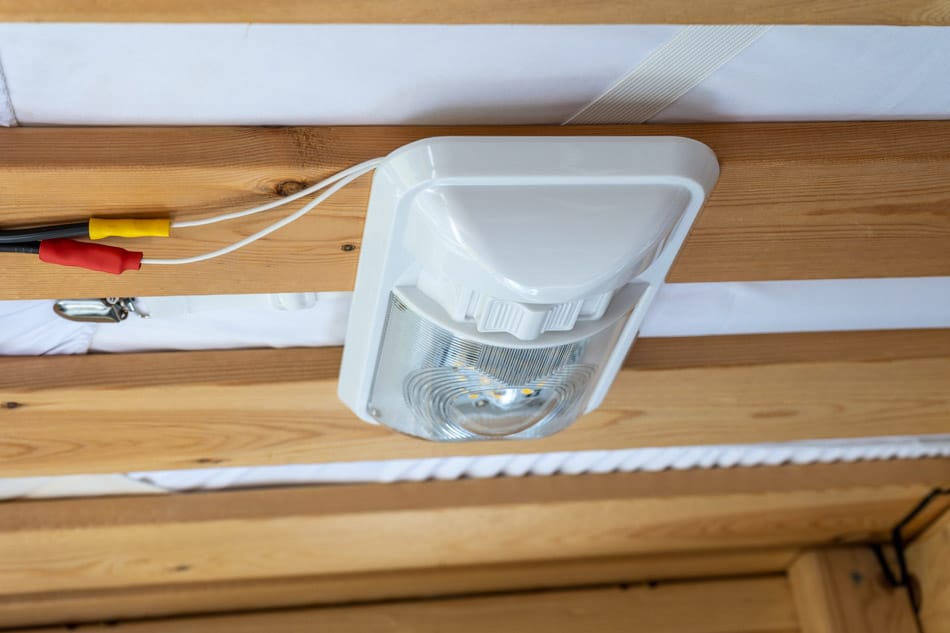
The switch on the light controls it so it’s an easy on and off light and it gives off great lighting for the entire garage area. This is super handy when you need to get something out of this area at nighttime. No need for a flashlight, just flip the switch and the whole garage area is lit up.
Camper Van Lighting Ideas
There may be times that you need additional lighting when you are out on the road. Some of the following are different types of lights that I use for various purposes and have come in handy during my travels. These lighting ideas are typically used for emergency or as a solution for when I wander away from my van in a dark area.
 | Crank flashlight lantern. This light is great to use in an emergency and it’s great to have in the van. I keep this in my emergency kit so that I always have light no matter what. If the batteries are dead, a couple of minutes of cranking will provide plenty of light. |
 | Goal Zero Crush Light. This light is also great to use in emergencies but I also use this as a flashlight of sorts when I am outside of my van. This is a great little light that is super bright and can easily be charged using the sun with the built-in solar panel on top of it. It crushes down and stores away in a very small space. |
 | UCO Leschi Lantern / Flashlight. This flashlight is one of my favorites since it is so small. Not only is it a flashlight, but it can also be used as a small little lantern. This is my go-to light when camping or hiking and it also comes in handy when you have to venture outside the van but need something small to keep in your pocket. |
I have lighting covered fairly well within my van conversion. Some people may say that I have too much light but I don’t think you can have too much lighting. The lights that I have installed in my van do get very bright and I have no problem seeing at all in my van. However, the good thing about it is that I can control the brightness with the dimming switches that I installed.
No matter what type of lighting you choose for your van, most 12 V lights will work the same way. The installation will be similar to what I experienced and with the light choices on the market today, you will have no problem finding lights that provide a sufficient amount of light for your living space.