Disclosure: Some of the links in the article below may be affiliate links. This means that I may earn a small commission if you click on them and make a purchase.

You can’t have much of an RV without a constant supply of freshwater as well as a place for greywater to go. The water system of a camper van conversion can be a difficult system to design and build but it doesn’t have to be. Some people make do with a simpler system, like me, that supplies a constant supply of water but is easy to build.
Some of the popular ways that people design their systems are by using a foot pump to pump water out of the faucet. This is basic in design and doesn’t need electricity to make work. It’s a good solution if you want to be able to run fresh water out of your faucet without having to build a complicated system.
For those looking for a bit more out of a water supply system, there are lots of different options. You can choose to build an all-out system that utilizes large freshwater tanks and large wastewater storage tanks underneath your rig. You can design these to work just as they would on any standard RV. You can also do what I did and utilize a combination of the two for a system that functions well but is easy to build.
Plumbing was one of the most dreaded parts of my build because I have always had a fear that water would somehow leak somewhere without me knowing. I wanted to make sure I built a system that was leak-free and idiot proof so that I would not have this problem.
I have experienced a leaky ice maker in my home refrigerator in the past that slowly leaked and damaged the hardwood flooring in my home. The entire floor had to be replaced so this came to mind as I was considering how I would approach this job. I didn’t want to have any damage from water slowly leaking somewhere that I didn’t know about.
Van Conversion Fresh Water Tank
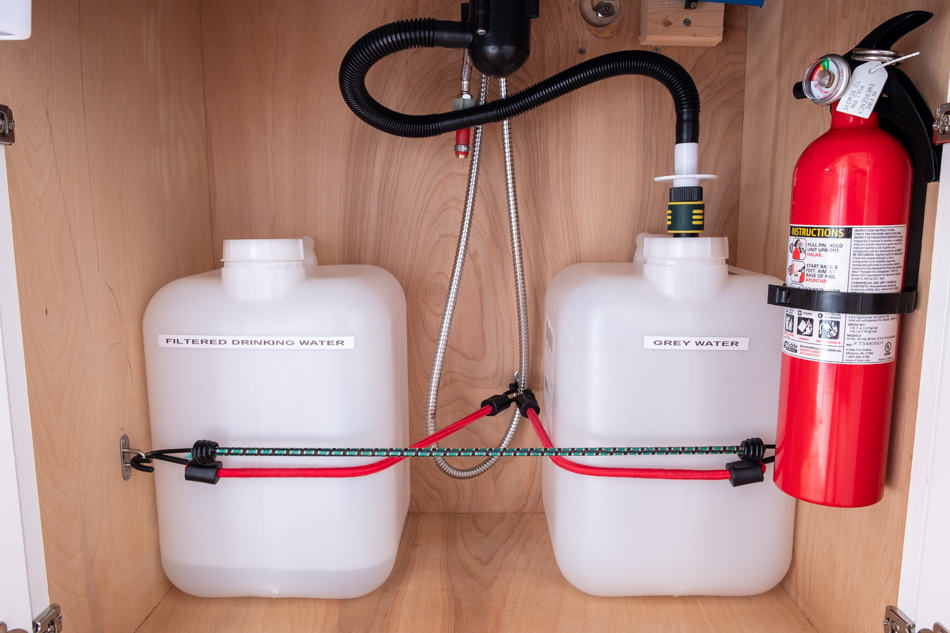
My initial thought on a freshwater tank was to have it in a 5-gallon jug under the kitchen sink with a greywater jug right beside it. This is what many van conversions consist of. This makes it easy to take the freshwater jug out and refill it as needed.
This would have been my approach if I wasn’t also installing a shower in my van. Since water is needed for the shower and the kitchen sink, I wanted to combine them into one large freshwater tank. Otherwise, I would be fumbling around with multiple freshwater jugs; one for the kitchen, one for the shower.
I chose to use a 16-gallon tank that could be installed inside the van with a fill hose. This would be a shared tank for anything in my van that used water. In hindsight, I probably should have chosen a larger tank like a 23-gallon one. I would definitely want more water storage if I was living in my van full-time.
My tank sits in a location underneath my bed, out of the way, yet easy to access via a fill cap in the rear of the van.

Connecting The Freshwater Tank
The difficult part was figuring out all the pieces I needed to be able to connect this tank to everything else in the van. This is an unconventional set up so I couldn’t just go and buy standard parts to work with. Instead, I had to piece together parts to make it work. It was difficult finding exact parts online that I needed so I figured out myself for the most part.
The following details will explain the way I went about installing my water system and some of the parts that I used in the process.
For the installation of my freshwater tank, I created a waterproof area in my van where it would be mounted. This waterproof area was built with a wooden frame and FRP boards glued to the wooden frame similar to my shower. With caulk closing the gaps and creating a watertight seal, I know that if anything were to leak in this area, it wouldn’t go very far.
Besides that, I have a water detecter on the floor of this waterproof area so I will hear the alarm if any water begins to leak.
Having a waterproof area like this gives me a little peace of mind knowing that any potential leaks will be caught before they get very far. This area contains the water tank as well as the water pump and accumulator tank. If there are any drips from the connections on the pump and tank, the water will be routed directly into the waterproof area.

The tank is held tightly into place with the frame of the wood that has padding on the sides that touch the tank. The tank doesn’t move as I drive down the road, hitting bumps and turning sharp curves.
For filling the tank, I used a fill hose that runs to the rear of the van. There, I installed a fill cap where I can easily fill the tank with a water hose that can connect to any standard spigot. This makes filling the freshwater tank easy and I don’t have to handle any heavy water tanks.
I used this lightweight flexible water hose that works perfectly for this solution. It’s 50ft when you are using it but after you are done, it contracts back down to a small hose that doesn’t take up much space. I can easily store it away in a waterproof container and keep it out of the way. I used a basic nozzle that I purchased from The Home Depot.

Van Conversion Water Pump & Accumulator Tank
In order to pull the water from the freshwater tank, I used the Shurflo Revolution water pump. I also installed the accumulator tank to it so that the pump would not have to run as much. This is simple to connect directly to the water pump and I would suggest you do the same if you are planning to use this type of setup.
The pump and accumulator tank come with everything you need to be able to connect to each other. You’ll have to come up with your own solution for connecting the accumulator tank to the rest of your system. You’ll also need a solution for connecting your pump to the freshwater tank. If the tank is close enough to the pump, I would suggest using the silencer kit.

With one silencer cable, you’ll be able to come out of the freshwater tank and thread the hose directly onto the pump. You’ll need to figure out a way to screw into the tank. This was a challenge for me since the tank has some odd size 3/8 threaded holes. I couldn’t find anything standard that fit these holes so I used a 3/8 inch PEX pipe that went down into the tank.
At the top, I attached a 3/8″ PEX x 1/2″ Male Threaded Adapter that the silencer cable could be screwed to. I filled in any remaining air gaps with food-grade silicone. This wasn’t a big deal with my setup since my fittings were on the top of the tank. If you have your tank facing where the fittings are on the side, it will be more important to create a watertight seal.
With the other silencer cable, you can screw it directly onto the accumulator tank and connect it to the rest of your plumbing. In this case, I used various PEX fittings that can be picked up at most home improvement stores. I chose to use the plastic 90-degree elbows to be able to run the PEX around corners.
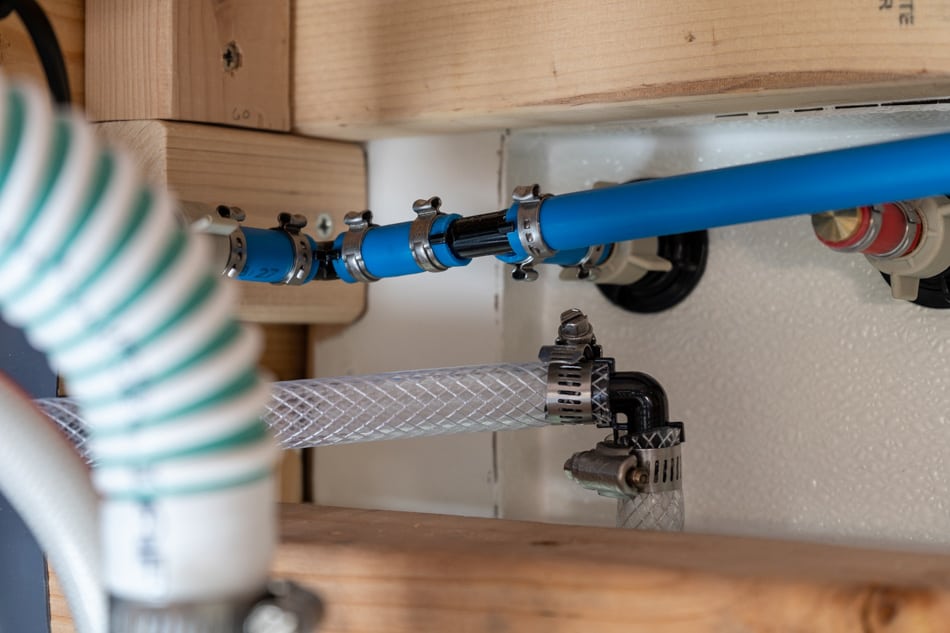
If you choose to use PEX, I suggest buying a good crimp tool to make sure everything is sealed properly. PEX is super simple to work with and to cut. They make tools for cutting it but I used a simple manual miter saw with a miter box to get quick, straight cuts. Once you crimp the crimps on, it is held tightly and you don’t have to worry about leaks if done right.

I also used a clear PVC hose to vent the tank and allow air to escape as I fill it up. The fill cap has a connection for this vent and it’s a necessary piece of the puzzle.
Van Conversion Greywater Tank
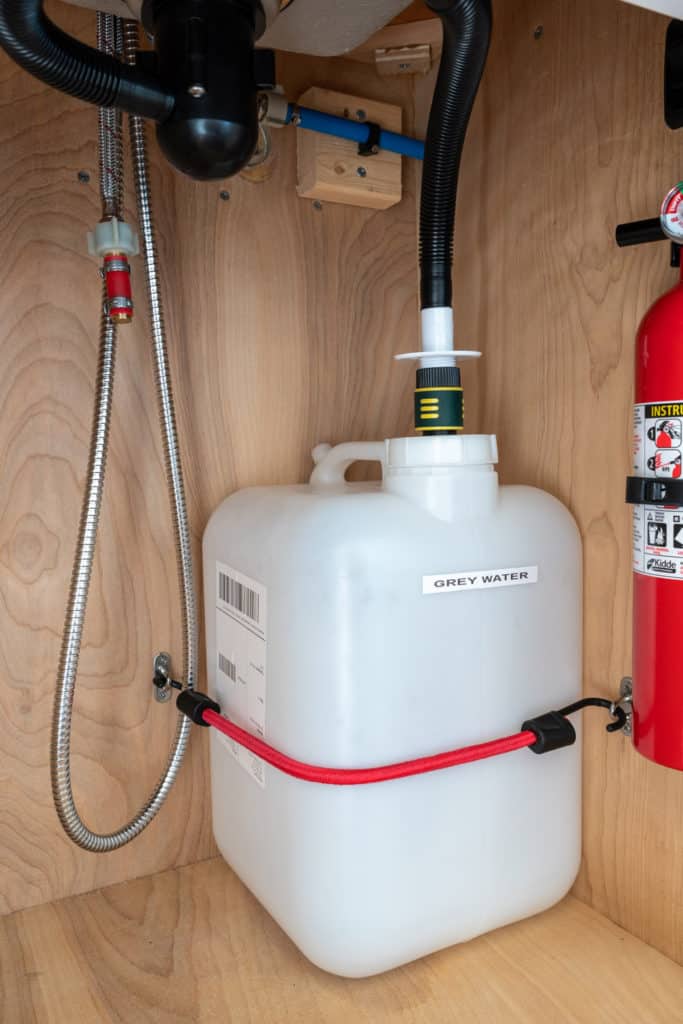
Although I chose a central freshwater system, I wanted my greywater tanks to be mobile so that I could easily dump them when needed. My greywater tank is positioned underneath my kitchen sink and for this, I used a 5-gallon Hedpack jug. I wanted to make sure it was clear or see-through so that I would know when it would need dumping at just a glance.
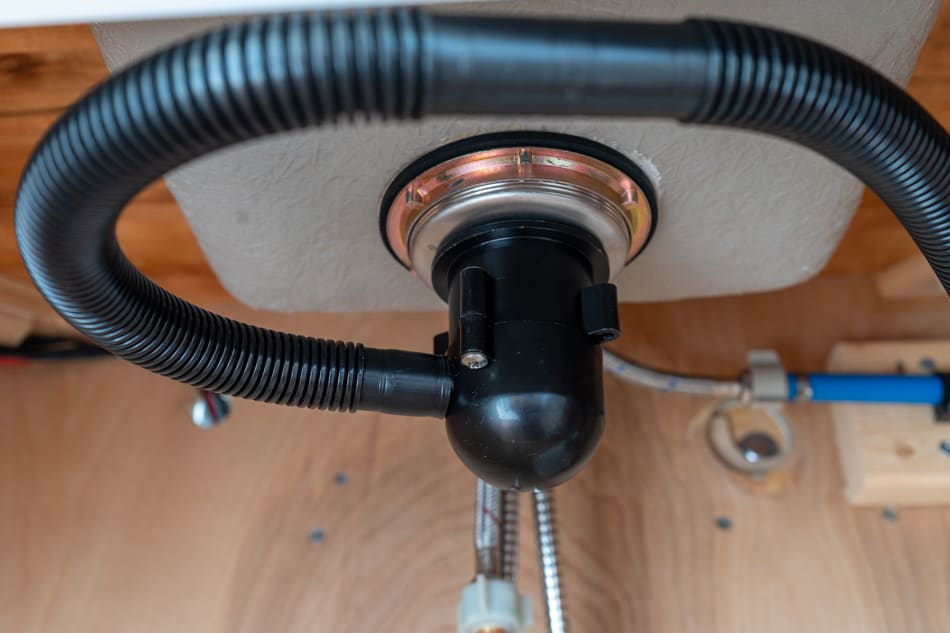
This jug is perfect for the setup I have because it connects easily to my drain system. For my drain, I used the Camco Flexible Camper Drain. This attaches perfectly to the Hedpack jug with a quick disconnect to make it easy to remove and dump. A standard garden hose quick-connect fits perfectly into the cap on this jug.

I also have an extra one that I can change out to if I am not able to dump the full one. Both of these jugs have quick disconnects installed, making it easy to switch them out.
For my shower, I didn’t install a greywater tank. I simply ran the drain out the bottom of the shower and it drains onto the ground. I only use biodegradable soaps so it isn’t a big deal when boondocking. If I am in a place where it can’t run onto the ground, I place my extra greywater tank under the van where the shower drains and it goes directly into the jug.
Using The Water System
Using this type of water system is similar to what you would be using in your home. Besides the sound of the water pump turning on and the hassle of dumping the greywater tank, everything else is business as usual. When you turn on a faucet, a difference in pressure in the system causes the water pump to turn on so that water is pumped from the freshwater tank.
If you have an accumulator tank, the pump will not turn on until the pressure in that tank reaches a certain level. The water is moved through the PEX plumbing and comes out the faucet just as you’d expect.
As it goes down the drain, it is routed into the 5-gallon jug beneath the sink. This jug has to be monitored so that it is not overfilled. Once it is time to dump it, you simply disconnect it from the drain and dump. Connect it back up using the quick connect and you are back in business again.
Filling the tank is easy and as long as you find a place with a spigot, the freshwater tank can be filled up in a matter of minutes.
Overall, this a great setup for someone converting a van, and I have been pleased with it during my travels. Of course, there are always things you wish you had done differently and the only thing I would have done differently is installed a larger freshwater tank. If your setup will be similar to this, buy the largest freshwater tank that you have space for. It will make for a better experience when you don’t have to fill it up so often.