9 Tips for Solo RV Travel – Staying Safe and Having Fun!

Are you ready to embark on a thrilling adventure and explore the great outdoors? Solo RV travel is becoming increasingly popular among those who want to experience a cost-effective way of living while exploring new places.

But if you’re planning to go alone, there are some important things you need to know before setting off on your journey. In this blog post, we’ll look at 9 tips for solo RV travel that will help you stay safe and have fun!

1. Plan, Plan, Plan

As the saying goes, failing to plan is planning to fail! Some may see this differently and prefer spontaneity in their approach but some level of planning is essential for a successful and safe trip. This is especially true for solo travelers!

Before setting off, consider where you’ll be going, what route you will take, and how long each leg of the journey should take. You may also need to plan ahead for RV campgrounds and accommodations depending on the duration of your travel.

Start by researching RV-friendly locations that are interesting and safe for camping alone. You could prioritize locations around national parks, scenic overlooks, or campgrounds with amenities like hookups for electricity and water. If safety is a concern, be sure to plan your stops in areas where there are lots of people. Putting yourself in remote areas alone is probably not the best idea for cautious travelers.

It’s a good idea to have a daily plan to follow, including stops for fuel and meals so you can optimize every moment of your journey without getting over-tired from long stretches on the road. With some preparation and imagination, your RV adventure promises to be rewarding and unforgettable!

Above all else, ensure that your vehicle is serviced and in excellent condition before taking off on your solo RV odyssey!

2. Prepare Your Vehicle

Part of planning your trip should also be considering your RV and preparing it for the trip. Your RV is what will take you to where you want to go so you want to make sure it is up to the challenge. Before hitting the road, make sure your vehicle is in good working order by checking all of the systems, tires, brakes, fluids, etc., so that it runs smoothly throughout your trip.

Be sure to change the oil and inspect and air up all tires. Here is a short list of vehicle preparation items that may be important to remember.

  • Change oil (if it needs it)
  • Check all fluids including brake, power steering, coolant, transmission, oil, and turn signal fluid (just kidding on that last one).
  • Air all tires and inspect for any damage. If necessary, replace tires with low treads. It could be dangerous traveling with worn-out tires.
  • Ensure the spare tire is useable and has proper air pressure.
  • Stock up on basic supplies such as food items, toiletries, and other essentials.
  • Check all systems and make sure all are in working order. This may include the water pump, furnace, air conditioning, and electrical systems.
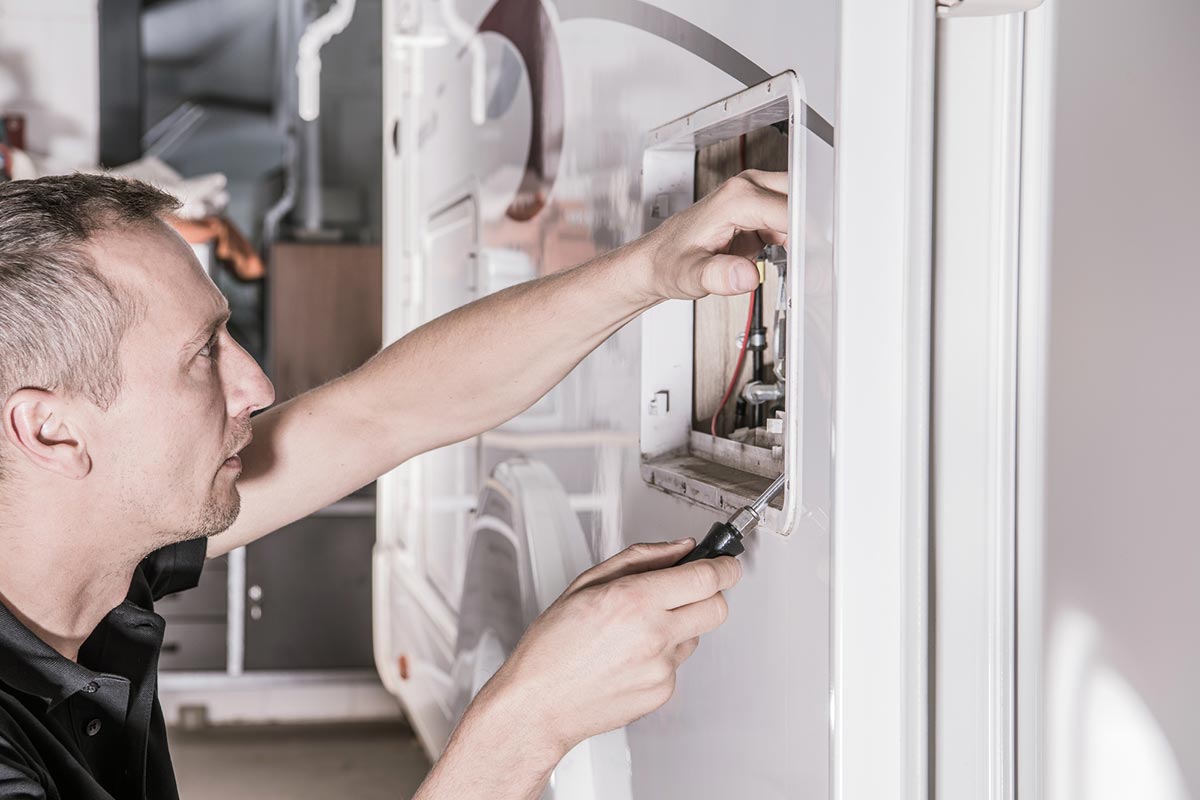
Repairing heating in RV

There are many more areas that you should check depending on your RV type and travel plans. Here is a great resource for lots of different RV travel checklists.

3. Be Prepared for Emergencies

No matter how careful we are, there may come times when unexpected events occur during our travels like mechanical breakdowns or accidents that require immediate assistance from professionals like tow trucks or mechanics who may not be nearby at the time of need. It is always best practice to keep emergency numbers handy such as roadside assistance services like Goodsam Roadside Assistance, AAA, or Allstate Motor Club in case something happens while out on the road.

Beyond that, it’s also important to carry an emergency kit with essential supplies in case you are stuck in the middle of nowhere. A first-aid kit can also come in handy. Stocking up on things like food, water, flashlights, and blankets can help you stay safe in the event of an emergency.

Finally, beyond cell phones, it is also a good idea to have a GPS unit or satellite phone handy so that if needed, you can easily contact friends or family for assistance.

4. Know Where Your Going Ahead of Time

As Yogi Berra famously said, “If you don’t know where you’re going, you’ll end up someplace else.”

While it’s probably not possible to know all the places you’ll be going, it’s a good idea to have a general plan in place. You can leave room for spontaneity and exploration, but mapping out where you want to go ahead of time can help you prioritize your stops and make sure you don’t miss out on anything.

Man looking at map in RV

Do research beforehand to look for interesting places along the way and plan RV Parks or campgrounds to stay at along the way. You can create a general list of places or mark them on your map for areas you know you’ll be in. By doing some research ahead of time, you’ll know the roads to take and the places worth seeing along your journey.

Finally, share this list with other family members or friends so they will also have a general idea of where you’ll be. If bad things happen, at least they will be in the know as to general areas that you may be at.

5. Pack light

You don’t need to bring everything with you when you’re traveling in an RV. Decide what items you need and make sure to pack light so that you don’t run out of storage space or add unnecessary weight to your vehicle.

Solo RV travel can be a great adventure, but packing can be the biggest challenge. When you’re on the road by yourself, it’s easy to forget to be practical and pack items that won’t actually serve any use or purpose with RV travel. To maximize the freedom and flexibility of being out there on your own, you should look to pack as few items as possible while remaining safe and prepared.

Successful packing comes down to understanding what you’ll need for a comfortable solo RV journey. Consider taking multi-use clothes, focusing on personal hygiene, planning out meals ahead of time, and packing only essential items for RV travel so that nothing is wasted along the way.

Being mindful of what you pack when RV traveling can help keep your load light enough so that you can enjoy the journey.

6. Stay safe

It’s important to take safety seriously when traveling alone. As a single traveler, you are more vulnerable to hazards that can arise while on the road. Staying vigilant and proactive will go a long way toward keeping you safe while RVing alone.

Here are a few ways that you can remain vigilant in your approach to staying safe while on the road alone.

  • Never park in sketchy areas or places that just don’t feel right. Trust your instincts and don’t always rely on reviews or other people’s suggestions.
  • Park in a way that will allow you to leave quickly if the need arises.
  • Always get permission to park in areas where you think free parking is allowed. You don’t want to get in legal trouble or fined for a simple parking infraction.
  • Keep some basic non-lethal weapons close at hand inside your RV. Here are a few suggestions.
  • Always be mindful of your surroundings and use common sense.
  • Keep your phone charged and make sure it is within arms reach at all times.
  • Make sure your RV is stocked with safety essentials such as a first-aid kit, emergency supplies, a working smoke detector, and a carbon monoxide detector.

The RV community is a great group of like-minded individuals. For the most part, you’ll have no problems but that doesn’t mean the chance isn’t there. Expect the best but prepare for the worst and you should be just fine under most circumstances.

7. Stay connected

Make sure to stay in touch with your family and friends by bringing along a phone or laptop for communication in case of an emergency. As mentioned above, make sure those items remain charged at all times so you don’t find yourself with a dead phone or computer when you need them most.

Take lots of pictures to share with your friends and family so they don’t miss out on all of your experiences and they know where you are. Be sure that you have an emergency plan in case anything goes wrong or something unexpected happens.

There are many ways to stay connected without spending too much money or time. Our phones are usually always with us and allow us to talk to anyone with the push of a button. However, cell reception can sometimes be an issue, especially if you are boondocking in rural areas. You may want to consider other options as backups, such as satellite internet or mobile antennas.

With the use of popular apps such as Skype, FaceTime, WhatsApp, and even more widely available WI-FI connections you’ll be able to check in every once in a while without racking up huge roaming charges along your journey.

Using the right phone plans that allow for national coverage at a flat rate makes staying connected while traveling in an RV solo much less of a hassle.

8. Relax

Although there are some concerns as a solo RV traveler, you still need to enjoy the journey. As long as you are prepared in the best way you can be for unexpected issues or danger, there isn’t much else you can do. Relax and enjoy what this lifestyle has to offer. There are mostly good people on the road and those you meet along the journey will be pleasant.

Through RV travel, you can explore picturesque locations of your choosing in complete peace and tranquility. You can take in the fresh air and natural beauty around you without the disruption of crowded tourist spots or bustling cities. Moreover, you can customize your RV trip to fit your exact needs and preferences. Choose from town-hopping day trips or multiday stays near popular attractions; embrace a slower pace or plan exciting itineraries along with outdoor activities.

With RV travel, there is no limit to how much you can relax – all while safely exploring nature in an enjoyable atmosphere.

9. Have fun

Don’t forget to have fun while traveling solo! Take pictures and document your journey so that you can look back on it fondly in the future. You may even meet some interesting people along the way! While there may be some initial safety concerns, you’ll generally find that it was all for nothing. I have been fortunate to not have any issues along my journey that put me in an unsafe position. They are few and far between when they do happen.

Don’t let the thought of what could happen ruin your experience.

From sightseeing to spending time outdoors, RVing allows you to make your own unique adventure – the sky is literally the limit when you go RVing! Everything from camping in a secluded spot to just driving around until you find something interesting can make having fun on an RV trip a breeze. All you need is you and your RV and any activity can become an opportunity for fun and exploration.

Conclusion

RV travel is a great way to explore the world and give yourself an unforgettable adventure. With proper preparation and the right attitude, you can have a safe and enjoyable experience, with plenty of chances to make memories that will last a lifetime. So, don’t be afraid to embark on your solo RV journey. With these tips in mind, you’ll be ready to hit the open road and explore what this world has to offer.
5 Best Shower Options For Van Life

Van life can be a dirty and sometimes stinky adventure. While most of the pictures you see online of van lifers enjoying the journey look great in pictures, they are often in environments where it is hot and nasty, and some may go for long periods of time without access to showers.

Many van dwellers will find public showers to clean themselves off from time to time but this makes for a yucky experience in between those cleanings. The solution is to have a shower option available in your van or something that you can use regularly to wash yourself off and stay clean. It isn’t always feasible to have a full shower within your van but some type of shower is possible for most van conversions.

There are numerous ways that you can stay clean while out on the road with some being more convenient than others. I’ve built a full-fledged shower in my van so, for me, taking a shower is similar to taking a shower at home. As long as I have plenty of water supply, I can take as many showers as needed. This makes it convenient but there are also downsides to this which I will discuss below.

Most van-dwellers are aware of using public locations for showers. These can easily be found in gyms, truck stops, campgrounds, hotels, etc. However, this list will focus on other options outside of public facilities. This list will help you create a self-sustaining environment in your own van rather than having to look for public options.

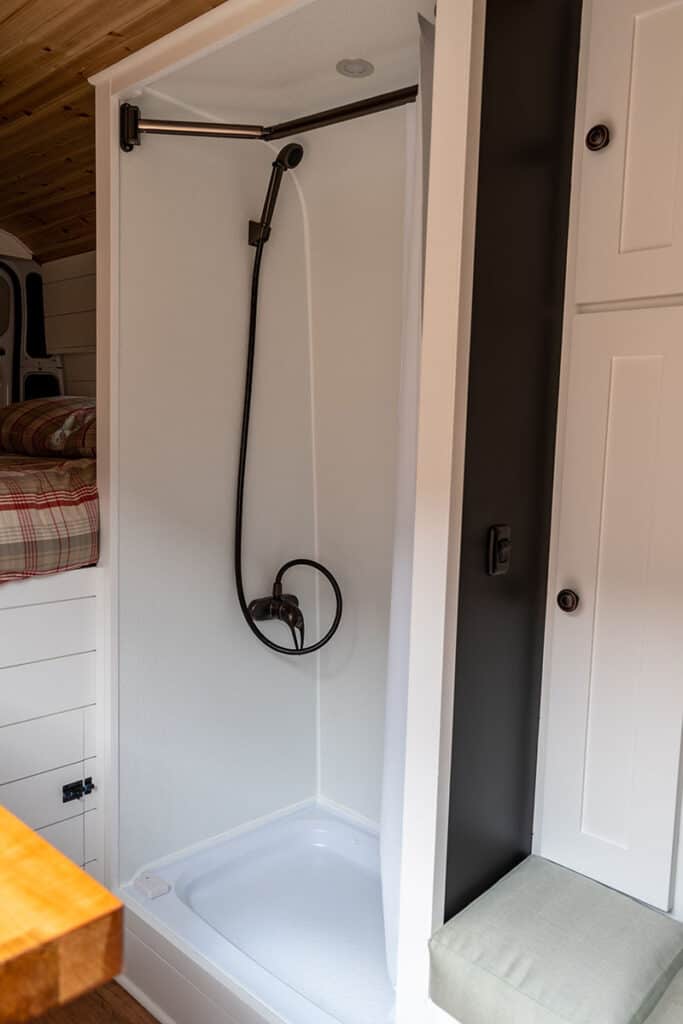
1. Built-In Indoor Shower

The best shower option for van life is a built-in, dedicated shower inside your van. Having a built-in shower will give you the privacy you need for an effective shower. Not only will it make showering easy when you are ready to do so but it can also serve other purposes. Besides showering, your shower stall could also be used to hang wet clothes or store wet shoes and other items out of the way, closed off to your van dwelling area so they do not become a nuisance.

Built-in van shower

While this is the most complicated way to have a shower since it requires you to build it during a van conversion, it’s certainly the most convenient once it is fully created and set up.

What’s more is that you can add a water heater to your shower system, making it as though you are taking a shower in a residential home. This is truly luxurious while out on the road living in a van. It makes a great way to take a shower as long as you have access to water and don’t mind using it for cleaning yourself off.

My shower in my van is fully built into my water system and utilizes my main water supply. However, my showers are usually very quick and I use a very small amount of that water. It usually works out to less than 2-gallons for a full shower.

In order to end up with a fully functioning shower like this, it will need to be planned in your van build or you’ll need to choose a van that already has a built-in shower. There are numerous ways that you can do it. While some of them may be fixed showers that are there at all times, and some may be the type that can be folded up and put away when not in use.

There is no best option when it comes to this but will come down to your preferences in the situation.

You can see pictures of my shower build here.

Pros

  • It’s convenient. You never have to leave your van to take a shower which makes it super convenient.
  • It’s luxurious. You’ll be tucked away in privacy in your van and can take your time with soaping up and rinsing off.
  • It can serve multiple purposes. It can be used for more than just a shower. I use mine for wet clothes and shoes, especially during rainy times.
  • It’s always available. No need to search for a public shower or do without. You can take a shower in the comfort and privacy of your own van no matter where you are.
  • It can be designed to your liking. Be creative and build it however you wish.

Cons

  • It uses an already small water supply. Using your main supply of water for showers is a quick way to end up empty and needing a refill. This may not be the best option if you are off the grid.
  • Water must be disposed of properly. When taking a shower, you’ll need to collect and dump your water properly or use environmentally friendly soaps when in an area that allows it to dump straight onto the ground.
  • It takes up valuable space in your van. This is one reason many people avoid indoor showers. They take up space so it has to make sense for you.

2. Built-in Outdoor Shower

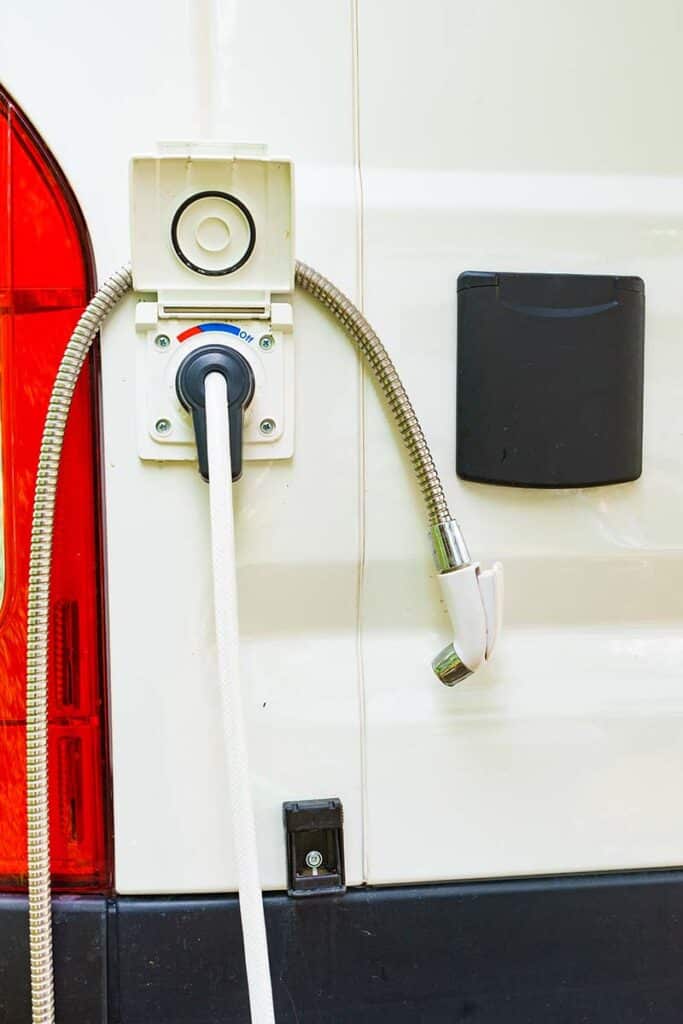
If an indoor shower is out of the question, an outdoor shower makes sense if you have a plumbing system with a water pump in your van. Including a way to take an outdoor shower can make the experience much more pleasant and save room in the process. This can give you a functioning shower head while not taking up any space within your van.

Outdoor van shower

This can be achieved in multiple ways and many people do it by using their kitchen sink faucet. By positioning your sink next to the side door of your van, you can extend the faucet head out the side of the door and take a shower as needed.

Another way is to build a dedicated outdoor shower with a nozzle and shower head that can be plugged up whenever you need it. This is often accomplished by installing it in the back of the van so that you can create some privacy between the doors. You can do this by fashioning a shower curtain between the two rear doors while they are opened. This can make for a great way to rinse off and take a quick shower after a beach excursion, hiking, biking, or just getting the funk off after a long day.

As you can imagine, some cons go along with having a shower like this. It’s not something that can easily be done in a public area and will not always be an ideal solution. Even with a shower curtain or some kind of privacy screen, it may not be allowed in certain areas and you will have to do without or find another way to wash off.

Pros

  • Provides you with a shower while taking up minimal room. It can tap into your water supply with a simple hose and sprayer.
  • Doesn’t require a gray water tank. Since you are outside, you can just let the water fall to the ground in most cases as long as you use the proper soaps.
  • Keeps all the dirty work outside your van. No need to worry about getting dirt, grime, and water inside your van. All the dirty work will stay outside.
  • Keeps moisture and water outside your van where it belongs. No moisture will build up in your van by keeping the showering outdoors.

Cons

  • It’s inconvenient. Setting up an outdoor showering space can be a pain unless you are out in the middle of nowhere and no people are around.
  • Requires you to be in an area that allows it. Many places won’t allow it so you’ll have to check first before assuming you can strip down and clean yourself off outdoors.
  • You will likely have to wear shorts or a bikini while showering. While it’s better than nothing, wearing clothing while showering isn’t ideal.
  • Not ideal in colder temperatures. You probably won’t want to take a shower when it’s super cold outside for obvious reasons.

While an outdoor shower like this can work well in some cases, it isn’t always the answer. It’s a good idea to combine an indoor shower and an outdoor shower as each of them can be used for specific reasons. An outdoor shower is great for those times when you need to rinse off because you have dirt and grime on your legs and feet.

However, an indoor shower may be the best option if you want to have a full-body wash in private and in the comforts of your own living space.

3. 12V Portable Shower

A portable shower system that connects to a 12-volt or other power source is a great alternative to a full-featured shower that is built into your van. With one of these, you are able to utilize pressurized water that can keep you clean while out on the road.

These types of showers usually hold a small amount of water and can be used long enough for a short rinse-off. They are perfect for van life or any type of camping experience where you need to be able to shower while using minimal electricity and water.

These can be used inside or outside your van depending on the type and the setup that you have. Some van dwellers create an encased area in their van that can be temporarily erected while they use the shower. Others simply take the unit outside their van and use it as an outdoor shower. Either way works great and gives you a place to rinse off when you need it.

My suggestion for a great quality portable shower is:

3.5-Gallon RinseKit PRO Portable Shower

The RinseKit Pro Portable Shower is a popular choice for camping and other outdoor activities and allows you to rinse off with a powered washer that has a water reserve of 3.5 gallons. This can simply be connected to a 12-volt power source and used as any other type of shower. With a decent rate of flow from the showerhead, you are able to rinse dirt and debris off your body or take a full shower and keep yourself clean while traveling in your van.

It’s a portable solution that is similar to storing a cooler in your van. It doesn’t take up much space and is ready to be used when you need it. It can also be used with the RinseKit Pro Immersion Heater so that you can enjoy a hot water shower.

4. Gravity Outdoor Shower

If an electrical shower will not work for you or you do not want to tap into your electricity for a simple shower, a gravity shower is a great solution and will also allow you the same opportunity to rinse off that the 12-volt portable ones will.

The only difference is that the gravity shower will need to be hung up at a height that allows gravity to do the work for you in creating water pressure. The water pressure will not be as strong as a 12-volt shower but it will be plenty for allowing you to fully rinse off.

These come in all shapes and sizes with some being very simplistic and others with more features and capacity. Some offer solar heating and a large capacity of up to 5-gallons. This amount of water is more than enough for a full shower.

My recommendation for a gravity shower is:

Advanced Elements 5 Gallon Summer Shower

With 5-gallons of capacity, the Advanced Elements 5-Gallon Summer Shower will give you plenty of water to clean yourself off. There is nothing to plugin and it works by using gravity. Simply hang the shower up at a high level on your van and let the water come flowing out.

It also includes a temperature gauge so you will know when the sun has heated the water to your liking. It’s a great way to enjoy a shower while out on the road without the hassles of a built-in shower or the expense of a more capable portable shower. It’s easy to fold up and store when not in use.

5. Solar Car-Top Shower

A car top shower works great for a van. Since there is so much space on top of your van, it makes sense to utilize this space to create a large capacity water reservoir that can be used as a shower. This allows the water to remain completely outside of your van yet ready to use whenever you need a shower.

These are often great at warming the water since they are in direct view of the sun throughout the day. They allow you to enjoy a nice warm shower after the sun has increased the temperature of the water.

These can be purchased ready-made or can be built custom with a few simple parts. This simple DIY version from REI can be built and mounted to the top of your van using minimal supplies. It utilizes ABS pipe that can be purchased at most home improvement stores. Other parts needed are easy to find and this type of setup provides a great solution for those wanting to be able to shower outdoors with the simple pressurized portable shower.

Purchasing a shower like this that is already built for you is also an option. If you are going to go this route, I recommend the WaterPORT The Weekender 8.0 Gallon Water Tank.

This is a shower that can be mounted on top of a van or other type of vehicle. With an 8-gallon water capacity, it’s more than enough to provide multiple showers and other uses. A shower like this creates a very large reservoir to store water and allows it to warm up with the help of the sun.

While it is expensive, it is a reliable shower that can be mounted up and out of the way, providing you with a warm shower.

Conclusion

As you can see, you are not limited to public shower facilities while living van life, there are plenty of ways for you to keep yourself clean while out on the road. While I believe the best way is to include some type of built-in shower in your van conversion, other options outside of your van can work great as well.

I have never regretted building a shower stall within my van that allows me to take a private shower anytime I wish.

However, many people don’t have the space for this or don’t want to take up space with a shower that may not get used very often. It all depends on your personal preferences and the conveniences you want within your van. If not an indoor shower, a built-in outdoor shower is among one of the most popular ways to keep fresh and clean while traveling in a van.

Whatever you choose, just know that traveling in a van doesn’t mean that you’ll only be able to take showers in public places like gyms, or truck stops. You can be proactive and create a solution within your van that allows you to stay clean most of the time.

5 Best Propane Stoves for Van Life

Van life presents you with a lifestyle that requires you to go outside the box a little. While you may have some semblance of normal life, some of the products you use may be a bit different than you are used to. A stove is one of those items. If you don’t have a built-in gas stove in your van, you’ll have to get used to a camping-style propane stove that utilizes small propane containers.

I chose not to use a built-in solution in my van because I didn’t want to dedicate a space for it. Cooking isn’t something I do a lot so wanted to have a mobile solution that could be set up and taken back down as needed.

That’s where the trusty ole propane camping stove comes in. It has served me well and as a camper and outdoor enthusiast for most of my life, I have used many stoves like this over the years. They are not created equal and some stand out above the crowd.

I’d like to share a list of the top 5 stoves that would make a great cooking solution for van-lifers. There is a clear winner for me as it’s been the one I’ve stuck with over the years and have cooked many meals with.

Keep in mind that these propane stoves are great for van life where most of your cooking will be done inside your van. My criteria for a great van life propane stove are quality, size, and mobility. All the stoves I have looked at are small enough to work well in tight spaces but pack a punch when it comes to cooking or heating foods and liquids.

While there isn’t too much that can go wrong with a simple camp stove, a low-quality one will leave you wanting more. While there are pros and cons to each of them, the trick is to find one that suits your needs. If you’re an aspiring chef, a built-in solution will be better. However, if you are in the market for a more portable solution, read on.

1. Eureka Ignite – Overall WINNER

Using propane grill in van

The Eureka Ignite has been my go-to cooking solution in my van since the beginning. I have cooked many meals on this little stove and it has been excellent! I initially purchased this because of its design. I liked the color, and size, and was sold on the simmer control that it offers.

I have been pleasantly surprised at how well this little stove functions. It’s small and sits nice and neat on my counter but stores away easily when I’m not using it. It is a quality product that some thought has gone into.

I wrote a full review on this stove that can be found here. Let’s look at a few of the best things to love about this stove.

Pros:

  1. Low flame control. You can simmer your meal really well with this stove. The flame can be brought down to nearly nothing and allow you to slowly cook or warm foods without burning them.
  2. Low profile. – This stove is quite slim and will fit nicely on a countertop or picnic table. I use it on my kitchen counter all the time and it works great.
  3. Quality. The quality of this stove is better than a lot of others I have tried. I have been satisfied with the overall build, controls, elements, and connections.
  4. It looks great. This stove looks great sitting on my countertop without being too bulky.
  5. Easy to clean. I have spilled my share of foods and liquids over time as I’ve gotten sloppy and allowed foods to fall or water to boil over. Those spills are easy to clean up with the stainless-steel drip tray.
Close up shot of Eureka Ignite burner
Close up view of Eureka Ignite burner on simmer

Cons:

  1. No storage case. I wish it came with a carrying case. It would be much easier to store in a van with a padded case. It does have a nice hidden carrying handle to easily carry it from place to place.
  2. Wind guards are flimsy. This is common with all camp stoves but the wind guards are flimsy and easy to bump into causing them to fall while you are using it. The simple solution is to just be careful not to bump into them while they are in position.

Overall the Eureka Ignite camp stove is my favorite! I consider it the best quality stove for the money and it can be perfect for van-lifers who want a portable solution rather than a built-in stove.

Camp stove being used and stored
The Eureka Ignite is easy to use and stores easily above the cab.

2. Coleman Cascade Classic Camp Stove

Another compact stove that packs a punch is the Coleman Cascade Classic Camp Stove. This stove is similar in color to the Eureka Ignite and has a similar overall look. Its feature set is quite similar and makes a great option for those who want a compact, portable stove.

While it weighs slightly more than the Eureka Ignite, it is still compact, sleek, and will get the job done with its 20,000 total BTUs of cooking power.

Pros:

  1. Sleek Design. this is not your camp stove of the old days. It has a modern look for those who want the aesthetics to go along with the functionality.
  2. Compact. While it is a little larger than my favorite Eureka stove, it is still compact and is small enough to store away easily.
  3. Built-in Carrying Handle. I love the carrying handle on this product. It’s built-in and easy to grab and go no matter where you are cooking your meals.
  4. Removable grate for easy cleaning. The grate can easily be removed to be cleaned or to clean spills and food out of the drip tray.

Cons:

  1. Not as solidly built as other Coleman stoves. This stove has reported issues with being flimsy and not as well constructed as some of the older Coleman models.

Overall, this is a great stove that won’t break the bank, will look great in your living space, and will allow you to cook some delicious meals out on the road.

3. Coleman Classic 3 Burner Propane Camping Stove

The Coleman Classic 3 Burner Stove is one of the most popular on the market and for good reason. Coleman has been the go-to brand for many campers for many years. This classic stove is larger than the previous two stoves above. It’s for those who need to utilize larger pans and have the space for it.

While it can be too large for many van living areas, it can make a great stove for those who want to cook outside the van. Its large size allows you to cook more food in less time, making it a great cooking solution on the road.

Coleman is a reliable brand so this classic stove will ensure that you have a reliable stove ready to serve your needs.

Pros:

  1. Carrying handle. All portable stoves should have a built-in handle like this. It makes it easy to transport from place to place while on the road or out in the wild.
  2. 3 Burners. A large amount of burner space will ensure that you make the most of every square inch of cooking area.
  3. Fold down wind guards. If the wind guards are in the way, you can easily fold them down. They make great areas for stove utensils and other items when not being used for blocking wind.
  4. It can accommodate larger pans up to 12-inches. Most compact camping stoves can only accommodate 10-inch pans at best. However, this whopper gives you the room you need to cook larger meals.

Cons:

  1. It’s large and bulky. This may be too large for van life but if you have the space, it has a lot of room for cooking large meals.
  2. The temperature is hard to adjust. Many have reported that the temperature is not as adjustable as some other stoves. This is common with camp stoves as you either get it too hot or not hot enough. It may take some time to get it working to your liking.

4. Coleman Fold N Go 2 Burner Propane Camping Stove

The Coleman Fold N Go 2-Burner Stove is a space-saving stove can help you maximize the room in your van while still providing a powerful place to cook meals. If you only get your stove out when it’s time to use it (like I do), you’ll appreciate the foldable design on this stove. Storing it away is easy as it can fit in smaller spaces than some of the regular-sized stoves mentioned above.

I have a place where I always keep my stove out of the way but having one that folds as small as this one does would make finding a storage space much easier.

Pros:

  1. Folds for easy storage. Storage is often hard to find in a van so having a small stove is an advantage. It folds small but still maintains a normal footprint when opened up and ready to use.
  2. Lightweight. At only 5 pounds, it’s about half the weight of some of the other lightweight models above. If you are trying to save weight, every little bit helps.

Cons:

  1. No wind guards. If you intend to use this stove outdoors, you won’t have wind guards to keep your flame from blowing out. This won’t be an issue on non-windy days but could cause a problem in windier conditions.
  2. Propane connection is in the back. If you have small counter space, the propane tank on the back will make this unit stick out further than those with the propane tank on the side.

5. Jetboil Flash Camping and Backpacking Stove Cooking System

Jetboil being used in van kitchen

The Jetboil Flash is a different system than those we’ve looked at so far. However, I feel that this is a perfect additional stove for van-lifers. There are times when you just need a simple burner that can warm water quickly. The Jetboil gets it done fast and is extremely small for storage.

I’ve included it on the list because I use it regularly and know how great it works. For those times when I just want to warm water for coffee, tea, dried soups, oatmeal, or anything else that requires hot water, this is the stove I reach for.

Besides that, van life allows me to be outdoors and as an avid hiker, I often find myself lost in the woods far away from the van. Having a portable stove like this allows me to enjoy creature comforts when I’m not in the van. I can take an early morning hike and fix some coffee once I get to my destination. It’s truly a great solution for the mobile outdoorsman.

It’s also great in your van as an addition to a larger stove. I love my Eureka stove but there are times when the Jetboil is all I need.

Pros:

  1. It’s very small. While not your typical camp stove, this stove serves a different purpose and is small for hikers, backpackers, and multi-day outdoor excursions. This means it takes up less space which is great for van-dwellers.
  2. It heats up fast. If you need some boiling water fast, this system is easy and fast to set up. Once set up, you can expect boiling water in just a few minutes.
  3. It can be used in your van or out on the trail. Use it in your van or on your day hikes. Either way, it can be useful in so many scenarios.
  4. It’s an all-in-one solution with minimal weight. Everything you need is inside, including the gas canister. Just drop it in your backpack and you’ll never know it’s there.
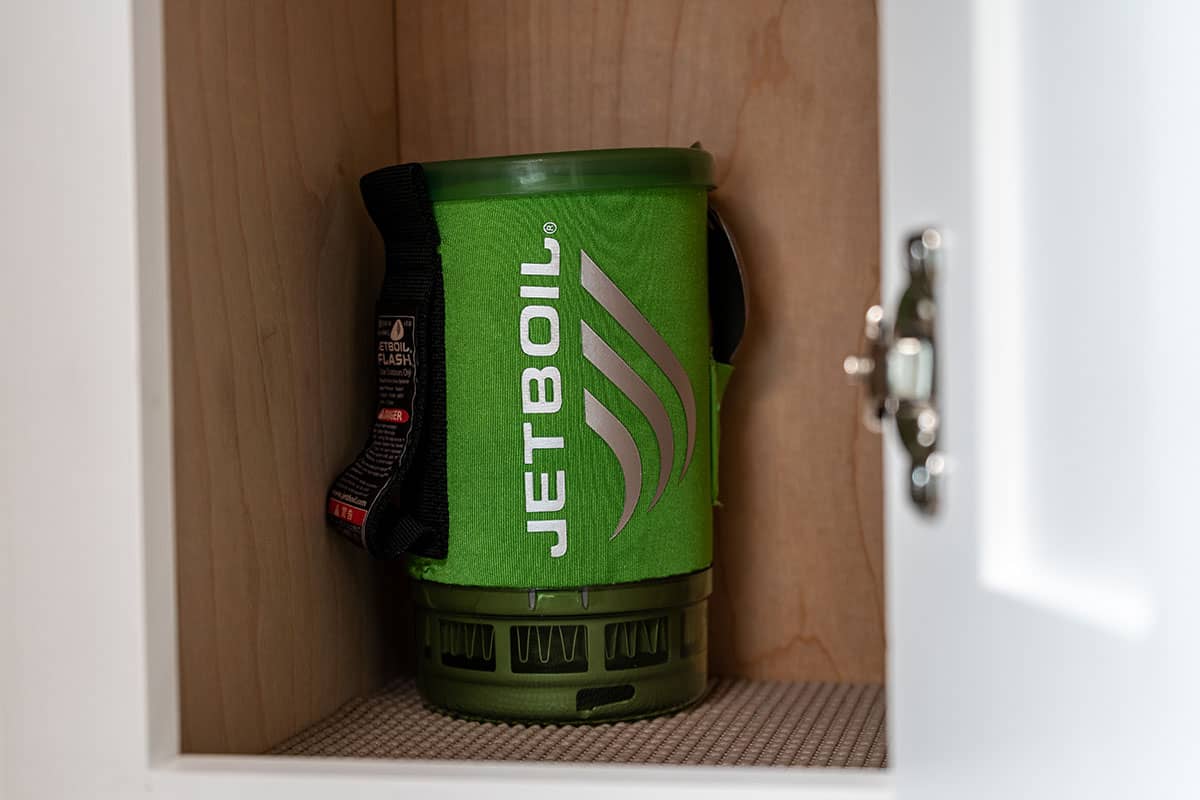
Jetboil Flash being stored in van cabinet
The Jetboil Flash stores easily in a small cabinet

Cons:

  1. It requires a different type of fuel canister than other stoves. It won’t work with the typical 1-pound propane tanks that camp stoves often use. Instead, you’ll need a specific canister designed to fit the smaller connection. These are easy to find at most outdoor stores or online.
  2. It’s too small to cook full meals on. You likely won’t be cooking large meals but will use it for dry soups and other foods that can be cooked out on the trail.
  3. It’s mainly used to boil water. Its primary use is to boil water that can then be added to items requiring it.
Propane canisters
Jetboil gas bottles are smaller than the typical 1-pound bottles

Conclusion

A good camp stove is essential for van life. Unless you decide to have a built-in solution, you’ll need to invest in a great portable stove so that you can live comfortably while on the road. There are many options on the market but my favorites are listed above. I’ve found these to be top-of-the-line models that will work great for your van.

While I have preferred and have used the Eureka Ignite for many years now, all of these are great solutions. The one you choose will be unique to your situation. You can’t go wrong with any of the models I have chosen for this list if you are looking for a reliable solution.

5 Dangers of Van Life and 5 Tips For Staying Safe

Living or traveling in a van is all the rage and I must admit, as a camper van traveler myself, I totally get it! It’s absolutely fun and adventurous to live life in this way. It’s a great way to travel and visit destinations that you might not otherwise be able to.

However, it does present some dangers and can often be scary for those who travel alone. While I haven’t had any major scares on my journey, I have often found myself in areas that I bailed from. There are just some places you know you shouldn’t be and it’s best to listen to your intuition and move on in these instances.

I try to believe that most people are good out there and there are only a small number of folks you need to worry about. This may be more true in some areas than others so it’s always best to err on the side of caution. It’s a good idea to always expect the best but be prepared for the worst.

While I haven’t experienced very many problems while out on the road, I have often been concerned about lurking dangers that present themselves with this lifestyle. There are some risks involved in being on the road and there is no way around it other than proper preparation and planning.

Let’s look at five of these dangers below that I consider to be top of the list.

5 Dangers of Van Life

1. Accidents

Anytime you are traveling in a motorized vehicle, accidents are always a concern. Even if you are the most careful driver on the planet, other people can totally ruin your day by not paying attention or just doing something stupid. Beyond that, accidents happen, and oftentimes no one is at fault. It could be an act of nature or a wild animal that has run into the path of your vehicle.

Deer standing in road

No matter how it happens, wrecks are a concern with van life as well as any other type of RV life. This lifestyle requires us to drive long distances and we are often behind the steering wheel for extended periods of time. It’s easy to get caught up in a bad situation out on the road that is not your fault.

It’s also easy to get distracted or tired and cause the problem yourself. It’s always a good idea to have this in the back of your mind as you travel on your journeys and expect that anything could happen at any time. It’s not negative thinking but simply being prepared for what could happen that could potentially threaten your life and the lives of others.

2. Mechanical Failures

Along with wrecks, auto vehicles also break down and have mechanical failures. This can be a huge headache when you are traveling long distances out on the road. The best you can do is proper maintenance of your vehicle and keep it in top running shape at all times. Beyond that, failures happen and it’s often beyond your control. There are some ways that you can prepare yourself for when these issues arise.

Flat tire broken down

The most important thing you can do to minimize breakdowns is to perform regular maintenance on your vehicle. This includes oil changes, tire replacement, and maintenance including maintaining proper air pressure. You can also change filters, check all serviceable fluids and do a thorough walk-around inspection of your vehicle often while out on the road.

There are some other ways that can you reduce your worries of breakdowns occurring while on the road. Some of the tools that I use include the following:

Roadside assistance

You can purchase roadside assistance for RVs that allow you to have a place to contact when breakdowns occur out on the road. These services can deliver fuel and other necessities to your location and also tow you to the nearest maintenance location.

Good Sam Roadside Assistance is a good choice and offers plans specifically for RVs (including vans).

Carry Jumper Cables or a Jump Starter

You shouldn’t leave home without jumper cables but if you really want a great solution to a dead battery, carry a jump starter at all times in your van or RV. These allow you to jumpstart your battery when it is dead. They are small and easy to store and can be a lifesaver in a desperate situation.

I carry the NOCO Boost Plus in my van and all other vehicles at all times. Just make sure you keep it charged and ready to use at all times.

Carry an Emergency Roadside Kit

You never know if, when, or where your van will break down. It’s good to have a few necessities in your van that could keep you safe when something occurs. You’ll want a kit that has a few common items that are needed out on the road including:

  • Reflective warning triangles
  • Socket set
  • Screwdrivers
  • Tire repair tools and air pressure gauge
  • 12v air compressor
  • Bright flashlight

These tools are always in my van and give me an extra level of security in knowing they are there in case of an emergency.

This Emergency kit includes the necessities you might need if you find yourself stranded on the side of the road.

Traction Boards

If you find yourself going off the beaten path more often than not, some traction boards should be in your van. Everyone who travels in a van or RV should consider having these no matter what. They are great to help you get unstuck from mud, sand, snow, or anything else that causes your tires to lose traction.

Even if you have a 4-wheel-drive van, you may still find yourself unable to work yourself out of a hairy situation. It’s best to have a backup plan that could provide some help.

If you have wandered down the wrong path or tried to be a little more adventurous than you should have, you may have gotten stuck and need a little help to get you out of it. These mats are great for helping you get unstuck and are easy to store away in your van when not in use.

These traction boards will do the trick and can store away easily when not being used.

3. Burglars

We all know that thieves can ruin everything! It’s a terrible experience to learn that your van or RV has been broken into when you were not around. Even worse is for it to be broken into when you are around and potentially cause you to have to fight for your life.

Most often, thieves are looking for easy targets and will run at the first sign of resistance. However, when a thief is backed into a corner, there’s no telling what he or she will do.

Whether you are traveling in a van or any other type of vehicle, thieves are lurking all over the place so you should always be prepared.

Those traveling in vans or RVs have a lot of their possessions on board. A thief that steals your IDs and other important documents or items can really turn your world upside-down.

The most obvious thing you can do is always keep your van locked no matter how far away you are from it. Whether you are strolling around close by in the campground or miles away, keeping your van locked when you are not around is the first line of defense to ward thieves away and make it too difficult for them to fool with.

Having blackout curtains or window covers in your van is also important. These should be installed at all times when you are not in the vehicle or even when you are in the vehicle. A thief will not know whether someone is in the vehicle or not if blackout curtains or other window coverings are installed. It’s best to keep them wondering than to allow them to see straight into your van.

4. Being Asked to Leave

It’s no secret that van lifers often park in any place they can find that seems legal. This isn’t always easy to accomplish and often leaves you wondering if you are going to be asked to leave or not. This can often present you with anxiety and fear that you will either be asked to leave, be fined, or get in other types of trouble.

It’s not always as easy as you would think to find parking while out on the road. If you are trying to maintain free parking everywhere you go, you will probably be disappointed along the way as it’s becoming increasingly more and more difficult to find such places.

It’s best to have multiple plans and sources of places to park your van for the night in case you aren’t able to discover free places. You want to seek out Campgrounds, RV parks, Harvest Hosts locations, Boondockers welcome, Hipcamp, and other legal areas where you can park. Combined with free parking areas, having a variety of other sources for parking your van can ensure that you will always have a place to go.

Constantly feeling like you are out of place and parked in an area you aren’t supposed to be in is a common fear and a danger when you are traveling in a van.

5. People Who Want To Do Harm

Beyond thieves, the other types of low lives out there on the loose are those who want to do you harm. It could be a variety of reasons but it’s a good idea to always have a plan when something goes wrong. When you are out on the road, you never know who you are going to encounter as well as who you can trust. It’s getting more and more difficult to trust people and even when you think you’ve met somebody good, you never know another person’s intentions.

Being out on the road, you are likely to meet people from time to time and while most of these people will be great, you will likely encounter a few bad apples along the way. Your intuition should guide you away from these types of people but it isn’t always that straightforward.

5 Tips for Staying Safe

1. Be Aware

Perhaps the best thing you can do to keep yourself safe while on the road is to be aware of every situation that you are in. This awareness should lead you to select safer parking areas, safer routes, and people to associate with. If you are aware and use your head in every situation, rather than allowing your emotions to take over, you will be better off.

As an example, consider parking your van in a location. When you park your van, always do a thorough check around the area to make sure you are in a safe place. If you feel that there is something not quite right, it’s best to move on. If your intuition is telling you that danger might be present, then don’t ignore it!

If you decide to stay, you want to be aware of how you are parking and what it will take to drive away if things go wrong. You will want to be parked in a position that makes it easy to get up and go at a moment’s notice.

If you pull into a location without even thinking about leaving, you could put yourself in danger should a situation arrive where you need to leave. Don’t allow the excitement of parking in an awesome location to overpower the need for awareness of the situation.

2. Be Prepared

Once you are parked, preparation for situations that might arise is a good idea. One of the ways that I prepare for a situation and make sure I can leave when needed is to always keep my keys, wallet, and phone in the same area in my van. I hang these items up in a location where I know they will always be.

This way, I am prepared to grab them and go at a moment’s notice if something were to happen. As long as I have parked properly, and have been aware of my surroundings, I can pick up my keys where I know they always are and crank my van up, and be out of there!

Don’t make the mistake of just throwing your keys and wallet in random locations around your van. Once it’s time to go, you will be scrounging around trying to find where you put them and put yourself in greater danger by not being able to leave a location when danger is present.

Prepare yourself for these situations by keeping your living space organized and allowing yourself to get away when needed.

3. Keep Others Informed

When you are out on the road in your van, you will want to keep others informed of your whereabouts at all times. Those who you trust should be aware of the locations you are in and hear from you regularly. In case something happens, these people will be able to lead authorities to where you might be located.

Many van lifers are loners and prefer alone time (including me). However, if you are concerned about your safety, make sure that you are telling someone else your whereabouts as you travel from place to place. If no one knows where you are, it would be difficult to provide any clues if something were to go awry on your travels.

Of course, a good phone signal will go a long way in making sure you can keep others informed of where you are and what you are experiencing.

4. Park in Safe Locations

When parking your van, it’s best to avoid sketchy areas altogether. Whether it’s free parking or not, it’s always better to be safe than sorry. Many places will have free access available for travelers and many of these places are great choices such as Walmart parking lots and other establishments that allow it. As long as these are in good areas and seem relatively safe, they can provide a good experience for the occasional night.

Van parked by a river

However, the best option is to find safe areas, have good cell service, and have other decent people around in case there’s an emergency. I typically prefer campgrounds as long as they are in good locations and provide a serene environment to enjoy. Some campgrounds are just as sketchy as free parking so you’ll need to consider that as well.

5. Carry a Weapon

After you have done everything that you know to do to keep yourself safe, you may want to consider carrying a weapon that can protect you. There are plenty of nonlethal weapons that you can carry which I wrote about here, but your location may also allow you to carry a gun if you are authorized to do so.

You’ll need to check local laws and make sure that you are doing everything legal if you go this route. Nonlethal options are always available and you probably already have them in your van, you just need to be aware of them and know how to use them and where they are at all times.

Some nonlethal weapons that you may consider include pepper spray, bear spray, fire extinguishers, a stun gun, taser, baseball bat, and nearly anything else you can use to easily strike someone with.

It’s a good idea to use a weapon that can be effective from a distance which is why pepper spray and aerosols work great. These require you to strike the perpetrator and then get out of there before making close contact. Weapons like this can be a last resort once you have done everything right and still have an intruder or someone trying to cause harm while out on the road. It’s a good idea to have everything you can have at your disposal when trying to protect yourself.

Bottom Line

The truth is, it can be quite scary out on the road, especially if you are by yourself. Men and women alike may find themselves riddled with anxiety and fear while on their trip. If you travel for any length of time, you’ll start to learn ways to avoid dangerous situations. You’ll also become more at ease as you become more experienced with the lifestyle.

No one is invincible from having bad things occur so the only thing you can do is make good choices, be aware of your surroundings at all times, and be prepared in the best ways that you can. Life is an adventure and we never know what lies around the corner.

Traveling in a van is fun, exciting, and adventurous. It provides the opportunity to travel lightly and make your way to places that other larger RVs or vehicles can’t go. You shouldn’t have to be scared while on your trip, just make sure you are preparing for dangerous situations and avoiding them as best you can while traveling.

How Big Are Tent Pads at Campgrounds?

When going tent camping, one important decision you’ll have to make is where to set up your tent. If you’re looking for a site with plenty of space for your shelter and all your gear, you’ll want to head to a campground with large tent pads. But just how big are these pads, and will they be roomy enough for your needs?

Standard tent pads at campgrounds are 10’ x 10’ (3 x 3 m) big, which accommodates most tents and still leaves plenty of space around the tent for people to move around. However, some campgrounds have bigger or smaller pads, typically 8’ x 8’ (2.4 x 2.4 m) or 12’ x 12’ (3.7 x 3.7 m).

This area isn’t always perfectly defined and may just be a cleaned-off dirt area that is approximate in size.

In general, tent pads in campgrounds work well with common tents on the market so should make for a roomy experience in most cases. Read on for more information on the size and shape of tent pads at campgrounds nationwide.

What Is a Tent Pad at Campsite?

A tent pad at a campsite is a designated area for pitching a tent. They are usually level and firm, making them ideal for setting up camp. Most tent pads are made of gravel or packed dirt, which helps to keep the bottom of the tent dry and free from mud.

Some campsites also have concrete or wooden tent pads.

While these materials are more difficult to set up on, they provide a smoother surface for sleeping and help to protect the bottom of the tent from sharp rocks or sticks. Tent pads are usually located near campsite amenities such as fire pits and picnic tables.

In a nutshell, here are some of the reasons campgrounds include tent pads:

  • They provide a safe and level place to pitch a tent. Tent pads are designed to be flat and firm, ideal for pitching a tent. This prevents the tent from sinking into the ground or becoming unlevel.
  • They keep the bottom of the tent clean and dry. Most tent pads are made of gravel or dirt, which helps keep the bottom of the tent clean and free from mud and water.
  • They help protect the tent from damage. Pads made of concrete or wood can help protect the bottom of a tent from sharp rocks or sticks.
  • They make it easier for campers to set up and take down their tents. Tent pads provide a designated area for pitching a tent. This makes it easier for campers to set up and take down their tents without having to search for a level spot on which to place them.
  • They provide a place for campers to congregate. Tent pads often have picnic tables and fire pits nearby, making them the perfect spot for socializing with other campers.
Tent set up at a campground

Key takeaway: Tent pads are essentially designated areas for camping tents. They can come in all shapes and sizes, but most are rectangular or square. The standard size for a tent pad is 10’ x 10’ (3 x 3 m), though this may vary depending on the campground.

What Is the Standard Tent Pad Size?

The standard tent pad size is 10’ x 10’ (3 x 3 m). This provides enough room for most tents as well as a space for campers to set up their chairs and cooking gear. Larger pads are available, especially for those with larger tents, but most pads are around this size.

Here’s a rundown of the typical tent pad sizes and what they offer.

8’ x 8’ Tent Pads

Smaller pads like this one are perfect for those who want a minimalist camping experience. They are usually located in more remote areas of the campground and may not have all the amenities of a larger pad.

Here are a few features of an 8’ x 8’ (2.4 x 2.4 m) tent pad:

  • They’re perfect for small tents. If you have a small tent, an 8’ x 8’ (2.4 x 2.4 m) pad is a great option, as it offers enough space for your shelter and your gear without feeling cramped.
  • They require smaller tents that are easy to set up and take down. This size pad is ideal for those who want a small, lightweight tent and will make setup and take-down a breeze.
  • They’re perfect for solo campers. This size is plenty of space for one camper, as you’ll have plenty of room to spread out and relax.

10’ x 10’ Tent Pads

The most common tent pads are 10’ x 10’ (3 x 3 m), and they provide plenty of space for a large tent and room for gear. Most pads of this size also have amenities such as picnic tables and fire pits.

Here are some features of a 10’ x 10’ (3 x 3 m) pad:

  • They’re perfect for large tents. A 10’ x 10’ (3 x 3 m) pad is the ideal size for a large tent. You’ll have plenty of room to spread out and get comfortable.
  • They have all the amenities you need. Most of these size pads come with picnic tables and fire pits, making them the perfect spot to hang out with friends.
  • They’re easy to find in the campground. A 10’ x 10’ (3 x 3 m) pad is easily identifiable in a campground.
  • They’re perfect for families. With enough space for a large tent and some gear, a 10’ x 10’ (3 x 3 m) pad is excellent for families. You’ll have everything you need in one spot.

12’ x 12’ Tent Pads

If you’re looking for a little more space, 12’ x 12’ (3.7 x 3.7 m) tent pads are a great option. They provide enough room for even the largest of tents and plenty of space for campers to set up their gear. They often come with all the amenities, such as picnic tables and fire pits.

Here are a few notable features of a 12’ x 12’ (3.7 x 3.7 m) pad:

  • They offer plenty of space for even the largest tents. If you’re looking for a spacious campsite to accommodate your large tent, a 12’ x ‘12 (3.7 x 3.7 m) pad is the perfect option.
  • All the amenities are included. Most pads of this size come with features like picnic tables and fire pits, so you don’t have to worry about setting them up yourself.
  • They’re big enough for groups. If you’re camping with a group of friends, a 12’ x 12’ (3.7 x 3.7 m) pad is the perfect size for everyone to set up their tents.

What Is the Average Size of a Tent Campsite?

The average size of a tent campsite is about 10’ x 12’ (3 x 3.7 m). While this may seem like a tight squeeze, it’s large enough to accommodate a 5’ x 8’ (1.5 x 2.4 m) tent. Besides, it offers enough room for a few supplies.

That said, there are a variety of sizes when it comes to campsites. Some campsites are large enough to accommodate several campers simultaneously, while others are perfect for a few campers.

Pro tip: When choosing a campsite, be sure to take into account the size of your tent as well as how much gear you plan to bring. This will help you make the best decision for your needs.

Conclusion

When choosing a campsite, it’s important to consider the size of your tent and the amount of gear you plan to bring. While the average size of a campsite is 10’ x 10’ (3 x 3 m), there are a variety of sizes to choose from.

If you’re looking for extra space, 12’ x 12’ (3.7 x 3.7 m) pads are a great option.

Remember, always read the campground rules before setting up your tent. This will help ensure you have a pleasant and stress-free camping experience. Also, heed any warnings about wildlife in the area.

Does Campfire Smoke Scare Deer?

Sharing food and stories around the campfire is one of the best parts of any trip to the great outdoors. This is often where a lot of fun happens as stories are told, music is played, and relaxation occurs as you gaze into the flames of the fire. This fire may be relaxing to you but what about the wild game that may be in the area? Does this campfire smoke scare deer?

Campfire smoke can scare deer off. The animal has a heightened sense of smell that can be triggered by the scent coming off a campfire or even clothing. However, if the area sees campfires regularly, deer might not be as affected by the smell.

In this article, I’ll be discussing how deer and other wild animals react to campfire smoke. You’ll see that, while the majority of these creatures can be driven off by the smell, this isn’t always the case.

Why Does Campfire Smoke Scare Deer?

Campfire smoke scares deer because it’s an unusual smell in their natural environment. To these animals, a campfire may indicate the presence of a possible predator. Moreover, the light and smoke coming off a campfire boost the visibility of humans, which deer may perceive as potential threats.

Young deer face close up

Mississippi State University has compared a deer’s sense of smell to a dog’s, estimating it to be anywhere between 500 and 1000 times stronger than that of humans. These herbivores can detect human scents from over half a mile (800 meters) away. Given this information, it’s no surprise they’re able to pick up the smell of a sizeable campfire.

However, the smell of smoke won’t necessarily ward off deer, especially if the animal is used to the scent. This can happen often in areas that hikers and campers frequent.

On the other hand, if the smell comes from an area that doesn’t see much human traffic, the animal may be alarmed — especially if the smoke comes from food being cooked over the campfire. Deer may have begun to associate the smell of cooked food with human presence, which is why they’re likely to be scared off by campfire scents.

If you’re having a hard time spotting any game, switching to a smokeless electric burner might change your luck. However, excessive movements and sounds are much more likely to scare off deer than the smoke coming off your campfire.

In short, the likelihood of your campfire smoke scaring off deer depends on how accustomed the animal is to the smell. Therefore, opting for a smokeless heat source can improve your chances of spotting deer while on your camping trip.

How Other Animals React to Campfire Smoke

Not all animals react the same way to a specific stimulus. While most of them avoid smoke altogether, there are some exceptions you should know about, especially if you’re relying on your campfire to ward off potential predators.

Here’s how some of the most common wild animals react to campfire smoke.

Does Campfire Smoke Scare Bears?

Campfire smoke does not always scare bears. Some bears will avoid it, while others may be curious enough to come closer. To avoid the latter situation, it’s best to avoid cooking fragrant food over an open fire to avoid attracting bears.

Therefore, if you’re relying on the smoke to protect yourself from ursine threats, I recommend an alternative solution. Generally speaking, making loud noises by banging pots, yelling, or using an air horn is a better way to deter the wild animal.

Bears usually aren’t aggressive, and often wander by your campsite because you happen to enter their territory. As I mentioned, all it usually takes to make them leave the area is to make noises they can’t ignore.

If the bear doesn’t leave despite your efforts, it’s better to back away without making eye contact until you are out of sight from it. You’ve probably heard many times before that you should never run from a bear. This is well-known by most hikers and campers. However, this is easier said than done when in the heat of the moment.

Thankfully I’ve never been in that situation before nor would I want to be. Bears are extremely strong, and the last thing you want is to be on the wrong end of their sharp teeth and claws.

In case you’ve ever wondered how strong a bear is, here’s a YouTube video showing one moving a bear trap as though it’s nothing more than a piece of paper.

Does Campfire Smoke Scare Wolves?

Campfire smoke can scare off wolves as long as they are not in groups. If the owner of the campfire happens to be a lone person and they are surrounded by a hungry pack, the smoke may not be enough to deter these animals.

Wolf standing next to tree

In general, wolves are afraid of fire. That’s because they’ve learned to associate it with danger. Like their domestic counterparts, wolves have a keen sense of smell, so they’re able to detect campfire smoke from a great distance away.

However, if you ever find yourself in a situation where a pack of wolves won’t go away despite being near a campfire, there are ways to scare them off. Similar to bears, wolves don’t like noise or displays that make you look scarier than you are (e.g. raising your arms above your head). For more information on how to scare off wolves, read this Business Insider article.

Does Campfire Smoke Scare Squirrels?

Campfire smoke can scare squirrels. The same goes for similar animals such as raccoons, and skunks. Because squirrels are prey animals, they tend to run from potential indicators of a threat (or predator) such as smoke.

Squirrel in grass standing on hind legs

That said, if you’re camping in a place where squirrels have become accustomed to humans, campfire smoke might not scare them off as easily as their counterparts who live in harsher environments.

In many campgrounds, you will see squirrels on a regular basis. It’s a great place for these little fellas because of all the foods given to them or left behind by campers. It’s not good to do this but it happens all the time. Because of this, squirrels are usually plentiful in campgrounds and will have no problems with your campfire.

Does Campfire Smoke Scare Birds?

Campfire smoke scares birds because the fumes can cause fatal damage to their respiratory systems. As soon as birds detect smoke, most of them will flee the area immediately. Those that remain are likely to suffer damage if they breathe large amounts of smoke.

Your campfire smoke may not seem like much to you but to a bird, it can be much more damaging. They know this and are usually able to fly away without much damage. Here’s a great guide to how birds are affected by wildfires.

Conclusion

Campfire smoke usually scares off deer, as it has a highly sensitive sense of smell that can be triggered even by the faintest odors. Moreover, the smoke and light coming off a campfire will make you much more visible to the animal.

That said, deer that are accustomed to the smell of smoke within their habitat might not be as spooked as those who’ve never encountered it before.

How Loud Can a Generator Be in a Campground?

Generators are a popular choice for providing electricity while off the grid, thanks to the versatility and convenience they offer. However, gas generators create excessive noise that often causes a disturbance when camping among others. This can sometimes be a major problem at campsites if the generator is too loud. But just how loud can a generator be?

A generator in a campground should be no more than 50 – 60 dB at 5 feet (1.5 meters). This is considered moderate noise and can be heard from a distance. If the generator is more than 60 dB at 5 feet (1.5 meters), it is deemed to be too loud and can be disruptive to others.

Just imagine getting settled into your campsite for a relaxing evening of nature enjoyment only to hear your neighbors crank up their loud generator. This can happen in primitive campgrounds so it should be expected but you always hope people will only use it a short while and be done with it for the night.

It doesn’t always happen this way and some people let it run all night long. It can be frustrating but it’s all part of the experience.

If you are planning a trip to a campground anytime soon, it is best to understand the rules about generator use and noise control in the campground. Read on to learn more!

Is It Rude To Run a Generator at a Campground?

It is not rude to run a generator at a campground if it is allowed and at an acceptable noise level. You’ll create a little noise, but it should be fine as long as you are not disturbing other campers. However, it is rude to run a generator if the campground has clear rules against it.

Some campgrounds may have quiet hours during which generators are not allowed, and others may simply ask you to turn off your generator during certain times of the day or night.

Woman enjoying camping

If other campers nearby are trying to sleep, it’s generally considered polite to keep the noise level down. However, if you’re camping by yourself in a remote area with no other campers, you may run your generator all night without any complaints. Just be sure to ask the campground staff about their generator policy before you arrive to be prepared.

In general, here are a few instances that may come off as rude if you decide to run a generator in a campground:

  • If the campground has quiet hours and you run your generator during those times, it can be disruptive to other campers and is generally not considered polite.
  • If the campground has a no-generator policy and you run one anyway, it is against the rules of the campground and can be considered rude.
  • If your generator is excessively loud and other campers have complained, it could be considered rude since you are disturbing the peace and quiet of others.

If a campground allows generators and you are within the parameters of the noise level allowance, you should be free to run your generator with no issues. Other campers will need to understand that the noise of generators is a possibility when they book their stay.

How Loud Is Too Loud for a Camping Generator?

Any noise level above 60 dB at 5 feet (0.3 meters) is considered too loud for a camping generator. This is the point at which the noise can cause discomfort among other campers. Above 70 dB, the noise may cause you and others to develop headaches, physical pain, and hearing problems.

If you’re like me, the noise of a generator is intensified when I am trying to relax and listen to nature. I often enjoy spending time with my van windows open or outside in a chair or hammock. To have to listen to a generator of any noise level often seems too much for me.

So, how can you reduce the noise of your generator while camping?

Here are a few tips to help reduce the noise of your generator while camping:

  • Invest in a quiet generator. Look for a generator that is specifically designed to be quiet. These generators typically use mufflers and other noise-reduction technology to help keep the noise level down. Besides, paying a little extra for a quiet generator will be worth it when you can enjoy a peaceful camping trip. Honda makes great generators (affiliate link) that have proven to be the gold standard among campers who want a quiet and dependable solution.
  • Place the generator away from the campsite. The further away the generator is from the grounds, the less noise it will make. Try to place the generator at least 50 feet (15 meters) away from your tent to help reduce the noise level.
  • Use a sound barrier. If you can’t place the generator far away from the campsite, try using a sound barrier to help reduce the noise. A sound barrier can be anything that will block or absorb noise, such as a tarp, blankets, or even a row of trees.
  • Turn off the generator when not in use. If you’re not using the generator, there’s no need to keep it running. Turning it off will help reduce the noise level for you and other campers.

These are just a few tips to help reduce the noise of your generator while camping. By following these tips, you can ensure that you and other campers have a peaceful and enjoyable trip.

For more tricks for reducing generator noise, the following video has a few tips:

Can You Run a Generator at Night in a Campground?

You can run a generator at night in a campground if it is allowed. However, this doesn’t mean that you should. Just because something is allowed, doesn’t mean it’s fine to do it. Being considerate of other campers’ sleep time should also be of concern.

For example, if your campground has a quiet time between 10 PM and 7 AM, ensure you switch off the generator during this period. If you’re not sure about the noise level of your generator, it’s always best to ask the campground staff before using it.

It also matters what other people in the campground are doing. If lots of generators are running then it won’t matter if yours joins the pack. However, if you are the only one with a loud generator running, you may want to shut it off.

If your campground allows generators at night, ensure you follow these seven guidelines:

  • Ensure the generator is placed away from other campers’ tents, as the noise can be disruptive.
  • Keep the generator well-maintained so it doesn’t produce more noise than necessary.
  • Be considerate of other campers and run the generator at a time that won’t disturb their sleep.
  • Only use the generator when absolutely necessary, as running it for long periods can be disruptive.
  • Ensure the generator is properly ventilated so that it doesn’t produce harmful fumes, such as carbon monoxide.
  • Never leave the generator running unattended, as this could pose a fire hazard.
  • Follow all campground rules and regulations regarding generators, noise, and quiet hours.

By following these guidelines, you can ensure that you’re being considerate of other campers while still being able to use your generator at night.

Choosing a Solar Generator Instead of a Gas Generator

A gas generator is not the only option when considering generators. If your energy demands are not high, a good solar generator may be all that you need to power your life while camping. While most solar generators on the market won’t power an air-conditioner or electric heater for very long, they will be plenty for nearly all other needs.

The best part is that solar generators make no noise! You can run one within a campground and no one will ever know. My solar generator powers my entire van unless I am connected to shore power. It’s always been plenty for my needs but I don’t have an air conditioning unit in my van.

Besides them being completely silent, you also won’t need to fill them with gasoline or smell fumes coming from them.

If you are someone who only needs to use electricity for the basics such as charging phones, laptops, running a TV, radio, and other small devices a solar generator may be the perfect alternative.

My favorite is the Goal Zero units but other affordable options are available including the Jackery and the Ecoflow.

Final Thoughts

When choosing a generator, it’s important to consider the noise level. Some generators can be quite loud, especially when running at full power. If you’re planning on using a generator at a campground, check with the campground rules beforehand to ensure it’s allowed.

Also, be considerate of your fellow campers and keep the noise to a minimum. If the generator is too loud, it can disturb other campers and even cause damage to their hearing. So, be sure to move the generator or use a muffler, or a generator box, to help reduce the noise.

Do Campgrounds Allow Outdoor Showers?

Camping provides a relaxing escape from the modern world and allows you to get out in nature. One problem with this is that we humans like to be clean at all times. We are accustomed to our conveniences and miss them when we don’t have them. Those of us who travel in RVs often have showers contained within our rigs but what about those who don’t? Are outdoor showers allowed at campgrounds?

Many campgrounds do allow outdoor showers. Some require you to collect wastewater and dispose of it at designated dumping areas while others do not. A portable shower enclosure for privacy along with a portable camping shower provides an ideal setup.

Many campgrounds are equipped with public shower and restroom facilities so you won’t have to worry about it but for those that aren’t, an outdoor shower at your campsite may be the only option. It’s usually not a problem if you are using a system that keeps you out of sight from others and are disposing of your wastewater properly.

It’s important to consider wastewater runoff with respect to you and the next camper. If you are creating a muddy mess by taking a shower next to your camper, it won’t be an ideal situation. The next camper will also inherit the mess you have left behind so be courteous and thoughtful with where you position your shower and what you do with the wastewater.

Taking a shower while camping is different from taking a shower in your home. You are usually only concerned with specific areas of your body during a quick camping shower rather than scrubbing every inch of your body. An outdoor shower gives you a way to keep your private areas clean when other options aren’t available.

Besides a shower, there are several ways to keep yourself clean and stink-free throughout your camping trip. In the rest of this article, I will take a look at the various ways you can shower outdoors, as well as product recommendations for each.

How Do You Shower Outside When Camping?

Showering outdoors and actually keeping clean while camping can be challenging, especially if you don’t come prepared. Your water source and storage, your camping site, shower gear, and even how often you need to shower are some of the things you need to consider.

It’s also likely that your camping trips are in the summer when the temperature and humidity are at their highest. Spending time outdoors, even while showering regularly, can make you sweaty and stinky in no time!

Here are some ways you can shower when camping:

  • Use the public shower facilities at the campground (if equipped) or other places
  • Use a portable gravity or pocket shower
  • Set up a camping shower tent
  • Sponge down
  • Go swimming

Let’s take a better look at these options.

Use the Public Shower Facilities at the Campground or Other Places

If you’re not camping in a remote wilderness, chances are you will come across a campground with public showers. If your campground isn’t equipped with these, you can find showers in other public places such as gyms and beaches. It’s a treat to find a good campground that has clean showers with hot water. Even in the summer, hot water is rejuvenating and makes you feel nice and clean.

If your campground doesn’t offer a shower, you may be able to leave and use other public showering options. Many van lifers and other full-time RVers have memberships to gyms that allow them to shower regularly. You may be able to find one in the vicinity of your campground in this case.

Many people plan their trips around where these locations are so they know there will always be a place to shower and use the facilities.

If you are staying at a campground that offers an indoor shower, be sure to bring biodegradable soap and shampoo. These are sometimes required to prevent contamination in the area.

The Stream2Sea Eco-Friendly 3-in-1 Body Wash is a great choice. It is also ideal for use as shampoo and conditioner.

Use a Portable Gravity or Pocket Shower

A portable gravity shower is a great option for those who want something light, portable, and easy to pack. It is simply a shower tool that you set up above your head. It relies on gravity to pour out water for you as you bathe.

The only downside to this shower tool is that since it doesn’t use pressure to release water, water flow is quite slow. But hey, it can help you manage your water consumption better.

One popular product on the market is this Advanced Elements Summer Solar Shower. The 5-gallon option will allow you to rinse off and wash all areas of concern. It’s an affordable option that is easy to set up, plus it’s so compact it will take up virtually no space in your RV or tent.

If you are in a place where you are required to collect wastewater, you can use a large plastic tub to stand in. It’s quite difficult to catch everything but you should aim to catch the majority of wastewater when you can.

If you are showering directly on the ground, a portable shower deck will help to keep your feet clean. Without it, you’ll likely be standing in the mud or sand and have dirty feet even after you’ve showered.

Set Up a Camping Shower Tent

If you’re in a crowded campsite without an indoor shower, you can’t simply attach a portable shower to your RV and go do your business. To shower in private, set up a shower tent instead. For this, you can use your gravity shower (or any type of outdoor shower that you like) and set it up inside a shower tent.

Try this GigaTent Shower Tent that you can simply pop up and use as a private space for changing, showering, or potty breaks. Since it has a base, you can easily drain out the gray water for proper disposal afterward.

A shower tent is also a great option if you want to experience some of the comforts of your home bathroom while at camp. Instead of using a gravity shower, you can use this rechargeable WADEO Portable Shower that can pump out water just like your shower at home. It’s pressurized and rechargeable, plus it’s easy to set up and store when you’re done.

Sponge Down

If you’re nowhere near a water source and your water tank is almost dry, try sponging down. All you need is a washcloth, castile soap, and a little water. I recommend Dr. Bronner’s Castile Liquid Soap so you don’t just get clean, but do it in a way that won’t contaminate the natural environment.

Simply pour a few drops of castile soap on your washcloth and use that to wipe yourself down. Then, rinse thoroughly with warm water.

However, if in a pinch, you can simply use sanitary wipes to wipe yourself down. Take note to use biodegradable ones, like these Combat Wipes ACTIVE Outdoor Wet Wipes. Not only are they better for the environment, but they’re also really thick, so they make a nice and sturdy substitute for a washcloth.

Go Swimming

When you’re outdoors, what better way to have a bath than out in nature! If you’re camping anywhere near a clean spring, river, or lake, go and have a dip! It sure beats having to scrimp on water in your shower tent. Plus, you’ll be having lots of fun while cleaning yourself.

So, if you don’t want to worry about the availability of bathwater, you can simply opt for campsites that are near bodies of water. However, if you do go for this option, make sure to use only biodegradable shower products. After all, you won’t want to contaminate the water while you have your fun.

Conclusion

Most campgrounds that don’t have indoor showers do allow outdoor showers. However, they are usually pretty strict about allowing them only if gray water will be properly collected and disposed of. You must also do so in privacy rather than stripping nude for all the campground to see.

Also, remember to only use biodegradable bath products so you don’t contribute to contamination or endanger wildlife in the area.

Do Campgrounds Charge for Electricity?

Electricity is something most of us use daily without giving much thought to it. Whether it’s powering our smartphones or running the air conditioner, it is a crucial part of our lives. However, when it comes to camping, electricity isn’t as much in demand. Many people go completely off the grid for camping and may not use any electricity.

However, campgrounds are usually set up to provide electricity for those who need it but do they charge you extra for it?

Most campgrounds charge for electricity and this cost is usually included in your campsite fee. This usually means that you’ll pay extra for a campsite that has electrical hookups. On average, expect to pay about $5-$10 per day for electric hookups at a campground.

Many campgrounds have different options including primitive campsites and ones for partial or full hookups. You will pay more for those that have access to full hookups, which usually include water, sewer, and electrical service.

Read on for more information on how campgrounds charge for electricity, tips on reducing your power consumption while camping, and more!

Is Electricity Included in Campsites?

Electricity is included in most campsites as one of the amenities. This is convenient for campers who need to use electrical appliances or charge devices. While some isolated sites may not have electricity, it is increasingly common for even remote camping areas to offer this service.

Electricity hook-ups are often available in 15, 30, or 50 amp services required by different types of RVs. Some people might not need or want to have this feature while camping, but it’s a convenient amenity option.

When determining if a particular campsite meets your needs, it is crucial to determine what type of power hookups are available. If your RV requires 50 amps and the only options at the campground are 30 or 15, you may not be able to utilize the electrical service.

I have a 15 amp plug on my van and this allows me to stay at any campsite that offers electricity. With an adapter, I can plug into a 30 or 50-amp service. While 15 amps won’t provide enough power for a larger, higher-consumption RV, it’s perfect for my minimalistic electrical setup.

Do Campers Use a Lot of Electricity?

Campers do not use a lot of electricity. For example, a typical RV uses just 20 kWh of electricity daily, 10 kWh lower than the average house, which requires around 30 kWh. Therefore, a camper’s average monthly electric bill is significantly lower than that of an average home.

Even if you factor in using some appliances that consume more electricity, such as air conditioners and hair dryers, campers still use considerably less power than people who live in homes.

To improve efficiency, some campers install solar panels on their roofs. These harness the sun’s energy and can dramatically reduce your reliance on generators and the grid.

Another option is to choose an RV that comes with built-in solar panels. This is a common option nowadays and is available on most newer RVs. Some are even self-sufficient, meaning they generate all the power they need without any help from outside sources.

This is one of the reasons why camping is becoming increasingly popular among those looking for ways to reduce their carbon footprint.

Some people don’t like to rely on solar power but I wouldn’t be without mine. It has allowed me to go anywhere I want and not have to worry about having electricity. While I do plug into shore power when available, it isn’t always a necessity. The self-sufficiency of my van gives me a good feeling when I’m traveling.

Tips for Reducing Power Consumption When Camping

Any experienced camper will tell you that one of the keys to a successful camping trip is minimizing your reliance on electricity. Not only does this help to reduce your carbon footprint, but it could potentially save you money on campground fees and allow you to unplug from the hustle and bustle of everyday life.

Camping is best when it is done primitively so that you can enjoy the nature around you rather than relying on electronic devices to entertain you. Camping allows you to get away from all of this so less reliance on these types of items will bring you the most joy on a camping trip.

So, how do you reduce power consumption when camping?

Here are a few tips:

Bring a Solar Charger To Keep Your Devices Powered

Portable solar charger and phone

One way to reduce your power consumption when camping is to bring a solar charger. If your RV or camping setup is not already equipped with solar panels, this will be a good addition to help you harness electrical power from the sun in a minimalistic way.

Solar chargers are easy to use and are a great way to reduce your carbon footprint when camping. In addition, they are relatively inexpensive and can be a great way to save money on your camping trip.

Even if you already have solar installed on your RV, a portable solar charger can take care of smaller devices while you maintain a charge on your larger system.

As an example, the Goal Zero Yeti 150 Portable Power Station is small, lightweight, and easy to include in your camping packing list. It’s one of the highest-rated solar chargers on the market thanks to its durable construction, efficient design, and affordable price tag. Goal Zero is known for its innovative solar products and I can vouch for how good they work as I use a Goal Zero system to power my entire camper van.

Bring a Battery Pack To Keep Your Devices Charged

Another sure-fire way to reduce your need to plug into the electrical grid while camping is to bring a spare battery pack. This way, you can recharge your devices without using a generator or plugging into an outlet.

Of course, you’ll need to make sure the battery pack is charged before leaving. Depending on how long your camping trip is and the size battery pack you have, it may get you through the entire trip, allowing you to charge your small devices multiple times.

In addition, battery packs are relatively inexpensive and can be a great way to save money on your camping trip. The Anker 325 Power Bank Portable Charger is a great choice and provides you with a 20,000mAh cell capacity to help keep your small devices charged for several days.

Bring an Led Flashlight for When the Sun Goes Down

Besides the tips I’ve mentioned, you can reduce your power consumption when camping by bringing an LED flashlight for when the sun goes down.

These flashlights use less power than traditional incandescent flashlights, and they last longer too.

As a result, you’ll save battery power, and you won’t have to worry about changing batteries as often. If it’s a rechargeable flashlight, you’ll be able to charge it with your portable solar charger or battery pack. In addition, LED flashlights emit a brighter, more focused light than incandescent flashlights, making them ideal for campers who need to participate in activities after dark.

I prefer the UCO Leschi Compact LED Lantern and Flashlight as it is small, fits into my pocket easily and can be used as a small flashlight or a small lantern. There are numerous options on the market so you will have no problem finding one that works well for you.

Use Low Power Consumption Fans

Camping in the summertime can be quite uncomfortable if you are in a hot and humid climate. The most obvious way to combat the heat is to use an AC if your RV is equipped. However, many smaller RVs, vans, or trailers aren’t equipped with them so you’ll need to find other ways to stay cool.

Small 12-volt or USB-powered fans can help you combat the heat while using minimal electricity. In fact, you can run one of these fans on a portable solar charger or battery pack for quite a while on a full charge. Even if your RV is equipped with AC, it’s good to make use of windows and fans as often as you can in order to reduce your dependence on the electrical grid.

For those camping in tents and smaller RV setups that don’t have air conditioning, fans are an absolute must! I use a combination of windows, a roof fan and a USB-powered fan in my van to help move air throughout the living space. This has always worked well for me.

Cook Meals on a Campfire or a Propane Camping Stove

Cooking noodles over campfire

One significant way to reduce power consumption when camping is by cooking meals on a campfire or on a propane camping stove instead of relying on an electric stove or microwave (if your RV is equipped). Not only is this more fun, but it will also not require any electrical usage.

Besides, there’s nothing quite like the taste of a meal cooked over an open fire.

Pack Light and Only Bring What You Need

While this may not be directly related to electrical energy consumption, packing light and only including the essentials will help you to enjoy camping for what it is. Some campers want to bring an entire RV full of entertainment along on the trip. While this will provide you with lots to do, it will also distract you from the joy of the camping experience.

Camping provides a great opportunity to get back to the basics. You can enjoy a card game rather than scrolling on your phone or sit outside and marvel at the stars in the sky. This may sound boring to some but allowing yourself to step away from all the distractions of daily life can be healing for your soul.

If you are interested in other ways to make your trip better and save money in the process, here’s an insightful video that will come in handy:

Limit Your Use of Electronics

Last but not least, one of the best ways to reduce your power consumption when camping is to limit your use of electronics. This means turning off your cellphone, tablet, laptop, and other electronic devices when you’re not using them.

Not only will this save battery power, but it will also help you to unplug from the digital world and enjoy the great outdoors. This good old-fashioned way of living is what makes camping fun. Rather than electronics, how about reading a book, drawing, or taking part in some other type of art form.

Allow nature to inspire you to be creative rather than just getting lost in a screen as you would in your regular life.

Conclusion

In a nutshell, electricity is included in most non-primitive campsites, and most campgrounds charge extra for these campsites. However, This is usually a non-issue. I have been to many campgrounds and the cost for full hookups is minimal when you consider the benefits. Once parked and plugged up, you will generally have access to an unlimited amount of electrical power.

There are plenty of ways to reduce your power consumption when camping. For example, you can bring a solar charger, pack a spare battery, or use an LED flashlight instead of an incandescent one. In addition, you can cook meals on a campfire or over the stovetop, pack light, and limit your use of electronics.

How Late Can You Arrive at a Campground?

Check-in and check-out times at campgrounds and RV parks allow staff to maintain campsites between occupants. When preparing for a camping trip, guests must know these times to avoid arriving too early or too late. Early arrivals may cause unnecessary waiting, whereas late arrivals could cause guests to lose the campsite altogether.

You can arrive as late as you want at most campgrounds. However, some facilities allow guests to arrive later, whereas others end check-in at certain times, and refuse check-in after dark or during “quiet hours.” Campground check-in times are typically between 2 and 4 p.m.

It’s always a good idea to check-in during the advertised check-in times. If you are unsure what these hours are, you can call the campground office to find out. If you are unable to arrive during check-in hours, you can let the campground office know. There are usually procedures in place for those arriving later.

This article discusses campground check-in times, late and early arrivals, as well as etiquette when checking in and checking out. Read on to learn more.

What Does Check-In Time Mean for Camping?

The check-in time for camping is the earliest time guests may arrive at their reserved campsite. Every campground and RV park has its own check-in times and procedures. Campgrounds usually have later check-in times than RV parks.

Some examples of check-in times for different RV parks and campgrounds are below:

CampgroundCheck-in Time
Lake Snowden3 p.m.
Lake Carl Blackwell3 p.m.
Virginia State Parks4 p.m
Alum Creek State Park Campground4 p.m.
Berlin RV Park and Campground1 p.m.
Trailer Village RV Park12 p.m.
Jekyll Island Campground2 p.m.

How Late Can You Check-In at a Campground?

Check-in times aren’t always strictly enforced. For example, if check-in starts at 11 a.m. and you arrive at 1 p.m., you’re probably not going to lose your spot, as you’ve reserved it for your nightly stay. However, it’s still important to discuss late arrivals with the campground office ahead of time to avoid any misunderstandings.

Most campgrounds allow campers to check in after the check-in time, as long as it’s within a reasonable time frame. However, others are more stringent and may not permit guests to check in after a specified time, after dark, or during quiet hours. Check with the campground office to be sure.

When calling the campground office to make reservations, discuss check-in times. Let the staff know when you expect to arrive to determine whether late arrivals are acceptable.

Some campgrounds observe “quiet hours” and, therefore, do not permit guests to arrive during this time to avoid disturbing other campers. Additionally, some campgrounds have strict guidelines regarding what campers can and cannot do after dark, including setting up tents or RVs.

How Early Can You Check-In at a Campground?

The earliest you can check-in at a campground is at the check-in time. With that said, some campgrounds and RV parks allow early check-in, although you must pre-arrange this during the reservation process. Early check-in may require an additional fee or other service costs.

Some campgrounds and RV parks allow for early check-in, depending on whether they’re booked or not. Different campgrounds have different rules and reservation policies and may charge an additional fee or service fee if you have to change your check-in date or time.

In the summer, it’s unlikely that guests can check-in early. Summers are the busiest times for campgrounds and RV parks, so it’s not unusual to be fully booked back-to-back. During these times, check-in and check-out times must be adhered to, as it allows just enough time for maintenance to clean up campsites in time for the next guests.

With that said, many campgrounds do not allow early check-in (usually during peak months) for a multitude of reasons, including:

  • Electricity Use: RV parks may not allow early check-in, as guests immediately begin using electricity. Electricity costs are included only in the nightly rates based on standard check-in and check-out times. Allowing guests to arrive early increases the cost of running the RV park due to extra energy usage.
  • Occupancy: When campgrounds and RV parks refuse early arrival, it’s usually because the site is already booked with a specified check-out time for the current occupants. If the current occupants haven’t yet vacated the campsite, other guests cannot arrive to set up camp in an occupied space.
  • Maintenance: In between occupants, a campground maintenance crew must clean and maintain the site prior to the arrival of the next campers. They must remove the trash, mow, and empty the fire pits. Since check-in and check-out times typically have a two-hour window, this only allows crews two hours to clean multiple campsites.

During slow months, some campgrounds may allow early check-in if the park isn’t fully booked. Sometimes, if the park isn’t at full capacity, you may arrive early and choose an alternative site.

Check-In Etiquette While Camping

Once guests reserve a campsite, they’re expected to arrive within a reasonable time frame, usually at or shortly after check-in time. It’s important to make it to the site on time whenever possible. Extenuating circumstances happen, however, so if you expect to arrive late, call ahead and discuss it with camp staff, so they don’t mark you down as a “no-show.”

If the campground allows you to check-in after dark or during quiet hours, it’s essential to be considerate of other campers. During this time, they may be sleeping or winding down, so remember camping etiquette and keep things peaceful:

  • Choose a campsite away from other guests. This isn’t always possible, as most campgrounds require you to choose a specific plot when making reservations. However, if it’s a free-for-all, move as far away from other campers as possible to avoid disturbing them.
  • Keep it quiet. Avoid loud conversations and try to keep sound to a minimum.
  • Set-up during the day. Don’t fully set-up camp until daylight when you can see. Trying to get everything set up at night is not only frustrating, but it makes a lot of noise that may disturb fellow campers. Just plug in the electricity, if necessary, and call it a night.

What Time Is Check-Out at Most RV Parks?

Like hotels, campgrounds maintain strict check-out times to allow for maintenance between occupants. While hotels clean, provide new linens, and make the beds, campground staff must mow, pick up trash, empty fire pits, and ensure that the space is suitable for the next occupant.

Check-out times for most RV parks and campgrounds are between 11 a.m. and 2 p.m. Some require earlier check-out, whereas others may allow late check-out times (when possible) for an additional fee. These fees cover the site, electricity use, and the use of camp facilities.

During the summer months or times of back-to-back bookings, check-out times are non-negotiable. If you find yourself camping during the slower months, you may have the option to stay later, depending on the campground and their policies and current reservations.

Camping Check-Out Etiquette

Campground and RV park check-out times are when guests should vacate the premises. As such, you should begin packing before check-out time to allow maintenance crews to come in and clean up the campsite.

Whenever possible, you should leave your campsite as clean as you can — preferably better than it was on arrival. The United States National Park Service recommends implementing the “Leave No Trace” principles when camping.

Some principles that apply to checking out include minimizing and disposing of trash and other waste and leaving nature as you found it — don’t take rocks, plants, or artifacts.

Conclusion

Camping, whether “roughing it” or chilling out in a luxury RV, is an adventurous experience that allows people to enjoy nature. However, campgrounds and RV parks are still businesses, so there are rules that guests must follow.

Good etiquette means recognizing and adhering to check-in and check-out times and procedures. Check-in as close to the set time as possible, or discuss late arrivals ahead of time with camp staff — and don’t be a lingering camper when it’s time to depart. Check out on time to avoid causing an inconvenience for camp staff, maintenance crews, and the next occupants.

Is Campground Water Safe To Drink? 5 Ways to Ensure it is

Finding a good clean water source is one of the biggest concerns that you may have when camping. However, when staying in a civilized campground, an unlimited supply of water will likely be available right out of the spigot at your campsite. But regardless of whether you have public drinking water or are close to a natural surface water source, the question of water safety always looms large.

Is it safe to drink campground water?

Campground water can be safe to drink in most cases but not all campgrounds are the same. Many campgrounds use a municipal water supply that undergoes rigorous water treatment standards. However, some campgrounds use wells, and/or other sources of natural water that may not be potable.

It’s best to assume that it’s not and plan to treat the water yourself before drinking. This can be done in a variety of ways, which will be outlined below, and can ensure that you are drinking clean water no matter what campground you visit.

Unfortunately, campgrounds differ in the quality of water available depending on the location. Even those that utilize public water sources may not be of the same standard that you may find in another location. Besides that, other contaminants could enter the water source from tainted pipes or other plumbing issues throughout the campground.

It’s best to take precautions and have filtering and purifying options available on your trips.

Personally, I never drink water straight from the spigot in a campground. No matter the quality of the water, I always run the water through a filtration system or bring my own treated water with me if it’s a short trip. Others may not be so picky be I tend to err on the side of caution concerning my health.

Let’s take a better look at whether you can drink water at campgrounds and how to purify water to make sure it is potable.

Drinking Water at Campgrounds

Campgrounds differ in the type of water sources they use so you never really know just how safe the water is. While many claim to have potable water that should be safe to drink, even KOA recommends having an RV water filter in order to ensure water safety no matter where you travel.

If you are camping in an area where your only water source is naturally occurring, such as in streams or rivers, determining whether it is safe to drink can be a lot trickier. For naturally occurring water to be considered potable, you have to know where the water flows from.

If the water flows downstream from either a residential area or an area where there are agricultural, commercial, or industrial activities, such as mining, that should tell you not to drink from the surface water without treating it first.

However, even in the case of naturally occurring water that flows from what is considered a clean or safe environment, there is always the possibility of contamination from animal feces or other bacteria.

Whether the campground utilizes a treated municipal water source or a natural water source, you should be knowledgeable about the different ways to purify the water. This will keep you safe from the contaminants that might pollute water sources.

5 Ways To Purify Water When Camping or RVing

Man pouring boiling water while camping

If you’re out camping for days, the last thing you want to happen is to get sick from drinking unsafe water. Unfortunately, it happens too frequently, especially because storing drinking water is often a problem.

If you store as much as you need, it will take up too much space. But if you don’t, you’ll need to rely on water sources that you find along the way. Sadly, the latter is often unsafe. So for your peace of mind, let’s discuss some of the easy ways you can treat your water so you have enough supply of drinking water that’s tummy-safe for your whole camping trip.

Here are camping-friendly ways to purify water:

  • Use an RV water filter
  • Use a portable water filter.
  • Boil the water.
  • Treat water with water purifying tablets.
  • Bring your own drinking water.

1. Use an RV Water Filter

If you are traveling in an RV, the best way you can protect yourself is to use an RV filtration system. Many newer RVs come with an internal water filter pre-installed so you don’t have to worry about anything other than changing the filters from time to time.

There are multiple options when considering this. You can choose to install a filter in line with the incoming water source so that all of the water throughout your RV is purified. This will include all water coming from the taps and the shower.

If you do not care to filter the shower water, a local water filter can be used under the sink where you will get your drinking water. This will purify your drinking water but leave your shower water untreated.

A combination of both is ideal. For example, you could use the Camco TastePure RV/Marine Water Filter on the outside of your RV while using an under-the-sink reverse osmosis system inside your RV. If you already have an internal filtration system in your RV, an inline filter like this will reduce sediments and other impurities before it even reaches your RV.

2. Use a Portable Water Filter

If you don’t have the room or don’t want to install a filter on your RV, a portable system may work great for you. One of the best on the market is the Berkey water filter system which is known for its ability to remove a high number of contaminants.

The Travel Berkey is perfect for RVs of all sizes. You can simply fill the unfiltered water reservoir with water and let the gravitational filtration system do the work. The purified water will be available via the spigot on the bottom, making it a convenient way to access it.

Berkey Filters are known to be among the best on the market so if you are looking for a portable solution, this one should top your list.

Many portable systems are designed to be safe for use when you know that your water source is clean enough as it is, such as if it is NOT flowing from a polluted or chemically contaminated environment. If it is coming from a public water supply, a portable filter should be able to purify the water to a more drinkable level.

Portable filters are great to use if you’re using them to purify campground water that’s intended for drinking, but that you’re not sure is being filtered or treated properly. It’s important to remember that not all portable water filters are made alike.

And to be effective in purifying your water, your water filter should:

  • Have a fine pore size to be able to filter out viruses, pathogenic bacteria, and pesticides.
  • Be NSF-certified.

If you want to take it further, you can also use a water filter that uses reverse osmosis. This way, it will also be able to filter out bacteria and viruses. These water filters are typically bulkier, though. But in an RV, you can have plenty of space to set them up. A great option is the AquaTru Countertop Water Filtration System with 4-Stage Ultra Reverse Osmosis Technology. This is a countertop reverse osmosis system that I have used in my home for years. It could work great in larger RVs that have room for them.

Aquatru filling glass with water

3. Boil the Water

Perhaps the easiest way to have access to clean water is to boil whatever water you find that is accessible to you, not including saltwater. If you have access to heating or if you have a portable camping stove, this should be easy to do.

Here are the things you will need:

  • A water pot or other system that allows you to boil water, such as a JetBoil.
  • Portable camping stove with propane/butane gas

To make water potable, here’s what you need to do:

  • Fill your pot or cup with water.
  • Bring to a boil.
  • Allow it to boil for at least a minute.
  • Let cool.

Once the water has been boiled for a minimum of a minute, you have successfully killed all the germs, bacteria, or pathogens that may have been in it. Now all you need to do is let it cool down and enjoy your cup of clean water.

4. Treat Water With Water Purifying Tablets

Another option that you can go for is using water purifying tablets made of chlorine dioxide. This is a great option if you have no patience to boil liters and liters of water or don’t like using a portable water filter.

One added advantage to this type of purification method is that it can improve the taste of your water while the previous two might not be able to do so.

If you’re looking for water purification tablets, check out Potable Aqua Water Purification Germicidal Tablets. It contains 50 tablets in a bottle, and you’ll need only two tablets to treat 0.9 liters (0.24 gallons) of water. All you have to do is drop two tablets in the water, wait for 35 minutes, and your water is safe to drink.

Using this method is great if you’re always on the go, as it’s an easy emergency fix. Also, the bottle can fit in any handbag or purse.

5. Bring Your Own Drinking Water

The option that I generally use when I know I am only staying a week or less is to bring my own water. I have multiple 5-gallon water jugs that can be filled with water from grocery stores or health food stores. I usually top these jugs off with my home reverse osmosis system before leaving and I’m good for a week or even more depending on the time of year.

Filtered water 5-gallon jug

Even if I run out, I am in a camper van so I can easily make my way to a store and fill the jugs back up with purified water.

This won’t work for everyone. Bringing your own water like this does require some extra space and it might not work for you if you have a small camper or are a large family that uses a lot of water. However, if you are going on a short trip, you might want to consider purchasing a large container to take water that you know is purified and safe to drink.

Conclusion

Safe drinking water is essential to our health, no matter if we’re in the comfort of our homes or out exploring the great outdoors. So for your safety and peace of mind, make sure to always treat or purify the water that you put inside your drinking bottles.

You never know what you can trust even if the campground claims to have potable water. It’s best to always assume it’s not and have a way to purify it even further. Having clean drinking water is an important part of camping. You’ll probably drink more when you are in the great outdoors so ensuring the water is safe just makes sense.

Can You Drink Alcohol at Campgrounds?

You’ve just parked your RV, van, or pitched your tent, maybe even gotten a campfire going, ready to wind down with a few beers. It may sound like the most natural thing to do when you’re out camping, but are you actually allowed to bring or consume alcohol at campgrounds?

Most campgrounds have restrictions on alcohol consumption while many state-regulated campgrounds prohibit it altogether. Some may allow alcohol consumption within your own campsite, inside your RV, or in designated areas only. Most family campgrounds prohibit alcohol consumption in common areas.

Camping is a fun experience and you have to remember that many families enjoy this type of adventure. There are often adults and children of all ages within a campground. It’s best to be courteous and keep your alcohol consumption to a minimum and within your own private campsite area to avoid any problems.

Still unsure whether you should be bringing beer or wine to camp? Further in this article, we will talk about whether you are allowed to drink alcohol at some of the popular campgrounds, including KOA campgrounds, as well as typical rules on alcohol consumption while camping.

Can You Drink Alcohol at KOA Campgrounds?

Most KOA campgrounds prohibit alcohol in common areas and ask that you only consume alcohol within your own designated campsite. Therefore, it’s best to keep your beer cans or wine bottles inside your RV if you already have them, or not to bring any alcoholic drinks at all.

These campgrounds typically cater to families and pride themselves on having a safe environment for all to enjoy without disruption from unruly campers. You may only intend to drink a beer or two and call it a night and this is usually not a problem if done within your own designated camping area.

Holding beer bottle while sitting near campfire

I have been to numerous KOA campgrounds and I occasionally have a beer in the evening with dinner or just to wind down. You can often find a few beers in my fridge at any given time. However, I usually do my eating and drinking within my rig and never bother anyone.

Just make sure that you aren’t walking through the campgrounds with a beer in your hand. This behavior could get you in some trouble depending on the specific campground policies and the mood of the enforcement officers.

While this is typically the case for KOA campgrounds, not all of them are alike. While some are extremely strict on prohibiting alcoholic beverages, some may be a little looser on their policies. Some campgrounds even have stores where you can buy alcoholic drinks. In such sites, there are usually rules on where these drinks may be consumed and until what time of the day.

To avoid any problems altogether, you should always stick to the following practices when camping in a family campground like a KOA.

  • Consume alcohol inside the privacy of your RV. It’s a sure way that you won’t cause any problems and no one will ever know. What goes on inside your RV, stays inside your RV (unless you are causing trouble).
  • Consume alcohol within your designated campsite. Campsites, usually have a picnic table and fire pit. Drinking alcohol within these areas inside your campsite should not cause any problems unless you have one too many and become loud and obnoxious.
  • Read the policies of the specific campground you are at. Each one may have different rules so be sure you understand the rules of the one you are at.
  • Be respectful of others. Drinking a beer or a glass of wine at the end of the day is different from getting sloshed! Drinking too much can lead to behavior that could make other people’s stay less fun. Be courteous to others who are trying to enjoy their stay.

If in doubt, all you have to do is ask the campground staff. You’ll probably be given a brochure with rules and other campground information in it upon check-in. Alcohol consumption rules are usually outlined within this literature so be sure you read them and adhere to them in order to avoid any problems.

It’s always best to simply follow campground rules, especially if you are camping at a state or national park, a reserve, or any government-regulated site, as these tend to have stricter policies. And besides, rules are in place to make sure that every camper has a pleasant experience.

Common Rules on Alcohol Consumption While Camping

Not all camp rules are the same. They depend on who’s managing the campsite, whether it’s a public or private area, and what amenities you’re looking to use (like a kayak or boat). But there are rules on alcohol consumption that are usually in place at campsites.

Here are some typical rules on alcohol consumption while camping:

  • Many state-regulated sites prohibit alcohol consumption
  • Drinking may be permitted in designated areas only
  • Underage drinking is not allowed
  • Alcohol is usually prohibited at boating sites
  • You could potentially be fined or asked to leave for unruly behavior

Let’s discuss each below:

Many State-Regulated Sites Prohibit Alcohol Consumption

State or national parks, wildlife sanctuaries, reserves, and the like may prohibit alcohol consumption in many areas, including campgrounds. Often, this is for the benefit of other people visiting the sites as much as to ensure a minimum human impact on these areas. Below, you’ll find a few examples of the different rules in place for various state parks and campgrounds.

  • Kentucky – Drinking alcoholic beverages is prohibited in most areas. In campgrounds, alcoholic beverages are not to be publicly displayed.
  • California – Alcohol is prohibited in all-day use areas and only allowed in overnight campsites.
  • Washington – Permitted only in designated campground areas.
  • Wyoming – Wyoming state parks has restrictions on how much alcohol you can have as well as where it can be consumed.
  • North Carolina – Prohibited, except in certain areas.
  • Illinois – Numerous restrictions and prohibitions on various campgrounds and day-use areas.

You should always check the state’s website or ask before assuming you are okay to crack open an alcoholic beverage.

It’s harder to impose rules on no littering or keeping quiet so as not to disturb wildlife when people are intoxicated. So campgrounds that have experienced frequent disturbance from campers are stricter than others when it comes to prohibiting alcoholic drinks.

However, as you can see from the examples above, not all state parks prohibit alcohol completely. Some may allow drinking only until a certain time of the day. Some are more explicit than others when warning about unruly or drunken behavior.

Regardless of whether there are warnings or not, though, remember to be a responsible drinker and avoid any unruly behavior.

And since rules may differ for every campground, best be on the safe side and refrain from bringing out any alcoholic drinks on campgrounds where you see signs saying that alcohol is not allowed.

National parks may have different policies from state parks and will also differ depending on the park you are at. National parks usually allow alcohol consumption within your private campsite but prohibit it in parking areas, pull-outs, and trailheads.

Drinking May Be Permitted in Designated Areas Only

Some campgrounds have stores where you can buy alcoholic drinks. These sites usually also have designated areas where you will be allowed to drink. Some may also allow you to drink where you’ve parked your rig or pitched your tent.

This may mean that you are not allowed to walk around campgrounds with an open drink in hand. So to be safe, it’s best to ask someone at the store what other limitations may be in place. Or better yet, find out what the rules are before you even head out on your camping trip.

Also, you can expect stricter policies on holidays or peak camping seasons.

Underage Drinking Is Not Allowed

If you are going to buy alcohol at a campsite store, you will most likely be asked to show your ID to prove that you are 21 years old or older, in compliance with the minimum legal drinking age in the US. If you can’t show proof that you’re legally allowed to buy alcohol, you shouldn’t be able to buy a drink.

Alcohol Is Usually Prohibited at Boating Sites

You should definitely not drink and drive–and that same principle applies when you’re going boating. There usually are signs of alcohol restrictions at boating access sites, but where there aren’t any, it’s safe to assume that you are not allowed to bring or drink any alcoholic beverages in the area.

You Could Potentially Be Fined or Asked To Leave for Unruly Behavior

And lastly, campgrounds are meant to be relaxing and enjoyable places for everyone. This means that anyone who disrupts the peace and quiet by being unruly, loud, or bothersome to others could be fined and asked to leave the campsite. This will depend on the campground rules and the small print that you agreed to when signing the rental agreement.

If you are going to enjoy your wine, beer, or other drink, then make sure that you know how much you can handle and not drink too much. Besides, you’re out to have a great camping experience, so don’t ruin it for yourself or anyone else!

Conclusion

If you want to enjoy a few beers while camping, it’s important that you know what the campground rules are before you go. Especially because not all campsite rules are the same.

Moreover, if you end up going somewhere where alcohol consumption is allowed, remember to take note of how much alcohol you can handle and drink only in areas where it’s allowed.

After all the places I have traveled, I have found that drinking alcohol is never a problem as long as I do it within the confines of my van. Having a beer in my van while eating dinner or enjoying a relaxing evening doesn’t bother anyone and no one even knows. As long as there are no alcohol restrictions or bans, you should be good to drink responsibly within your private campsite.

Just use your head and be sure and check the rules before you decide to stay at a campground. This information should be easy to find on the campground website or posted at the campground itself.